Table of Contents
Advertisement
Available languages
Available languages
Advertisement
Table of Contents

Subscribe to Our Youtube Channel
Related Manuals for My Geko Gear ORBIT 500


Summary of Contents for My Geko Gear ORBIT 500
- Page 1 DASH CAMERA ORBIT 500 Quick User Manual...
- Page 2 Disclaimer 1. Please follow the set-up and usage instructions in the print material that came with this Dashboard Camera (dash cam) product. 2. You should not set/install this dash cam at a place that would obstruct or reduce a driver’s view; make sure your usage comply with pertinent vehicle codes of your state, province, territory or country.
-
Page 3: Product Overview
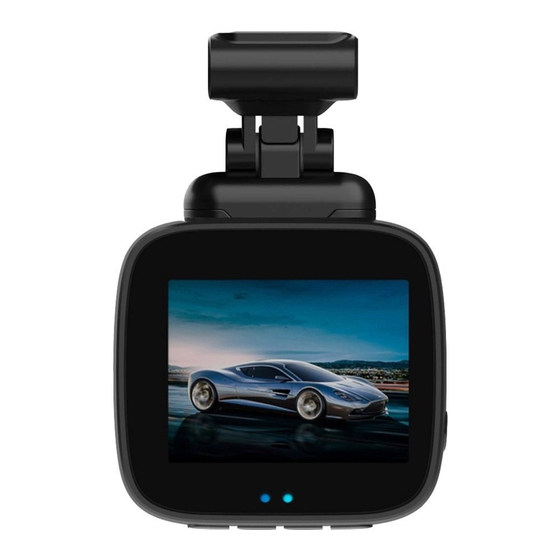
Thank You! Thank you for purchasing the ORBIT 500 dash camera. This user manual contains technical specifications and instructions for use, operate, and install. Please read this manual carefully before using. Product Overview This product is a high-definition digital video camera, with high-quality digital audio and video, and USB charging function. -
Page 4: Product Features
Product Features 1. Mini DVR, 120 degree grade A+ high resolution ultra-wide angle lens 2. Built-in lithium battery can be charged while video recording function 3. Seamless Video 4. 2.0 inch TFT LCD 5. Built-in Mic/ Speaker 6. Support Micro SD card up to 32GB 7. - Page 5 Where to Install Your Dash Cam 1) Select an installation location that perfectly records the entire view at the front of the vehicle without obstructing the driver’s view. 2) Magnetically attach the mount to the dash cam 3) Carefully take off the mount’s film. and it will simply click together.
- Page 6 4) When finding the best mounting location on the windshield, steadily place it onto the windshield and lock it into place. Connecting & Arranging Your Power Cable 1) Connect the power cable to the dash cam’s USB slot and to the vehicle’s power socket. 2) Carefully organize and manage your cables along the window’s liner.
-
Page 7: Button Actions
Button Actions NOTE: To get into menu settings, make sure you are in standby mode by clicking the “OK” button once and hold the menu button for a few seconds. Recording Mode: Start Recording / Standby Setting Mode: OK Mode/ Lock/ Menu: Recording Mode: Lock emergency recording Preview Mode: Return recording mode Playback Mode: Return recording mode... -
Page 8: Battery Charge
Battery Charge 1. Directly connect the car charger with charging cable in USB interface of the device. 2. USB charging, use the USB cable to connect it to the computer. Micro SD Card Insert and Removal NOTE: Ensure the dash cam is turned off before inserting or removing the microSD card. 1. -
Page 9: Connection Steps
Connecting to a PC The ORBIT 500 can be connected to a PC by using a USB data cable. The USB cable is for charging and reading the Micro SD card. When the device is connected to the PC, mass storage is displayed on the device’s screen. You can view the Micro SD card content on the PC. -
Page 10: Video Recording Settings
Note ● Improper operation will cause the device to crash. If the dash cam crashes, press the reset button to resume the camera. ● Don’t leave the camera in direct sunlight or where the temperature could go above 60 degrees Celsius or 140 degrees Fahrenheit for a long period of time. -
Page 11: General Settings
4. Motion Detection: Off/ On 5. Date Stamp: Off/ On 6. Record Audio: Off/ On 7. G-Sensor: Off/Low/Medium/High General Settings In standby mode, press and hold the mode button to enter the video settings, then press mode button again to enter general settings, and then press the up/down button to select the suitable menu. -
Page 12: Specifications
Specifications Need more information? Visit our website via www.mygekogear.com Feel free to contact our service team at service@mygekogear.com if you have any additional questions. - Page 13 CAMERA DE TABLEAU DE BORD ORBIT 500 Manuel d’utilisation rapide...
- Page 14 Avertissement 1. Veuillez suivre les instructions d'installation et d'utilisation figurant dans le matériel imprimé fourni avec ce produit Dashboard Camera (caméra de tableau de bord). 2. Vous ne devez pas installer cette caméra de tableau de bord à un endroit qui pourrait obstruer ou réduire la vue du conducteur ;...
-
Page 15: Aperçu Du Produit
Merci ! Merci pour l'achat de la caméra de tableau de bord ORBIT 500. Ce manuel d'utilisation contient des spécifications techniques et des instructions pour l'utilisation, le fonctionnement et l'installation. Veuillez lire attentivement ce manuel d'utilisation avant l’utilisation. Aperçu du produit Ce produit est une caméra numérique haute définition, avec son et vidéo numériques de haute qualité, et fonction de... -
Page 16: Fonctionnalités Du Produit
Fonctionnalités du produit 1. Mini DVR, Objectif ultra grand angle haute résolution à 120 degrés A + 2. La batterie au lithium intégrée peut être chargée pendant la fonction d'enregistrement vidéo 3. Vidéo en continu 4. LCD TFT de 2 pouces 5. - Page 17 Où installer votre caméra 1) Sélectionnez un emplacement d'installation qui enregistre parfaitement toute la vue à l'avant du véhicule sans obstruer la vue du conducteur. 2) Fixez magnétiquement le support à la caméra 3) Retirez délicatement le film du support. de bord et elle se clipsera.
- Page 18 4) Une fois que vous avez trouvé le meilleur emplacement de montage sur le pare-brise, placez-la fermement sur le pare-brise et verrouillez-la en place. Connexion et disposition de votre câble d'alimentation 1) Connectez le câble d'alimentation au port USB de la caméra et à la prise de courant du véhicule. 2) Organisez et gérez soigneusement vos câbles le long du revêtement de la fenêtre.
-
Page 19: Bouton Haut
1. Vous trouverez votre connexion OBD II sous ou sur le côté gauche du volant. 2. Branchez soigneusement l'OBD II sur le port OBD II de votre véhicule. 3. Connectez le mini-câble USB OBD II à la caméra de tableau de bord. 4. -
Page 20: Charge De La Batterie
Reset: Si la caméra ne fonctionne pas, essayez de la réinitialiser. Appuyez sur le bouton de réinitialisation à l'aide d'un stylo fin ou d'un trombone. Alimentation: Appuyez et maintenez le bouton d'alimentation pendant 3 secondes pour allumer l'appareil ; appuyez et maintenez enfoncé... - Page 21 2. Ouvrez la connexion Wi-Fi de votre smartphone, et votre téléphone recherchera automatiquement le point d'accès Wi-Fi. Après avoir trouvé le point d'accès avec le nom de SSID Orbit 500, entrez le mot de passe 12345678 (le mot de passe initial par défaut est 12345678) et cliquez sur «...
- Page 22 réel de l'image. 5. Grâce aux boutons de l'écran du téléphone mobile, vous pouvez enregistrer, prendre des photos, lire, prévisualiser, couper le son et régler les paramètres. Note ●Une mauvaise utilisation entraînera le plantage de l'appareil. Si la caméra de tableau de bord tombe en panne, appuyez sur le bouton de réinitialisation pour reprendre la caméra.
-
Page 23: Paramètres D'enregistrement Vidéo
Paramètres d’enregistrement vidéo En mode veille, appuyez sur mode pour accéder aux paramètres vidéo, puis appuyez sur le bouton haut/bas pour sélectionner le menu désiré. Appuyez sur le bouton OK pour confirmer. 1. Résolution: 1080FHD 1920*1080 / 1080P 1440*1080 / 720P 1280*720 Off... -
Page 24: Spécifications
Spécifications Besoin de plus d’informations ? Visitez notre site web via www.mygekogear.com Veuillez contacter notre équipe de service clientèle à l'adresse suivante service@mygekogear.com si vous avez des questions supplémentaires.
Need help?
Do you have a question about the ORBIT 500 and is the answer not in the manual?
Questions and answers