Advertisement
Table of Contents
- 1 Table of Contents
- 2 Port Description
- 3 Button Description
- 4 Machine Operating Instructions
- 5 Install Lasergrbl/Lightburn
- 6 Engraving and Cutting with Lasergrbl
- 7 Engraving and Cutting with Lightburn
- 8 Engraving and Cutting with APP
- 9 Engraving and Cutting with the Web Controller
- 10 Laser Module Instructions
- 11 Lighting Description
- Download this manual
Advertisement
Table of Contents

Related Manuals for Ortur OLM3


Summary of Contents for Ortur OLM3
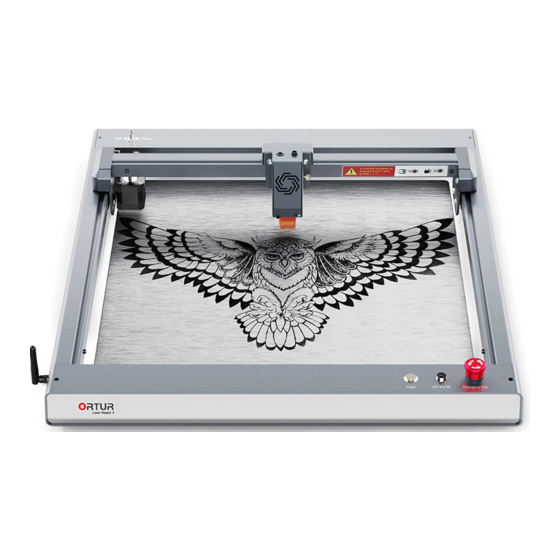
- Page 1 User Manual...
-
Page 2: Table Of Contents
Content Port Description Button Description Machine Operating Instructions Install LaserGRBL/LightBurn Engraving and cutting with LaserGRBL Engraving and Cutting with LightBurn Engraving and cutting with APP Engraving and cutting with the web controller Laser Module Instructions Lighting Description © 2022 ORTUR... -
Page 3: Port Description
3. USB Port 10. Input and Output Ports 4. Main Power Button (Status Light) 11. Harness Interface 5. Key Switch 12. Y-axis Motor Interface 6. Emergency Stop Button 13. YRR Transfer Switch 7. TF-card 14. YRR Motor Wire Port © 2022 ORTUR... -
Page 4: Button Description
"Reset" button while pressing the power button for a long time. YRR Transfer Switch Hit the left when using YRR, hit the right when using it normally When using YRR, please connect "YRR Motor Wire" to "YRR Motor Wire Port" © 2022 ORTUR... -
Page 5: Machine Operating Instructions
When the key is turned to the left, it is locked, and the right is unlocked. It cannot be turned on in the locked state. (The direction of locking and unlocking may be reversed for different batches of machines) © 2022 ORTUR... -
Page 6: Install Lasergrbl/Lightburn
Install LaserGRBL/LightBurn LaserGRBL download URL: https://lasergrbl.com/ (Freeware) LightBurn download URL: https://lightburnsoftware.com/ (Paid software) © 2022 ORTUR... -
Page 7: Engraving And Cutting With Lasergrbl
Engraving and cutting with LaserGRBL 1. Connect the machine Click the button in the red box to connect the software to the machine. 2. Unlock Buttons Click the button in the red box to unlock the grey buttons. © 2022 ORTUR... - Page 8 3. Engraving © 2022 ORTUR...
- Page 9 11. The size can be modified according to your needs 12. Click "Create" Note: The engraving parameters are only for learning and reference, and the actual use will be affected by factors such as materials and engraving images! © 2022 ORTUR...
- Page 10 Use the moving direction buttons to adjust After adjusting the engraving starting point, the engraving starting point. you must click this button to record the position, otherwise the movement will be invalid! Click the button in the red box to start engraving. © 2022 ORTUR...
- Page 11 4. Cutting © 2022 ORTUR...
- Page 12 Use the moving direction buttons to adjust After adjusting the engraving starting point, the engraving starting point. you must click this button to record the position, otherwise the movement will be invalid! Click the button in the red box to start cutting. © 2022 ORTUR...
-
Page 13: Engraving And Cutting With Lightburn
Engraving and cutting with LightBurn 1. Connect the machine 1. Click the "Create Manually" 2. Click the "GRBL", then click "Next". 3. Click the "Serial/USB", then click "Next". © 2022 ORTUR... - Page 14 4. Modify "X Axis Length" and "Y Axis Length" to 5. Select the origin "Front Left", turn off auto-homing, 400mm. then click "Next". 6. Click the "Finish". 7. Click the "OK". © 2022 ORTUR...
- Page 15 8. Select "COM19". 9. Connection succeeded. © 2022 ORTUR...
- Page 16 1, and "Power Max" to 100. (Note that the unit is mm/m) Note: The engraving parameters are only for learning and reference, and the actual use will be affected by factors such as materials and engraving images! © 2022 ORTUR...
- Page 17 1. The coordinates of the center point of the engraving range 2. Engraving image size 3. Engraving image size ratio 4. The effective engraving range of the machine Click the button in the red box to start cutting. © 2022 ORTUR...
- Page 18 file. The cut image must be lines! Modify the speed to 100, "Pass Count" to 1, and "Power Max" to 100. (Note that the unit is mm/m) © 2022 ORTUR...
- Page 19 1. The coordinates of the center point of the engraving range 2. Engraving image size 3. Engraving image size ratio 4. The effective engraving range of the machine Click the button in the red box to start cutting. © 2022 ORTUR...
-
Page 20: Engraving And Cutting With App
Android-Google Play IOS-App Store 1. Connect the machine (Mobile phone connected to machine WiFi) The WiFi name of the machine starts with "Ortur Laser Master 3". WiFi password is "12345678". Note 1: The mobile phone cannot access the Internet when the machine's WiFi is connected. - Page 21 2. Enter "$75=WiFi password" in the red box, then "$74=WiFi name" in the red box, and then click Enter. click Enter. 3. Enter "$WRS" in the red box, then 4. The IP of the machine in the LAN. click Enter. © 2022 ORTUR...
- Page 22 2.3 Connecting the machine Click the options in the red box in order from left to right. Note 1: The correct laser module must be selected! Note 2: The phone and the machine must be connected to the same WiFi! © 2022 ORTUR...
- Page 23 3. Use the APP to configure the network function (currently only supports OLM3 and subsequent new devices) 1. Click the position of the red 2. Click the device to be 3. Just fill in the WiFi password. box. connected. 4. In the power-on state, short press 5.
- Page 24 4.Album (can view and select images in the phone album) 5.History (used data can be called directly) 6.File (can read engraving file) 7.Bar Code (software comes with barcode editor) 8. QR Code (the software comes with a QR code editor) © 2022 ORTUR...
- Page 25 Note: The parameters are for learning reference only, and the actual use will be affected by factors such as material and thickness! Please do more tests according to the actual situation! Parameter settings for cutting (reference) © 2022 ORTUR...
- Page 26 1. Click the options in the red box in order from left to right. Please wait patiently until the file is loaded. © 2022 ORTUR...
- Page 27 3. Click "Confirm". 2. Click "Run" to start engraving or cutting. © 2022 ORTUR...
-
Page 28: Engraving And Cutting With The Web Controller
2. Enter "$75=WiFi password" in the red box, then "$74=WiFi name" in the red box, and then click Enter. click Enter. 3. Enter "$WRS" in the red box, then 4. The IP of the machine in the LAN. click Enter. © 2022 ORTUR... - Page 29 1.2 Connect the machine (the mobile phone and the machine are in the same local area network) (LightBurn) 1. Connect the machine to LightBurn, 2. Enter "$75=WiFi password" in the red box, and then click enter "$74=WiFi name" in the red box, Enter.
- Page 30 2. Computer connected to the machine 1. Open a browser, enter the IP address of the machine, and hit enter. 2.Enter "admin" for the user and password to enter the operation interface. © 2022 ORTUR...
- Page 31 3.1 Make Ggode files needed for web controller engraving or cutting(LaserGRBL) 1. After setting the parameters in the software, click "File" → "Quick Save". 2. Click "Save". © 2022 ORTUR...
- Page 32 3.2 Make Ggode files required for web controller engraving or cutting(LightBurn) 1. After setting the parameters in the software, click "File" → "Quick Save". 2. Click "Save". © 2022 ORTUR...
- Page 33 4. Engraving or cutting 1. Click the button inside the red box to open the saved Ggode file. 2.Click "Open". Please wait patiently until the file is loaded. © 2022 ORTUR...
- Page 34 3. Click the button inside the red box to start engraving or cutting. 4.Click "Checked". 5.Click "Next". 6.Click "Start". © 2022 ORTUR...
- Page 35 7. .Click "Run". © 2022 ORTUR...
-
Page 36: Laser Module Instructions
Laser Module Instructions 1. Focal Gauge Rod Engraved Object Focal Gauge Rod © 2022 ORTUR... - Page 37 To install the laser shield, the long clip must be inserted into the wide card slot first. After installing the long clip, firmly press one side of the short clip to let the short clip enter the narrow card slot. © 2022 ORTUR...
- Page 38 Note: No need to install air assist when not using an air compressor! You only need to remove the rubber plug when air assist is used. Please install the rubber plug when air assist is not used. © 2022 ORTUR...
- Page 39 Air Pipe (cut into 2 segments) Air Flow Regulator Pipe Connector The pipe joint is connected to the air compressor (it is recommended to use an air compressor with an air flow of 40L/min) © 2022 ORTUR...
-
Page 40: Lighting Description
Lighting Description © 2022 ORTUR...
Need help?
Do you have a question about the OLM3 and is the answer not in the manual?
Questions and answers
Писк прекращается когда прирываешь связь с компьютером. В гнездо вставляешь USB накопитель. Но работать можно только через Wi-Fi. Помогите пожалуйста
Здравствуйте. При подключении OLM3 к компьютеру постоянно звучит звуковой сигнал. Издаётся писк. И мигает кнопка пуск.