Table of Contents
Advertisement
Quick Links
Advertisement
Table of Contents

Related Manuals for Sipromac 250


Summary of Contents for Sipromac 250
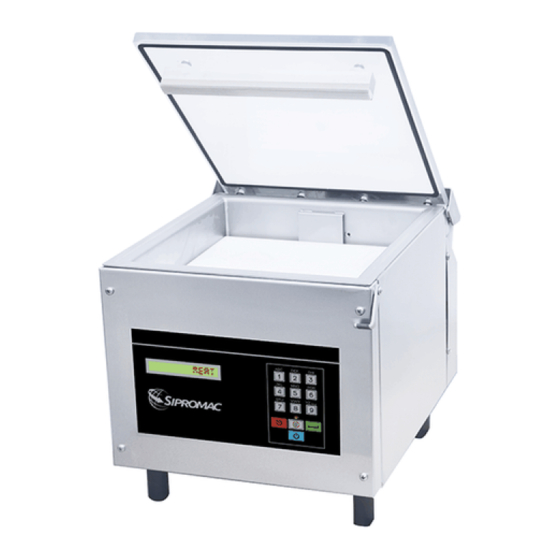
- Page 1 INSTRUCTION MANUAL VACUUM PACKAGING MACHINE MODEL SERIAL NUMBER...
- Page 3 IMPORTANT SAFETY INSTRUCTIONS SAVE THESE INSTRUCTIONS This symbol points out important safety instructions which, if not followed, could endanger the personal safety and/or property of yourself and others. Read and follow all instructions in this manual before attempting to operate your machine. Failure to comply with these instructions may result in personal injury.
- Page 4 Never incline the machine more than 30 degrees, it may tip over and hurt someone seriously. Work only in daylight or good artificial light. Do not operate any appliance with a damaged cord or plug, or after the appliance malfunctions or is dropped or damaged in any manner.
-
Page 5: Table Of Contents
Contents SETTING UP THE MACHINE ....................... 6 ELECTRICAL CONNECTION ....................... 6 OPERATION ............................7 ..........................7 ORKING PRINCIPLES ) ........................... 8 AS FLUSHING OPTION ) ......................... 8 LECTRICAL BAG CUT OPTION ) ......................8 RESSURE REGULATOR OPTION CONTROL ............................. 9 .............................. -
Page 6: Setting Up The Machine
1. Setting up the machine Before choosing the site for the machine, please consider that you will also need room for packaged and non-packaged products apart from the space needed for the machine itself. Before starting to work, check the oil view glass on the pump, if there is a sufficient quantity of oil in the pump. -
Page 7: Operation
3. Operation a. Working principles A vacuum packaging cycle is made of 3 stages. First the vacuum is made, the air is completely taken out of the chamber and from bag containing the product (see figure 1). Then it is possible to inject neutral gas from the nozzles, gas flushing extended product shelf life and also act as a cushion for delicate product. -
Page 8: Gas Flushing (Option)
b. Gas flushing (option) There is an atmospheric pressure of 1 kg/cm (14 PSI) upon products when fully evacuated. Products which can be damaged by high pressure must be packaged with a partial vacuum, or the pressure must be counterbalance by inflating the bag with neutral gas. -
Page 9: Control
4. Control a. Basic Use power key to power the vacuum packaging machine. When the unit is energized, the identification of the last executed program is displayed on LCD screen. To disconnect, use the power key to turn off the machine, then remove plug from outlet. -
Page 10: Vacuum Level Setting
In program submenu, use esc key to get back to the programs menu. Strike any key to clear the error messages which may be displayed on LCD screen. Menu Structure can be found in section 4.H. Create a program: When executing the "create a program" function, the program submenu is acceded, starting with the identification. -
Page 11: Vacuum Plus Setting
automatically performed following the third digit entry (the new vacuum level is blinking). In the middle of an acquisition, use enter key to validate the vacuum level and key "ESC" to come backward and start over with a new acquisition. Set vacuum level to zero to bypass the pressure transducer and proceed only using the vacuum plus time. -
Page 12: Sealing Time Setting
e. Sealing time setting For a selected program set the sealing, starting with the seconds; the decimal point is automatically inserted following the first digit entry and the validation is automatically performed following the third digit entry (the new sealing time is blinking. -
Page 13: Menus Structure
h. Menus structure • Functions menu: "F1 CREATE A PRGM" "F2 DELETE A PRGM" • Programs menu: "Pxx NAME" Program submenu: "VACUUM: xx.x%" (10.0% - 99.5%) "VACUUM PLUS: xxs" (0s - 99s) "GAS FLUSH: xx.x%" (0.0% - 10% below the vacuum level) (units with gas option) "SEAL TIME: x.xxs"... -
Page 14: Daily Cleaning
“D9 ACCESS CODE” Enable or disable the access code to modify the programs “D10 CODE CHANGE” Modify the program access code "D11 PUB” Enable or disable the screen saver message “D12 SELECT PUB” Factory use “D13 VACUUM CALIB” Automated calibration sequence "SYSTEM MONITOR"... -
Page 15: Troubleshooting
WARNING: All electrical work described in this brochure should be done by a QUALIFIED and AUTHORIZED technician. 6. Troubleshooting a. Failure during packaging cycle COVER DOWN ERROR’’ message is display on LCD. The input signal of the down position switch has been lost during cycle execution. Check limit switch adjustment. -
Page 16: Faulty Valve
d. Faulty valve Check whether there is voltage on the magnetic valves during their period of operation. If there is no voltage a wire is broken or the PC board is damaged. If the lid does not open at the end of the cycle; air enters, but there is still 20 - 40% vacuum in chamber, vacuum valve does not close (needs to be serviced). - Page 17 Check vacuum connections for tightness. Check oil in pump (oil level in view glass; add if necessary. Regular change of oil - necessity indicated by change of color). Follow Busch maintenance schedule. Check vacuum in chamber with precision vacuumeter. Check desiccant filter for proper color, change if necessary. Check function of cycle with various settings of timers.This board software is allowing access to a "Diagnostics Menu".
- Page 40 NOTES...
Need help?
Do you have a question about the 250 and is the answer not in the manual?
Questions and answers