
Related Manuals for ESI 5 Series


Summary of Contents for ESI 5 Series
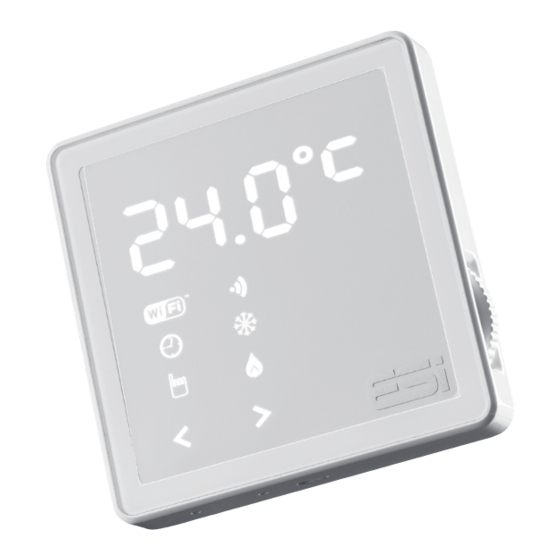
- Page 1 ESRTP5RFWIFIP 5 Series WiFi Wireless Programmable Room Thermostat Installing and using the ESi Centro App...
- Page 2 Thank you for choosing ESi Controls. All our products are tested in the UK so we are confident this product will reach you in perfect condition and give you many years of service. However, for additional peace of mind, we recommend you register your product online at www.esicontrols.co.uk/warranty for your extended warranty.
-
Page 3: Table Of Contents
Contents Downloading your Centro App Pairing a device Setting the Heating Setting Holiday Mode Pairing the Thermostat and Receiver Abbreviation Menu... - Page 4 Downloading your Centro App 1. To get the App, search for ESi Centro in the App Store (iPhone) or Google Play (Android devices). Or visit our website: www.esicontrols.co.uk/centro.html 2. If you already have an account, then simply login using the email address and password you registered with (Fig 1) OR if you haven’t...
-
Page 5: Downloading Your Centro App
Pairing your device Fig 1 1. Press and hold (1) until the display shows tINE. Turn the dial (2) until the display shows CoUP then press . symbol (3) will flash and - - - - will be displayed (4). 2. -
Page 6: Pairing A Device
5. Enter the individual thermostat WiFi code (Fig 4) (this can be found on the rear of the thermostat or in the box). Then tap Next. 6. Select your router and enter your router password (Fig 5). Then tap Next and the App will search for the thermostat (Fig 6). Fig 4 Fig 5... - Page 7 7. Your thermostat should now be connected to your WiFi and the symbol on your thermostat should be constantly on and the App should display the configuration has been successful (Fig 7). Fig 6 Fig 7...
- Page 8 8. If the symbol on the thermostat is off or flashing and the App displays it has failed to connect to the network (Fig 8) this means the connection has not been completed. Please check carefully that you have entered the correct 10-digit number in (Fig 4), and that the correct WiFi password was entered (Fig 5), and the router is set to the 2.4Ghz range then follow the instruction on the App and tap ‘retry’...
-
Page 9: Setting The Heating
Setting the Heating 1. Click the Heating Control tab (Fig 1). 2. If more than one thermostat is attached to the App, choose the thermostat to adjust (Fig 2). Fig 1 Fig 2... - Page 10 3. Choose between modes: Schedule, Manual or Off (Fig 4). 4. Set temperature by either swiping the number up or down, or use the + or – (Fig 4). 5. Either click the Schedule tab, or Swipe Left to enter the Time and Temperature settings (Fig 5).
- Page 11 7. Choose between 7, 5/2 days or 24 hours, and either 4 or 6 events per day (Fig 6). 8. To adjust a heating schedule, tap on the schedule to be changed (Fig 7). Fig 6 Fig 7...
- Page 12 9. Choose the desired Temperature for the time period (Fig 8). 10. Click the Start button and adjust the Start Time, then click the End button and set the desired End Time (Fig 8). 11. Click the Save button (Fig 8) to return to the Schedule page and confirm changes (Fig 9).
-
Page 13: Setting Holiday Mode
Setting Holiday Mode 1. Click the Menu button at the top left hand corner (Fig 1). 2. Select and click into the Set Holiday tab (Fig 2). Fig 1 Fig 2... - Page 14 3. Set the Departure and Return dates and times (it is recommended to set the return date one day before your actual arrival date to allow the house to return to its normal temperature) (Figs 3 & 4). 4. Once Departure and Return dates and times are set, click Save to exit (Fig 4).
- Page 15 5. Select the desired Away Temperature (Fig 5). 6. Click the Activate Holiday Mode button and it will confirm Departure and Return dates and times and display all thermostats (Fig 7). Fig 5 Fig 7...
-
Page 16: Pairing The Thermostat And Receiver
Pairing the Thermostat and Receiver N.B. The receiver and thermostat comes pre-paired, but if for some reason the pairing is lost, please follow the section below to pre- pair your thermostat and receiver. 1. Press and hold the on the receiver until green and red lights flash alternatively (Fig 1). - Page 17 4. Turn the dial until CFG is displayed then tap (Fig 5) until t-r is displayed then press (Fig 6) which will revert back to the CFG display. Fig 5 Fig 6 5. Turn the dial until COUr is displayed, then tap (Fig 7).
-
Page 18: Abbreviation Menu
Abbreviation Menu... - Page 19 We are continuously developing our products to bring you the very latest in energy saving technology and simplicity. However, should you have any questions setting up your controls please email us at sales@esicontrols.co.uk. WARNING: Interference with sealed parts renders the guarantee void. In the interests of continuous product improvement we reserve the right to alter designs, specifications and materials without prior notice and cannot accept liability for errors.
- Page 20 Version 6.10.2 © ESi Controls Limited 2017...
Need help?
Do you have a question about the 5 Series and is the answer not in the manual?
Questions and answers