Advertisement
Procedure: Installation
Title: iN10 Installation Checklist
Revision: 02
Procedure # Install-00
ECCN: EAR99
Part number: 912A0604/912A0605
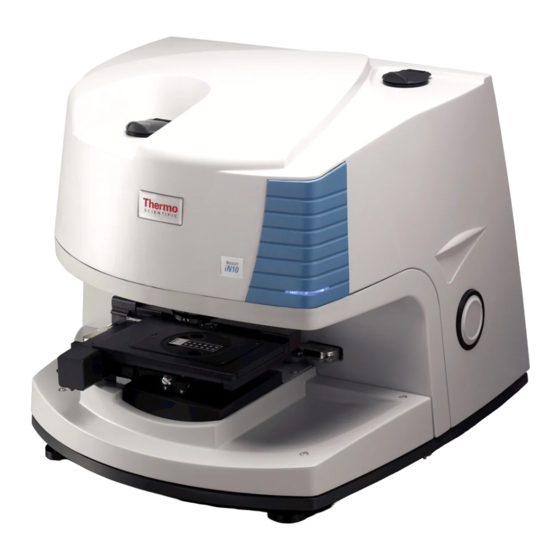
Part description: iN10/in10MX Integrated Infrared Microscope
Functional description:
Problems associated with this assembly:
Tools required:
Scissor
Short handled medium Phillips screwdriver
Long handled medium Phillips screwdriver
Flat blade screwdriver
5/64" balldriver or L-wrench (array alignment)
Needle nose pliers (iZ10 interface installation)
Pliers (iZ10 installation)
3/16" L-wrench (iZ10 installation)
5/32" balldriver (iZ10 installation)
Laboratory grade powder-less gloves
ATR Crystal alignment procedure
Service test slide
100um Pinhole slide
Estimated time required: Approximately 4 -12 hours
depending on ValPro configuration.
Notes:
This document contains confidential or proprietary information of Thermo Fisher Scientific. Neither this
document nor the information therein is to be reproduced, distributed, used or disclosed, either in whole or
in part, except as specifically authorized by Thermo Fisher Scientific.
9/25/2012
iN10/iN10MX
Page 1 of 10
Advertisement
Table of Contents

Summary of Contents for ThermoFisher Scientific iN10
- Page 1 Procedure: Installation Title: iN10 Installation Checklist Revision: 02 Procedure # Install-00 ECCN: EAR99 Part number: 912A0604/912A0605 Part description: iN10/in10MX Integrated Infrared Microscope Functional description: Problems associated with this assembly: Tools required: Scissor Short handled medium Phillips screwdriver Long handled medium Phillips screwdriver ...
- Page 2 Added Safety page. Added Remove the array detector shipping restraint if applicable (refer to the latest iN10 installation procedure); iN10MX systems only to the Preparing the system and loading OMNIC Picta section. This document contains confidential or proprietary information of Thermo Fisher Scientific. Neither this document nor the information therein is to be reproduced, distributed, used or disclosed, either in whole or in part, except as specifically authorized by Thermo Fisher Scientific.
- Page 3 Important: Prior to performing any replacement procedure, you must read the Nicolet iN10 Safety Guide. If you do not have the Safety Guide, it is available for download from the PSE website. If you do not have access to the PSE website, email international support to request access at Support.Madison@thermofisher.com...
- Page 4 Installation Checklist This page intentionally left blank. This document contains confidential or proprietary information of Thermo Fisher Scientific. Neither this document nor the information therein is to be reproduced, distributed, used or disclosed, either in whole or in part, except as specifically authorized by Thermo Fisher Scientific.
-
Page 5: Setting Customer Expectations
Installation Checklist Setting customer expectations Clearly explain the services you will provide during the installation. Explain the installation procedure. Inform the customer of any known backorders. Identify a suitable location for the system. Review the site preparation manual with the customer. This manual contains specifications for the operating environment. - Page 6 Installation Checklist Environment considerations: No static producing objects are near the instrument. The system is away from outside windows. The room temperature is constant between 16ºC (60ºF) and 27ºC (80ºF). The non-condensing humidity is between 20% and 80%. The area is free from dust.
-
Page 7: Unpacking The System
Installation Checklist Unpacking the system Notice: This procedure assumes the instrument has been at room temperature for at least 24 hours and has not been removed from the packing box and bag. Notice: Before you unpack the system, inspect the shipping container for damage. If possible, take digital photos of any damage. - Page 8 Use the OMNIC Picta installation CD to install OMNIC Picta on the system computer. Use the iN10 driver CD to install the iN10 driver on the system computer. Use the Camera Driver CD to install the camera driver on the system computer.
-
Page 9: System Operation
Verify System Status. Run IQ performance tests through Advanced Diagnostics for TGS and MCT detector (if applicable). Verify the array detector according to the iN10 installation procedure (if applicable). Verify ATR according to the iN10 installation procedure (if applicable). Validate the iZ10 through Advanced Diagnostics (if applicable). -
Page 10: System Overview
Installation Checklist System Overview Show the customer how to use the Help menu in OMNIC Picta to access the software help. Point out the safety labels on the instrument and explain the significance of each label. Identify and explain the customer LRUs. There are only four parts that the customer can replace: The IR source.


Need help?
Do you have a question about the iN10 and is the answer not in the manual?
Questions and answers