Advertisement
Contents
1. General safety instructions _______________________________ 2
2. Installation____________________________________________ 9
3. Description of the controls ______________________________ 20
4. Operating instructions __________________________________ 31
5. Cleaning and maintenance ______________________________ 52
6. Troubleshooting. What to do if... __________________________ 55
7. Troubleshooting ______________________________________ 60
Thank you for choosing one of our products.
You are advised to read this manual carefully; it contains all the
information you need about the right conditions for the proper, safe use of
your dishwasher.
The individual sections are laid out to provide you with a step-by-step
guide to all your appliance's functions; the texts are easy to understand
and are complete with detailed illustrations.
Recommendations are given for the correct use of the baskets, spray
arms, containers, filters, washing programs, and for operating the controls.
Following the cleaning instructions provided here will keep your
dishwasher's performance at peak levels in the long term.
This user-friendly manual will provide answers to all your questions about
use of the dishwasher.
INSTALLATION INSTRUCTIONS: these are intended for the qualified
technician who must carry out the installation, hook-up and testing of the
appliance.
USER INSTRUCTIONS: these consist of recommendations for using the
appliance, a description of its controls and of the correct cleaning and
maintenance procedures.
This manual includes options, programs and features that may be present
on the type of dishwasher you have purchased. For the specific
characteristics of your model, please refer to the manual supplied together
with the product.
1
Advertisement
Troubleshooting

Related Manuals for Smeg DI322BQLH


Summary of Contents for Smeg DI322BQLH
-
Page 1: Table Of Contents
Contents 1. General safety instructions _______________________________ 2 2. Installation____________________________________________ 9 3. Description of the controls ______________________________ 20 4. Operating instructions __________________________________ 31 5. Cleaning and maintenance ______________________________ 52 6. Troubleshooting. What to do if... __________________________ 55 7. Troubleshooting ______________________________________ 60 Thank you for choosing one of our products. -
Page 2: General Safety Instructions
Installation TRANSLATION ORIGINAL INSTRUCTIONS 1. General safety instructions This manual is an integral part of the appliance; it must always be kept intact together with the dishwasher for future reference (even if sold). Before using the appliance, carefully read all the instructions contained in this manual. - Page 3 Installation Never leave waste packaging unattended. Do not allow children to play with packaging materials. Separate waste packaging materials by type and consign them to the nearest recycling centre. The plate with the technical data, serial number and marking is in a visible position on the inside edge of the door.
- Page 4 Installation Building-in the appliance underneath a hob is absolutely forbidden. Installing a hob on top of free- standing appliance is absolutely forbidden. To ensure stability, install the appliance only under continuous worktop, securely fixed to adjacent cabinets. If the appliance is installed in a high cabinet, both the appliance and the cabinet must be adequately fixed.
- Page 5 Installation The appliance must be connected to the water supply by means of new hoses. Briefly test the appliance after installation. Run a wash cycle with a temperature of between 45 and 70°C with the dishwasher empty and using a specific dishwasher detergent.
- Page 6 Installation suffocation. Observe all the safety instructions on the packaging of these products. Do not drink the water residues which may be present on the dishes or appliance at the end of the washing program. Never place solvents such as alcohol or turpentine, which potentially explosive,...
- Page 7 Installation water tap. In the event of damage to the supply cord, have it replaced by the manufacturer or an authorised technical service centre. Some components are live even with the on/off button in the off position. Before performing any maintenance work on the appliance, disconnect it from the electrical power supply.
- Page 8 Installation 1.1 Declaration of conformity The appliance complies with the essential requirements of the following European directives: - 2009/125/EC - 2011/65/EU - 2014/35/EU - IEC/EN 62471, risk group 1, for models with internal lighting. - IEC/EN 61770 1.2 Disposal This appliance must be disposed of separately from other waste (directive 2012/19/EC).
-
Page 9: Installation
Installation 2. Installation 2.1 Technical characteristics Water supply pressure min. 0.05 - max. 0.9 MPa (min. 0.5 – max. 9 bar) Water supply temperature max. 60°C Capacity 12-13 standard place settings Class of protection against IPX0 moisture Protection against electric class I shock Electrical data... - Page 10 Installation 2.2 General information Remove the polystyrene basket retainers. Position the appliance in the desired place of installation. This appliance may be placed up against walls or other furniture units. If the appliance is installed near a heat source, fit a special insulating panel to prevent overheating and malfunction of the appliance.
- Page 11 Installation electronic boards and printed circuits; electronic displays; pressure switches; thermostats and sensors, software and firmware, including reset software. The following spare parts will be available for 10 years after the model is no longer produced: door hinge and seal;...
- Page 12 Installation Building-in a dishwasher underneath a hob is absolutely forbidden. Moreover, dishwashers may not be installed directly touching appliances which are not conventional built-in kitchen appliances (e.g. fireplaces, stoves, etc.). When installing dishwasher compartment next to one or more other appliances, it is essential to comply with all the recommendations provided by the appliance’s manufacturer (minimum distances, installation...
- Page 13 Installation For free-standing models only - Installing a hob on top of a free-standing dishwasher is absolutely forbidden. - If the appliance is accessible from one side, the door hinge area has to be covered for safety reasons (risk of injury). The covers are available as an accessory and can be ordered through the Technical Assistance Service.
- Page 14 Installation CONNECTING TO THE WATER SUPPLY Connect the intake hose to a cold water supply with ¾” gas thread, inserting the filter A supplied with the dishwasher. Take care to screw the hose firmly into place with your hands then complete tightening about ¼...
- Page 15 Installation The dishwasher can also be connected to a hot water supply not exceeding 60°C. Supplying the appliance with hot water cuts down the washing time be approximately 20 minutes, but slightly reduces its effectiveness. Make the connection to the domestic hot water supply using the same procedure described for connecting to the cold water supply.
- Page 16 Installation DRAIN CONNECTION Insert dishwasher’s drain hose into a drain pipe having a diameter of at least 4 cm, or alternatively, place it inside the kitchen sink using plastic support provided, taking care not to crush or excessively bend the hose. It is important to prevent the hose from coming loose and falling.
- Page 17 Installation 2.4 Electrical connection and precautions Check that the voltage and the frequency of the mains match the ratings on the name plate of the appliance positioned on the inner edge of the door. The plug on the supply cord and the corresponding socket outlet must be of the same type and meet the regulations in force.
- Page 18 Installation Some components are live even with the ON/OFF position. Before performing any maintenance work appliance, disconnect it from the electrical power supply. IF THE APPLIANCE IS PROVIDED WITH A PLUGLESS SUPPLY CORD: An omnipolar circuit breaker in overvoltage protection class III must be installed in an easily accessible position on the power supply line.
- Page 19 Installation FOR GREAT BRITAIN ONLY: This appliance must be earthed. Fuse replacement If the mains lead of this appliance is fitted with a BS 1363A 13A fused plug, to change a fuse in this type of plug A.S.T.A. approved fuse to BS 1362 and proceed as follows: 1.
-
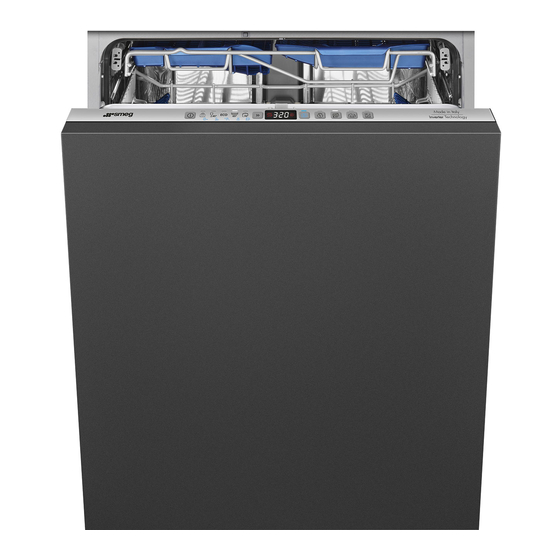
Page 20: Description Of The Controls
User instructions 3. Description of the controls 3.1 Upper panel All the dishwasher controls are grouped on the upper panel. Switch-on, programming, switch-off, etc. procedures are only possible when the door is open. The panel shown is only a guideline example. ON-OFF BUTTON SALT and RINSE AID INDICATOR LIGHTS (depending on the model) - Page 21 User instructions Information displayed Scheduled program duration Remaining program time Delayed start 1 - 24 hours Error message SETTING THE WASHING PROGRAM AND SWITCHING ON After identifying the most suitable program with the aid of the programs table: Press the ON/OFF button (A) and wait for the PROGRAM ...
- Page 22 User instructions PROGRAM IN PROGRESS INDICATOR LIGHT (on some models only) When a program is running, a flashing light is projected onto the floor under the right-hand corner of the door. At the end of the program, the light goes out to reduce sleep mode electricity consumption.
- Page 23 User instructions The number, type and the sequence of wash programs depend on the model purchased. Refer to the instruction manual supplied together with the product. ECO: Program with the lowest water and energy consumption for washing normally soiled dishes, even with dried-on residues. The information refers to the STANDARD EN60436 program (indicated in the programs table) that is the most efficient in terms of combined energy and water consumption.
- Page 24 User instructions HYGIENE Increases the temperature of the final rinse to obtain a greater level of hygiene. Suitable for the intensive washing of plates, pots, pans, cutting boards, feeding bottles. Ideal for baby dishes or if there are allergy sufferers in the family. NOTE: The Hygiene 99.9% program has been tested by an external laboratory (VDE) without an option selected.
- Page 25 User instructions REFERENCES for the ENERGY LABEL supplied with the dishwasher: The information refers to the EN 60436 - STANDARD program (indicated in the program table), which is the most effective in terms of combined energy and water consumption. The program is recommended for normally soiled dishes and is used to assess ecodesign compliance with EU legislation.
- Page 26 User instructions 3.2 Washing programs Before starting a washing program make sure that: The water supply tap is open. The softener container contains regenerating salt. The correct amount of detergent has been added to the dispenser. The baskets have been correctly loaded. ...
- Page 27 User instructions SPECIAL (if present) Allows you to enable additional programs when selected together with any wash cycle. After having selected the required wash cycle, press the button (the light turns on). It turns off automatically when the cycle has finished.
- Page 28 User instructions DELAY (if present) Press the DELAY button to set the dishwasher cycle to start during the required time period (e.g. night). According to the model, this may be indicated on the display or by specific lights. The option cannot be selected once the cycle is running.
- Page 29 User instructions CANCELLING THE CURRENT PROGRAM To cancel the currently selected program open the door and hold down the PROGRAM SELECTION (C) button for a few seconds until the indicator lights for programs 4 and 5 illuminate simultaneously (marked "end"). Close the door.
- Page 30 User instructions TO CUT DOWN ON DETERGENT CONSUMPTION! … AND PROTECT THE ENVIRONMENT The phosphates contained in dishwasher detergents are harmful to the environment. To avoid using excessive amounts of detergent and to save on electricity, observe the following: separate the more delicate items from dishes that are more resistant to aggressive detergents and high temperatures;...
-
Page 31: Operating Instructions
User instructions 4. Operating instructions After having installed the dishwasher, remove the basket retainers and prepare the machine for use as follows: Regulate the water softening system; Add regenerating salt; Add rinse aid and detergent. 4.1 Setting the water hardness Press and hold the program selection button until the salt light ... - Page 32 User instructions WATER HARDNESS TABLE WATER HARDNESS German French SETTINGS degrees degrees (°dH) (°dH) All indicator 0 – 6 0 – 11 lights off 7 – 10 12 – 18 One indicator light on 11 – 15 19 – 27 Two indicator lights on Three...
- Page 33 User instructions 4.2 Adding the salt The amount of scale contained in the water (water hardness index) can cause whitish staining on the dry dishes, which tend to become dull over time. The dishwasher is equipped with an automatic softening system which uses a special regenerating SALT salt to reduce the hardness of the water.
- Page 34 User instructions In order for the water softening system to give fault-free service, the appliance performs a regeneration cycle of the system at regular intervals. The regeneration process consists of several stages. It starts at the end of the last rinse cycle, after the amount of water indicated in the mains water hardness setting has been reached during the wash cycle, and finishes at the beginning of the following wash cycle.
- Page 35 User instructions 4.3 Adding the rinse aid detergent rinse dispensers are situated on the inner part of the door: the detergent dispenser is on the left, and the rinse aid dispenser is on the right. The rinse aid helps the dishes dry faster and prevents the formation of scale deposits and staining;...
- Page 36 User instructions Adjusting the rinse aid dispenser mode Press and hold the program selection button, after approximately 15 seconds the salt light flashes, keep it pressed until the rinse light. The program lights (D) / display (G) indicate the current setting. ...
- Page 37 User instructions 4.4 Adding the detergent Open the detergent dispenser cover by lightly pressing the button P. Add the detergent or tablet. Close the cover by sliding it until it stops, indicated by a click. The dispenser will open automatically during the wash cycle. Only add the detergent or tablet if the dispenser is dry.
- Page 38 User instructions When a program with a hot pre-wash is selected (see program table), extra detergent must be placed in the cavity. Use only detergents specially formulated for dishwashers. The detergent packs must be sealed and stored in a dry place to ...
- Page 39 User instructions WARNING! Make sure that the dishes are securely in place so that they cannot tip over or obstruct the rotation of the spray arms during the washing cycle. Do not place very small objects in the baskets as these could fall and obstruct the spray arms or the wash pump.
- Page 40 User instructions 4.6 Using the baskets Capacity, including serving dishes: 12 or 13 place settings depending on model (see energy label). LOWER BASKET The lower basket receives the full force of the lower spray arm, and should therefore be used for the “toughest” items with a heavier degree of soiling. All types and combinations of loads are permitted, provided that the dishes, pots and pans are arranged with all the soiled surfaces...
- Page 41 User instructions LOADING THE LOWER BASKET Carefully load flat plates, soup plates, dessert and serving dishes, positioning them vertically. Pots, pans and their covers must be loaded upside down. When loading soup plates and dessert bowls, be sure to leave a gap between them. Loading examples: UPPER BASKET The upper basket should be loaded with small or medium-sized items...
- Page 42 User instructions CUTLERY BASKET (on some models only) The basket is suitable for all types of cutlery, except long items that may interfere with the upper spray arm. The cutlery should be arranged in the spaces in the upper racks to allow the water to pass effectively between the items.
- Page 43 User instructions TOP CUTLERY BASKET (on some models only) The basket is designed to take cutlery, placed in the spaces provided, and long utensils, positioned lengthwise. The “drawer” extraction system makes the basket easier to load, but it can also be taken completely off its runners by removing the retainers (as shown here).
- Page 44 User instructions FLEXIDUO TOP CUTLERY BASKET (on some models only) This comprises two independent sliding, pull-out tray racks for easier loading/unloading of cutlery. Various loading systems and configurations are possible. For example, tea cups can be loaded with the right-hand rack set in the low position, while the left-hand rack or both can be removed to allow large dishes to be put in the top basket.
- Page 45 User instructions EXAMPLES OF LOADING FOR INTENSIVE DIRT 12 standard place setting If the bottom basket inserts are of the fold-down type, they should be laid flat for easier loading. 13 standard place setting If the bottom basket inserts are of the fold-down type, they should be laid flat for easier loading.
- Page 46 User instructions 13 standard place setting TOP CUTLERY BASKET (on some models only) If the bottom basket inserts are of the fold-down type, they should be laid flat for easier loading.
- Page 47 User instructions 13 standard place setting FLEXIDUO TOP CUTLERY BASKET (on some models only) If the bottom basket inserts are of the fold-down type, they should be laid flat for easier loading.
- Page 48 User instructions UPPER BASKET EQUIPMENT (depending on the model) Cutlery tray For knives, spoons (tea and dessert) and long objects. The ends are designed to hold long stemmed glasses. - It can be removed by pressing and pushing the release levers (B) at the same time.
- Page 49 User instructions Fold-down shelves For mugs, cups and long objects. The ends are designed to hold long stemmed glasses When not used they can be moved to a vertical position (until a click is heard). Shelves with expandable wings For small objects, mugs and cups. They can be used either closed or open (pull the upper, sliding part).
- Page 50 User instructions Fold-down tines These can be secured in a vertical position, resting on the bottom of the basket if unused, or placed in an intermediate position, as required. The single tine on the right is ideal for supporting long stemmed glasses.
- Page 51 User instructions ADJUSTING THE UPPER BASKET The height of the top basket can be adjusted to allow large dishes or pans to be placed in the bottom basket. The adjustment procedure may be type A or B, depending on the dishwasher model purchased. Version A: pull-out with adjustment in two positions.
-
Page 52: Cleaning And Maintenance
User instructions 5. Cleaning and maintenance Before carrying out any work, always unplug the appliance from the electrical supply or switch off the omnipolar circuit breaker. 5.1 General warnings and recommendations Avoid the use of acidic or abrasive detergents. Clean the outer surfaces and door-lining of the dishwasher regularly using a soft cloth moistened with water or with a normal detergent suitable for painted surfaces. - Page 53 User instructions To remove the lower spray arm, simply lift it up, pulling by the central part. To remove the orbital spray arm assembly, take hold of the longer arm and pull the orbital unit upward. Wash the arms under a jet of running water and return them carefully to their seat.
- Page 54 User instructions CLEANING THE FILTER UNIT (models with planetarium sprayer) If the dishwasher is used every day, we recommend that you clean it once a week. It is advisable to periodically inspect the centre filter and, if necessary, to clean it. ...
-
Page 55: Troubleshooting. What To Do If
User instructions 6. Troubleshooting. What to do if... Fault Possible cause Solution The salt light does not turn on There is still enough salt Check the fill level The rinse aid light does not There is still enough rinse aid Check the fill level turn on Water collects at the bottom... - Page 56 User instructions Cutlery becomes oxidized Avoid washing parts that can even if washed together with become oxidized other items that are subject to oxidation (pot handles, damaged knives, etc.) Too much salt in the washing Tighten the cap of the water water softener container properly The dishwasher does not start...
- Page 57 User instructions - if it has triggered (S), close the door with force (without slamming it) until it rearms; then open and close the door again Door does not close properly Make sure that there are no obstacles that prevent it from closing (e.g.
- Page 58 User instructions Dishes not dry No rinse aid Add rinse aid A program has been used that See program table does not involve a final drying cycle Water in dishes or pans When loading the dishwasher, make sure that you place dishes and pans at an angle The dishes were taken out too Wait at least 20 minutes after...
- Page 59 User instructions Dirty filters Clean the filters as indicated in the manual Filters inserted incorrectly or Check and correct not fastened in place Wash program unsuitable for Find the suitable washing the type of soil program in the program table Combined detergent used with Use a powder detergent or a programs that are too short...
-
Page 60: Troubleshooting
User instructions 7. Troubleshooting The dishwasher is capable of signalling a number of faults through the simultaneous illumination of several indicator lights, with the following meanings: FAULT DESCRIPTION Acquastop failure (some models only) Safety level Water heating fault Water temperature detection fault Water intake fault Water drainage fault Turbine flow-meter fault (some models only)