Table of Contents
Advertisement
Quick Links
Advertisement
Table of Contents

Subscribe to Our Youtube Channel
Related Manuals for Tar River BDR-135


Summary of Contents for Tar River BDR-135
- Page 1 Drum Mower BDR-135, BDR-165 & BDR-185 Operator’s Manual Rev. 08/22...
- Page 2 Drum Mower BDR-135,165, 185 Page left blank intentionally...
- Page 3 Drum Mower BDR-135,165, 185 TO THE DEALER: Assembly and proper installation of this product is the responsibility of the Tar River dealer. Read manual in- structions and safety rules. Make sure all items on the Dealer’s Pre-Delivery and Delivery Check Lists in the Owner’s/Operator’s Manual are completed before releasing equipment to the owner.
-
Page 4: Table Of Contents
Drum Mower BDR-135,165, 185 Table of Contents Introduction …………………………………………………………………………………………….. 5 Technical Specifications ……………………………………………………………………………….. 5 Safety …………………………………………………………………………………………………… 6 Safety Signal Words ……………………………………………………………………………………. 6 General Safety Guidelines ……………………………………………………………………………… 7 Safety Decal Care ………………………………………………………………………………………. 7 Before Operation ……………………………………………………………………………………….. 8 During Operation ……………………………………………………………………………………….. 9 Highway And Transport Operations ……………………………………………………………………... -
Page 5: Introduction
Drum Mower BDR-135,165, 185 Introduction Thank you for purchasing your Tar River Drum Mower. This Operator’s Manual is available with every machine for the purpose of introducing the user to the design, maintenance, and adjustment of the mower. It will also warn against any possible threats. The Operator’s Manual includes information regarding the adjustment and transport on the public roads. -
Page 6: Safety
Drum Mower BDR-135,165, 185 Important Safety Information Safety It is important that you read the entire manual and to become familiar with this product before you begin using it. This product is designed for certain applications only. The manufacturer cannot be responsible for issues arising from modification. -
Page 7: General Safety Guidelines
Drum Mower BDR-135,165, 185 Important Safety Information General Safety Guidelines Safety of the operator is one of the main concerns in designing and developing a new piece of equipment. De- signers and manufacturers build in as many safety features as possible. However, every year many accidents occur which could have been avoided by a few seconds of thought and a more careful approach to handling equipment. -
Page 8: Before Operation
Drum Mower BDR-135,165, 185 Important Safety Information How to install Safety Signs: Be sure that the installation area is clean and dry. • Decide on the exact position before you remove the backing paper. • Remove the smallest portion of the split backing paper. -
Page 9: During Operation
Drum Mower BDR-135,165, 185 Important Safety Information During Operation Children should not be allowed on the machine. • Clear the area of small children and bystanders before moving the machine. • If using a towing unit, securely attach feeder by using a hardened 3/4” pin, a metal retainer, and safety •... -
Page 10: Highway And Transport Operations
Drum Mower BDR-135,165, 185 Important Safety Information Highway and Transport Operations Adopt safe driving practices. • Keep the brake pedals latched together at all times. Never use independent braking with machine in tow • as loss of control and/or upset of unit can result. - Page 11 Drum Mower BDR-135,165, 185 Important Safety Information Highway and Transport Operations Maneuver the tractor or towing vehicle at safe speeds. • Avoid overhead wires or other obstacles. Contact with overhead lines could cause serious injury or death. • Avoid loose fill, rocks and holes, they can be dangerous for equipment operation or movement.
- Page 12 General Information Sales Information The technical condition and the equipment of the mower should be checked at the time of purchase. It should be required from the equipment dealer to carefully fill out the Warranty Registration Form. Failure to provide the date of purchase or the dealer’s information might cause the buyer to suffer disapproval of any possible complaints.
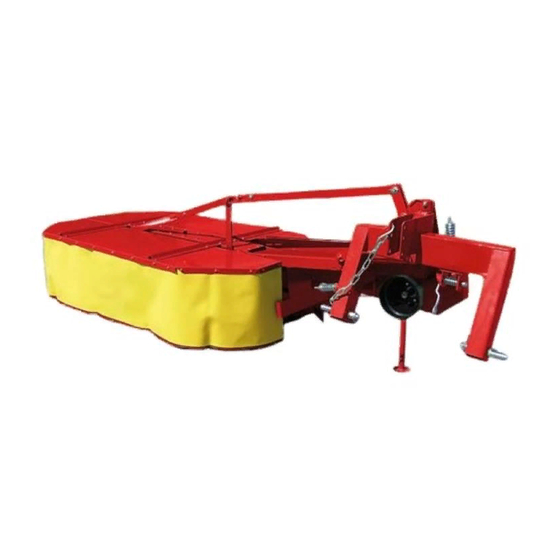
- Page 13 General Information The suspension system frame (1) is used to connect the mower with the tractor. The main frame (4) is connected pivotally with the suspension frame through the central beam (2). The cutting system is made of two operating drums (7) with blades attached rotation- ally in their lower part.
- Page 14 Operational Service You may start operating the machine only after having carefully read the Operator’s Manual. Prior to connecting the rotary mower to the recommended tractors, they should be properly prepared. • Check the physical condition of the machine and perform daily maintenance work in accordance with the operator’s manual of the tractor.
- Page 15 Operational Service Instructions to connect the mower to the tractor: 1. Insert the bottom push rods of the tractor (Drawing #4, point 1) in the suspension frame pins (first the left one, then the right one) and secure them with cotter pins (Drawing # 4, point 3). 2.
- Page 16 Attaching to Tractor Attaching PTO Shaft Attaching PTO Shaft Attaching the PTO shaft: Before installing the PTO shaft make sure that the RPM rating and the direction of rotation match those of the tractor. Carefully read the PTO shaft and tractor instructions. Before operation, make sure that the guards are installed on the power take off of the tractor and PTO shaft.
- Page 17 Attaching to Tractor Attaching PTO Shaft Transport Adjusting the Mower to the transport position and transport: Rev. 08/22...
- Page 18 • mounted on the actuator into the locked position. SPECIAL NOTE: The BDR-135 model does not have the parts shown in #1 and #3 on the preceding page. • It must be disconnected at the fuse #5 from the frame it was attached to, swung back to the transport posi- tion, and then locked using the lock bar supplied on the mower.
- Page 19 Attaching to Tractor Attaching PTO Shaft Transport During the transport: Lift the mower with the hydraulic lifting unit to the upper position to ensure the space between the stump • jumper of the cutting drum and the ground of at least 40cm, tighten the side chains of the tractor’s bottom push rods so the machine does not swing to the sides.
- Page 20 Attaching to Tractor Attaching PTO Shaft Transport Changing the mower’s position from the transport position to the operating position and vise versa. Changing the mower’s position to the operating position. Rev. 08/22...
- Page 21 Attaching to Tractor Attaching PTO Shaft Operation Adjusting the Mower Determining the length of the upper connector. After repositioning the mower to the operating position, the stump jumpers should be positioned parallel to the ground and the suspension frame should be positioned at such a height so the distance “a” is about 11 inches and the pin is in the middle of the longitudinal opening of the push rod (Drawing 2).
- Page 22 Attaching to Tractor Attaching PTO Shaft Operation 1 - Bolt M12x25 2 - Stump jumper 3 - Bolt M12x30 4 - Spring washer Ø12 5 - Spacer 8mm or 12 mm 6 - Resistance disk 7 - Hub 8 - Operating disk 9 - Blade Adjusting the height of cut.
- Page 23 Attaching to Tractor Attaching PTO Shaft Operation Operating the Mower: The fields and meadows to be mowed should be free from any obstructions and debris, which may damage the mower. The shields of the mower must be positioned downwards during operating of the machine. The mower’s drive should be turned on slowly and after reaching 540 RPM of the power take-off, the operation may be started.
- Page 24 Attaching to Tractor Attaching PTO Shaft Operation Attention: Because of the possibility of damage to the mower, NEVER: Exceed the tractor’s PTO 600 RPM. • Lift the mower while the drive is engaged, and the drums are rotating. • Mow while backing up (this will cause machine to fail!) •...
- Page 25 Drum Mower BDR-135,165, 185 Notes: This chart is an approximate estimate of torque values. Always tighten hardware to these values unless a different torque value or tightening procedure is listed for a specific application. Fasteners must always be replaced with the same grade as specified in the manual.
- Page 26 Drum Mower BDR-135,165, 185 Page left blank intentionally...
- Page 27 Drum Mower BDR-135, BDR-165 & BDR-185 Operator’s Manual Rev. 08/22...
- Page 28 Drum Mower BDR-135,165, 185 Standard Version With Rods BDR-135, 165...
- Page 29 Drum Mower BDR-135,165, 185 Standard Version With Rods BDR-135, 165 Item Part # Description Qty. BM102030 Bolt HH M10 x 2.0 x 30 8.8 Galv. DM10110 Manual Rod; BDR-185 DM10235 Manual Rod; BDR-135, BDR-165 BM1217530 Bolt HH M12 x 1.75 x 35 8.8 Galv.
- Page 30 Drum Mower BDR-135,165, 185 Version With Hydraulics BDR-165, 185...
- Page 31 Drum Mower BDR-135,165, 185 Version With Hydraulics BDR-165, 185 Item Part # Description Qty. BM102030 Bolt HH M10 x 2.0 x 30 8.8 Galv. DM150303A Rod Assembly – Hydraulic BM1217530 Bolt HH M12 x 1.75 x 35 8.8 Galv. LW12 Lock Washer - 12M Galv.
- Page 32 Drum Mower BDR-135,165, 185 Frame BDR-135, 165, 185...
- Page 33 DM020506 Lower 3 point hitch pin Cat 2 (optional for BDR-185 only) FW24 Flat Washer M24 DMT0402 Lower 3 Point Hitch Pin- BDR-135, 165 Cat 1 & 2 FW24 Washer flat M24 (optional for BDR-185 only) NM2415 Nut HH M24-1.5...
- Page 34 Drum Mower BDR-135,165, 185 Central Frame BDR-135, 165, 185...
- Page 35 Washer flat M10; BDR-135, BDR-165 BM101540 Bolt HH M10-1.5 x 40 8.8 Galv.; BDR-185 only FW16 Washer flat M16 Galv.; BDR-185 FW16 Washer flat M16 Galv.; BDR-135, BDR-165 LNM1620 Nut self-locking M16-2.0; BDR-185 only DM20760 Stand DM11024 Large Spring R-clip...
- Page 36 Drum Mower BDR-135,165, 185 Central Frame BDR-135, 165, 185...
- Page 37 Drum Mower BDR-135,165, 185 Central Frame BDR-135, 165, 185 Item Part # Description Qty. DM90290 Safety release DMT0234 Mower pin M18 x 65 Galv. FW24 Washer flat M18 Galv. DM30101 Front cover BM101525 Bolt HH M10-1.5 x 25 8.8 (galv.) DM150051 Bolt stud (connector bolt) M10-1.4 x 120...
- Page 38 Drum Mower BDR-135,165, 185 Head Pipe BDR-135, 165, 185...
- Page 39 Drum Mower BDR-135,165, 185 Head Pipe BDR-135, 165, 185 Item Part # Description Qty. DM90513B Drive head complete DM90513 Drive head only B6007ZZ Bearing 6007 ZZ B60092RS Bearing 6009-2RS DM20172C Carrier complete (Includes items 6,7,8,9) DM20172 Carrier DM20205 Carrier bushing...
- Page 40 Drum Mower BDR-135,165, 185 Tensioner BDR-135, 165, 185...
- Page 41 Drum Mower BDR-135,165, 185 Tensioner BDR-135, 165, 185 Item Part # Description Qty. DM20246 Tensioner rod DM20307 Tensioner spring saddle DM20409 Angle bar DM20241 Tensioner spring (galv.) NM1620 Nut self-locking M16-2.0...
- Page 42 Drum Mower BDR-135,165, 185 Safety Device BDR-135, 165, 185...
- Page 43 Drum Mower BDR-135,165, 185 Safety Device BDR-135, 165, 185 Item Part # Description Qty. DM20290 Sliding bar assembly DM20307 Spring saddle DM20310 Lock spacer sleeve DM20348 Spring BM1420260 Bolt HH M14-2.0 x 260 LNM142 Nut HH M14-2.0 DM20322 Lock fuse...
- Page 44 Drum Mower BDR-135,165, 185 Cutting Unit - Main Frame BDR-135, 165...
- Page 45 Drum Mower BDR-135,165, 185 Cutting Unit - Main Frame BDR-135, 165 Item Part # Description Qty. DM10192-135 Main frame BDR-135 DM10192-165 Main frame BDR-165 FW10 Washer flat M10 (BDR-135) FW10 Washer flat M10 (BDR-165) LNM1015 Nut self-locking M10-1.5 (BDR-135) LNM1015 Nut self-locking M10-1.5 (BDR-165)
- Page 46 Drum Mower BDR-135,165, 185 Cutting Unit - Main Frame BDR-135, 165...
- Page 47 Qty. DM10250-35 Small pulley BDR-135 DM10250-85 Small pulley BDR-165 DM10088 Tab washer BM10525 Bolt HH M10-1.5 x 25 8.8 Galv. BDR-135 BM10525 Bolt HH M10-1.5 x 25 8.8 Galv. BDR-165 DM10441 Vent/fill plug DMT0247 Support bushing BDR-135 DM10291 Support bushing BDR-165...
- Page 48 Drum Mower BDR-135,165, 185 Cutting Unit - Main Frame 185...
- Page 49 Drum Mower BDR-135,165, 185 Cutting Unit - Main Frame 185 Item Part # Description Qty. DM10192-185 Main frame BDR-185 FW10 Washer flat M10 LNM1015 Nut self-locking M10-1.5 DM150012 Sealing washer BM1217530 Bolt HH M10-1.75 x 35 8.8 (galv.) LW10 Washer lock M10...
- Page 50 Drum Mower BDR-135,165, 185 Cutting Unit - Drum BDR-135, 165, 185 Blade Changing Tool...
- Page 51 Drum Mower BDR-135,165, 185 Cutting Unit - Drum BDR-135, 165, 185 Item Part # Description Qty. DMSC0085 Drum spindle complete; BRD-185 DMSC3565 Drum spindle complete; BRD-165 DMSC3535 Drum spindle complete; BRD-135 DM10721 Drum guard DM20021-185 Operating disc; BDR-185 DM20021-165 Operating disc; BDR-165 DM20021-135 Operating disc;...
- Page 52 Drum Mower BDR-135,165, 185 Complete Drum Unit - Drum BDR-135, 165, 185...
- Page 53 Drum Mower BDR-135,165, 185 Complete Drum Unit - Drum BDR-135, 165, 185 Item Part # Description Qty. DMSC3535 Drum spindle complete; BDR-135 DMSC3565 Drum spindle complete; BDR-165 DMSC0085 Drum spindle complete; BDR-185 SRE-25 Snap ring eternal M25 DM82005 Spacer washer M25 (0.3, 0.5 or 1mm as required) DM10019-65 Small bevel gear Z16;...
- Page 54 Drum Mower BDR-135,165, 185 Guard Assembly - Drum BDR-135, 165, 185...
- Page 55 Drum Mower BDR-135,165, 185 Guard Assembly - Drum BDR-135, 165, 185...
- Page 56 Drum Mower BDR-135,165, 185 Guard Assembly - Drum BDR-135, 165, 185 Item Part # Description Qty. DM30015-185 Metal guard set (includes items 1-6); BDR-185 DM30015-165 Metal guard set (includes items 1-6); BDR-165 DM30015-135 Metal guard set (includes items 1-6); BDR-135...
- Page 57 Drum Mower BDR-135,165, 185 Warranty LIMITED WARRANTY Belco Resources Equipment warrants to the original purchaser of any new piece of machinery from Belco Re- sources Equipment, purchased from an authorized Belco Resources Equipment dealer, that the equipment be free from defects in material and workmanship for a period of one (1) year for non-commercial, state, and mu- nicipalities’...
- Page 58 Drum Mower BDR-135,165, 185 Page left blank intentionally...
- Page 59 Drum Mower BDR-135,165, 185 Page left blank intentionally...
- Page 60 Drum Mower BDR-135,165, 185 401 Jeffreys Road Tel: 252-822-7140 Rocky Mount, NC 27804 Fax: 252-787-5855 www.tarrivermfg.com Sales@tarrivermfg.com...
Need help?
Do you have a question about the BDR-135 and is the answer not in the manual?
Questions and answers