
Related Manuals for Nordcap NUOVAIR N150T1 Industry


Summary of Contents for Nordcap NUOVAIR N150T1 Industry
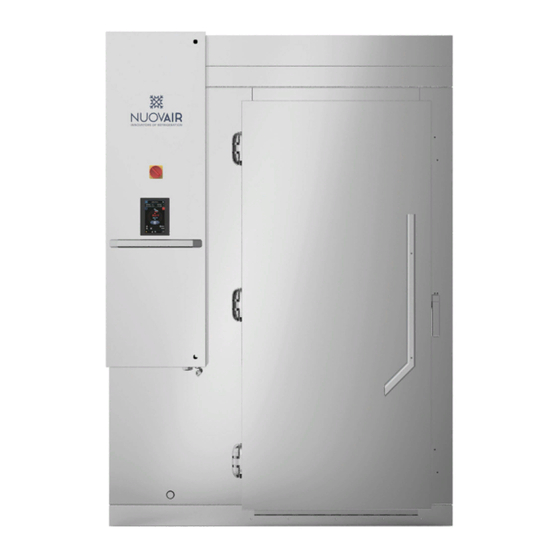
- Page 1 Bedienungsanweisung Schnellkühler / Schockfroster N150T1 Industry [Art. 4493001500] 2019-03...
- Page 2 Revision 00 Ausgabe 01...
- Page 3 INDUSTRY Sehr geehrter Kunde, Vielen Dank, dass Sie sich für die INDUSTRY Schnell- kühler und Schockfrostgerät entschieden haben. Diese Anleitung ist wesentlicher Bestandteil der Maschine / unvollständigen Maschine und muss daher für die gesamte Lebensdauer der Maschine / unvollständigen Maschine aufbewahrt werden. Für den korrekten und sicheren Gebrauch der Maschine ist es notwendig, die in dieser Anlei- tung enthaltenen Warnhinweise zu beachten.
-
Page 4: Table Of Contents
Inhaltsangabe INDUSTRY Abschnitt 1 Wichtige Sicherheitshinweise Abschnitt 2 Einleitung Allgemeinheiten ........... . 8 Beschreibung der Maschine / unvollständigen Maschine und Verwendungszweck . - Page 5 Inhaltsangabe INDUSTRY Abschnitt 4 Installation 4.6.3 Elektroanschluss..........43 4.6.3.1 Elektroanschluss Kommunikationskabel Maschine mit Bedientafel .
- Page 6 Abschnitt 1 Sicherheitshinweise INDUSTRY ACHTUNG! Vor der Verwendung des Geräts wird em- pfohlen, die folgenden Sicherheitshinweise aufmerksam zu lesen und sich daran zu halten, um die Restrisiken zu reduzieren: Diese Anleitung ist wesentlicher Bestandteil Die Installation, Handhabung, Bedienung, der Maschine / unvollständigen Maschine Wartung und Entsorgung der Maschine und muss daher für deren gesamte Lebensdauer muss von fachlich qualifiziertem und autorisier-...
- Page 7 Abschnitt 1 Sicherheitshinweise INDUSTRY Die Kernsonde darf nur für den Zweck Wenn das Stromversorgungskabel der verwendet werden, für den sie bestimmt Maschine beschädigt ist, lassen Sie es ist, d.h. zur Messung der Temperatur in der Mitte von qualifiziertem Personal durch ein ganz von Lebensmitteln, die gefroren oder gekühlt ähnliches ersetzen, um die daraus resultieren- werden sollen.
-
Page 8: Einleitung
Abschnitt 2 Einleitung INDUSTRY Allgemeinheiten Die Schockkühler wurden unter Berücksichtigung der Der Schockkühler ist eine manuell betriebene Maschine. Richtlinien und der beigefügten harmonisierten Normen Nach der Inbetriebnahme der Maschine wird der Kühl- der Europäischen Gemeinschaft sowie der entsprechen- oder Gefrierzyklus automatisch gesteuert und erfordert den Produktnormen entwickelt. -
Page 9: Eigenschaften Der Informationen
Abschnitt 2 Einleitung INDUSTRY Eigenschaften der Informationen Die in diesem Handbuch enthaltenen Informationen Die Themen sind in Abschnitte unterteilt, die wiederum sind Eigentum von La Nuovagel S.r.l. und daher sind alle in Paragraphen und Unterparagraphen unterteilt sind, Rechte vorbehalten. Dieses Handbuch darf ohne schrift- die nach und nach nummeriert sind, um ein schnelles liche Genehmigung des Herstellers weder ganz noch Au inden von Informationen zu ermöglichen. -
Page 10: Allgemeinheiten
Abschnitt 3 Allgemeine Informationen und Sicherheitsnormen INDUSTRY Allgemeinheiten ACHTUNG! Die in diesem Kapitel enthaltenen Informationen beziehen sich nur und ausschließlich auf die SCHOCKKÜHLER und sind gegebenenfalls durch Informationen über die Sicherheitsstandards der Anlage/Struktur zu ergänzen, in der der SCHOCK- KÜHLER verwendet wird. Die gesamte Dokumentation zur Maschine / unvollstän- digen Maschine wurde unter Berücksichtigung der in der Maschinenrichtlinie 2006/42/EG, in der PED-Richtli-... - Page 11 Abschnitt 3 Allgemeine Informationen und Sicherheitsnormen INDUSTRY Tabelle 1 NORMEN BESCHREIBUNG NATIONALE GESETZGEBUNG Hygienevorschriften für Verpackungen, Behälter, Werkzeuge, die dazu bestimmt sind, mit Min.D. vom 21-03-1973 Lebensmitteln oder Sto en für den persönlichen Gebrauch in Berührung zu kommen. EUROPÄISCHE GESETZGEBUNG D.
-
Page 12: Terminologische Konventionen, Definitionen Und Symbologien
Abschnitt 3 Allgemeine Informationen und Sicherheitsnormen INDUSTRY Terminologische Konventionen, Im Handbuch verwendete Symbole Definitionen und Symbologien. 3.3.1 Terminologische Konventionen Dieses Symbol kennzeichnet eine Situation, in der die Nichteinhaltung der Der Begri unvollständige Maschine bezeichnet sowohl angegebenen Normen zu Gefahren für die Reinigungszelle als auch die Kondensierungseinheit. -
Page 13: Allgemeine Sicherheitsnormen
Abschnitt 3 Allgemeine Informationen und Sicherheitsnormen INDUSTRY Allgemeine Sicherheitsnormen ACHTUNG! Die Einhaltung der Maschinenrichtlinie und der Der SCHOCKKÜHLER darf nur von Bedienern einschlägigen Absätze der betre enden harmonisierten Normen hat es ermöglicht, die mit dieser Maschine / benutzt werden, die an der Schulung vor Ort durch unvollständige Maschine verbundenen Risiken während das Personal von "LaNuovagel S.r.l."... -
Page 14: Kleidung
Abschnitt 3 Allgemeine Informationen und Sicherheitsnormen INDUSTRY 3.5.1 Kleidung Wenn es notwendig ist, Arbeiten in der Nähe von elektrischen Komponenten durchzuführen, arbei- Die Kleidung derjenigen, die die Maschine bzw. unvoll- ten Sie immer mit gut getrockneten Händen und ständige Maschine bedienen oder warten, muss immer tragen Sie dielektrische Handschuhe. -
Page 15: Sicherheitsvorrichtungen
Abschnitt 3 Allgemeine Informationen und Sicherheitsnormen INDUSTRY 1) SALPETERSÄURE. ACHTUNG! 2) NATRIUMHYPOCHLORIT >5% (BLEICHMITTEL). 3) NATRIUMHYDROXID >10%. Das Entfernen oder Nichtersetzen der Etiketten im 4) CHROMSÄURE. Falle einer Verschlechterung führt dazu, dass der 5) AMEISENSÄURE. Benutzer die volle Verantwortung für alle Folgen 6) FLUORWASSERSTOFFSÄURE. -
Page 16: Besondere Hinweise Für Die Hebe- Und Transportphase
Abschnitt 3 Allgemeine Informationen und Sicherheitsnormen INDUSTRY • 3.7.2 AUSPACKEN, INSTALLATION, Zusammenstöße von Teilen oder Komponenten des ANSCHLUSS UND ABNAHME. Schockkühlers mit Personen oder Gegenstände durch unerwartete Bewegungen oder falsches Verhalten des Personals oder durch das Vorstehen von beweglichen Teilen des Schockkühlers, die während der Verpackun- 3.7.2.1 Restrisiken beim Auspacken, gsphase nicht ordnungsgemäß... -
Page 17: Verwendung
Abschnitt 3 Allgemeine Informationen und Sicherheitsnormen INDUSTRY 3.7.2.2 Besondere Hinweise für di schlag, Feuer und Stößen führen kann. Auspackungs-, Installations- und • Nur Elektrik-Wartungstechniker dürfen auf die elektri- Anschlussphase schen Teile zugreifen. • Beim Auspacken, der Installation und dem Anschluss Die Leitungen der Anschlüsse an die Energiequellen sind die folgenden Arbeiten besonders zu beachten. -
Page 18: Besondere Hinweise Für Die Nutzung
Abschnitt 3 Allgemeine Informationen und Sicherheitsnormen INDUSTRY 3.7.4 WARTUNG UND VERSCHROTTUNG 3.7.3.2 Besondere Hinweise für die Nutzung • Trennen Sie die Maschine von der Stromversorgung, 3.7.4.1 Restrisiken bei der Wartung bevor Sie eine Reinigung durchführen. und Abbau • Unter keinen Umständen dürfen die Lüfterschutzgitter Bei der Wartung und Abbau liegen die damit verbundenen entfernt werden, da es sich um rotierende Teile handelt, Restrisiken vor:... -
Page 19: Besondere Hinweise Für Die Wartungs- Und Abbauphase
Abschnitt 3 Allgemeine Informationen und Sicherheitsnormen INDUSTRY 3.7.4.2 Besondere Hinweise für die Wartungs- und Abbauphase Bei der Wartung und Abbau sind die folgenden Arbeiten positioniert wurden, auch überprüfen, dass kein Kälte- besonders zu beachten. mittel austritt. Überprüfen Sie auch die korrekte Positi- onierung der Kugelhähne und Absperrventile. -
Page 20: Gefahrenhinweisschilder
Abschnitt 3 Allgemeine Informationen und Sicherheitsnormen INDUSTRY Gefahrenhinweisschilder Dieses Symbol kennzeichnet eine Rutschgefahr durch einen vereisten Um die Bereiche des SCHOCKKÜHLERS, in denen oder rutschigen Zellenboden. besondere Aufmerksamkeit zu schenken ist, und die Bereiche mit Restrisiko für die Sicherheit des Bedieners und der exponierten Personen hervorzuheben, wurden Gefahrenschilder angebracht. -
Page 21: Garantie
Abschnitt 3 Allgemeine Informationen und Sicherheitsnormen INDUSTRY 3.8.1 Garantie La Nuovagel S.r.l. garantiert den von Material- und Verar- Jegliche Reklamationen sind vom Benutzer innerhalb beitungsfehlern freien Schockkühler für einen Zeitraum von acht Tagen nach Erhalt des Geräts oder eines seiner von 12 Monaten. -
Page 22: Installation
Abschnitt 4 Installation INDUSTRY Kennzeichnung des Schockkühlers Zur Kennzeichnung der Maschine / unvollständigen Maschine wird ein spezielles Identifikationsetikett mit CE-Kennzeichnung angebracht. Bei plattenförmigen Schockkühlern wird das Etikett an der Seite der elektri- schen Schalttafel angebracht, und bei Monoco- que-Schockkühlern an der Rückseite der Schockkühlers. Das Typenschild enthält die folgenden Daten: Modell. -
Page 23: Abmessungen Und Außenmaße Der Zellen
Abschnitt 4 Installation INDUSTRY Abmessungen und Außenmaße der ZELLEN NA 2.90T1 MIN. SERVICE-BEREICH MIN. SERVICE-BEREICH 1500 ABSCHNITT MIN. SERVICE AREA... - Page 24 Abschnitt 4 Installation INDUSTRY NA2.140T1 MIN. SERVICE-BEREICH 1680 ~1066 ABSCHNITT MIN. SERVICE-BEREICH 2250...
- Page 25 Abschnitt 4 Installation INDUSTRY NA2.200T1 MIN. SERVICE-BEREICH 1680 ~1066 ABSCHNITT MIN. SERVICE-BEREICH 2250...
- Page 26 Abschnitt 4 Installation INDUSTRY NA2.260T1 MIN. SERVICE-BEREICH 1680 ~1066 ABSCHNITT MIN. SERVICE-BEREICH 2250...
- Page 27 Abschnitt 4 Installation INDUSTRY NA2.260T1 XL MIN. SERVICE-BEREICH 1960 ~1066 1100 ABSCHNITT MIN. SERVICE-BEREICH 2495...
- Page 28 Abschnitt 4 Installation INDUSTRY NA2.260T2 2P MIN. SERVICE-BEREICH 1680 MIN. SERVICE-BEREICH ~152 ~ 227 ABSCHNITT MIN. SERVICE-BEREICH 2250...
- Page 29 Abschnitt 4 Installation INDUSTRY NA2.520T2 2P MIN. SERVICE-BEREICH 1680 MIN. SERVICE-BEREICH ~152 ~ 227 ABSCHNITT MIN. SERVICE AREA 2250...
- Page 30 Abschnitt 4 Installation INDUSTRY NA2.520T2 2P XL MIN. SERVICE-BEREICH 1960 MIN. SERVICE-BEREICH ~145 ~ 234 1100 MIN. SERVICE-BEREICH ABSCHNITT...
- Page 31 Abschnitt 4 Installation INDUSTRY NA2.450T3 2P MIN. SERVICE-BEREICH 1680 MIN. SERVICE-BEREICH ~145 ~ 237 ABSCHNITT MIN. SERVICE-BEREICH...
- Page 32 Abschnitt 4 Installation INDUSTRY NA2.780T3 2P MIN. SERVICE-BEREICH 1680 MIN. SERVICE-BEREICH ~145 ~ 237 ABSCHNITT MIN. SERVICE-BEREICH...
- Page 33 Abschnitt 4 Installation INDUSTRY NA2.780T3 2P XL MIN. SERVICE-BEREICH 1960 MIN. SERVICE-BEREICH 1100 ABSCHNITT MIN. SERVICE-BEREICH SCALA 1 : 20...
-
Page 34: Technische Charakteristiken Der Zellen
Abschnitt 4 Installation INDUSTRY 4.3 Technische Charakteristiken der ZELLEN. Technische Daten ZELLEN NA2.90T1 NA2.140T1 NA2.200T1 NA2.260T1 NA2.260T1 NA2.260T2 NA2.520T2 NA2.520T2 NA2.450T3 NA2.780T3 NA2.780T3 2P XL 2P XL Abmessungen B. (mm) 1680 1680 1680 1960 1680 1680 1960 1680 1680 1960 T. -
Page 35: Technische Charakteristiken Der Kondensierungseinheit
Abschnitt 4 Installation INDUSTRY 4.4 Technische Charakteristiken der KONDENSIERUNGSEINHEIT Technische Daten KONDENSIERUNGSEINHEIT UC NA2.90T1 UC NA2.140T1 UC NA2.200T1 UC NA2.260T1 UC NA2.260T1 UC NA2.260T2 UC NA2.520T2 UC NA2.520T2 UC NA2.450T3 UC NA2.780T3 UC NA2.780T3 2P XL 2P XL Abmessungen B. (mm) 1120 1750 1750... -
Page 36: Abmessungen Und Außenmaße Der Kondensierungseinheit
Abschnitt 4 Installation INDUSTRY Abmessungen und Außenmaße der KONDENSIERUNGSEINHEIT. UC NA2.90T1 1120 UC NA2.140T1 - UC NA2.200T1 - UC NA2.260T1 - UC NA2.260T1 XL 1532 1610 1688 Power Supply 1750 Suction line Liquid line... - Page 37 Abschnitt 4 Installation INDUSTRY UC NA2.260T2 2P 2050 2110 2170 2230 Suction line Liquid line Power Supply UC NA2.520T2 2P - UC NA2.520T2 2P XL 1425 1325 1315 3100 Suction line Liquid line Power Supply...
- Page 38 Abschnitt 4 Installation INDUSTRY UC NA2.450T3 2P 1315 Suction line Liquid line Power Supply UC NA2.780T3 2P - UC NA2.780T3 2P XL 1425 1325 1315 2830 Suction line Liquid line Power Supply...
-
Page 39: Transport, Entladen Und Auspacken
Abschnitt 4 Installation INDUSTRY VORKONTROLLEN ACHTUNG! Befolgen Sie unbedingt die unten aufgeführten Arbeits- Beim Heben und Transportieren muss man vorsichtig schritte, um eine korrekte Anordnung der Schockkühler vorgehen. Benennen Sie nur Personen, die in den im vorgesehenen Arbeitsbereich zu gewährleisten. Die Verfahren zur Handhabung von Maschinen geschult Schockkühler sind mit einer geeigneten Verpackung sind und in der Lage sind, die für diese Arbeiten am... -
Page 40: Positionierung
Abschnitt 4 Installation INDUSTRY 4.6.2 POSITIONIERUNG Bevor Sie die Schockkühler aus der Verpackung nehmen, überprüfen Sie, dass sie intakt sind; beanstanden und Die Maschine / unvollständige Maschine muss unter halten Sie die festgestellten Schäden vor der Unterzeich- voller Beachtung der im Einsatzland der Maschine / nung auf dem Lieferschein des Versenders fest. - Page 41 Abschnitt 4 Installation INDUSTRY Wenn die Schockkühler in einer geschlossenen Positi- on installiert werden, muss, um einen ordnungsgemä- ßen Betrieb zu gewährleisten, eine ordnungsgemäße Umluftführung gewährleistet sein. Die Umluftwerte sind in den technischen Tabellen der Schockkühler angege- ben. Was die Umgebungsbedingungen der Installation betri t, siehe den entsprechenden Abschnitt.
- Page 42 Abschnitt 4 Installation INDUSTRY 4.6.2.2 POSITIONIERUNG ACHTUNG! DER REMOTE-KONDENSIERUNGSEINHEIT Verwenden Sie entsprechende Hebebühnen, um die Bei der Positionierung der Remote-Kondensierungsein- schwerere Maschinen zu nivellieren. heit, d.h. sie ist nicht in die Maschine integriert, sind die folgenden Anweisungen zu beachten: • Die Installation muss von qualifiziertem Personal durchgeführt werden, das über die erforderlichen ACHTUNG!
-
Page 43: Elektroanschluss
Abschnitt 4 Installation INDUSTRY 4.6.3 ELEKTROANSCHLUSS dass er gut sichtbar und erreichbar ist. Wenn die Maschine einphasig ist, installieren Sie einen zweipo- Aus Sicherheitsgründen müssen alle elektrischen ligen Trennschalter mit einer Kontaktö nung von Anschlussarbeiten von qualifiziertem und autorisiertem mindestens 3 mm vor der Steckdose. Dieser Schalter Personal gemäß... -
Page 44: Elektroanschluss Kommunikationskabel Maschine Mit Bedientafel
Abschnitt 4 Installation INDUSTRY 4.6.3.2 FERNKUNDENDIENSTSYSTEM 4.6.3.1 ELEKTROANSCHLUSS KOMMUNIKATIONSKABEL MASCHINE Fernkundendienstsystem wird einem MIT BEDIENTAFEL Mini-PC-Router durchgeführt, der sich im Schalt- schrank der Behandlungszelle befindet und über 2 Für den Anschluss der Kommunikationskabel ist der Netzwerkkabel mit der Steuerung und dem Monitor der maschinenspezifische Schaltplan zu beachten. -
Page 45: Kühlschrankanschluss
Abschnitt 4 Installation INDUSTRY 4.6.4 KÜHLSCHRANKANSCHLUSS 4.6.4.2 ÖLRÜCKLAUF Alle Kältemittelleitungen müssen so ausgelegt sein, dass eine Um die Kältemittelverbindung zwischen der Schockkühler- korrekte Ölrückführung zum Verdichter gewährleistet ist. zelle und der Remote-Kondensierungseinheit herzustellen, Wenn sich die Motor-Kondensierungseinheit über dem muss man die Leitungen der Flüssigkeits- und Saugleitun- Verdampfer befindet, müssen im vertikalen Abschnitt der gen entsprechend den Durchmessern der an der Maschine Leitung alle 2 Meter Siphons und am Ende des ansteigen-... -
Page 46: Vakuum
Abschnitt 4 Installation INDUSTRY 4.6.4.3 VAKUUM Bei sehr langen Leitungen muss man den Ölstand beim ersten Start und in den folgenden Tagen unter Kontrolle halten und ggf. nachfüllen. ACHTUNG! Starten Sie den Verdichter zu diesem Zeitpunkt nicht, da dies zu irreparablen Schäden am Verdichter führen kann. -
Page 47: Demontage Und Abbau
Abschnitt 4 Installation INDUSTRY 4.6.4.6 DEMONTAGE UND ABBAU 4.6.4.7 ABBAU UND ENTSORGUNG Muss man die Maschine demontieren, führen Sie die Wenn eine Maschine ihren Lebenszyklus abgeschlossen folgenden Schritte aus: hat, ist es notwendig, vor der endgültigen Entsorgung eine Reihe von Maßnahmen durchzuführen, um eine minimale •... -
Page 48: Sicherheitsdatenblätter Für Die Kältemittel R404A Und R452A
Abschnitt 4 Installation INDUSTRY 4.7 Sicherheitsdatenblätter für die Kältemittel R404a und R452a Die Maschinen verwenden fluorierte Treibhausgase, die g) Unregelmäßiger Herzschlag unter das Kyoto-Protokoll fallen: R404a (GWP 3921) und h) Besorgnis R452a (GWP 2141). Die in diesem Abschnitt angegebe- i) Gefühl der Ohnmacht nen Angaben ergeben sich aus den Sicherheitsdaten- 4.7.4 MASSNAHMEN ZUR BRANDBEKÄMPFUNG blättern der Kältemittelhersteller. -
Page 49: Beschreibung Des Displays
Abschnitt 5 Gebrauchsanweisung INDUSTRY 5.0 Beschreibung des Displays Die Steuerungen zur Durchführung der Einstellung, der Regulierung oder der Anzeige der Display-Funktionen befinden sich im oberen und unteren Bereich und in der Mitte des Displays (Abb.3) Beschreibung der Standard-Symbole: - Zurück zur vorhergehenden Seite - Zugri auf alle Funktionen und Einstellungen des Schnellkühlers - Blinkt diese werden laufende Alarme angezeigt... -
Page 50: Erstes Einschalten
Abschnitt 5 Gebrauchsanweisung INDUSTRY 5.1 Erstes Einschalten Nach dem Einschalten des Hauptschalters des Schnellkühlers, schaltet sich das Display ein. Einige Minuten auf das Laden der Software warten, bis die Bildschirmseite aus Abb. 5. erscheint. Dann alle erforderlichen Daten einstellen. Abbildung 5 5.1.1 Eingabe des Namens des Unternehmens Wählt man “Company Name”... -
Page 51: Spracheinstellung
Abschnitt 5 Gebrauchsanweisung INDUSTRY 5.1.3 Spracheinstellung Wählt man "Sprache" erscheint die Bildschirmseite aus Abbildung 8. Die gewünschte Sprache wählen Abbildung 8 5.1.4 Einstellung von Datum und Uhrzeit Wählt man "Datum" oder "Time" erscheint die Bildschirmseite aus Abbildung 9. Die Zeit (Stunden und Minuten) mit den Tasten ein- stellen. -
Page 52: Beschreibung Der Zyklen
Abschnitt 5 Gebrauchsanweisung INDUSTRY 5.2 Beschreibung der Zyklen SCHNELLKÜHLZYKLEN +3°C Nudeln/Reis Brot Gemüse Fleisch/Fisch Suppen/Saucen Kuchen +3 Cremes +3 Cremes +25 Windbeutel +3 Quiche +3 CROISSANT +3 Croissant+16 PIZZA +3 SUSHI +3 TARTARE +3 Trocknen Kopfsalat +10 Lasagne +3 Fisch +3 Fleisch +3 SCHOCKKÜHLUNGSZYKLEN -18°C Nudeln/Reis... -
Page 53: Beschreibung Der Schnellkühlzyklen
Abschnitt 5 Gebrauchsanweisung INDUSTRY 5.2.1 Beschreibung der SCHNELLKÜHL-Zyklen 1 - SOFT CHILLING Geeignet für empfindliche oder dünne Produkte, wie Gemüse, Gebäck, Brot, Reis, Nudeln. Kühlt das Produkt sanft, mit Temperaturen in der Kammer um 0°C. Der Zyklus ist beendet wenn das Produkt +3°C im Kern erreicht hat oder nach Ablauf der eingestellten Zeit. - Page 54 Abschnitt 5 Gebrauchsanweisung INDUSTRY 12 - LASAGNE Geeignet für Fleisch- und Fischblätterteig, gekochte Lasagne, das Produkt wird in verschiedenen Temperaturschritten, um den Iglu-E ekt zu vermeiden und um die Feuchtigkeit des Produkts zu bewahren, auf +3°C abgekühlt. Der Zyklus ist beendet wenn der Produktkern +3°C erreicht hat oder nach Ablauf der eingestellten Zeit.
- Page 55 Abschnitt 5 Gebrauchsanweisung INDUSTRY 5.2.2 Beschreibung der SCHOCKKÜHL-Zyklen 1 - SOFT FREEZING Geeignet für rohe und warme empfindliche Produkte aller Art. Zur Tiefkühlung des Produkts, mit positiven Temperaturen in der ersten Phase und negativen Temperaturen in der zweiten Phase. Vermeidet den Iglu-E ekt. Der Zyklus ist beendet wenn der Produktkern -18°C erreicht hat oder nach Ablauf der eingestellten Zeit.
- Page 56 Abschnitt 5 Gebrauchsanweisung INDUSTRY 12 - VEGETABLE Für alle gekochten oder rohen Gemüsearten geeignet. Sanftes Tiefkühlen des Produktes, vermeidet die Oxidation des Produktes und bewahrt dessen Frische. Der Zyklus ist beendet wenn der Produktkern -18°C erreicht hat oder nach Ablauf der eingestellten Zeit. 13 - CAKES Geeignet für Torten/Kuchen aller Art oder für Mürbeteigkuchen.
-
Page 57: Funktionstypologien
Abschnitt 5 Gebrauchsanweisung INDUSTRY 5.3 Funktionstypologien Es sich 2 Betriebsmoden-Ausführungen möglich: Zyklen der Schnellkühlung 1) Ausführung FULL MODE (72 Zyklen) 2) Ausführung EASY MODE Zyklen der Schockkühlung 1) Ausführung FULL MODE 72 Zyklen (Abb. 11) Zyklen Mit dieser grafischen Anzeige kann man insgesamt 72 zur individuellen Zyklen wählen, unterteilt in die folgenden Kategorien: Gestaltung... - Page 58 Abschnitt 5 Gebrauchsanweisung INDUSTRY Schnellkühlung / Schockkühlung im Modus FULL MODE (72 Zyklen) Um einen Schockkühl- oder Gefrierzyklus zu starten, wählt man einen voreingestellten Zyklus, der auf dem Startbildschirm markiert ist, oder drückt auf die seitli- che Leiste +3 oder -18, um alle voreingestellten Schockkühl- oder Gefrierzyklen anzuzeigen (Abb.
- Page 59 Abschnitt 5 Gebrauchsanweisung INDUSTRY 5.4.1 Änderungen und Regulierungen der Zyklen voreingestellte Schnellkühlung Einen Schnell-/Schockkühlzyklus austauschen hervorgehoben auf der Home-Bildschirmseite Um einen voreingestellten Vermeidungs-/Gefrierzyklus im Hauptbildschirm zu ersetzen, halten Sie den Zyklus, den Sie vom Hauptbildschirm aus ersetzen möchten, 2 Sekunden lang gedrückt (Abb. 17), der Bildschirmseite aus Abbildung 18 erscheint, den Zyklus wählen, den man versetzen möchte, hervorgehoben auf der Home-Bildschirmseite und die Ikone...
- Page 60 Abschnitt 5 Gebrauchsanweisung INDUSTRY Duplizieren eines Schnell-/Schockkühlzyklus Zur Duplizierung eines Schock-/Schnellkühlzyklus greift man auf die Zyklen-Bildschirmseite zu, wählt man den zu duplizierenden Zyklus und drückt Es erscheint die Bildschirmseite aus Abbildung 20, die Position wählen, in die man den zu duplizierenden Zyklus einfügen möchte und dann den Namen des duplizierten Zyklus eingeben.
- Page 61 Abschnitt 5 Gebrauchsanweisung INDUSTRY 5.5 Funktion Schnellkühlung EASY MODE Modus Abbildung 23 Zur Verwendung des Easy Mode Modus des Schnell- kühlers muss man diese Funktion im Menü "BEDIE- NERPARAMETER" aktivieren. Drückt man das Symbol auf der Home-Bildschirm- seite, greigt man auf die Bildschirmseite der Einstellun- gen zu (Abbildung 23).
-
Page 62: Abtauen
Abschnitt 5 Gebrauchsanweisung INDUSTRY 5.6 Abtauen Zur Aktivierung der Abtauung drückt man die Ikone (Abbildung 28) Das Abtauen kann adaptiv oder nach Zeit. erfolgen. Abbildung 28 Im Falle der Zeitabtauung wird die Dauer vom Benutzer entsprechend dem gewählten Intensitätsgrad in der folgenden Tabelle bestimmt. -
Page 63: Ionisierung
Abschnitt 5 Gebrauchsanweisung INDUSTRY 5.7 Ionisierung Zur Aktivierung der Ionisierung drückt man auf der Home-Bildschirmseite das Symbol greift auf die "Settings"-Bildschirmseite zu, drückt "Operator Settings", um auf die Bildschirmseite "Custo- mer Parameter" zuzugreifen und drückt dann auf "Ioni- zer Settings" (Abbildung 32). Es erscheint die Bildschirmseite aus Abbildung 33, auf der man die Ionisierung aktivieren kann und wählt 15 Abbildung 32... -
Page 64: Haccp (Hazard Analysis And Critical Control Point)
Abschnitt 5 Gebrauchsanweisung INDUSTRY 5.8 HACCP (Hazard Analysis and Critical Control Point) Zur Aktivierung dieser Funktion, drückt man auf der Home-Bildschirmseite das Symbol greift auf die "Settings"-Bildschirmseite zu, drückt "Operator Settings", um auf die Bildschirmseite "Custo- mer Parameter" zuzugreifen und drückt dann auf "HACCP Settings"... -
Page 65: Export Alarms Log
Abschnitt 5 Gebrauchsanweisung INDUSTRY 5.9 Export Alarms Log Zur Aktivierung dieser Funktion, drückt man auf der Home-Bildschirmseite das Symbol greift auf die "Settings"-Bildschirmseite zu, drückt "Operator Settings", um auf die Bildschirmseite "Custo- Abbildung 36 mer Parameter" zuzugreifen und drückt dann auf "Export Alarms Log"... -
Page 66: Import Export Parameter
Abschnitt 5 Gebrauchsanweisung INDUSTRY 6.1 Import Export Parameters Zum Export / Import der Parameter des Schnellkühlers drückt man auf der Home-Bildschirmseite das Symbol greift auf die "Settings"-Bildschirmseite zu, drückt "Operator Settings", um auf die Bildschirmseite "Custo- mer Parameter" zuzugreifen und drückt dann auf Abbildung 40 "Import Export Parameters"... - Page 67 Abschnitt 5 Gebrauchsanweisung INDUSTRY 6.2 Detailansichtsmenü um Aufrufen des Detailansichtsmenüs drücken Sie auf das Symbol Abbildung 42 auf der Startseite, der Bildschirm „Settings“ wird aufge- rufen, drücken Sie auf „Detailed View” (Abbildung 42), um den Bildschirm zu ö nen. Der in Abbildung 43 dargestellte Bildschirm erscheint; durch Drücken auf die entsprechenden Symbole werden die Fenster aufgerufen, die das Verhalten einiger Maschinekomponente beschreiben.
-
Page 68: Temperaturverlauf
Abschnitt 5 Gebrauchsanweisung INDUSTRY 6.2.3 Betrieb des Verflüssigungssatzes Auf dem Bildschirm des Verflüssigungssatzes (Abbil- dung 46) können der Steuerstatus, der die Kühlleis- tungsanforderung aktiviert, und das Vorhandensein der elektrischen Versorgung des Verflüssigungssatzes angezeigt werden. Ebenso können die folgenden Parameter geschätzt werden: •... -
Page 69: Schäden Und Mögliche Lösungen
Abschnitt 5 Gebrauchsanweisung INDUSTRY Schäden und mögliche Lösungen Bei Anzeige jedes anderen Alarmtyps: einige Minuten warten, sollte das Problem weiterhin Der Schnellkühler ist mit einem Sichtsystem versehen, bestehen, den Kundendienst verständigen und den ange- das das Vorhandensein eines Alarms meldet. Die Alarme zeigten Alarmcode nennen. - Page 70 Abschnitt 5 Gebrauchsanweisung INDUSTRY Mögliche Ursachen Mögliche Lösung Auswirkungen N° Beschreibung 17-20 Alarm Motor - Motor abgetrennt, - Das Versorgungs- und Kommuni- - Der Zyklus kann nicht in Elektronisches beschädigt oder nicht kationskabel zwischen Controller Betrieb genommen und der thermostatisches Ventil. korrekt versorgt (EVD) und Motor des elektronischen Schnellkühler nicht...
- Page 71 Abschnitt 5 Gebrauchsanweisung INDUSTRY Mögliche Ursachen Mögliche Lösung Auswirkungen N° Beschreibung 47-48 larm Inkompatibilität - Kein Update vom - Update der Software - Blockierung Controller des Betriebssystems Betriebssystem des Controllers des elektronischen des elektronischen EEV. vom elektronischen Thermostatventils Thermostatventils Thermostatventil - Den Händler verständigen.
- Page 72 Abschnitt 5 Gebrauchsanweisung INDUSTRY Mögliche Ursachen Mögliche Lösung Auswirkungen N° Beschreibung Alarm Ventilatoren - Ventilatoren der Zelle - Kontrolle Schütz Ventilatoren - Der Zyklus startet, aber der Zelle. beschädigt oder - Austausch des beschädigten Schnellkühler funktioniert statisch. Funktionsstörung. oder kaputten Ventilators. An der Maschine fällt - Den Händler verständigen.
- Page 73 Abschnitt 5 Gebrauchsanweisung INDUSTRY Mögliche Ursachen Mögliche Lösung Auswirkungen N° Beschreibung Alarm - Sonde nicht wirksam - Kontrolle des Anschlusses und - Die Vorrichtung verwendet Produkttemperatur - Fehler interne Sonde, der Konfiguration der Sonde. nicht die Nadelsonde 3. (Nadelsonde 3) beschädigt oder kaputt.
- Page 74 Abschnitt 5 Gebrauchsanweisung INDUSTRY Mögliche Ursachen Mögliche Lösung Auswirkungen N° Beschreibung Alarm Blackout - Fehlende - Rückstellung der - Meldung des Alarms, wenn der während des Zyklus. Stromversorgung während Stromversorgung Blackout die eingestellte Zeit- eines laufenden Zyklus schwelle überschreitet und ein laufender Zyklus vorhanden ist - Meldung ALLGEMEINER ALARM LAUFENDER ZYKLUS...
-
Page 75: Nutzungsempfehlungen
Abschnitt 5 Gebrauchsanweisung INDUSTRY 6.4 Nutzungsempfehlungen Um die korrekte Verwendung des Geräts zu garantieren, wird die Umsetzung der folgenden Tipps empfohlen: • Stellen Sie den Blechträgerwagen in die Scchock- kühlerzelle vor den Ventilatoren, an den Wagenan- schlägen der Ventilatorentür. • Vermeiden Sie das Ansammeln von an den Zellenwän- den haftenden Produkten, da sie die Luftzirkulation be- hindern würden, die die Gleichmäßigkeit der Tempera-... -
Page 76: Wartung
Abschnitt 6 Wartung INDUSTRY 6.5 Ordentliche und außerordentliche Wartung der Maschine 6.5.1 Allgemeinheiten zur Wartung ACHTUNG! Um die maximale Zuverlässigkeit und Funktionalität der Vor Reinigungs- und Wartungsarbeiten muss der Maschine zu gewährleisten und gefährliche Bedingun- Schockkühler vom Stromnetz getrennt werden. gen zu vermeiden, befolgen Sie unbedingt die folgenden Anweisungen. -
Page 77: Wartung Und Reinigung Der Schockkühlzelle
Abschnitt 6 Wartung INDUSTRY 6.5.2 Wartung und Reinigung der Schockkühlzelle Die ordentliche Wartung sieht eine tägliche Reinigung ACHTUNG! vor: Edelstahl darf nicht über längere Zeit mit sauren • aller Teile, die mit Lebensmitteln in Berührung kommen, Lebensmitteln oder extrem hohen Salzkonzentrati- •... -
Page 78: Wartung Und Reinigung Des Verdampfers
Abschnitt 6 Wartung INDUSTRY 6.5.3 Wartung und Reinigung des Verdampfers ACHTUNG! Vor Reinigungs- und Wartungsarbeiten muss der Schockkühler vom Stromnetz getrennt werden. Zur korrekten Reinigung des Verdampfers: • Das Gerät bei geö neter Tür abtauen lassen. • Verwenden Sie zum Waschen der Verdampferbatterie keine Druckwasserstrahlen, da diese die Aluminium- lamellen, aus denen das Lamellenpaket besteht, beschädigen könnten. -
Page 79: Wartung Und Reinigung Der Konditionierungseinheit
Abschnitt 6 Wartung INDUSTRY 6.5.5 Wartung und Reinigung der Konditionierungseinheit und Elektroanlage Die wichtigsten Arbeiten im Zusammenhang mit der ACHTUNG! routinemäßigen Wartung sind im Handbuch der Zentra- leinheit oder der Kondensierungseinheit aufgeführt. Vor Reinigungs- und Wartungsarbeiten muss der Die wichtigsten Tätigkeiten werden im Folgenden Schockkühler vom Stromnetz getrennt werden. - Page 80 Maintenance Manual Blast Chiller N150T1 Industry [Art. 4493001500] 2020-03...
- Page 81 INDUSTRY Revision Edition...
- Page 82 INDUSTRY Dear Customer, Thank you for purchasing the blast chiller of the INDUSTRY line. This manual is an integral part of the machine/partly completed machinery and as such must be kept for the entire useful life of the machine/partly complet- ed machinery.
- Page 83 Table of contents INDUSTRY Section 1 Important safety warnings page Section 2 Introduction page General information ..........8 Description of the machine/partly completed machinery and intended use 8 Reasonably foreseeable misuse of the machine .
- Page 84 Table of contents INDUSTRY Section 4 Installation 4.6.3 Electrical connection..........43 4.6.3.1 Machine to panel electrical communication cables connection .
- Page 85 Section 1 Safety warnings INDUSTRY WARNING! Before using the equipment it is recom- mended that you carefully read and observe the following safety warnings in order to to reduce residual risks: This manual is an integral part of the ma- Installation, handling, operation, mainte- chine/partly completed machinery and nance and disposal of the machine must...
- Page 86 Section 1 Safety warnings INDUSTRY The core probe must be used solely for If the power supply cable of the machine the purpose for which it is designed, i.e. is damaged, ensure that it is replaced with to measure the temperature at the core of food an identical one by qualified personnel in order products that are being frozen or chilled.
-
Page 87: Introduction
Section 2 Introduction INDUSTRY General information The blast chiller has been designed considering the The blast chiller is a manually operated machine. Once directives and the attached harmonised standards of the the machine has started, the blast chilling or freezing European Union, as well as the related product stand- cycle is managed automatically and does not require the ards associated with it (See specific paragraph). -
Page 88: Information Ownership
Section 2 Introduction INDUSTRY Information ownership Storing the manual The information contained in this manual is the property The manual is considered an integral part of the of La Nuovagel S.r.l. and, therefore, all rights are machine/partly completed machinery and must be kept reserved. -
Page 89: General Information And Safety Regulations
Section 3 General information and safety regulations INDUSTRY General information WARNING! The information contained in this chapter refers only and exclusively to the BLAST CHILLER and, if necessary, must be supplemented with the informa- tion relating to the safety regulations of the plant/- facility where the BLAST CHILLER is used. - Page 90 Section 3 General information and safety regulations INDUSTRY Table 1 STANDARDS DESCRIPTION NATIONAL LEGISLATION Hygiene regulations for packaging, containers and utensils intended to come Ministerial Decree 21.03.1973 into contact with foodstu s or with substances for personal use. EUROPEAN LEGISLATION D.
-
Page 91: Terminology Conventions, Definitions And Symbols
Section 3 General information and safety regulations INDUSTRY Terminology conventions, Symbols used in the manual definitions and symbols 3.3.1 Terminology Conventions This symbol identifies a situation for which failure to comply with the indicat- The term partly completed machinery indicates both the ed standards could cause risks for the chilling cabinet and the condensing unit. -
Page 92: General Safety Rules
Section 3 General information and safety regulations INDUSTRY General safety rules and regulations WARNING! Observance of the machinery directive and compliance The BLAST CHILLER must be used exclusively by with the paragraphs relevant to the relative harmonised operators who have taken part in the on-site train- standards have allowed use to eliminate or reduce the ing given by sta from "La Nuovagel S.r.l."... -
Page 93: Clothing
Section 3 General information and safety regulations INDUSTRY 3.5.1 Clothing electrical insulating gloves. Those working or carrying out maintenance on the At the end of maintenance operations, check that machine/partly completed machinery must always wear no tools used have been left inside the BLAST clothing that is adequate for the type of operation to be CHILLER and that any guards removed have been carried out. -
Page 94: Safety Devices
Section 3 General information and safety regulations INDUSTRY 1) NITRIC ACID. WARNING! 2) SODIUM HYPOCHLORITE >5% (BLEACH). 3) SODIUM HYDROXIDE >10%. The removal of the signs or their non-replacement in 4) CHROMIC ACID. the event of deterioration means the user takes on 5) FORMIC ACID. -
Page 95: Special Attention To Be Paid During Lifting And Transport
Section 3 General information and safety regulations INDUSTRY • 3.7.2 UNPACKING, INSTALLATION, Parts or components of the blast chiller hitting persons CONNECTION AND TESTING or property due to unexpected movements or incorrect behaviour by the handling operators or due to the projection of moving parts of the blast chiller not properly secured in the packing phase. -
Page 96: Special Attention To Be Paid During Unpacking
Section 3 General information and safety regulations INDUSTRY • 3.7.2.2 Special attention to be paid during Only electrical maintenance personnel must access unpacking, installation and connection electrical parts. • Protect the piping connections to energy sources by During unpacking, installation and connection, special means of suitable sti sheaths or cable ducts. -
Page 97: Special Attention To Be Paid During Use
Section 3 General information and safety regulations INDUSTRY 3.7.4 MAINTENANCE AND DISMANTLING 3.7.3.2 Special attention to be paid during use. 3.7.4.1 Residual risks during maintenance • Before carrying out any cleaning operation, disconnect and dismantling the machine from the mains power supply. During maintenance and dismantling there are residual •... -
Page 98: Special Attention To Be Paid During Maintenance And Dismantling
Section 3 General information and safety regulations INDUSTRY 3.7.4.2 Special attention to be paid during maintenance and dismantling • During maintenance and dismantling, special attention Never use gasoline, solvents or other flammable fluids must be paid to the operations described below. for cleaning parts, only use approved, non-toxic and non-flammable detergents. -
Page 99: Hazard Warning Signs
Section 3 General information and safety regulations INDUSTRY Hazard warning signs This symbol warns of a slipping hazard due to the chilling cabinet floor Hazard warning signs have been attached to the that may be icy or slippery. machine in order to highlight the areas of the BLAST CHILLER where particular attention must be paid and the areas with residual risk for the safety of the operator and exposed persons. -
Page 100: Warranty
Section 3 General information and safety regulations INDUSTRY 3.8.1 Warranty La Nuovagel S.r.l. guarantees that the blast chiller if free Any complaint must be communicated directly to La of material and manufacturing defects for a period of 12 Nuovagel S.r.l. by the user within eight days of receipt of months. -
Page 101: Installation
Section 4 Installation INDUSTRY Blast chiller identification. A specific identification label with CE marking is attached to identify the machine/partly-completed machinery. For panel blast chillers, the label is attached to the side of the electrical panel, while for unibody blast chillers, it is attached to the rear of the blast chiller. -
Page 102: Dimensions And Overall Footprint Of The Cabinets
Section 4 Installation INDUSTRY Dimensions and overall footprint of the CABINETS NA 2.90T1 MIN. SERVICE AREA MIN. SERVICE AREA 1500 SECTION MIN. SERVICE AREA... - Page 103 Section 4 Installation INDUSTRY NA2.140T1 MIN. SERVICE AREA 1680 ~1066 SECTION MIN. SERVICE AREA 2250...
- Page 104 Section 4 Installation INDUSTRY NA2.200T1 MIN. SERVICE AREA 1680 ~1066 SECTION MIN. SERVICE AREA 2250...
- Page 105 Section 4 Installation INDUSTRY NA2.260T1 MIN. SERVICE AREA 1680 ~1066 SECTION MIN. SERVICE AREA 2250...
- Page 106 Section 4 Installation INDUSTRY NA2.260T1 XL MIN. SERVICE AREA 1960 ~1066 1100 SECTION MIN. SERVICE AREA 2495...
- Page 107 Section 4 Installation INDUSTRY NA2.260T2 2P MIN. SERVICE AREA 1680 MIN. SERVICE AREA ~152 ~ 227 SECTION MIN. SERVICE AREA 2250...
- Page 108 Section 4 Installation INDUSTRY NA2.520T2 2P MIN. SERVICE AREA 1680 MIN. SERVICE AREA ~152 ~ 227 SECTION MIN. SERVICE AREA 2250...
- Page 109 Section 4 Installation INDUSTRY NA2.520T2 2P XL MIN. SERVICE AREA 1960 MIN. SERVICE AREA ~145 ~ 234 1100 SECTION MIN. SERVICE AREA...
- Page 110 Section 4 Installation INDUSTRY NA2.450T3 2P MIN. SERVICE AREA 1680 MIN. SERVICE AREA ~145 ~ 237 SECTION MIN. SERVICE AREA...
- Page 111 Section 4 Installation INDUSTRY NA2.780T3 2P MIN. SERVICE AREA 1680 MIN. SERVICE AREA ~145 ~ 237 SECTION MIN. SERVICE AREA...
- Page 112 Section 4 Installation INDUSTRY NA2.780T3 2P XL MIN. SERVICE AREA 1960 MIN. SERVICE AREA 1100 SECTION MIN. SERVICE AREA SCALA 1 : 20...
- Page 113 Section 4 Installation INDUSTRY 4.3 Technical specifications CABINETS Technical data CABINETS NA2.90T1 NA2.140T1 NA2.200T1 NA2.260T1 NA2.260T1 NA2.260T2 NA2.520T2 NA2.520T2 NA2.450T3 NA2.780T3 NA2.780T3 2P XL 2P XL Dimensions L. (mm) 1680 1680 1680 1960 1680 1680 1960 1680 1680 1960 D. (mm) 1650 1565 1565...
- Page 114 Section 4 Installation INDUSTRY 4.4 Technical specifications CONDENSING UNITS Technical data CONDENSING UNITS UC NA2.90T1 UC NA2.140T1 UC NA2.200T1 UC NA2.260T1 UC NA2.260T1 UC NA2.260T2 UC NA2.520T2 UC NA2.520T2 UC NA2.450T3 UC NA2.780T3 UC NA2.780T3 2P XL 2P XL Dimensions L.
- Page 115 Section 4 Installation INDUSTRY Technical specifications CONDENSING UNITS UC NA2.90T1 1120 UC NA2.140T1 - UC NA2.200T1 - UC NA2.260T1 - UC NA2.260T1 XL 1532 1610 1688 Power Supply 1750 Suction line Liquid line...
- Page 116 Section 4 Installation INDUSTRY UC NA2.260T2 2P 2050 2110 2170 2230 Suction line Liquid line Power Supply UC NA2.520T2 2P - UC NA2.520T2 2P XL 1425 1325 1315 3100 Suction line Liquid line Power Supply...
- Page 117 Section 4 Installation INDUSTRY UC NA2.450T3 2P 1315 Suction line Liquid line Power Supply UC NA2.780T3 2P - UC NA2.780T3 2P XL 1425 1325 1315 2830 Suction line Liquid line Power Supply...
-
Page 118: Preliminary Operations
Section 4 Installation INDUSTRY PRELIMINARY OPERATIONS WARNING! Strictly follow the operations listed below in order to Special attention must be paid during lifting and correctly set up the blast chiller in designated work transport. Designate these operations exclusively to area. The blast chiller has suitable packaging in order to personnel specialised and trained in machinery protect it from damage during transport. -
Page 119: Positioning
Section 4 Installation INDUSTRY 4.6.2 POSITIONING Before removing the blast chiller from the packaging, check that it is intact, notifying and writing any damage The machine/partly-completed machinery must be found on the carrier's delivery note before signing it. installed and tested in full compliance with the accident Take photographs of any external damage. - Page 120 Section 4 Installation INDUSTRY If the blast chiller is installed in an enclosed area, to ensure proper operation it is necessary to ensure appropriate air circulation. The air recirculation values are shown in the technical tables of the blast chillers. For the environmental installation conditions see the dedicated paragraph.
-
Page 121: Positioning Of The Remote Condensing Unit
Section 4 Installation INDUSTRY 4.6.2.2 POSITIONING WARNING! OF THE REMOTE CONDENSING UNIT Use special lifting systems for the setting of heavier Regarding the positioning of the remote condensing machines. unit, i.e. not built into the machine, it is necessary to adopt the following indications: •... -
Page 122: Electrical Connection
Section 4 Installation INDUSTRY 4.6.3 ELECTRICAL CONNECTION contact opening of at least 3mm upstream of the socket. This switch is mandatory when the load For safety reasons all electrical connection operations exceeds 1000W or when the machine is connected must be carried out by qualified and authorised person- directly to the mains power supply. -
Page 123: Machine To Panel Electrical Communication Cables Connection
Section 4 Installation INDUSTRY 4.6.3.2 REMOTE ASSISTANCE SYSTEM 4.6.3.1 MACHINE TO PANEL ELECTRICAL COMMUNICATION CABLES CONNECTION The remote assistance system is carried out using a mini PC Router positioned inside the electrical panel of To connect the communication cables, refer to the the chilling cabinet and connected via 2 network cables specific wiring diagram for the machine purchased. -
Page 124: Refrigerant Connection
Section 4 Installation INDUSTRY 4.6.4 REFRIGERANT CONNECTION 4.6.4.2 OIL RETURN All refrigerant lines must be designed to allow correct oil To make the refrigerant connection between the chilling return to the compressor. cabinet and the remote condensing unit it is necessary If the condensing unit is positioned above the evaporator to install the piping of the liquid and suction line accord- it is necessary to insert siphons at a height of every 2... -
Page 125: Vacuum
Section 4 Installation INDUSTRY 4.6.4.3 VACUUM If the line is very long, it is necessary to keep the oil level under control at the first start-up and in the following days and top up if necessary. WARNING! In this phase do not start the compressor to avoid irreparable damage to it. -
Page 126: Disassembly And Dismantling
Section 4 Installation INDUSTRY 4.6.4.6 DISASSEMBLY AND DISMANTLING 4.6.4.7 DISMANTLING AND DISPOSAL If it is necessary to disassemble the machine, proceed as When a machine has completed its life cycle, before follows: proceeding to the final disposal, it is necessary to carry out a series of operations aimed at ensuring minimum •... - Page 127 Section 4 Installation INDUSTRY 4.7 R404a and R452a refrigerant fluid safety data indications The machines use fluorinated greenhouse gases i) Sense of fainting covered by the Kyoto protocol: R404a (GWP 3921) and 4.7.4 FIRE-FIGHTING MEASURES R452a (GWP 2141). T he indications provided in this para- In the event of fire, wear self-contained breathing appa- graph are obtained from the safety data sheets of refrig- ratus.
-
Page 128: Description Of The Display
Section 5 Instructions for use INDUSTRY 5.0 Description of the display The commands for setting, adjusting or displaying the functions are located on the lower section, on the upper section and on the central part of the display (Fig.3) Description of the standard symbols: - Returns to the previous page - Access to all the functions and settings of the blast chiller... -
Page 129: First Start-Up
Section 5 Instructions for use INDUSTRY 5.1 First start-up After turning on the main blast chiller switch, the display lights up. Wait a few minutes for the software to load, until the screen in Fig. 5 appears. Then set all the required data. figure 5 5.1.1 Entering the company name By selecting "Company Name"... -
Page 130: Selecting Unit Of Measurement
Section 5 Instructions for use INDUSTRY 5.1.3 Language selection By selecting "Language", the screen in figure 8. is displayed. Choose the desired language. figure 8 5.1.4 Date and time settings By selecting "Date" or "Time", the screen in figure 9 is displayed. -
Page 131: Description Of The Cycles
Section 5 Instructions for use INDUSTRY 5.2 Description of the cycles BLAST CHILLING CYCLES +3°C Pasta/Rice Bread Vegetables Meat/Fish Soups/Sauces Cakes +3 Creams +3 Creams +25 Cream pu s +3 Quiche +3 Croissants +3 Croissants +16 Pizza +3 Sushi +3 Tartare +3 Lettuce dryer +10 Lasagna +3... -
Page 132: Description Of Blast Chilling Cycles
Section 5 Instructions for use INDUSTRY 5.2.1 Description of the BLAST CHILLING cycles 1 - SOFT CHILLING Suitable for all delicate or thin products such as vegetables, pastries, bread, rice, and pasta. It gently cools the product with chamber temperatures around 0°C. The cycle is finished when the product has reached +3°C at the core or at the end of the set time. - Page 133 Section 5 Instructions for use INDUSTRY 12 - LASAGNE Suitable for meat and fish in pu pastry, cooked lasagna, the product is chilled to + 3°C with various temperature steps, avoiding the igloo e ect and retaining the moisture of the product. The cycle is finished when the product has reached +3°C at the core or at the end of the set time.
-
Page 134: Description Of Freezing Cycles
Section 5 Instructions for use INDUSTRY 5.2.2 Description of the FREEZING cycles 1 - SOFT FREEZING Suitable for all hot and raw delicate products. It gently freezes the product with positive temperatures in the first phase and negative in the second phase. It prevents the igloo e ect. The cycle is finished when the product has reached -18°C at the core or at the end of the set time. - Page 135 Section 5 Instructions for use INDUSTRY 12 - VEGETABLE Suitable for all types of cooked and raw vegetables. The product is gently frozen avoiding the oxidation of the product and completely retaining its freshness. The cycle is finished when the product has reached -18°C at the core or at the end of the set time.
-
Page 136: Operating Modes
Section 5 Instructions for use INDUSTRY 5.3 Operating modes There are 2 operating modes: Blast chilling 1) FULL MODE version (72 cycles) cycles 2) EASY MODE version Freezing cycles 1) FULL MODE version 72 cycles (figure 11) With this graphic display we can select a total of 72 Customised cycles divided by categories: cycles... -
Page 137: Blast Chilling/Freezing In Full Mode (72 Cycles)
Section 5 Instructions for use INDUSTRY 5.4 Blast chilling/Freezing in FULL MODE (72 cycles) To start a blast chilling or freezing cycle, select a pre-set cycle on the Home screen or press on the side section +3 or -18 to display all the preset blast chilling or freezing cycles (Fig. - Page 138 Section 5 Instructions for use INDUSTRY 5.4.1 Cycle changes and adjustments preset blast chilling Replacing a blast chilling/freezing cycle highlighted on the home screen To replace a preset blast chilling/freezing cycle on the home screen, press the cycle that you want to replace from the home for 2 seconds (fig.17), the screen in figure 18 will appear, select the cycle you want to highlight...
- Page 139 Section 5 Instructions for use INDUSTRY Duplicating a blast chilling/freezing cycle To duplicate a blast chilling or freezing cycle enter the cycles screen, select the cycle to duplicate and press The screen in figure 20 will appear, select the position in which to insert the cycle to duplicate and then enter the name of the duplicated cycle.
- Page 140 Section 5 Instructions for use INDUSTRY 5.5 Blast chilling operation EASY MODE figure 23 To use the blast chiller Easy Mode, it is necessary to enable the operation in the "OPERATOR PARAME- TERS" menu. By pressing the symbol on the Home screen, you access the settings screen (figure 23).
-
Page 141: Defrosting
Section 5 Instructions for use INDUSTRY 5.6 Defrosting To start defrosting, press the icon (figure 28) figure 28 Defrosting can be adaptive or timed. In the case of timed defrosting, the duration is set by the user according to the level of intensity chosen shown in the table below. - Page 142 Section 5 Instructions for use INDUSTRY 5.7 Ionization To activate ionization press the symbol on the Home screen to access the "Settings" screen, press "Operator Settings" to enter the "Customer Para- meter" screen and then press on "Ionizer settings" (figure 32). The screen in figure 33 will appear where you can activate ionization and choose from 15 di erent levels figure 32...
-
Page 143: Haccp (Hazard Analysis And Critical Control Point)
Section 5 Instructions for use INDUSTRY 5.8 HACCP (Hazard Analysis and Critical Control Point) To activate this function press the symbol on the Home screen to access the "Settings" screen, press "Operator Settings" to enter the "Customer Para- meter" screen and then press on "HACCP Settings" (figure 34). -
Page 144: Export Alarms Log
Section 5 Instructions for use INDUSTRY 5.9 Export Alarms Log To activate this function press the symbol on the Home screen to access the "Settings" screen, press "Operator Settings" to enter the "Customer Para- figure 36 meter" screen and then press on "Export Alarms Log" (figure 36). -
Page 145: Import Export Parameters
Section 5 Instructions for use INDUSTRY 6.1 Import Export Parameters To perform an export/import of the blast chiller parameters press the symbol on the Home screen to access the "Settings" screen, press "Operator Settings" to enter the "Customer Para- meter" screen and then press on "Import Export Para- figure 40 meters"... -
Page 146: Detailed Display Menu
Section 5 Instructions for use INDUSTRY 6.2 Detailed display menu To access the detailed display menu, on the Home screen press the symbol figure 42 you access the “Settings” screen, press “Detailed View” (Figure 42) to enter the screen. The screen in Figure 43 appears, clicking on the relevant icons, you can access the windows describing the behaviour of some components of the machine. -
Page 147: Operation Of The Condensing Unit
Section 5 Instructions for use INDUSTRY 6.2.3 Operation of the condensing unit The specific screen of the condensing unit (Figure 46) allows you to view the adjustment status and enable the request for refrigeration power and the presence of electrical energy on the condensing unit. We can also estimate the following parameters: •... - Page 148 Section 5 Instructions for use INDUSTRY 6.3 Faults and possible solutions For any other type of alarm displayed: wait a few minutes if the problem persists The blast chiller is equipped with a visual system that contact support and specify the alarm code displayed. signals the presence of an alarm.
- Page 149 Section 5 Instructions for use INDUSTRY Possible cause Possible solution E ects Description 17-20 Motor Electronic - Motor disconnected, - Check the power and - Impossibility to start a cycle Thermostat damaged or incorrectly communication cable between and to use the blast chiller. Valve Alarm.
- Page 150 Section 5 Instructions for use INDUSTRY Possible cause Possible solution E ects Description 47-48 Incompatibility - Failure to update - Upgrade the software - Controller Block of the EEV operating the operating system of the electronic thermostatic of the electronic thermostatic system Alarm.
- Page 151 Section 5 Instructions for use INDUSTRY Possible cause Possible solution E ects Description Chamber Fan - Chamber fans broken - Check the fan - The cycle starts but the blast Alarm. or malfunctioning. contactor. chiller works without the fans. - Replace the broken The temperature of the or damaged fan.
- Page 152 Section 5 Instructions for use INDUSTRY Possible cause Possible solution E ects Description Product Temperature - Probe fault. - Check probe connection and - The device will not use Probe Alarm - Internal probe error, configuration. Needle Probe 3. (Needle Probe 3) damaged or broken.
- Page 153 Section 5 Instructions for use INDUSTRY Possible cause Possible solution E ects Description Blackout Alarm - Power failure during a - Restore electric power - Alarm signal in the event that during the cycle. cycle in progress. supply. the blackout exceeds the time threshold set and there is a cycle in progress.
-
Page 154: Advice On Use
Section 5 Instructions for use INDUSTRY 6.4 Advice on use To ensure proper use of the equipment it is recom- mended to take on board the following suggestions: • Place the trolley with trays inside the chilling cabinet in front of the fans, in line with the trolley guides on the fan door. -
Page 155: Maintenance
Section 6 Maintenance INDUSTRY 6.5 Routine and extraordinary machine maintenance 6.5.1 General information on maintenance WARNING! To guarantee the maximum reliability and functionality of Before carrying out any cleaning and maintenance the machine and to avoid hazardous conditions, carefully operation it is necessary to disconnect the blast chiller follow the indications given below. -
Page 156: Maintenance And Cleaning Of The Chilling Cabinet
Section 6 Maintenance INDUSTRY 6.5.2 Maintenance and cleaning of the chilling cabinet Routine maintenance consists of daily cleaning: WARNING! • of all the parts that are in contact with food, Stainless steel should not remain in contact for • of the stainless steel parts inside the cabinet. prolonged periods with food products containing acids or extremely high salt concentrations such To be also regularly checked:... -
Page 157: Maintenance And Cleaning Of The Evaporator
Section 6 Maintenance INDUSTRY 6.5.3 Maintenance and cleaning of the evaporator WARNING! Before carrying out any cleaning and maintenance operation it is necessary to disconnect the blast chiller from the mains power supply. For correct cleaning of the evaporator: • Perform a defrost by leaving the door open. -
Page 158: Maintenance And Cleaning Of The Condensing Unit
Section 6 Maintenance INDUSTRY 6.5.5 Maintenance and cleaning of the condensing unit and electrical system The most important routine maintenance operations are WARNING! listed in blast chiller manual or that of the condensing unit. The most important operations are listed below: Before carrying out any cleaning and maintenance •... - Page 159 Großmoorbogen 5 Hermann-Bopp-Straße 4 Tel.+49 421 48557-0 Tel.+49 30 936684-0 Tel.+49 211 540054-0 Tel.+49 40 766183-0 Tel.+49 6132 7101-0 Fax+49 421 488650 Fax+49 30 936684-44 Fax+49 211 540054-54 Fax+49 40 770799 Fax+49 6132 7101-20 www.nordcap.de bremen@nordcap.de berlin@nordcap.de erkrath@nordcap.de hamburg@nordcap.de ingelheim@nordcap.de...