
Related Manuals for Nordcap COOL-LINE SKF 5 Easy


Summary of Contents for Nordcap COOL-LINE SKF 5 Easy
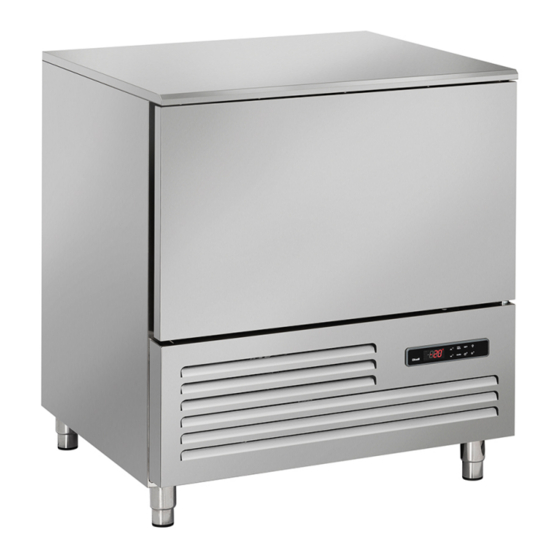
- Page 1 Bedienungsanweisung COOL-LINE-Schnellkühler/Schockfroster SKF 5 Easy [Art. 45110250] 2019-12...
-
Page 2: Table Of Contents
Sehr geehrter Kunde! Herzlichen Glückwunsch zum Kauf dieses Geräts. Nehmen Sie sich bitte einige Minuten Zeit, bevor Sie das Gerät gebrauchen, und lesen Sie diese Bedienungsanleitung. Inhaltsverzeichnis Produktbeschreibung ......................3 Sicherheitshinweise ......................4 Bestimmungsgemäße Verwendung ..................5 Aufstellungsort und Installation ..................6 Bedienung des Geräts ...................... -
Page 3: Produktbeschreibung
Produktbeschreibung Bezeichnung des Geräts Schockkühler – 5 Trays (GN und Euronorm) -
Page 4: Sicherheitshinweise
Sicherheitshinweise WICHTIG: Lesen Sie diese Bedienungsanleitung zu Ihrer eigenen Sicherheit gewissenhaft durch, bevor Sie das Gerät installieren oder gebrauchen. Bewahren Sie die Betriebsanleitung für ein zukünftiges Nachschlagen auf. Informieren Sie sich über die Bestimmungen und gesetzlichen Vorschriften zu folgenden Bereichen: 1. -
Page 5: Bestimmungsgemäße Verwendung
Sicherheitshinweise 18. Verwenden Sie dieses Gerät NICHT zur Lagerung von medizinischem Verbrauchsmaterial. 19. Verwenden Sie zur Reinigung KEINEN Hochdruckreiniger. 20. Gestatten Sie Kindern NICHT, mit dem Verpackungsmaterial zu spielen, und entsorgen Sie die Kunststoffbeutel auf eine sichere Weise. 21. Flaschen mit hochprozentigen alkoholischen Getränken müssen einwandfrei verschlossen senkrecht in den Kühlschrank gestellt werden. -
Page 6: Aufstellungsort Und Installation
Aufstellungsort und Installation • Entfernen Sie die Verpackung des Geräts. Vergewissern Sie sich, dass alle Schutzfolien von den Oberflächen entfernt werden. Um Verletzungen von Personen und Schäden am Gerät zu verhindern, sollte das Gerät von zwei Personen ausgepackt und aufgestellt werden. •... - Page 7 Aufstellungsort und Installation Aufstellungsort und Installation • Wenn das Kabel nicht bis zur nächsten Steckdose reicht, müssen Sie die Anordnung der Geräte im Raum ändern oder von einem Elektrofachmann eine neue Steckdose anbringen lassen. • Nach einer Unterbrechung der Stromversorgung müssen Sie mindestens 3 Minuten warten, bis Sie das Gerät wieder einschalten, um Schäden am Verdichter zu vermeiden.
-
Page 8: Bedienung Des Geräts
Bedienung des Geräts ACHTUNG: Dieses Gerät ist direkt betriebsbereit; nach dem Anschluss an die Stromversorgung ist der Schockkühler im Standby-Modus. Das Symbol dem Display leuchtet. Um das Gerät auf EIN zu schalten, drücken Sie 3 s lang die START/STOP-Taste . Das Gerät zeigt danach die Kammertemperatur an. - Page 9 Bedienung des Geräts TASTENKOMBINATIONEN: Tastenkombination zum ENTSPERREN oder SPERREN des Tastenfelds. Im gesperrten Zustand können keine Parameter editiert werden, die sonstigen Funktionen des Bedienfelds sind jedoch weiterhin aktiv. Aufruf des Programmiermodus. Rückkehr zur Anzeige der Kammertemperatur. LEGENDE DER LED-SYMBOLE: Zeigt durch LEUCHTEN an, dass ein Abtauzyklus ausgeführt wird. Zeigt durch LEUCHTEN an, dass ein Kühlzyklus ausgeführt wird.
- Page 10 Bedienung des Geräts 1. Umschalten des Geräts auf EIN / in den Standby-Modus • Halten Sie die START/STOP-Taste 3 s lang gedrückt, das Symbol LEUCHTET. • Halten Sie die START/STOP-Taste 3 s lang gedrückt, das Symbol VERLÖSCHT und das Display zeigt die Kammertemperatur rNP an. 2.
- Page 11 Bedienung des Geräts Funktionsweise von Schockkühlen und Schockfrosten Schockkühlen und Schockfrosten haben jeweils einen temperaturgesteuerten und einen zeitgesteuerten Betriebsmodus. • Wenn Sie den TEMPERATURGESTEUERTEN Zyklus wählen, wird die Temperatur vom Kerntemperaturfühler n2P gemessen und der Zyklus endet, sobald die voreingestellte Temperatur entsprechend dem Parameterwert von +3 °C für das Kühlen bzw.
- Page 12 Bedienung des Geräts Mögliche Betriebsarten des Geräts: • SCHONENDER KÜHLZYKLUS (SOFT) • INTENSIVER KÜHLZYKLUS (HARD) • SCHONENDER GEFRIERZYKLUS (SOFT) • INTENSIVER GEFRIERZYKLUS (HARD) • SPEISEEISZYKLUS • SCHOCKFROSTZYKLUS -40 °C Schonender Kühlzyklus Den temperaturgesteuerten schonenden Kühlzyklus starten Sie wie folgt: Der temperaturgesteuerte schonende Schockkühlzyklus besteht aus folgenden 2 Phasen: •...
- Page 13 Bedienung des Geräts Intensiver Kühlzyklus Das intensive Schockkühlen starten Sie wie folgt: Der temperaturgesteuerte intensive Schockkühlzyklus besteht aus folgenden 3 Phasen: • Intensives Schockkühlen • Schockkühlen • Temperaturhalten Die Einstellung HARD sollten Sie wählen, wenn Sie einen schnellen Schockkühlvorgang wünschen (die Kammertemperatur beträgt zu keinem Zeitpunkt mehr als null Grad).
- Page 14 Bedienung des Geräts Die Einstellung SOFT sollten Sie wählen, wenn Sie einen schonenden Tiefgefriervorgang wünschen (während der Soft-Phase liegt die Kammertemperatur zu keinem Zeitpunkt unter dem Nullpunkt). Sobald der Kerntemperaturfühler eine Temperatur von +3 °C (Parameterwert iS1) erreicht hat, endet das SCHONENDE TIEFGEFRIEREN und beginnt das Schockfrosten. 1.
- Page 15 Bedienung des Geräts 3. Drücken Sie kurz die START/STOP-Taste , um den intensiven Gefrierzyklus zu starten: Das LED-Symbol des Verdichters plus und das Kerntemperaturfühler LED-Symbol LEUCHTEN permanent. (Stattdessen ist der zeitgesteuerte Zyklus EINGESCHALTET). 4. Sobald die Temperatur des Kerntemperaturfühlers den Voreinstellwert erreicht hat oder der zeitgesteuerte Zyklus beendet ist, meldet ein optischer und akustischer Alarm das Zyklusende, das Gerät schaltet in den Haltezyklus um und das LED-Symbol blinkt.
- Page 16 Bedienung des Geräts Der Schockkühler eignet sich für ein rasches Kühlen und Gefrieren von Lebensmitteln (siehe die Tabelle mit den Temperaturangaben für die zu gefrierenden Produkte). Legen Sie keine ofenwarmen Lebensmittel in den Schockkühler, sondern warten Sie einige Minuten, bevor Sie die Kammer beladen und den Zyklus starten.
- Page 17 Bedienung des Geräts KERNTEMPERATURMESSUNG Wenn die Dicke des Lebensmittels es zulässt, können Sie den Kerntemperaturfühler verwenden und damit sicherstellen, dass exakt die gewünschte Kerntemperatur im Lebensmittel erreicht wird. Es empfiehlt sich, den Schockkühl- bzw. -frostzyklus nicht zu unterbrechen, bevor eine Temperatur von +3 °C beim Kühlen bzw.
- Page 18 Bedienung des Geräts LAGERUNG VON LEBENSMITTELN NACH DEM SCHOCKKÜHLZYKLUS Schockgekühlte bzw. schockgefrostete Lebensmittel können im Kühlschrank gelagert werden, sie bewahren ihre organoleptischen Eigenschaften bis zu 5 Tage lang nach dem Schockkühlen. Es ist wichtig, dass die Kühlkette nicht unterbrochen wird und je nach Lebensmittel eine konstante Temperatur von 0 - 4 °C eingehalten wird.
- Page 19 Bedienung des Geräts ZEITGESTEUERTES SCHOCKKÜHLEN Max. Max. Lebensmittel Behälter Kühlzeiten Zyklus Beladung Beladung ERSTER HAUPTGANG Béchamelsauce 4 cm 70 Minuten PLUSTEMPERATUR GN1/1 H 60 Fleischbrühe 6-7 cm 90 Minuten PLUSTEMPERATUR GN 1/1 H 110 Pasta überbacken 4 kg 3-4 cm 40 Minuten PLUSTEMPERATUR GN 1/1 H 40...
-
Page 20: Hauptparameter
Hauptparameter Der Schockkühler hat 2 Programmierebenen: ERSTE EBENE: „pr1“ beinhaltet die Standardparameter ab Werk für Zusatzfunktionen. ZWEITE EBENE: Alle kritischen Parameter der 5 Hauptzyklen. (5 Zyklen, da der SCHOCKFROST-Zyklus über Parameter „SEf“ der ersten Parameterebene angesteuert wird und deshalb nicht enthalten ist). ERSTE EBENE: •... - Page 21 Hauptparameter ZWEITE EBENE: Nur für folgende Zyklen SCHONENDER KÜHLZYKLUS (SOFT) INTENSIVER KÜHLZYKLUS (HARD) SCHONENDER GEFRIERZYKLUS (SOFT) INTENSIVER GEFRIERZYKLUS (HARD) SPEISEEISZYKLUS Hinweis: Für den SCHOCKFROST-Zyklus gilt die obige Parameterliste Pr1 (Parameterwert SEF). • Drücken Sie die entsprechenden Tasten, um die gewünschte Betriebsart zu wählen (siehe Seite 12).
- Page 22 Hauptparameter Parameter Bedeutung Zykluseinstellung tEP: Temperaturgesteuert; die Ausführung des Zyklus entsprechend der Einstellung von Parameter rEM tiM: Zeitgesteuerter Zyklus, in Funktion der Optionsparameter Pd1, Pd2 und Pd3. Abtauen vor dem Zyklus Yes = Abtauen wird ausgeführt No = der Zyklus startet sofort ohne Abtauvorgang Abtauen bei Zyklusende / vor dem Temperaturhalten Yes = Abtauen wird ausgeführt No = das Temperaturhalten startet sofort...
-
Page 23: Reinigung, Pflege Und Wartung
Reinigung, Pflege und Wartung Routinewartung Schalten Sie das Gerät vor der Reinigung aus und trennen Sie es vom Stromnetz. • Reinigen Sie das Gehäuse und die Innenflächen des Geräts so oft wie möglich. • Im Rahmen der Schockkühler-Wartung muss mindestens einmal täglich der mit Lebensmitteln beladene Bereich gereinigt werden, um ein Verkeimen zu verhindern. -
Page 24: Sonderzubehör
Sonderzubehör Vier Lenkrollen Positionierung: Die zwei Laufrollen mit Bremse werden unten an der Vorderseite und die zwei Laufrollen ohne Bremse werden unten an der Rückseite angebracht. Vorgehensweise: Halten Sie die folgenden 12 Schritte ein, um die Füße durch Lenkrollen zu ersetzen. Hinweis: Falls Sie Sonderzubehör erwerben möchten, lassen Sie sich bitte von unseren Vertriebsmitarbeitern beraten. - Page 25 Sonderzubehör Reinigen des Verflüssigers Hinweis: Dieser Eingriff am Gerät darf nur vom Kundendienst oder einer Fachfirma durchgeführt werden, da durch spannungsführende Teile die Gefahr eines Stromschlags besteht.
- Page 26 Sonderzubehör Einbau der Kondensatwanne (Kondensatwanne GN1/1, nicht im Lieferumfang enthalten) Ablage des Kerntemperaturfühlers bei Nichtgebrauch...
- Page 27 Sonderzubehör Versetzen des Türanschlags...
- Page 28 Sonderzubehör...
-
Page 29: Fehlersuche
Fehlersuche Problem Mögliche Ursache Abhilfe Das Gerät Das Gerät ist nicht eingeschaltet. Prüfen, ob das Gerät korrekt an das funktioniert nicht. Stromnetz angeschlossen und eingeschaltet ist. Stecker u./o. Kabel defekt Den Kundendienst oder eine Fachfirma verständigen. Die Schmelzsicherung im Stecker ist Die Sicherung ersetzen (UK Stecker). -
Page 30: Entsorgung
Entsorgung Wenn Sie das Gerät nicht länger in Gebrauch ist und Sie es entsorgen möchten, müssen Sie als Erstes die Türen abnehmen, damit kleine Kinder nicht darin eingesperrt werden können. Führen Sie dann die Entsorgung auf eine umweltschonende Art und Weise durch. Lassen Sie folgende Arbeiten von einem Kundendiensttechniker ausführen: 1. -
Page 31: Technische Daten
Technische Daten Modell Schockkühler (5 Trays) Klimaklasse Kältemittel Kältemittelfüllung Temperaturbereich (°C) Anschlussleistung Beachten Sie hierzu die Angaben auf dem Gerät. Sie finden die Angaben Nennfrequenz auf dem Typenschild an der Rückseite des Geräts. Der Schaltplan ist Nennspannung ebenfalls an der Rückseite des Geräts abgebildet. Volumen Nettogewicht Bruttogewicht... -
Page 32: Garantie
Garantie Für dieses Gerät gilt die gesetzliche Gewährleistung. Schäden durch unsachgemäßen Gebrauch, Fehlbedienung, nicht korrekte Aufstellung oder Lagerung, durch Installations- oder Anschlussfehler sowie durch äußere Einwirkungen sind nicht durch diese Gewährleistung gedeckt. Lesen Sie diese Bedienungsanleitung gründlich durch, denn sie enthält zahlreiche wichtige Informationen. - Page 33 Instruction Manual COOL-LINE-Blast Chiller SKF 5 Easy [Art. 45110250]...
- Page 34 Dear Customer, Congratulations on your purchase of this product. Please take a few minutes before starting operation of the appliance and read the following operating instructions. Table of Contents Product Overview ....................... 3 Safety Tips ........................... 4 Intended Use ........................5 Location and Installation ....................
-
Page 35: Product Overview
Product Overview Article Description Blast Chiller – N.5 Trays (GN and Euronorm) P2M054STD-Ver1.2... -
Page 36: Safety Tips
Safety Tips IMPORTANT: For your safety read the manual carefully before installing or using this product. Save this manual for future reference. Consult Local and National Standards to comply with the following: 1. Health and Safety at Work Legislation 2. Fire Precautions 3. -
Page 37: Intended Use
Safety Tips 18. DO NOT use this appliance to store medical supplies. 19. DO NOT use jet/pressure washers to clean the appliance. 20. DO NOT allow children to play with the packaging, and dispose plastic bags safely. 21. Bottles that contain a high percentage of alcohol must be sealed and placed vertically in the refrigerator. -
Page 38: Location And Installation
Location and Installation Remove the appliance from the packaging. Make sure that all protective plastic film and coatings are thoroughly removed from all surfaces. To prevent injury or damage to the unit, we recommend that the appliance should be unpacked and set up by two people. ... - Page 39 Location and Installation Location and Installation If the cable does not reach the nearest socket, either rearrange your store layout or ask a qualified electrician to fix a new socket. If power is cut off, wait for at least 3 minutes before restarting the appliance to avoid damaging the compressor.
-
Page 40: Operation
Operation ATTENTION: This is a plug-in unit; once the blast chiller will be connetct to supply the item is in “Stand-by” mode; on the display the icon is ON. For switch ON the unit hold START/STOP key for 3s. The items will display the inner room chamber temperature. - Page 41 Operation KEY COMBIANTIONS: Keyboard UNLOCK or LOCK combination: lock status does not allow editing the parameters while the instrument function are still active. Enter in the programming mode. Return the room temperature display. LED ICON DISPLAY LEGENDA: If switch ON a Defrost cycle is in progress. If switch ON a Chilling cycle is in progress;...
- Page 42 Operation 1. To switching the device ON/Stand-by mode Hold the START/STOP key for 3s, the icon will be ON. Hold the START/STOP key for 3s, the icon will be OFF and the display will show the chamber temperature “rNP”. 2.
- Page 43 Operation Blast chilling and freezing functionality Blast Chilling and Freezing cycle have two main working option: controlled by temperature or by time: If operator chooses TEMPERATURE cycle option, temperature will be detected by needle probe “n2P” and cycle will end once needle probe reaches the pre-setting temperature according to value of parameter +3°C for chilling and -18°C for freezing.
- Page 44 Operation Possible operation cycles: SOFT CHILLING CYCLE HARD CHILLING CYCLE SOFT FREEZING CYCLE HARD FREEZING CYCLE ICE CREAM CYCLE FROST BUST -40°C CYCLE Soft Chilling cycle Operate as follows to start the Temperature soft chilling cycle: The temperature-controlled Soft Blast Chilling cycle is split in the following 2 phases: ...
- Page 45 Operation Hard Chilling cycle Operate as follows to start the Temperature hard chilling cycle: The temperature-controlled Hard Blast Chilling cycle is split in the following 3 phases: Blast Chilling Hard phase Blast chilling Storage HARD cycle is used when the end user wants a fast blast chilling process (Chamber temperature will keep always a negative temperature);...
- Page 46 Operation SOFT cycle is used when the end user wants a smooth freezing process (during the softh phase the chamber temperature will never go down to a negative temperature). Once the needle probe reaches temperature of +3°C (“iS1” parameter value) the SOFT BLAST FREEZING PHASE stops and a Blast freezing cycle starts.
- Page 47 Operation 3. Press and release START/STOP key to start freezing hard cycle: the Compressor LED icon plus and needle probe led icon will switch ON permanently. (Time cycle will be ON instead). 4. Once the needle probe temperature reaches the pre-setting point or time cycle is ending, a visual and acustic alarm will notify the ending cycle, the unit will start a storage cycle and led icon will flashing.
- Page 48 Operation The blast chiller is suitable for a fast dropping food product temperature (see the table with the temperatures in relation to the product to freeze). Do not put directly in the blast chiller food just taken out from the oven, wait few minutes before placing the product inside the chamber and start the cycle.
- Page 49 Operation TEMPERATURE MEASUREMENT AT PRODUCT CORE When the product thickness allows, use always the temperature needle probe in order to know the exact temperature reached at the product core. It is suggested to not interrupt the blast chilling cycle before it has reached the temperature of +3 °c, in positive cycle and -18°C for the negative cycle.
- Page 50 Operation STORAGED OF FOOD AFTER BLAST CHILLING CYCLE The blast chilling/freezing food can be stored in the refrigerator and keep the organoleptic qualities up to 5 days from the blast chilling cycle. It is important to respect the “cold chain”, keeping a constant temperature between 0°C ÷...
- Page 51 Operation BLAST CHILLING TIMES Food Tray Max load Max load Chilling Times Cycle FIRST COURSES Béchamel 4 cm 70 minutes POSITIVE GN1/1 h 60 Meat broth 6-7 cm 90 minutes POSITIVE GN 1/1 h 110 Oven pasta 4 Kg 3-4 cm 40 minutes POSITIVE GN 1/1 h 40...
-
Page 52: Main Parameters
Main Parameters Blast chiller device have N.2 Level of programming mode: FIRST LEVEL: “pr1” for standard machine parameter that are belong to secondary functionality. SECOND LEVEL: Are all sensible parameter belong the 5 main functionality cycle. (N.5 Cycle because FROST BUST cycle is not included, since follow the parameter “SEf” present in the FIRST LEVEL list). - Page 53 Main Parameters SECOND LEVEL: for the following cycle SOFT CHILLING CYCLE HARD CHILLING CYCLE SOFT FREEZING CYCLE HARD FREEZING CYCLE ICE CREAM CYCLE Note: for the FROST BUST Cycle check the previous parameter tab Pr1 (SEf parameter value) Press suitable keys in order to select one of the operation cycle (refer to page.12) ...
- Page 54 Main Parameters Parameter Meaning Cycle setting tEP: by temperature; the cycle is done according to the rEM parameter tiM: Timed cycle, based pn the Pd1,Pd2,Pd3 (Option parameter) Defrost before cycle Yes = defrost is carried out No = the cycle starts immediately without defrosting Defrost end of cycle/before storage Yes = defrost is carried out No = the storage phase starts immediately...
-
Page 55: Cleaning, Care & Maintenance
Cleaning, Care & Maintenance Routine maintenance Switch OFF and disconnect from the power supply before cleaning. Clean the enclosure and interior of the appliance as often as possible. Blast chiller maintenance must include at least one daily cleaning of the loading zone to prevent the development and accumulation of bacteria. -
Page 56: Optional Accessory
Optional Accessory Four pieces of Castor Positioning: Two castors with break to be fixed at the bottom front and two castors with no break to be fixed at the bottom rear. Procedure: Follow the 12 steps below to change the footings to castors. Note: If you intend to purchase optional accessories, please ask our sales staff for advice. - Page 57 Optional Accessory How to clean the condenser Note: These operation on the appliance should only be carried out by the customer service department or qualified technician due expose to live parts and risk of shock hazard. P2M054STD-Ver1.2...
- Page 58 Optional Accessory How to assembly water tray (GN1/1 water tray not included in the assembly kit) Where to store the needle probe meantime is not used P2M054STD-Ver1.2...
- Page 59 Optional Accessory How to reverse the door P2M054STD-Ver1.2...
- Page 60 Optional Accessory P2M054STD-Ver1.2...
-
Page 61: Troubleshooting
Troubleshooting Fault Potential Failure Problem solving action The appliance is The unit is not switched on Check the unit is plugged in correctly and not working switched on Plug and/ or lead are damaged Call your agent or qualified technician Fuse in the plug has blown Replace the fuse (UK Plug) Power supply... -
Page 62: Disposal
Disposal If the appliance is no longer of use and you wish to dispose of it, remove doors to prevent any small child from be trapped inside. Then please do in an environmentally correct way. Contact a qualified service technician: 1. -
Page 63: Technical Data
Technical data Model Blast Chiller (5 Trays) Climate Class Refrigerant Gas Refrigerant Charge Temperature Range (°C) Input Power Please refer to the information indicated on the product. You will find Rated Frequency the information on the rating plate on the back of the unit. The circuit Rated Voltage diagram is displayed on the back of the unit. -
Page 64: Warranty
Warranty A statutory warranty applies for this product. Damages caused by wrong treatment or operation, by false placement or storage, improper connection or installation, as well as force or other external influences are not covered by this warranty. We recommend careful reading of the operating instructions as it contains important information. - Page 65 Istruzioni d’uso Abbattitore SKF 5 Easy [Art. 45110250]...
- Page 66 Gentile cliente, Congratulazioni per l'acquisto di questo prodotto. Prenditi qualche minuto prima di iniziare a utilizzare l'apparecchio e leggi le seguenti istruzioni operative. Contenuto Panoramica Prodotto ......................35 Suggerimenti di sicurezza ....................36 Uso Previsto ........................37 Luogo e installazione ......................38 Funzionamento .........................
-
Page 67: Panoramica Prodotto
Panoramica Prodotto Descrizione articolo Abbattitore - (N.5 Teglie - GN e Euronorm) P2M054STD-Ver1.2... -
Page 68: Suggerimenti Di Sicurezza
Suggerimenti di sicurezza IMPORTANTE: Per la propria sicurezza leggere il manuale attentamente prima di installare o usare questo prodotto. Conservare il presente manuale per futuro riferimento. Consultare gli Standard locali e nazionali per garantire la conformità con quanto segue: 1. Legislazione sulla salute e sicurezza sul posto di lavoro 2. -
Page 69: Uso Previsto
Suggerimenti di sicurezza 19. NON usare dispositivi di lavaggio a getto/pressione per pulire l'apparecchio. 20. NON consentire ai bambini di giocare con l'imballaggio e smaltire i sacchetti di plastica in modo sicuro. 21. Le bottiglie che contengono una percentuale di alcol devono essere sigillate e posizionate verticalmente nel frigorifero. -
Page 70: Luogo E Installazione
Luogo e installazione Rimuovere l’apparecchio dall’imballaggio. Assicurarsi che tutte le pellicole protettive di plastica e i rivestimenti vengano completamente eliminati da tutte le superfici. Per evitare lesioni o danni all’unità, si consiglia di disimballare ed installare l’apparecchio in presenza di due persone. ... - Page 71 Luogo e installazione Funzionamento Se il cavo non raggiunge la presa elettrica più vicina, riorganizzare la disposizione dell’arredamento oppure rivolgersi a un elettricista per l’installazione di una nuova presa elettrica. Se l’alimentazione viene interrotta, attendere almeno 3 minuti prima di riavviare l’apparecchio per evitare danni al compressore.
-
Page 72: Funzionamento
Funzionamento ATTENZIONE: Questo abbattitore è un modello “plug-in”; una volta alimentato il prodotto si avvierà in modalità “Stand by”; sul diplay apparirà l’icona in rosso Per iniziare un’operazione sull’abbattitore tenere premuto il tasto START/STOP per 3s, il display mostrerà la temperatura all’interno della camera. Al termine della fase di abbattimento positivo si ha il passaggio automatico in modalità... - Page 73 Funzionamento COMBINAZIONI (COMBO) TASTI Combo per ABILITAZIONE o DISABILITAZIONE tastiera, una tastiera disabilitata non permette all’operatore di entrare nella lista parametri mentre uno dei cicli di abbattimento è in esecuzione. Visualizzazione parametri Ritorno alla visualizzazione della temperatura in camera LEGENDA ICONE LED SUL DISPLAY TERMOSTATO Se acceso, un ciclo di sbrinamento è...
- Page 74 Funzionamento 1. Accensione del prodotto ON/Modalità Stand-by. Tenere premuto pulsante START/STOP per 3s: il led si accenderà. Dalla modalità “Stand-by” ad acceso “ON”, tenere premuto il pulsante START/STOP per 3s: il led si spegnerà e sul display verrà visualizzata la temperatura della camera “rNP”...
- Page 75 Funzionamento Funzioni per l’abbattimento positivo e negativo I cicli di abbattimento positivo e negativo hanno due tipologie di lavoro principali: possono essere a “Temperatura controllata” oppure “Temporizzati” Se l’operatore sceglie il ciclo a “TEMPERATURA CONTROLLATA”, la temperatura viene rilevata dalla sonda spillone “n2P” e il ciclo terminerà quando si raggiungerà la temperatura pre-impostata nei parametri (+3°C per abbattimento positivo e -18°C per abbattimento negativo).
- Page 76 Funzionamento Possibili cicli operative di abbattimento: CICLO ABBATTIMENTO POSITIVO SOFT CICLO ABBATTIMENTO POSITIVO HARD CICLO ABBATTIMENTO NEGATIVO SOFT CICLO ABBATTIMENTO NEGATIVO HARD CICLO “GELATO” CICLO “FROST BUST” (-40°C) Ciclo abbattimento Positivo Soft Seguire le seguenti istruzioni per iniziare un ciclo di abbattimento positivo soft: Ciclo di abbattimento positivo soft a temperatura controllate è...
- Page 77 Funzionamento Ciclo abbattimento Positivo Hard Seguire le seguenti istruzioni per iniziare un ciclo di abbattimento positivo hard: Ciclo di abbatimento positivo hard a temperatura controllata è suddiviso nelle seguenti 3 fasi: Abbattimento positivo Hard Abbattimento positive Soft Conservazione Il Ciclo HARD viene utilizzato quando l’operatore vuole un ciclo di abbattimento positivo veloce (La camera scenderà...
- Page 78 Funzionamento Ciclo abbattimento Negativo Soft Seguire le seguenti istruzioni per iniziare un ciclo di abbattimento negativo soft: Ciclo di abbatimento negativo soft a temperatura controllate è suddiviso nelle seguenti 3 fasi: Abbattimento negativo Soft Abbattimento negativo Conservazione Il Ciclo SOFT viene utilizzato quando l’operatore vuole un ciclo di abbattimento negativo regolare (La camera non scenderà...
- Page 79 Funzionamento Ciclo abbattimento Negativo Hard Seguire le seguenti istruzioni per iniziare un ciclo di abbattimento negativo hard: Ciclo di abbatimento negativo hard a temperatura controllata è suddiviso nelle seguenti 3 fasi: Abbattimento positivo Hard Abbattimento negativo Conservazione Il Ciclo HARD viene utilizzato quando l’operatore vuole un ciclo di abbattimento negativo veloce.
- Page 80 Funzionamento Ciclo GELATO Nota: la sonda spillone non può essere utilizzata per i seguenti passaggi (La temperatura viene rilevata dalla sonda camera “rNP”). 1. Premere il pulsante GELATO ,i led inizieranno a lampeggiare, sul display verrà visualizzato il tempo 210min. 2.
- Page 81 Funzionamento L’abbattitore è adatto ad abbattere la temperatura di un prodotto alimentare (vedere la tabella con le temperature in relazione al prodotto). Non introdurre nell’abbattitore il cibo appena uscito dal forno, attendere qualche minuto prima di posizionare il prodotto dentro la camera ed iniziare il ciclo. Si ricorda che il tempo di abbattimento del prodotto alla temperatura desiderata, dipende da vari fattori come ad esempio: ...
- Page 82 Funzionamento MISURAZIONE TEMPERATURA AL CUORE DEL PRODOTTO Quando lo spessore del prodotto lo consente, utilizzare sempre la sonda di temperatura a spillone, per conoscere l’esatta temperatura raggiunta al cuore del prodotto, si suggerisce, inoltre, di non interrompere il ciclo di abbattimento o aprire la porta prima che si sia raggiunta la temperatura di +3°C, in abbattimento positivo e -18°C per quello negativo.
- Page 83 Funzionamento CONSERVAZIONE PRODOTTO COTTO ED ABBATTUTO Il prodotto cotto ed abbattuto può essere conservato in frigorifero mantenendo le qualità organolettiche fino a 5 giorni da quello di trattamento. Importante è rispettare la catena del freddo, mantenendo durante la conservazione una temperatura costante compresa tra 0°C ÷ 4°C, a seconda dell’alimento. Utilizzando la tecnica del sottovuoto, il tempo di conservazione può...
- Page 84 Funzionamento TEMPI DI ABBATTIMENTO Carico Carico Tempo di Ciclo Alimento Teglia massimo massimo abbattimento utilizzato PRIMI PIATTI Besciamella 4 cm 70 minuti POSITIVO GN1/1 - h 60mm Brodo di carne 6-7 cm 90 minuti POSITIVO GN 1/1 h 110mm Cannelloni al 4 Kg 3-4 cm 40 minuti...
-
Page 85: Parametri Principali
Parametri principali L’abbattitore ha N.2 livella di modalità di programmazione: PRIMO LIVELLO: “pr1” sono i parametri standard dalla fabbrica, e sono relativi alle funzionalità secondarie dell’apparecchio. SECONDO LIVELLO: Sono tutti quei parametri sensibili relativi al funzionamento dei 5 cicli base. (Nei 5 Cicli sopracitati, con i prametri variabili, non è incluso il ciclo “FROST BUST” comandato dal parametro “SEf”... - Page 86 Parametri principali SECONDO LIVELLO: solo per Ie seguenti 5 tipologie di ciclo ABBATTIMENTO POSITIVO “SOFT” ABBATTIMENTO POSITIVO “HARD” ABBATTIMENTO NEGATIVO “SOFT” ABBATIMENTO NEGATIVO “HARD” CICLO GELATO Nota: Ciclo FROST BUST (-40°C) fa riferimento alla lista parametri precedente“Pr1”(Valore “SEf”). Seguire le istruzioni precedenti per selezionare il ciclo di abbattimento desiderato. (Pag.44) ...
- Page 87 Parametri principali Parametro Significato Modalità gestione ciclo tEP: per temperatura; il ciclo viene svolto in accordo al parametro rEM. tim: a tempo; la durata del ciclo è determinato dai parametri Pd1, Pd2, Pd3 (3 fasi). Sbrinamento prima del ciclo Y= lo sbrinamento viene effettuato n= il ciclo inizia subito senza effettuare lo sbrinamento.
-
Page 88: Pulizia, Assistenza E Manutenzione
Pulizia, assistenza e manutenzione Spegnere e scollegare dalla rete di alimentazione prima della pulizia. Pulire l’esterno e l’interno dell’apparecchio più frequentemente possibile. La manutenzione dell’abbattitore deve includere almeno una pulizia periodica giornaliera della zona di carico per prevenire lo sviluppo e l’accumulo di batteri. ... -
Page 89: Accessorio Opzionale
Accessorio opzionale Quattro ruote Fissare due ruote dotate di freno nella parte inferiore/anteriore e due ruote prive di freno nella parte posteriore in basso. Procedimento: Seguire i 12 passi descritti qui di seguito per procedere alla sostituzione dei piedi con ruote. Nota: se desiderate acquistare accessori opzionali, chiedete ai responsabili di vendita per suggerimenti. - Page 90 Accessorio opzionale Come pulire Il condensatore Nota: Questo tipo di operazioni sull'apparecchio devono essere eseguite dal dipartimento assistenza cliente o da un tecnico qualificato, in quanto si è esposti a componentistica elettrica. P2M054STD-Ver1.2...
- Page 91 Accessorio opzionale Come assemblare la vaschetta raccolta condensa (Vaschetta GN1/1 non inclusa nel kit di montaggio) Dove riporre la sonda spillone mentre non è utilizzata P2M054STD-Ver1.2...
- Page 92 Accessorio opzionale Come invertire la porta P2M054STD-Ver1.2...
- Page 93 Accessorio opzionale P2M054STD-Ver1.2...
-
Page 94: Risoluzione Dei Problemi
Risoluzione dei problemi Problema Potenziale problema Azione per risolvere il problema L’apparecchio non L’unità non è accesa Controllare che l'unità sia collegata funziona correttamente e accesa La spina e / o il cavo sono Contattare il proprio rappresentante o un danneggiati tecnico qualificato Il fusibile nella spina è... -
Page 95: Smaltimento
Smaltimento Se l'apparecchio non viene più utilizzato e si desidera smaltirlo, rimuovere gli sportelli per evitare che bambini piccoli rimangano intrappolati all'interno. Quindi si prega di farlo in modo ecocompatibile. Contattare un tecnico qualificato: 1. Per recuperare tutto il freon / refrigerante 2. -
Page 96: Dati Tecnici
Dati Tecnici Modello Abbattitore (5 Teglie) Classe climatica Gas refrigerante Carica del refrigerante Range di temperatura (°C) Alimentazione in entrata Fare riferimento alle informazioni indicate sul prodotto. Troverete le Frequenza nominale informazioni sull'etichetta informativa sul retro dell'unità. Tensione nominale Il diagramma di circuito è mostrato sul retro dell'unità. Volume interno Peso netto Peso lordo... -
Page 97: Garanzia
Garanzia A questo prodotto si applica una garanzia di legge. I danni causati da un trattamento o funzionamento sbagliato, da posizionamento o conservazione errata, collegamento o installazione impropria, così come da forze o altre influenze esterne non sono coperti dalla garanzia.
Need help?
Do you have a question about the COOL-LINE SKF 5 Easy and is the answer not in the manual?
Questions and answers