
Subscribe to Our Youtube Channel
Related Manuals for Electrolux EOD6P60W


Summary of Contents for Electrolux EOD6P60W
- Page 1 User Manual Oven EOD6P60W EOD6P60X EOD6P60X0 KODDP60W KODDP60X electrolux.com/register...
-
Page 2: Table Of Contents
WE’RE THINKING OF YOU Thank you for purchasing an Electrolux appliance. You’ve chosen a product that brings with it decades of professional experience and innovation. Ingenious and stylish, it has been designed with you in mind. So whenever you use it, you can be safe in the knowledge that you’ll get great results every time. -
Page 3: Safety Information
SAFETY INFORMATION Before the installation and use of the appliance, carefully read the supplied instructions. The manufacturer is not responsible for any injuries or damage that are the result of incorrect installation or usage. Always keep the instructions in a safe and accessible location for future reference. -
Page 4: Safety Instructions
similar accommodation where such use does not exceed (average) domestic usage levels. Only a qualified person must install this appliance and • replace the cable. Do not use the appliance before installing it in the built-in • structure. Disconnect the appliance from the power supply before •... - Page 5 • Before mounting the appliance, check if • Make sure not to cause damage to the the appliance door opens without mains plug and to the mains cable. restraint. Should the mains cable need to be • The appliance is equipped with an electric replaced, this must be carried out by our cooling system.
- Page 6 The earth cord (green / yellow cable) must be • Discoloration of the enamel or stainless 2 cm longer than phase and neutral cables steel has no effect on the performance of (blue and brown cables). the appliance. • Use a deep pan for moist cakes. Fruit 2.3 Use juices cause stains that can be permanent.
- Page 7 • Before carrying out a Pyrolitic self- harmful to humans, including children, or cleaning function or the First Use please persons with medical conditions. remove from the oven cavity: 2.6 Internal lighting – any excess food residues, oil or grease spills / deposits. –...
-
Page 8: Installation
3. INSTALLATION 3.1 Building in WARNING! Refer to Safety chapters. www.youtube.com/electrolux www.youtube.com/aeg How to install your AEG/Electrolux Oven - Column installation (*mm) min. 550 min. 560 (*mm) min. 550 min. 560 ENGLISH... -
Page 9: Product Description
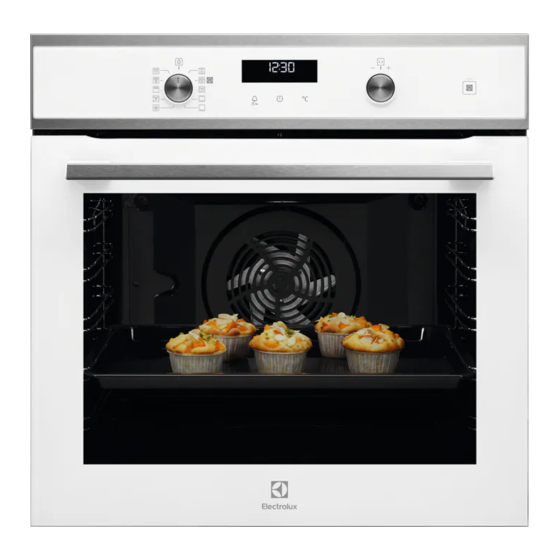
3.2 Securing the oven to the cabinet 4. PRODUCT DESCRIPTION 4.1 General overview Control panel Knob for the heating functions Power lamp / symbol Display Control knob (for the temperature) Temperature indicator / symbol Plus Steam Heating element Lamp Cavity embossment Shelf support, removable Shelf positions 4.2 Accessories... -
Page 10: Before First Use
5.2 Sensor fields / Buttons To set the MINUTE MINDER. Hold it for more than 3 seconds to turn on or turn off the oven lamp. To set a clock function. To check the oven temperature or the temperature of the core temperature sensor (if applicable). -
Page 11: Daily Use
7. DAILY USE WARNING! Step 2 Turn the control knob to select the tem‐ Refer to Safety chapters. perature. Step 3 When the cooking ends, turn the knobs 7.1 How to set: Heating function to the off position to turn off the oven. Step 1 Turn the knob for the heating functions to select a heating function. - Page 12 7.4 Heat-up indicator Heating func‐ Application When the oven function operates, the bars in tion the display appear one by one when the This function is designed to temperature in the oven increases, and save energy during cooking. disappear when it decreases. When you use this function, the Moist Fan Baking temperature in the cavity may...
-
Page 13: Clock Functions
8. CLOCK FUNCTIONS 8.1 Clock functions table Clock function Application To show or change the time of day. You can change the time of day only when the oven is off. Time of Day To set the length of cooking. Use only when a heating function is set. Duration To set the oven turn-off time. - Page 14 Step 4 Turn the knob for the temperature to set the hour. - press to confirm. When the set time ends the signal sounds for 2 min. Time setting flashes in the display. The oven turns off automatically. Step 5 Press any button to stop the signal.
-
Page 15: Using The Accessories
8.6 How to set function: Minute Minder Minute minder can be both set when the oven is turned on and off. Step 1 - press repeatedly. , 00 - flash. Step 2 Turn the knob for the temperature to set the seconds and then the minutes. When the time you set is longer than 60 min, hr flashes. -
Page 16: Additional Functions
Deep pan: Push the tray between the guide bars of the shelf support. Wire shelf, Deep pan: Push the tray between the guide bars of the shelf support and the wire shelf on the guide bars above. 10. ADDITIONAL FUNCTIONS 10.1 How to use: Child lock Step 2 When the function is on the oven cannot be... -
Page 17: Hints And Tips
10.4 Automatic switch-off 10.5 Cooling fan For safety reasons the oven turns off after When the appliance operates, the cooling fan some time, if a heating function works and turns on automatically to keep the surfaces of you do not change any settings. the appliance cool. - Page 18 Ramekins Pizza pan Baking dish Flan base tin Ceramic Dark, non-reflective Dark, non-reflective Dark, non-reflective 8 cm diameter, 5 28 cm diameter 26 cm diameter 28 cm diameter cm height 11.3 Moist Fan Baking For the best results follow suggestions listed in the table below.
- Page 19 (°C) (min) Tartlets, 8 pieces baking tray or dripping pan 20 - 30 Vegetables, poached, baking tray or dripping pan 35 - 45 0.4 kg Vegetarian omelette pizza pan on wire shelf 25 - 30 Mediterranean vege‐ baking tray or dripping pan 25 - 30 tables, 0.7 kg 11.4 Information for test institutes...
-
Page 20: Care And Cleaning
(°C) (min) Short bread True Fan Baking tray 2 and 4 140 - 150 25 - 45 Cooking Short bread Conventional Baking tray 140 - 150 25 - 45 Cooking Toast, 4 - 6 Grill Wire shelf max. 2 - 3 minutes Preheat the oven for 3 pieces first side;... - Page 21 12.2 How to clean: Cavity embossment Clean the cavity embossment to remove limestone residue after cooking with steam. Step 1 Step 2 Step 3 Pour: 250 ml of white vinegar into Let the vinegar dissolve the lime‐ Clean the cavity with warm water the cavity embossment.
- Page 22 Step 1 Set the function: - flashes. Step 2 Turn the control knob (for the temperature) to set the cleaning mode. Option Cleaning mode Duration Light cleaning 1 h 30 min Normal cleaning 2 h 30 min Step 3 - press to start the cleaning. Step 4 After cleaning, turn the knob for the heating functions to the off position.
- Page 23 Step 2 Lift and pull the latches until they click. Step 3 Close the oven door halfway to the first opening position. Then lift and pull to remove the door from its seat. Step 4 Put the door on a soft cloth on a stable sur‐ face.
-
Page 24: Troubleshooting
Make sure that you put the glass panels (A and B) back in the correct sequence. Check for the symbol / printing on the side of the glass panel, each of the glass panels looks different to make the disassembly and assembly easier. - Page 25 The oven does not turn on or does not heat Error codes If the display shows an error code that is not in this table turn the house fuse off and on to restart the Problem Check if... oven. If the error code recurs contact an Authorised You cannot activate or The oven is correctly Service Centre.
-
Page 26: Energy Efficiency
We recommend that you write the data here: Serial number (S.N.) ......... 14. ENERGY EFFICIENCY 14.1 Product Information and Product Information Sheet* Supplier's name Electrolux EOD6P60W 949499620 EOD6P60X 949499618 Model identification EOD6P60X0 949499623 KODDP60W 949499619 KODDP60X 949499621 Energy Efficiency Index 81.2... -
Page 27: Environmental Concerns
Keep breaks between baking as short as Use the residual heat to warm up other possible when you prepare a few dishes at dishes. one time. Keep food warm Cooking with fan Choose the lowest possible temperature When possible, use the cooking functions setting to use residual heat and keep a meal with fan to save energy. - Page 28 electrolux.com...
Need help?
Do you have a question about the EOD6P60W and is the answer not in the manual?
Questions and answers