
Related Manuals for Echelon ECH-ROW-s


Summary of Contents for Echelon ECH-ROW-s
- Page 3 Hello, I am Lou Lentine, President of Echelon, and I would like to welcome you to the Echelon community. You’ve made a great decision for yourself and your family. The Echelon Experience is an innovative combination of fitness products integrated with our state-of-the-art Echelon Fit App. This brand-new, fitness lifestyle connects your family, friends, the Echelon community, and Echelon instructors together to help you with your fitness goals.
- Page 4 FEDERAL COMMUNICATIONS COMMISSION (FCC) STATEMENT 15.21 YOU ARE CAUTIONED THAT CHANGES OR MODIFICATIONS NOT EXPRESSLY APPROVED BY THE PART RESPONSIBLE FOR COMPLIANCE COULD VOID THE USER’S AUTHORITY TO OPERATE THE EQUIPMENT. 15.105(B) THIS EQUIPMENT HAS BEEN TESTED AND FOUND TO COMPLY WITH THE LIMITS FOR A CLASS B DIGITAL DEVICE, PURSUANT TO PART 15 OF THE FCC RULES.
- Page 5 INNOVATION, SCIENCE AND ECONOMIC DEVELOPMENT CANADA (ISED) INNOVATION, SCIENCE ET DÉVELOPPEMENT ÉCONOMIQUE CANADA (ISED) THIS CLASS B DIGITAL APPARATUS COMPLIES WITH CANADIAN ICES-003 CET APPAREIL NUMÉRIQUE DE CLASSE B EST CONFORME À LA NORME NMB-003. CANADIAN NOTICE THIS DEVICE COMPLIES WITH ISED LICENSE-EXEMPT RSS STANDARD(S). OPERATION IS SUBJECT TO THE FOLLOWING TWO CONDITIONS: (1) THIS DEVICE MAY NOT CAUSE INTERFERENCE, AND (2) THIS DEVICE MUST ACCEPT ANY INTERFERENCE, INCLUDING INTERFERENCE THAT MAY CAUSE UNDESIRED...
-
Page 6: Important Safety Instructions
NOTE: CARE SHOULD BE TAKEN IN MOUNTING AND DISMOUNTING THE ROWER. BEFORE MOUNTING OR DISMOUNTING MOVE THE SEAT TO ITS LOWEST POSITION ON THE ECHELON® ROW RAIL AND COME TO A COMPLETE STOP. THE MANUFACTURER RECOMMENDS TO PLACE THE ECHELON® ROW IN A SPACE WHERE YOU HAVE TWO FEET OF CLEARANCE ON ALL SIDES OF THE ROWER FOR SAFE MOUNTING AND DISMOUNTING OF THE EXERCISE ROWER. - Page 7 WARNING - To reduce the risk of burns, fire, electric shock, or injury to persons. 1. An appliance should never be left unattended when plugged in. Unplug from outlet when not in use, and before putting on or taking off parts. 2.
- Page 8 IF YOU ANSWER “YES” TO ANY OF THE ABOVE QUESTIONS, YOU SHOULD SEEK FURTHER ADVICE FROM YOUR DOCTOR PRIOR TO USING THE Read the user manual fully and follow all instructions. This ensures your safety. • ALWAYS use the Echelon ® Row-s on solid, level ground and in a well lit and ventilated area.
- Page 9 • NEVER use the ROW if it is not properly/completely assembled or is damaged in anyway. • NEVER exceed the weight limit for this rower. The weight limit for this rower is 300 pounds. Do not use the Echelon ®...
- Page 10 • DO NOT use corrosive chemical liquids which may damage the cover. • Keep Children under the age of 13 away from the ROW-S. • ALWAYS keep pets away from the ROW-S. If any problems arise affecting the performance of the Echelon ROW-S , contact the manufacturer immediately. Always ®...
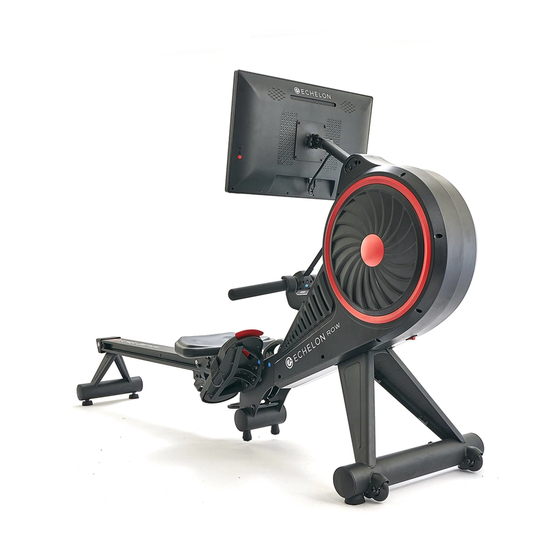
- Page 11 INCLUDES 1. Echelon® Row Base 2. Echelon® Row Rail 3. Rear Foot 4. Front Foot 5. M8*16 screws 6. M10*25 screws with washer 7. M8*16 screw with washer 8. M8*20 screw with washer 9. Hex Key 10. Left Foot Carriage 11.
-
Page 12: Account Creation
If you have purchased from one of our retailers, go to member.echelonfit.com and follow the on- screen instructions to choose where you purchased from, choose a plan, and setup your account. This info will be needed to login to your account on the Echelon Fit App. - Page 13 Step 1. Remove the bracket(No.14) Step 2. Place the front foot and hand Step 3. Tighten the screws with hex and bolt with hex key. tighten screws(No.6) into place. key. Step 4. Set rower upright and Step 5. Place seat on ground and lay Step 6.
- Page 14 Step 7. Place the rail onto rail Step 8. Place the four screws (No.5) Step 9. Tighten screws with hex key. bracket. into rail and hand tighten. ANGLE AWAY FROM ROW Step 10. Align front foot with screw Step 11. Tighten screws with hex Step 12.
- Page 15 Step 13. Tighten screws with hex Step 14. Connect the power cord Step 15. Route the power cable through the cable routing clips key. Repeat with left foot carriage. and toggle to power switch on. legs, as shown above. Step 17. To lock into place, pull up on Step 18.
- Page 16 Step 19. Connect the USB cord and power cord from tablet arm. Flip over the handle and place Pres s on the battery cover when Flip handle back over and place into the handle cradle. pulling out the activation strip. into handle cradle.
- Page 17 Press down the folding lock with Lift up the rail until you hear a To lower the rail, press down the your foot. click to ensure the rail is securely foot pedal at the joint and lower locked. the rail gently to the ground. To lock into place, pull up on this Pull up on the handle located Move the product.
- Page 18 To turn up the resistance, press To turn down the resistance, press To adjust footrest, push down on the right toggle. the left toggle. the red locking mechanism on the footrest. While holding red locking mechanism, pull up or push down the black sliding adjustment.
- Page 19 Adapter Input: 100-240V~, 50/60Hz 1.5A Adapter Output: 12.0V 5.0A DIMENSIONS: 85"L X 21"W X 48"H...
- Page 20 ® customer service at 833-937-2453 or at cs@echelon.com to determine whether it is necessary to return the unit. To return, securely pack the entire unit. Be sure carton clearly identifies sender by name and address. Attach a letter or card describing defect and original sales receipt.
Need help?
Do you have a question about the ECH-ROW-s and is the answer not in the manual?
Questions and answers