Advertisement
Quick Links
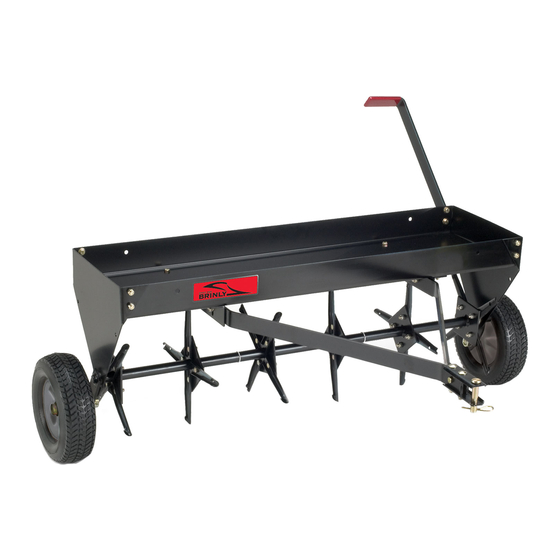
OWNER'S MANUAL
P L U G A E R A T O R
MODEL:
PA - 4 0 3 B H
PA - 4 0 3 B H - A
PA - 4 8 2 B H
PA - 4 8 2 B H - A
• Assembly
• Installation
• Operation
• Repair Parts
For use with Riders
and Lawn/Garden Tractors
Visit us on the web!
www.brinly.com
English Manual
Call Customer Service, Toll-Free: 877-728-8224
Important: This manual contains information for the safety
( 4 0 " & 4 8 " )
of persons and property. Read it carefully before
assembly and operation of the equipment!
1
L-1762-L
Advertisement

Subscribe to Our Youtube Channel
Related Manuals for Brinly PA-403BH


Summary of Contents for Brinly PA-403BH
- Page 1 For use with Riders and Lawn/Garden Tractors Call Customer Service, Toll-Free: 877-728-8224 Important: This manual contains information for the safety Visit us on the web! of persons and property. Read it carefully before www.brinly.com assembly and operation of the equipment! English Manual L-1762-L...
-
Page 2: Table Of Contents
INDRODUCTION ================================================================================================ CONGRATULATIONS on the purchase of your new Brinly-Hardy Plug Aerator! This accessory has been designed, engineered and manufactured to give you the best possible dependability and performance. Should you experience any problem you cannot easily remedy, please do not hesitate to contact our knowledgeable customer service department toll-free at 1-877-728-8224. -
Page 3: Safety
SAFETY ================================================================================================ • Keep the towing vehicle and attachment in good operating condition and keep safety devices in place. • The towing vehicle and attachment should be stopped and inspected for damage after striking a foreign object. Any damage should be repaired before restarting and operating the equipment. •... -
Page 4: Specifications
SPECIFICATIONS ================================================================================================ MODELS: MODELS: PA - 4 0 3 B H & PA - 4 0 3 B H - A PA - 4 8 2 B H & PA - 4 8 2 B H - A Maximum Towing Speed ....5 MPH Maximum Towing Speed . -
Page 5: Hardware Identifier
HARDWARE IDENTIFIER ================================================================================================ DO NOT RETURN PRODUCT IF YOU ARE MISSING PARTS. Illustrations on this page Please Call: 1 (877) 728-8224 are to scale for faster identification of hardware during assembly. Nut: Hex Lock: 5/16” ..B-1674P Washer: Lock Nut: Hex Lock: 5/8”... -
Page 6: Pa-403Bh
PART IDENTIFIER ================================================================================================ PA-403BH PA-482BH PA-403BH-A PA-482BH-A DESCRIPTION PART NO. PART NO. Clevis R-892-10 R-892-10 Side Plate B-4851-10 B-4901-10 Tray With Labels B-6173-BH B-6257-BH Tow Bar B-6259-10 B-6259-10 Plugging Spoon B-4855-10 B-4855-10 Axle Assembly B-5700-10 B-5702-10 Lift Handle Assembly B-5698-10... -
Page 7: Assembly
• Pliers • Gloves ASSEMBLY: 40” Plug Aerator ( PA-403BH ) ================================================================================================ If you are assembling the 48” model (PA-482BH), please skip to page 15 of this manual. Not sure which model you have? Page 4 will clear up any confusion. -
Page 8: Assembly
ASSEMBLY: 40” Plug Aerator ( PA-403BH ) ================================================================================================ STEP 2-A - - - - - - - - - - - - - - - - - - - - - - - - - - Align the Side Plates (5) with Tray (6) as illustrated here. - Page 9 ASSEMBLY: 40” Plug Aerator ( PA-403BH ) ================================================================================================ STEP 3 - - - - - - - - - - - - - - - - - - - - - - - - - - - - - - Assemble Mount Brackets (31) to Tray (6) as shown.
- Page 10 ASSEMBLY: 40” Plug Aerator ( PA-403BH ) ================================================================================================ STEP 4 - - - - - - - - - - - - - - - - - - - - - - - - - - - - - - - - - - C.
- Page 11 ASSEMBLY: 40” Plug Aerator ( PA-403BH ) ================================================================================================ STEP 6 - - - - - - - - - - - - - - - - - - - - - - - - - - - - - - - - - - - - - - - - - - - - - - - - - - - - - - - - - - - - - - - - - - - - - - - - - - - - - -...
- Page 12 ASSEMBLY: 40” Plug Aerator ( PA-403BH ) ================================================================================================ STEP 7 - - - - - - - - - - - - - - - - - - - - - - - - - - - - - - - - - - - - - - - - - - - - - - - - - - - - - - - - - - - - - - - - - - - - - - - - - - - - - -...
- Page 13 ASSEMBLY: 40” Plug Aerator ( PA-403BH ) ================================================================================================ STEP 8 - - - - - - - - - - - - - - - - - - - - - - - - - - - - Combine: - x1 Hex Bolt (22) - 5/8” x 4”...
- Page 14 ASSEMBLY: 40” Plug Aerator ( PA-403BH ) ================================================================================================ STEP 10 - - - - - - - - - - - - - - - - - - - - - - - - - - - - Adjustment Bolts...
- Page 15 ASSEMBLY: 48” Plug Aerator ( PA-482BH ) ================================================================================================ If you are assembling the 40” model (PA-403BH), please go back to page 7 of this manual. Not sure which model you have? Page 4 will clear up any confusion. STEP 1...
- Page 16 ASSEMBLY: 48” Plug Aerator ( PA-482BH ) ================================================================================================ STEP 2-A - - - - - - - - - - - - - - - - - - - - - - - - - - - - - - Align the Side Plates (5) with Tray (6) as illustrated here.
- Page 17 ASSEMBLY: 48” Plug Aerator ( PA-482BH ) ================================================================================================ STEP 3 - - - - - - - - - - - - - - - - - - - - - - - - - - - - - - Assemble Mount Brackets (31) to Tray (6) as shown.
- Page 18 ASSEMBLY: 48” Plug Aerator ( PA-482BH ) ================================================================================================ STEP 4 - - - - - - - - - - - - - - - - - - - - - - - - - - - - - - - - - - C.
- Page 19 ASSEMBLY: 48” Plug Aerator ( PA-482BH ) ================================================================================================ STEP 6 - - - - - - - - - - - - - - - - - - - - - - - - - - - - - - - - - - - - - - - - - - - - - - - - - - - - - - - - - - - - - - - - - - - - - - - - - - - - - - SHORT FACES SHORT...
- Page 20 ASSEMBLY: 48” Plug Aerator ( PA-482BH ) ================================================================================================ STEP 7 - - - - - - - - - - - - - - - - - - - - - - - - - - - - - - - - - - - - - - - - - - - - - - - - - - - - - - - - - - - - - - - - - - - - - - - - - - - - - - NOTE: Make sure the Axle Assembly Flat Plate (10) and Lift Handle Assembly (11)
- Page 21 ASSEMBLY: 48” Plug Aerator ( PA-482BH ) ================================================================================================ STEP 8 - - - - - - - - - - - - - - - - - - - - - - - - - - - - Combine: - x1 Hex Bolt (22) - 5/8” x 4” - x1 Flat Washer (25) - 5/8”...
-
Page 22: Operation, Maintenance And Service
ASSEMBLY: 48” Plug Aerator ( PA-482BH ) ================================================================================================ STEP 10 - - - - - - - - - - - - - - - - - - - - - - - - - Adjustment Bolts LEVELING The final step is to level Tray (6) using adjustment bolts as shown here and installed in Step 2. - Page 23 (OR scan the QR codes below) TO DETERMINE LAWN CONDITION: PA-403BH & PA-403BH-A Dig a small amount of your soil (about three inches deep). Roll it into a small ball in the palm of your hand. Soil forms a ball...
- Page 24 USE AND CARE ================================================================================================ OPERATION MOUNTING CAUTION : AND TRANSPORTING • After first thirty minutes of use check all fasteners for tightness. - - - - - - - - - - - - - - - - - - - - - - - - - - - - - - - •...
- Page 25 - Diameter: 1/2” 2. In North America and canada, call - Pin Length: 3” 1-877-728-8224 and provide product serial number and model number. NOTE: Additional accesories are also available in our Parts Store online: shop.brinly.com English Manual L-1762-L...
- Page 26 PART ExPLOSION ================================================================================================ INSTALLATION QUESTIONS? MISSING PARTS? NEED REPLACEMENT PARTS? DON’T GO BACK TO THE STORE! Please call Customer Service Department Toll Free 877-728-8224 OR Email: customerservice@brinly.com English Manual L-1762-L...
- Page 27 PA-403BH PA-482BH PA-403BH-A PA-482BH-A DESCRIPTION PART NO. PART NO. Wheel 1009097 1009097 Side Plate B-4851-10 B-4901-10 Tube Assembly, End B-5309-10 B-4862-10 Tube Assembly, center B-5311-10 B-4865-10 Lift Handle Assembly B-5698-10 B-5698-10 Center Plate B-4902-10 Mount Bracket B-6171-10 B-6258-10 Tray, with Labels...
-
Page 28: Limited Warranty
MANUFACTURER’S LIMITED WARRANTY AERATORS The limited warranty set forth below is given by Brinly-Hardy Company with respect to new merchandise purchased and used in the United States (its possessions and territories) and Canada. Brinly-Hardy company warrants the products listed below against to use this product.
Need help?
Do you have a question about the PA-403BH and is the answer not in the manual?
Questions and answers