Advertisement
Quick Links
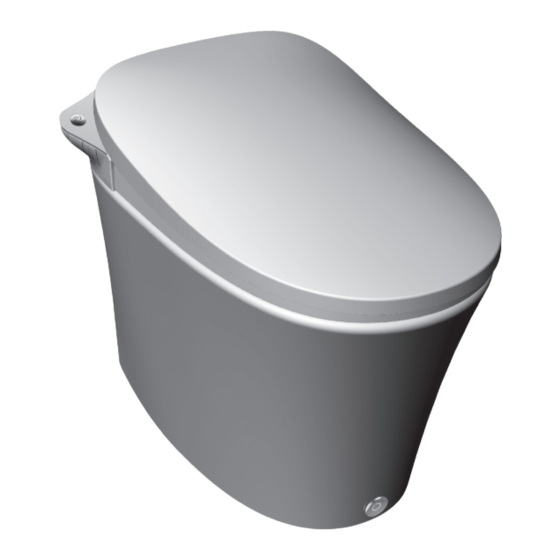
智能坐便器
瓦尔登系列
安装说明书
Intelligent Toilet
WALDEN Series
INSTALLATION INSTRUCTIONS
如需安装支持,配件丢失等,请联系MOEN。
对于中国大陆以外的市场,请自选当地经销商。
400-630-8866
(中国大陆)
www.moen.cn
(中国大陆)
(中国大陆以外)www.moen.com.hk
PLEASE CONTACT MOEN FIRST
For Installation Help, Missing or Replacement
Parts.For markets exclude Chinese mainland,
please consult your local dealer.
(China Mainland) 400-630-8866
(China Mainland) www.moen.cn
(Exclude China Mainland) www.moen.com.hk
推荐工具
为了安全和让安装和替换变得容易,Moen建议
您使用以下工具:
HELPFUL TOOLS
For safety and ease of replacement, Moen rec-
ommends the use of these helpful tools.
记号笔
活动扳手
Marker Pen
Adjustable Wrench
量杯
密封胶
Measuring Cup
Sealant
字螺丝刀
美工刀
Utility Knife
Screwdriver
卷尺
螺纹密封带
Tape Measure
Thread Seal Tape
图片仅供参考
(款式因型号而异)
Image is for reference only
(Style varies by model)
记录购买的型号:
(保存安装说明书以备将来参考)
Record Purchased Model Number:
(Save instruction sheet for future reference)
INS11035A - 12/26
Advertisement

Related Manuals for Moen WALDEN Series


Summary of Contents for Moen WALDEN Series
- Page 1 Image is for reference only (Style varies by model) 推荐工具 为了安全和让安装和替换变得容易,Moen建议 您使用以下工具: HELPFUL TOOLS 记录购买的型号: For safety and ease of replacement, Moen rec- (保存安装说明书以备将来参考) ommends the use of these helpful tools. Record Purchased Model Number: (Save instruction sheet for future reference) 字螺丝刀 记号笔...
- Page 2 功能表 Function Table SW1296CS SW1295CS SW1294CS SW1293CS SW1292CS SW1291CS 功能分类 SW1296DS SW1295DS SW1294DS SW1293DS SW1292DS SW1291DS 型号 Model Functional 深空灰 深空灰 香槟金 深空灰 香槟金 太空银 功能 Function Dark Grey Dark Grey Golden Dark Grey Golden Silver Classification 控制类Controlling 遥控控制 Remote Control 臀洗...
- Page 3 产品整体图和配件清单 Product Overview and Parts List 缓冲垫 Cushion 安全须知标贴 Caution Label 座盖 Lid 暖风出口 Warm Air Outlet 冲水/停止按键 Flush/Stop Button 臀洗/妇洗按键 Rear Wash/Front Wash Button 清洗器 Nozzle 电源插头(带漏电保护功能) Power Plug (with earth leakage 感应区域 Seat Sensor protection function) 陶瓷冲水系统供水软管 加热座圈 Heating Seat Water Supply Hose For The Ceramic Flushing System 前置净滤器...
- Page 4 物品清单 List of Articles 停电冲水电池盒组件 智能坐便器 前置净滤器 角阀 (含电池1块) Smart Toilet Pre-filter Angle Valve Battery Box Assembly For Emergency Flushing (Including Battery ×1) 遥控器组件(含支架1个、数据线1根) 油泥 说明书、有害物质清单 Remote Controller Assembly Wax Ring Manual, Hazardous Substance List (Including Holder×1, Data Cable×1) ※Please confirm whether the contents of the package are ※请确认包装内物品是否完整,如有缺失,请及时与我们的客户中心...
-
Page 5: Precautions Before Installation
产品安装 Product Installation Precautions Before Installation 一.安装前注意事项 The following precautions are related to safety and may cause 以下注意事项均与安全密切相关,根据不同情况可能造成重大 major consequences according to different situations. Please 后果,请您务必遵守。 be sure to observe them. Warning: If you ignore this warning and misuse it, it may 警告:如果无视警告而误操作时,有可能造成人员伤亡。... - Page 6 二.安装步骤 Installation Steps 水压的确认 将包装箱向上提取 最低动态工作水压为0.14MPa,另外最高静态水压为0.75MPa。 依据下图,将相关配件放置在一边备用,再将包装箱向上提取。 Extract the packing box upwards. 最低水流量测定方法。 Based on the following drawing, place the relevant accessories 打开供水角阀,测量10秒钟流出的水量超过3升。 aside for backup, and then extract the packing box upwards. (使用工具:秒表、量杯)。 ※如无法满足以上条件,则无法达到最佳的冲水效果, 需增加增 压泵来增压。 Confirmation of water pressure The minimum dynamic operating water pressure is 0.14MPa, and the maximum static water pressure is 0.75MPa.
- Page 7 带接地、防水、 防溅电源插座 With a grounded, waterproof, 供水角阀 splash-proof Angle Valve power outlet 排污口 Outlet 地面排污口 Floor Drain 油泥 Wax Ring 十字标记 Cross Mark 。 拆卸以前的供水角阀,安装上所配置的供水角阀 将油泥安装在陶瓷底部排污口上,注意连接紧密。 wax ring Install the on the drain outlet at the bottom of the ※在拆卸之前要先关闭总角阀。 ※在更换角阀前,请先排净管道中的泥沙等杂物,直至清水流出。...
- Page 8 陶瓷冲水系统供水软管 Water Supply Hose For The Ceramic Flushing System 供水软管联接螺母锁 紧扭力推荐7N ·m, 不能超过18N ·m。 The locking torque of the water supply hose coupling nut is recommended to be 7N·m, not more than 18N·m. 前置净滤器 Pre-filter 供水角阀 墙 Angle Valve Wall 遥控器支架...
- Page 9 开 Open 停电冲水电池盒组件 关 Battery Box Assembly Closed For Emergency Flushing 停电冲水电池的安装 确认通水 1.将连接线从图示处取出。 1.将供水角阀打开到最大。 2.将防水DC电源插头连接好,并拧紧防水帽。 2.确认各连接部位没有漏水。 3.如图所示将电池盒放置合适的位置。 ※如漏水,请将螺母类重新拧紧,进行再次安装。 Confirm the water ※电池、连接线有正负极之分,请勿强行插入,否则会导致产品 1.Open the water supply Angle valve to maximum. 损坏。如有疑问请致电客服电话或当地经销商。 2.Make sure there is no leakage at the link. 停电冲水电池的更换...
- Page 10 1.确认插头指示灯是否亮起,如指示灯变暗,请试按复位开关。 2.产品指示灯点亮,确认智能坐便器处于开机状态。 3.长按“ ”秒,切换开关机。 1.Confirm whether the plug indicator light is lit-up. If the indicator light turns dark, please try to press the reset switch. 2.A lit-up product indicator light will confirm that the smart toilet is powered-on. Rear 3.Long press " "...
-
Page 11: Safety Precaution
使用说明 Use Instructions Safety Precaution 一.安全注意事项 Read all instructions before use 使用前请详细阅读 Thanks for purchasing our products.In order to make a better 感谢您购买本公司的产品,为了您更好的享用本产品,请详 use of the product,please read this manual carefully and install 细阅读本说明书后正确使用,阅读完毕后请妥善保管。 the product correctly.Keep this manual properly for future 此处列出的注意事项是与安全相关的重要内容,根据不同情... - Page 12 警告 Warning 本产品必须可靠接地。 请勿将点燃的香烟及其他燃烧物投入坐便器内。 ※否则可能会因故障或短路而导致触电。 ※否则容易发生火灾。 Do not throw the lit cigarettes or other burning things ※当不确定时,请联系电器安装公司。 into the toilet. The product should be electrically grounded appropriately. Otherwise fire hazard may occur. ※ ※ Not doing so may cause electric shock due to malfunction or short circuit, ※...
- Page 13 儿童不应玩耍本产品。 请勿把电源线随意拉拽、破损、强行弯曲和 ※否则可能造成人身伤害。 扭曲、拉伸、卷曲、打捆、承重、过度夹挤。 Do not leave your children playing with the product. ※否则电源线破损会导致触电或火灾。 Doing so may cause the children get injured. ※ Do not pull,damage,bend by force,twist,tense,curl,knot,crimp the cord. ※ Doing so would cause the broken of the cord,which would leads electric shock or fire hazard.
- Page 14 请勿向坐便器或遥控器内部加水或清洁剂。 请避免安装在潮湿及易浸到水的浴室内使用。 请勿用水或清洁剂弄湿坐便器及电源插头。 请勿将水喷淋到本产品上面或用水冲洗,以 ※否则可能会有触电和发生火灾的危险。 防内部进水,造成损失。 Do not add water or detergent to the toilet bowl or remote ※否则容易引发触电、火灾。 controller.Do not wet the toilet bowl or power plug with water or Please do not install it in the wet environment or in the bathroom detergent.
- Page 15 注意 Caution 请勿长时间使用座温的“高”、“中”档。 请避免阳光直射或将取暖器靠近本产品。 ※否则长时间使用会有烫伤的危险。 ※否则可能造成产品变色。 Do not use seat temperature,”high”、”medium” gear Keep the product away from direct sun light and for a long term. heating apparatus. ※Otherwise, it may cause discoloration of the product. Otherwise,it may have a risk of scald for long-term use. ※...
- Page 16 二.遥控器的使用说明 Remote Control Use Instructions 唤醒按键 Wake-up Button 冲水Flushing 便后冲水 遥控器按键背光点亮 Flushing after urination Remote controller button backlight lit up 烘干Wind Drying 停止Stop 停止臀洗Stop rear wash 通过暖风使被清洗部位干燥 停止妇洗Stop front wash Drying the washed part by wind 停止烘干Stop wind drying 臀洗Rear Wash 档位指示灯Gear Indicator Light 清洗臀部...
- Page 17 Remote Control Code 遥控器对码 If you have more than two items of the same brand smart toilet, 如果用户装有两台或以上同品牌智能坐便器,使用遥控器时可 there maybe interaction while using remote control. In this 能会有相互影响的现象,此时使用遥控器对码功能,保证遥控 condition, use the remote control code matching function to 器和产品的唯一性。执行对码操作时,必须将附近其他智能坐 match the remote control and the toilet. During match operation, 便器的电源插头拔掉。...
- Page 18 停止 Stop 烘干(暖风烘干)Wind Drying 按下“ ”按键。停止臀洗、妇洗、烘干功能。 按下“烘干”按键,对清洗过的部位烘干。 ※臀洗和妇洗,具有4分钟后自动停止功能。 第一次按动按键时,显示当前温度档位。再次按动 Press the " " button to stop the rear wash, front 按键,则为切换温度档位,即可设定为适宜的温度。 wash, and drying functions. ※烘干具有4分钟后自动停止功能。 ※The rear wash and front wash can be stopped Press the "Wind Drying" button to dry the cleaned parts. automatically after 4 minutes.
- Page 19 风温Wind Temperature 冷热按摩Hot and Cold Massage 风温Wind Temperature 立体按摩 3D Massage 按下“冷热按摩”按键,冷热按摩功能开启 按下“立体按摩”按键,立体按摩功能开启 或关闭。 或关闭。 在臀洗、妇洗、智能臀洗和智能妇洗模式下, 在臀洗、妇洗、智能臀洗和智能妇洗模式下, 按冷热按摩按键来实现水温的冷热交替清洗。 按立体按摩按键实现水柱的前后来回清洗、 ※该功能只能在清洗模式下才能使用 水压的强弱交替清洗、水温的冷热交替清洗 Press the "Hot and Cold Massage" button to 同时进行,达到立体按摩效果。 turn on or off the hot and cold massage function. ※该功能只能在清洗模式下才能使用。...
- Page 20 冲水/停止按键Flush/Stop Button 按下“ ”按键。 短按实现冲水,长按实现开/关机。 Press the " " button. Flush by the short press and turn it on/off by the long press. 冲水/停止按键Flush/Stop Button 臀洗、妇洗功能运行时。 短按按下“ ”按键,功能停止。 The rear wash and front wash are functioning. Short press thee " "...
- Page 21 Sterilize the nozzle with ultraviolet ray. 喷枪紫外线杀菌Nozzle UV Sterilization UV sterilization starts after 10 seconds rising from the seat, and 对喷头进行紫外杀菌。 stops after working for 3 minutes. ※The UV sterilization runs automatically again if the toilet is out of 离座10秒后启动紫外线,工作3分钟停止。 use for 12 hours.
- Page 22 更多人性化贴心设计More Humanized and Thoughtful Design Nozzle Self Cleaning 喷嘴自洁 ● ● The washer can automatically clean, keeping bacteria and 清洗器自动清洁,细菌污渍统统远离。 stains away. 座圈/座盖缓降 ● Soft-close Seat/Cover ● 产品增加阻尼功能,使座圈/座盖平稳起落,从而起到良好 The product has a damping function to make the seat/cover 的静音效果。 rise and fall smoothly, thus playing a good silent effect. 即热恒温...
- Page 23 清洁保养方法 Cleaning and Maintenance Please clean and maintain the product regularly for the normal 为了保证产品的正常使用,请定期对产品进行清洗保养。 use of the product. 注意: Note: 在保养前请切断电源,关闭供水角阀,停止供水。 ● Before maintenance, please cut off the power supply, close 保养过程中严禁用水冲洗本产品。 ● ● the water supply angle valve, and stop the water supply. Do not rinse this product with water during maintenance.
- Page 24 WARNING Do not add water or detergent to the toilet or remote control. 请勿向坐便器或遥控器内部加水或清洁剂。 Do not wet the toilet and power plug with water or detergent. 请勿用水或清洁剂弄湿坐便器及电源插头。 Note: There may be a risk of electric shock and fire. 注意:否则可能会有触电和发生火灾的危险。 It is recommended to replace the filter element once a year. 建议1年更换一次滤芯。...
- Page 25 常见故障诊断 Common Fault Diagnosis Please read the following contents and try to solve the fault in 如果发现类似故障,请先阅读以下内容尝试其处置方法来排解故障 other disposal methods if similar faults are found, or contact 问题,若仍无法解决问题时,请联系销售单位或拨打客户服务中心 the sales department or call customer service center if the 电话进行联系。 fault cannot still be solved. 电源开关...
- Page 26 暖风烘干/风温 Warm Air Drying/Wind Temperature 故障现象 故障分析 故障处理 Failure phenomenon Failure analysis Troubleshooting 检查烘干是否设置在关闭档 参照说明书调节暖风 Check whether the drying temperature is set at Adjust the drying temperature according to the 烘干吹冷风 normal temperature instructions Drying blow cold air 烘干加热部件是否损坏 请专业人员维修 Whether the drying heating parts are damaged Ask a professional to repair 座温...
- Page 27 其他 Other 故障现象 故障分析 故障处理 Failure phenomenon Failure analysis Troubleshooting 脚触翻盖/翻圈无法开启或关闭 1.拔出插头一分钟后重新通电 ※仅限于部分型号 2.上述处理无效,请专业人员维修 Fails to enable or disable 自动阻尼功能故障 1.Unplug the plug for one minute and then power it on again the Foot-touch flipping for Automatic damping function failure Cover/Seat 2.If the above method is invalid, please ask the specialized ※This function is limited...
- Page 28 ,对于中国大陆以外的市场, 此产品的保修及保障服务详情请咨询当地经销商。 摩恩公司对摩恩保修拥有最终解释权。 For markets exclude Chinese mainland, the terms and conditions of warranty shall differ between product categories and countries. Please refer to warranty stated by local distribution. Moen Incorporated shall have the final interpretation of Moen warranties.
Need help?
Do you have a question about the WALDEN Series and is the answer not in the manual?
Questions and answers