Advertisement
Quick Links
INSTALLATION
AND MAINTENANCE
INSTRUCTIONS
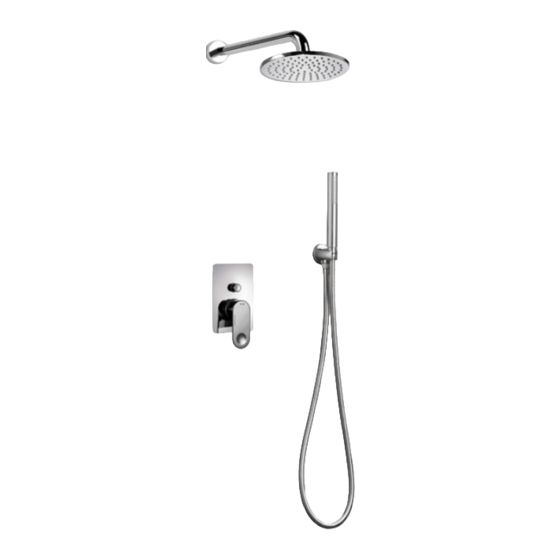
SHOWER KIT PRESSURE BALANCE
YOUNG
99270610+07102110
WILD
99270610+08102110
MIMO
99270610+10201110
PIN
99270610+48102110 - 99270710+48201110
88
99270610+88102110 - 99270710+88201110
ITALO/BELLA
INSTRUCTIONS D'INSTALLATION ET D'ENTRETIEN
SHOWER KIT PRESSURE BALANCE
INSTRUCCIONES PARA LA INSTALACIÓN
Y EL MANTENIMIENTO
JUEGO DE DUCHA PRESSURE BALANCE
99270610+91102710 - 99270710+91201310
Advertisement

Related Manuals for PALAZZANI YOUNG 99270610+07102110


Summary of Contents for PALAZZANI YOUNG 99270610+07102110
- Page 1 INSTALLATION AND MAINTENANCE INSTRUCTIONS SHOWER KIT PRESSURE BALANCE YOUNG 99270610+07102110 WILD 99270610+08102110 MIMO 99270610+10201110 99270610+48102110 - 99270710+48201110 99270610+88102110 - 99270710+88201110 ITALO/BELLA 99270610+91102710 - 99270710+91201310 INSTRUCTIONS D’INSTALLATION ET D’ENTRETIEN SHOWER KIT PRESSURE BALANCE INSTRUCCIONES PARA LA INSTALACIÓN Y EL MANTENIMIENTO JUEGO DE DUCHA PRESSURE BALANCE...
- Page 2 YOUNG YOUNG YOUNG 99270610+07102110 07K04710 07K06610 WILD WILD 99270610+08102110 08K06810...
- Page 3 99270710+48201110 48K05610 48K06410 99270610+48102110 99270710+88201110 88K05610 88K05710 99270610+88102110...
- Page 4 ITALO/BELLA ITALO/BELLA ITALO/BELLA 99270710+91201310 91K04110 91K04210 ITALO/BELLA 99270610+91102710 ITALO/BELLA ITALO/BELLA 91K04410 91K04510...
- Page 5 MIMO MIMO 99270710+10201110 10K06910...
- Page 6 SPARE PARTS / MONTAJE DE REFACCIONES 1A - YOUNG code 99162010 WILD code 99169919 PIN - 88 - ITALO/BELLA code 99166410 1B PIN - 88 - ITALO/BELLAcode 99160010 2 - code 99020599 3 - code 99230702 4 - code 99230810 ...
- Page 7 ASSEMBLY / MONTAJE EXAMPLE CONCEALER 1 WAY EJEMPLO MEZCLADOR 1 VÍA Altezza consigliata Recommended height soffione doccia head shower. Altura aconcejada por cabeza Recommended height 1° uscita Acqua miscelata 1˚ exit Mixed water de ducha. head shower 1˚ salida Agua mezclada exit Mixed water 2150 mm Altezza consigliata...
- Page 8 ASSEMBLY / MONTAJE EXAMPLE CONCEALER 2 WAYS EJEMPLO MEZCLADOR 2 VÍAS Altezza consigliata Recommended height soffione doccia head shower. Altura aconcejada por cabeza Recommended height 1° uscita Acqua miscelata 1˚ exit Mixed water de ducha. head shower 1˚ salida Agua mezclada exit Mixed water 2150 mm Altezza consigliata...
- Page 9 ASSEMBLY / MONTAJE EXAMPLE CONCEALER 1 WAY EJEMPLO MEZCLADOR 1 VÍA Altezza consigliata Recommended height soffione doccia head shower. Altura aconcejada por cabeza Recommended height 1° uscita Acqua miscelata 1˚ exit Mixed water de ducha. head shower 1˚ salida Agua mezclada exit Mixed water 2150 mm Pavimento / Floor...
- Page 10 ASSEMBLY / MONTAJE EXAMPLE CONCEALER 2 WAYS EJEMPLO MEZCLADOR 2 VÍAS Recommended height Altezza consigliata soffione doccia head shower. Altura aconcejada por cabeza Recommended height 1˚ exit Mixed water 1° uscita Acqua miscelata de ducha. head shower 1˚ salida Agua mezclada exit Mixed water 2150 mm Altezza consigliata...
- Page 11 ASSEMBLY / MONTAJE...
- Page 12 ASSEMBLY / MONTAJE mixed water mixed water red:hot blue:cold water water...
-
Page 13: Montaje En Pared
ASSEMBLY / MONTAJE WALLMOUNTING ▪ Drill the wall, paying attention to minimum and maximum deep measure- ments of the recessed, indicated on protection cover, put on concealed dinghy. ▪ Place the recessed into the wall. ▪ Connect the exit placed in the upper part of the faucet (1 way concealed body), or connect the upper exit to the handshower and the lower one to the shower head/bath spout (2 ways exit) NB: It’s of fundamental importance to make a test of concealed... - Page 14 ASSEMBLY / MONTAJE...
- Page 15 ASSEMBLY / MONTAJE EXTERNAL PARTS MOUNTING ▪ Insert the o-ring or the gasket in its respective place into the holes of the plate-rose. ▪ Fit the plate on concealed dinghy, paying attention not to ruin the finishing when mounting, apply silicone on the plate and place it perfectly fitted to the wall.
- Page 16 ASSEMBLY / MONTAJE...
-
Page 17: Cartridge Maintenance
MAINTENANCE / MANTENIMIENTO Cartridge maintenance To perform maintenance or check the cartridge, remember to shut off the water supply and relieve internal pressures by opening the tap. Remove the cap, if present, unscrew the grub screw and remove the handle. With the appropriate key dismount the ring of block. -
Page 18: Technical Specs
Technical specs Hot supply index left, red color Cold supply index right, blue color Limits of use recommended by UNI EN 817 for good functioning Pressure Min = 1 bar Max = 5 bar Temperature Max = 65 Warning It is of fundamental importance that the device is installed respecting the input positions of the water supply, hot on the left and cold on the right. -
Page 19: Características Técnicas
Características técnicas índice de suministro agua caliente a la izquierda de color rojo índice de suministro agua fría a la izquierda de color azul Límites de utilización recomendados por UNI EN 817 para un correcto funcionamiento Presión Min = 1 bar Max = 5 bar Temperatura Max = 65... - Page 20 www.palazzani.eu...
Need help?
Do you have a question about the YOUNG 99270610+07102110 and is the answer not in the manual?
Questions and answers