
Related Manuals for Jensen JTA-475


Summary of Contents for Jensen JTA-475
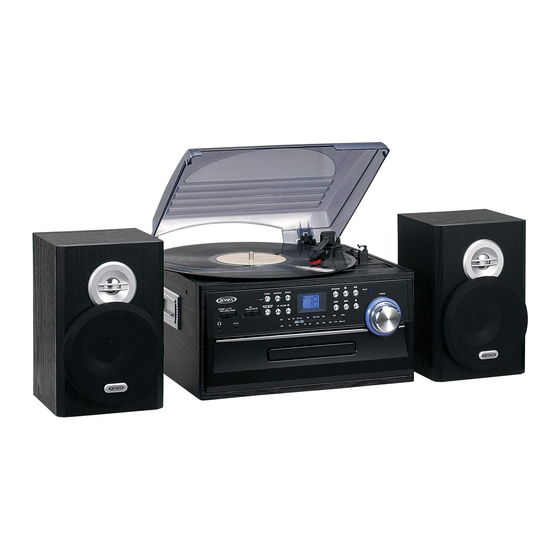
- Page 1 3-SPEED STEREO TURNTABLE WITH CD AND CASSETTE MUSIC SYSTEM AND PITCH CONTROL MODEL: JTA-475 USER MANUAL PLEASE READ THIS USER MANUAL COMPLETELY BEFORE OPERATING THIS UNIT AND RETAIN THIS BOOKLET FOR FUTURE REFERENCE.
-
Page 2: Important Safety Instructions
WARNING TO PREVENT FIRE OR SHOCK HAZARD, DO NOT USE THIS PLUG WITH AN EXTENSION CORD, RECEPTACLE OR OTHER OUTLET UNLESS THE BLADES CAN BE FULLY INSERTED TO PREVENT BLADE EXPOSURE. TO PREVENT FIRE OR SHOCK HAZARD, DO NOT EXPOSE THIS APPLIANCE TO RAIN OR MOISTURE. The Caution Marking is located at the back enclosure of the apparatus. - Page 3 15. This appliance shall not be exposed to dripping or splashing water and that no object filled with liquids such as vases shall be placed on the apparatus. 16. Do not overload wall outlet. Use only power source as indicated. 17.
- Page 4 This symbol indicates that this product incorporates double insulation between hazardous mains voltage and user accessible parts. CAUTION TO PREVENT ELECTRIC SHOCK, MATCH WIDE BLADE OF PLUG TO WIDE SLOT. FULLY INSERT THE PLUG TO MAIN POWER SOCKET. SAVE THESE INSTRUCTIONS CAUTION Follow the advice below for safe and appropriate operation.
-
Page 5: Important Notes
PRECAUTION FORE USE UNPACK ALL PARTS AND REMOVE PROTECTIVE MATERIAL. DO NOT CONNECT THE UNIT TO THE MAINS BEFORE CHECKING THE MAINS VOLTAGE AND ALL OTHER CONNECTIONS HAVE BEEN MADE. DO NOT COVER ANY VENTS AND MAKE SURE THAT THERE IS A SPACE OF SEVERAL CENTIMETERS AROUND THE UNIT FOR VENTILATION. -
Page 6: Dear Jensen® Customer
The serial number of this product is found on its back cover. You should note the serial number of this unit in the space provided as a permanent record of your purchase to aid in identification in the event of theft of loss. Model Number: JTA-475 Serial Number: ____________________... -
Page 7: Getting Start
GETTING START SPEAKER CONNECTION 1. Insert the speaker cable ends (exposed wires) into the terminals located on the back of the main unit by pushing down the lever of the left speaker terminal and then the right speaker terminal 2. Connect the left speaker to the left speaker terminals with the red wire to L+ and the black wire to L -. -
Page 8: Location Of Controls And Indicators
LOCATION OF CONTROLS AND INDICATORS FRONT VIEW & BACK VIEW 17.) TUNING KNOB 1.) DUST COVER 2.) FM-ST/MO/PLAY MODE BUTTON 18.) CD TRAY OPEN/CLOSE BUTTON 19.) CD SKIP/SEARCH FORWARD 3.) FUNCTION BUTTON 4.) POWER ON/STANDBY BUTTON /BACKWARD BUTTON 20.) CD TRAY 5.) STANDBY LED INDICATOR 21.) TAPE FAST FORWARD / EJECT BUTTON 6.) 3.5MM STEREO HEADPHONE JACK... -
Page 9: Battery Installation
Remote Control (For CD Operation Only) 1) FUNCTION BUTTON 2) POWER ON/STANDBY BUTTON 3) SKIP/SEARCH FORWARD BUTTON SKIP/SEARCH BACKWARD BUTTON 4) FM-ST/MO/PLAY MODE BUTTON 5) VOLUME + / - BUTTON (For CD, Tape, Phono/AUX and Tuner) 6) CD TRAY OPEN/CLOSE BUTTON 7) CD PLAY/PAUSE BUTTON... -
Page 10: Listening To The Radio
OPERATING INSTRUCTIONS LISTENING TO THE RADIO 1.) Press the POWER button to turn the system "On", the LCD display will light up. 2.) Press the FUNCTION button to select the Radio mode and the display shows “F” for FM radio, “A” for AM radio. 3.) Press the / AM/FM BAND button to select the desired band, AM or FM. -
Page 11: Programmed Cd Playback
CD PLAYBACK/PAUSE After you have loaded the CD in the player: 1.) Press the PLAY/PAUSE button to start playback from Track 1 on the disc. 2.) Press the VOLUME+/- buttons to adjust volume level as desired. 3.) To temporarily stop playback, press the PLAY/PAUSE button again. - Page 12 PLAY MODE - RANDOM Playback Press the PLAY MODE button for three times, “RAN.” indicator will light on the display. Then, all the tracks in the CD will be played in random order. Press the PLAY MODE button again (the fourth time), “RAN.” indicator will go out and will resume to normal playback.
-
Page 13: Cassette Tape Operation
CASSETTE TAPE OPERATION 1.) Press the POWER button to turn the system "On". 2.) Press the FUNCTION button to select the TAPE mode and the display shows “tA”. 3.) The system will start playback automatically after inserting the cassette tape. 4.) Press the VOLUME+/- buttons to adjust volume level as desired. -
Page 14: Auxiliary Input
AUXILIARY INPUT This unit provides an auxiliary audio signal input jack for connecting external audio devices like MP3 players, CD players and older, non-dockable iPods (except iPod shuffle 3 gen) so you can listen to your external source through the speakers of this system. 1. -
Page 15: Compact Disc Care
For records with only light amounts of dust, we recommend brushing them off with a carbon fiber brush or velvet pad before playing them. Use a good quality record cleaner and brush set to keep your records clean. Carbon fiber brushes, velvet pads and record cleaning kits are available online or in local record stores. -
Page 16: Cleaning The Unit
CLEANING THE UNIT To prevent fire or shock hazard, disconnect your unit from the AC power source when cleaning. The finish on the unit may be cleaned with a dust cloth and cared for as other furniture, Use caution when cleaning and wiping the plastic parts. -
Page 17: Specification
SPECIFICATION Power Requirement Main unit: AC120V~ 60Hz 2 x 1.5V “AAA” (UM-4) size batteries (included) Remote control Frequency Range Radio Band FM 88 ~ 108 MHz AM 530 ~ 1710 KHz Power Consumption Main Unit: 18Watts At Spectra, environmental and social responsibility is a core value of our business. - Page 18 90 DAY LIMITED WARRANTY AND SERVICE VALID IN THE U.S.A. ONLY SPECTRA MERCHANDISING INTERNATIONAL, INC. warrants this unit to be free from defective materials or factory workmanship for a period of 90 days from the date of original customer purchase and provided the product is utilized within the U.S.A. This warranty is not assignable or transferable.
Need help?
Do you have a question about the JTA-475 and is the answer not in the manual?
Questions and answers