
Related Manuals for INVENTOR PS18861LIN


Summary of Contents for INVENTOR PS18861LIN
-
Page 1: 4 . S I W C T H N I G F O F F R O L O N G P R E O I D S F O I T M . E
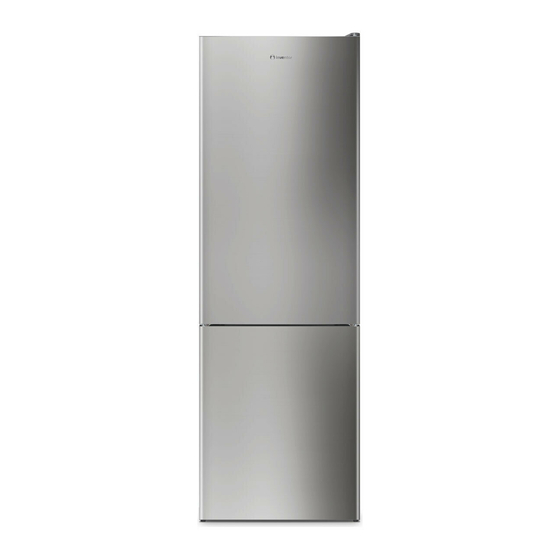
REFRIGERATOR BOTTOM FREEZER • USER’S MANUAL • ΕΓΧΕΙΡΙΔΙΟ ΧΡΗΣΗΣ • MANUAL UTILIZATORULUI MODELS: PS18861LIN PS18861LW ENGLISH | ΕΛΛΗΝΙΚΑ | ROMANA... -
Page 2: Table Of Contents
Contents 1. SAFETY WARNINGS .....................3 2. INSTALLATION .....................4 Location ........................4 Door Handle Install lllumination ................4 Reversing the Door Swing ..................6 Door Space Requirements ..................8 Levelling the Unit ......................8 Cleaning Before Use ....................8 Before Using Your Unit ....................8 Interior Accessories ....................9 3. -
Page 3: Safety Warnings
1. SAFETY WARNINGS WARNING - Keep ventilation openings, in the appliance enclosure or in the built-in structure, clear of obstruction. WARNING - Do not use mechanical devices or other means to accelerate the defrosting process, other than those recommended by the manufacturer. WARNING - Do not damage the refrigerant circuit. -
Page 4: Installation
2. INSTALLATION 2.1 Location When selecting a position for your unit you should make sure the floor is flat and firm, and the room is well ventilated. Avoid locating your unit near a heat source, e.g. cooker, boiler or radiator. Also avoid direct sunlight as it may increase the electrical consumption. Extreme cold ambient temperatures may also cause the unit not to perform properly. - Page 5 Cap the screw caps on the handle Remove the screw and take the screws handle down. Take out the screw caps from the Cap the screw caps on the door handle screw holes. handle holes again.
-
Page 6: Reversing The Door Swing
Install the handles into the door handle holes of the other side in accordance with the handle installation instructions. 2.3 Reversing the Door Swing Take off knuckle guard. Take off top hinge... - Page 7 Take off the door of refrigerating Assemble the door of freezer chamber. chamber on the lower hinge. Take off middle hinge with a Assemble middle hinge assembly screw driver. to left side of the cabinet. Take off the door of freezing Assemble the door of refrigerating.
-
Page 8: Door Space Requirements
2.4 Door Space Requirements The unit’s door must be able to open fully as shown. W x D ≥ 991X 975mm 2.5 Levelling the Unit To do this adjust the two levelling feet at the front of the unit. If the unit is not level, the door and magnetic seal alignments will not be covered properly. -
Page 9: Interior Accessories
Before placing any food in your unit, turn it on and wait for 24 hours, to make sure it is working properly and to allow it time to fall to the correct temperature. Your unit should not be overfilled. Do not damage the power cord under any condition so as to ensure safe- ty use, do not use when the power cord is damaged or the plug is worn. -
Page 10: Product Overview
3. PRODUCT OVERVIEW * Dotted line represents the position of air outlet and return air inlet. *AII images in this instruction manual are for indication only; please refer to your individu- al unit for details. 4. OPERATION 4.1 Operation Instructions Temperature control •... - Page 11 ⑤ ④ ③ ② ① fast cool (External display - optional) A.SET: gear setting key. Display screen 1 Gear 1 2 Gear 2 3 Gear 3 4 Gear 4 5 Gear 5 Display For the power-on, the display screen (including the key light) will be displayed in full for 3s, and then the gear in the middle displays the state of running.
-
Page 12: Noise Inside The Unit
4.2 Noise Inside the Unit! You may notice that your unit makes some unusual noises. Most of these are perfectly normal, but you should be aware of them! These noises are caused by the circulation of the refrigerant liquid in the cooling system. It has become more pronounced since the introduction of CFC free gases. -
Page 13: Cleaning
5. CLEANING 5.1 Defrosting Auto-defrost for Frost-free Refrigerator 5.2 Cleaning the Interior and the Exterior of the Unit Remove all the shelves and the salad bin. To remove the salad bin remove the low- er door shelf. Wipe the inside of the unit with a weak solution of bicarbonate soda and then rinse with warm water using a “wrung-out”... -
Page 14: Do Not Shield Positions Of Air Outlet And Return Air Inlet Of The Refrigerator
6.5 Do not shield positions of air outlet and return air inlet of the refrigerator 6.6 Do not keep foods of higher temperature close to temperature sensor 6.7 Take out drawer of freezing chamber of refrigerator and put foods directly on the glass partition 7. -
Page 15: Disposal
Every now and then check if the appliance is sufficiently ventilated (adequate air circulation behind the appliance). In normal temperature conditions, please arrange the thermostat at the middle setting. Before loading the appliance with packages of fresh food, make sure they are cooled to ambient temperature. - Page 16 All the pictures in the manual are for explanatory purposes only. The actual shape of the unit you purchased may be slightly different, but the operations and functions are the same. The company may not be held responsible for any misprinted information. The design and the specifications of the product for reasons, such as product improvement, are subject to change without any prior notice.
- Page 17 Wait for the confirmation email you will receive at the email address you have filled once the warranty submission has been completed a confirmation message will be þ in - please also check your spam folder. STEP 5 Inventor warranty is now valid! * Required field...
- Page 18 Περιεχόμενα 1. ΠΡΟΕΙΔΟΠΟΙΗΣΕΙΣ ΑΣΦΑΛΕΙΑΣ .................1 2. ΕΓΚΑΤΑΣΤΑΣΗ ......................2 Τοποθεσία ........................2 Αλλαγή φοράς λαβής θύρας ..................2 Αναστροφή της κατεύθυνσης ανοίγματος της πόρτας .........4 Απαιτούμενος χώρος για το άνοιγμα της πόρτας ..........6 Οριζοντίωση της συσκευής ..................6 Καθαρισμός πριν από τη χρήση ................6 Πριν...
-
Page 19: Προειδοποιησεισ Ασφαλειασ
1. ΠΡΟΕΙΔΟΠΟΙΗΣΕΙΣ ΑΣΦΑΛΕΙΑΣ ΠΡΟΕΙΔΟΠΟΙΗΣΗ - Διατηρήστε ελεύθερες τις οπές εξαερισμού, στο περίβλημα της συσκευής ή στην ενσωματωμένη δομή της, απομακρύνοντας τυχόν εμπόδια. ΠΡΟΕΙΔΟΠΟΙΗΣΗ - Μη χρησιμοποιείτε μηχανικές συσκευές ή οποιαδήποτε άλλα μέσα για να επιταχύνετε τη διαδικασία απόψυξης, εκτός από αυτά που συνιστώνται από τον κατασκευαστή. -
Page 20: Εγκατασταση
2. ΕΓΚΑΤΑΣΤΑΣΗ 2.1 Τοποθεσία Κατά την επιλογή της θέσης για τη συσκευή σας πρέπει να διασφαλίζετε ότι το δάπεδο είναι επίπεδο και σταθερό και το δωμάτιο αερίζεται καλά. Αποφύγετε να τοποθετήσετε τη συσκευή σας κοντά σε πηγή θερμότητας, π.χ. κουζίνα, θερμοσίφωνα ή σώμα καλοριφέρ. Επίσης... - Page 21 Τοποθετήστε τα βιδωτά πώματα Αφαιρέστε τις βίδες και βγάλτε στις βίδες των λαβών. τις λαβές. Αφαιρέστε τα βιδωτά πώματα από Τοποθετήστε πάλι τα βιδωτά τις οπές βιδών των λαβών. πώματα στις βίδες των λαβών.
-
Page 22: Αναστροφή Της Κατεύθυνσης Ανοίγματος Της Πόρτας
Τοποθετήστε τις λαβές στις οπές των λαβών της πόρτας στην άλλη πλευρά, σύμφωνα με τις οδηγίες εγκατάστασης των λαβών. 2.3 Αναστροφή της κατεύθυνσης ανοίγματος της πόρτας Αφαιρέστε τον προφυλακτήρα Αφαιρέστε τον άνω των αρθρώσεων των δαχτύλων. μεντεσέ. - Page 23 Αφαιρέστε την πόρτα του θαλάμου Συναρμολογήστε την πόρτα του θαλά- ψύξης. μου κατάψυξης στον κάτω μεντεσέ. Αφαιρέστε τον μεσαίο Συναρμολογήστε το μεσαίο μεντεσέ με κατσαβίδι. συγκρότημα μεντεσέ στην αριστερή πλευρά του θαλάμου. Αφαιρέστε την πόρτα του Συναρμολογήστε την πόρτα της ψύξης. θαλάμου...
-
Page 24: Απαιτούμενος Χώρος Για Το Άνοιγμα Της Πόρτας
2.4 Απαιτούμενος χώρος για το άνοιγμα της πόρτας Η πόρτα της συσκευής πρέπει να μπορεί να ανοίγει εντελώς, όπως φαίνεται στην εικόνα. ΠxΒ≥991 x 975mm 2.5 Οριζοντίωση της συσκευής Για να γίνει αυτό, ρυθμίσετε τα δύο πόδια οριζοντίωσης στο μπροστινό μέρος... -
Page 25: Εσωτερικά Αξεσουάρ
Μην τοποθετείτε εύφλεκτα, εκρηκτικά, πτητικά και εξαιρετικά διαβρωτικά στοιχεία στο ψυγείο, για να προλάβετε τις ζημιές στο προϊόν και τα ατυχήματα με πυρκαγιά. Μην τοποθετείτε εύφλεκτα αντικείμενα κοντά στο ψυγείο, για να αποφύγετε τις πυρκαγιές. Αυτό το προϊόν είναι οικιακό ψυγείο και είναι κατάλληλο μόνο για την αποθήκευση τροφίμων. -
Page 26: Επισκοπηση Του Προϊοντοσ
3. ΕΠΙΣΚΟΠΗΣΗ ΤΟΥ ΠΡΟΪΟΝΤΟΣ Φωτισμός LED ράφι δίσκος πόρτας συρτάρι * Η διακεκομμένη γραμμή αντιπροσωπεύει τη θέση της εξόδου αέρα και της εισόδου αέρα επιστροφής. * Όλες οι εικόνες σε αυτό το εγχειρίδιο οδηγιών είναι μόνο ενδεικτικές. Ανατρέξτε στη δική σας συσκευή για λεπτομέρειες. 4. - Page 27 ⑤ ④ ③ ② ① fast cool (Εξωτερική οθόνη - προαιρετικά) Πλήκτρο A.SET: πλήκτρο ρύθμισης βαθμίδας. Οθόνη ένδειξης 1 Βαθμίδα 1 2 Βαθμίδα 2 3 Βαθμίδα 3 4 Βαθμίδα 4 5 Βαθμίδα 5 Οθόνη Για την πρώτη ενεργοποίηση η οθόνη ένδειξης (συμπεριλαμβανομένου του φωτός του πλήκτρου) θα...
-
Page 28: Θόρυβος Στο Εσωτερικό Της Συσκευής
4.2 Θόρυβος στο εσωτερικό της συσκευής! Μπορείτε να παρατηρήσετε ότι η συσκευή σας κάνει ασυνήθιστους θορύβους. Οι περισσότεροι από αυτούς είναι απολύτως φυσιολογικοί, αλλά θα πρέπει να είστε ενημερωμένοι γι’ αυτούς! Αυτοί οι θόρυβοι προκαλούνται από την κυκλοφορία του ψυκτικού υγρού στο σύστημα ψύξης. Έχουν... -
Page 29: Καθαρισμοσ
5. ΚΑΘΑΡΙΣΜΟΣ 5.1 Απόψυξη Αυτόματη απόψυξη. 5.2 Καθαρισμός του εσωτερικού και του εξωτερικού μέρους της συσκευής Αφαιρέστε όλα τα ράφια και το συρτάρι λαχανικών. Για να αφαιρέσετε το συρτάρι λαχανικών, αφαιρέστε πρώτα το χαμηλότερο ράφι της πόρτας. Σκουπίστε το εσωτερικό της συσκευής με ένα ασθενές διάλυμα διττανθρακικού νατρίου και στη... -
Page 30: Μην Καλύπτετε Τις Θέσεις Εξόδου Αέρα Και Εισόδου Αέρα Επιστροφής Του Ψυγείου
6.5 Μην καλύπτετε τις θέσεις εξόδου αέρα και εισόδου αέρα επιστροφής του ψυγείου 6.6 Μην διατηρείτε τρόφιμα υψηλής θερμοκρασίας κοντά στον αισθητήρα θερμοκρασίας 6.7 Αφαιρέστε το συρτάρι του θαλάμου κατάψυξης του ψυγείου και τοποθετήστε τα τρόφιμα κατευθείαν πάνω στο γυάλινο χώρισμα 7. -
Page 31: Απορριψη
Ελέγχετε από καιρό σε καιρό αν η συσκευή αερίζεται επαρκώς (επαρκής κυκλοφορία του αέρα πίσω από τη συσκευή). Σε κανονικές συνθήκες θερμοκρασίας, ρυθμίζετε το θερμοστάτη στη μέση ρύθμιση. Πριν γεμίσετε τη συσκευή με πακέτα φρέσκων τροφίμων, βεβαιωθείτε ότι έχουν ψυχθεί σε θερμοκρασία... - Page 32 Όλες οι εικόνες στο παρόν εγχειρίδιο εξυπηρετούν επεξηγηματικούς σκοπούς. Το προϊόν που προμηθευτήκατε μπορεί να εμφανίζει ορισμένες διαφορές ως προς το σχήμα, ωστόσο οι λειτουργίες και τα χαρακτηριστικά παραμένουν ίδια. Η εταιρεία δεν φέρει ευθύνη για τυχόν τυπογραφικά λάθη. Ο σχεδιασμός και οι προδιαγραφές...
- Page 33 Παρακαλούμε ελέγξτε και τον φάκελο με τα Ανεπιθύμητα εισερχόμενα. Διεύθυνση κατοχύρωσης στο il σας ΒΗΜΑ 5 φώ στο της Έχετε υποβάλει επιτυχώς την εγγύηση του προϊόντος Inventor! Να εγγραφώ στο της ο πεδίο Απαραίτητο πεδίο τας τη φόρμα εγγύησης αποδέχεστε τους όρους και τις προϋποθέσεις...
- Page 34 CUPRINS 1. AVERTISMENTE PRIVIND SIGURANTA ............17 2. INSTALAREA ...................... 18 Localizare ......................... 18 Instalarea manerului usii iluminat (optional) ............18 Inversarea balansului usii ..................20 Cerinte privind spatiul usii ..................22 Nivelarea unitatii ..................... 22 Curatarea inainte de utilizare ................22 Inainte de a utiliza unitatea ..................
-
Page 35: Avertismente Privind Siguranta
1. AVERTISMENTE PRIVIND SIGURANTA AVERTIZARE- Pastrati orificiile de ventilatie, in carcasa aparatului sau in structura incorporata, fara obstacole. AVERTIZARE- Nu utilizati dispozitive mecanice sau alte mijloace pentru a accelera procesul de dezghetare, altele decat cele recomandate de producator. AVERTIZARE- Nu deteriorati circuitul agentului frigorific. AVERTIZARE- Nu utilizati aparate electrice in interiorul compartimentelor de depozitare a alimentelor ale aparatului, doar daca sunt tipul recomandat de producator. -
Page 36: Instalarea
2. INSTALAREA 2.1 Localizarea Cand selectati o pozitie pentru unitatea dvs., trebuie sa va asigurati ca podeaua este plata si ferma si ca camera este bine ventilata. Evitati sa va amplasati unitatea langa o sursa de caldura, de ex. aragaz, cazan sau radiator. De asemenea, evitati lumina directa a soarelui, deoarece poate creste consumul electric. - Page 37 Capaceti capacele suruburilor de Scoateti surubul si luati manerul pe suruburile manerului in jos. Scoateti capacele suruburilor din Inchideti din nou capacele surubu- orificiile suruburilor manerului. rilor de pe orificiile manerului usii.
-
Page 38: Inversarea Balansului Usii
Instalati manerele in orificiile manerului usii din cealalta parte, conform cu instructiunile de instalare a manerului. 2.3 Inversarea balansului usii Pozitionati-l in picioare. Prindeti balamaua superioara. - Page 39 Scoateti usa de refrigerare. Asamblati usa congelatorului pe balamaua inferioara. Scoateti balamaua mijlocie Asamblati balamaua centrala in cu osurubelnita. partea stanga a dulapului. Scoateti usa congelatorului. Asamblati usa frigiderului. Scoateti balamaua cu o surubelnita, asamblati balamaua inferioara in partea 10) Pozitionati in picioare. stanga a dulapului cu o surubelnita.
-
Page 40: Cerinte Privind Spatiul Usii
2.4 Cerinte privind spatiul usii Usa unitatii trebuie sa se poata deschide complet, precum figura alaturata. W x D ≥ 992X 975mm 2.5 Nivelarea unitatii Daca unitatea nu este la nivel, aliniamentele usii si ale garniturii magnetice nu vor fi acoperite corespunzator. Asigurati-va ca piciorul atinge solul inainte de utilizare. -
Page 41: Accesorii De Interior
Inainte de a plasa orice aliment in unitatea dvs., porniti-l si asteptati 24 de ore, pentru a va asigura ca functioneaza corect si pentru a-i permite sa coboare la temperatura optima. Unitatea dvs. nu trebuie supraincarcata. Nu deteriorati cablul de alimentare in niciun fel pentru a asigura utilizarea in siguranta, nu il folositi cand cablul de alimentare este deteriorat sau stecherul este uzat. -
Page 42: Prezentarea Produsului
3. PREZENTAREA PRODUSULUI Iluminare LED tava usii raft sertar * Linia punctata reprezinta pozitia iesirii aerului si a intrarii aerului de retur. * Toate imaginile din acest manual de instructiuni sunt doar cu titlu orientativ; va rugam sa consultati unitatea dvs. individuala pentru mai multe detalii. 4. - Page 43 ⑤ ④ ③ ② ① rapid rece (Afisaj extern) Legenda: A.SET: tasta de setare a vitezei. Ecran 1 Gear 1 2 Gear 2 3 Gear 3 4 Gear 4 5 Gear 5 Afisaj Pentru prima pornire, ecranul de afisare (inclusiv lumina tastelor) va fi afisat integral timp de 3 secunde, iar apoi uneltele din mijloc afiseaza starea initiala.
-
Page 44: Zgomot In Interiorul Unitatii
4.2 Zgomot in interiorul unitatii! Este posibil sa observati ca unitatea dvs. produce unele zgomote neobisnuite. Cele mai multe dintre acestea sunt perfect normale, dar ar trebui sa constient de ele! Aceste zgomote sunt cauzate de circulatia lichidului in sistemul de racire. A devenit mai pronuntat de la introducerea gazelor libere CFC. -
Page 45: Curatarea
5. CURATAREA 5.1 Decongelare Decongelarea automata este disponibila pentru modelele fara inghet. 5.2 Curatarea interioara si exterioara a unitatii Scoateti toate rafturile si cosul de salate. Pentru a scoate cosul de salate, scoateti mai intai raftul inferior al usii. ... -
Page 46: Nu Blocati Pozitiile De Iesire A Aerului Si Nu Returnati Intrarea In Frigider
6.5 Nu blocati pozitiile de iesire a aerului si nu permiteti intrarea de aer in frigider, 6.6 Nu tineti alimentele cu temperatura mai mare in apropierea senzorului de temperatura 6.7 Scoateti sertarul camerei de congelare a frigiderului si puneti alimentele direct pe platoul de sticla. -
Page 47: Eliminarea
Verificati din cand in cand daca aparatul este suficient de aerisit (circulatie adecvata a aerului in spatele aparatului). In conditii normale de temperatura, va rugam sa aranjati termostatul la setarea de mijloc. Inainte de a incarca aparatul cu pachete de alimente proaspete, asigurati-va ca sunt racite la temperatura ambientala. - Page 48 Toate imaginile din acest manual, au scop pur informativ. Forma reala a produsului pe care l-ati cumparat poate fi usor diferita insa functiile si operatiile sunt aceleasi. Compania nu isi asuma nici o responsabilitate pentru greselile de tipar. Aspectul fizic si specificatiile tehnice se pot schimba fara o notificare prealabila datorita imbunatatirii con- tinue a echipamentelor noastre.
- Page 49 Un email de confirmare va fi trimis la adresa de email pe care ati declarat-o. In cazul in þ care nu ati primit un email avem rugamintea sa verificati de asemenea si folderul Spam. PASUL 5 Ati activat cu succes Garantia Inventor! Cu acest certificat de garantie acceptati...
- Page 51 REFRIGERATOR BOTTOM FREEZER V:1.1.102021 INVENTOR A.G. S.A. Manufacturer: 24th km National Road Athens - Lamia & 2 Thoukididou Str., Ag.Stefanos, 14565 Tel.: +30 211 300 3300, Fax: +30 211 300 3333 - www.inventor.ac...
Need help?
Do you have a question about the PS18861LIN and is the answer not in the manual?
Questions and answers