Table of Contents
Advertisement
Quick Links
Advertisement
Table of Contents

Related Manuals for MYiR MYD-AM335X


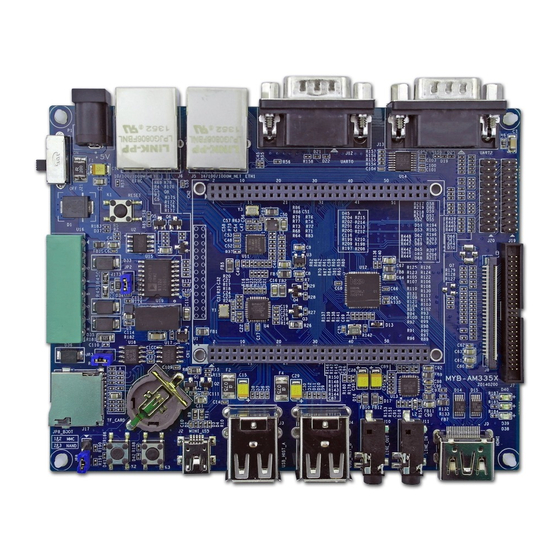
Summary of Contents for MYiR MYD-AM335X
-
Page 2: Table Of Contents
Table of Contents Introduction 1. Software Resources 2. Deploy development environment 2.1 Install tools 1.3.1 2.2 Setup GCC Toolchain 1.3.2 3. Bulid System 3.1 Bulid Bootloader 1.4.1 3.2 Build Linux Kernel 1.4.2 3.3 Build Filesystem 1.4.3 3.4 Build QT 1.4.4 4. - Page 3 6. Update System 7. Peripheral Module Use 7.1 4.3-Inch Resistive Touch Screen 1.8.1 7.2 WIFI Module 1.8.2 7.3 USB Camera Module 1.8.3 7.4 GPS Module 1.8.4 7.5 GPRS Module 1.8.5 Appendix Warranty & Technical Support Services...
-
Page 4: Introduction
This chapter describes how to run Linux system and embedded Linux applications and the process of drive development in MYD-AM335X series development board. It includes building the development environment, compiling the source code, examples of Linux application and image download. - Page 5 Hardware Version MYD-AM335X, MYD-AM335X-Y,MYD-AM335X-J. Note: This document applies to the above three versions of the hardware, the user can choose the corresponding operation according to the corresponding board.In this paper, the MYD-AM335X series is used to represent the three board.
-
Page 6: Software Resources
1. Software Resources This section describes the software resources of the MYD-AM335X series development boards. Table 1-1 Software Resources. MYD- MYD- Category Name Description Source AM335X- AM335X Responsible for system Bootloader U-boot √ √ initialization and boot kernel. Designed for... - Page 7 Drivers HDMI HDMI driver √ × Power Drivers Management √ √ Unit driver Drivers USB Host USB Host driver √ √ USB Device Drivers √ √ Device driver(Gadget) Filesystem Rootfs Base on buildroot √ √ Filesystem Rootfs-qt Qt filesystem √ √...
-
Page 8: Deploy Development Environment
PC development environment: Ubuntu12.04/Ubuntu14.04/Ubuntu16.04 64bit Desktop Cross compiler: gcc5.3(Linaro GCC 2016.02) Hardware debugging environment structures MYD-AM335X Hardware debugging environment structures: Connect the debug serial port J12 to the PC,set the baudrate of serial port on host PC to 115,200-8-n-1. Specific as follows:... - Page 9 Figure 2-1 MYD-AM335X Hardware Debugging Interface MYD-AM335X-Y Hardware debugging environment structures: Connect the debug serial port J10 to the PC,set the baudrate of serial port on host PC to 115,200-8-n-1. Specific as follows: Figure 2-2 MYD-AM335X-Y Hardware Debugging Interface MYD-AM335X-J Hardware debugging environment structures:...
- Page 10 Connect the debug serial port J3 to the PC,set the baudrate of serial port on host PC to 115,200-8-n-1. Specific as follows: Figure 2-3 MYD-AM335X-J Hardware Debugging Interface Create a working directory: Create a work directory and copy the resources from 04-Linux_Source of our release package to the work directory on ubuntu host PC,...
-
Page 11: Install Tools
2.1 Install tools Install other development tools For the sake of convenience we install all the tools and libraries before as shown below: Ubuntu 12.04 64Bit Desktop sudo apt-get install build-essential git-core libncurses5-dev $ sudo apt-get install flex bison texinfo zip unzip zlib1g-dev gettext $ sudo apt-get install gperf libsdl-dev libesd0-dev libwxgtk2.6-dev $ sudo apt-get install uboot-mkimage $ sudo apt-get install g++ xz-utils... -
Page 12: Setup Gcc Toolchain
2.2 Setup GCC Toolchain Set environment variables: $ cd <WORKDIR>/Toolchain $ tar xvf gcc-linaro-5.3-2016.02-x86_64_arm-linux-gnueabihf.tar.xz export PATH=$PATH:<WORKDIR>/Toolchain/gcc-linaro-5.3-2016.02-x86_64_arm-linux-gnueab ihf/bin export ARCH=arm export CROSS_COMPILE=arm-linux-gnueabihf- After executing the "export" command,type "arm" then press TAB to check if it’s correctly set. This setting is valid only for the this terminal, for a permanent modification, please modify user profiles. - Page 13 $ arm-linux-gnueabihf-gcc -v Using built-in specs. COLLECT_GCC=arm-linux-gnueabihf-gcc …… Thread model: posix gcc version 5.3.1 20160113 (Linaro GCC 5.3-2016.02)
-
Page 14: Bulid System
3. Bulid System There are many open source tools for building an embedded Linux system, they are more convenient for embedded software engineers to build bootloader, kernel, filesystem all in one step. Currently, OpenWRT, Buildroot Yocto are more commonly used. Buildroot is a simple, efficient and easy-to-use tool to generate embedded Linux systems through cross-compilation,thanks to its kernel-like menuconfig, gconfig and xconfig configuration interfaces, building a basic system with Buildroot is easy, so it's... -
Page 15: Bulid Bootloader
$ cd <WORKDIR>/Bootloader $ tar -jxvf myir-u-boot.tar.bz2 $ cd myir-u-boot Compile U-Boot: The configuration of U-boot for MYD-AM335X series is located at myir-u- boot/configs/, the corresponding configuration file name are shown below: Table 3-1-1 U-boot Config Files for MYIR Development Boards Board... -
Page 16: Build Linux Kernel
$ cd <WORKDIR>/ $ tar -jxvf myir-kernel.tar.bz2 $ cd myir-kernel Compile Kernel: The configuration of Kernel for MYD-AM335X series is located at myir- kernel/arch/arm/configs/,customers can compile Kernel as shown below: Table 3-2-1 Kernel Config Files for MYIR Development Boards Board Type... - Page 17 For example: Patch for MYD-AM335X-Y with SGX , 4.3-inch screen: $ patch -p1 < <WORKDIR>/Patches/myd-am335x-y-lcd4.3.diff $ patch -p1 < <WORKDIR>/Patches/myd-am335x-y-sgx.diff Compile device tree: make dtbs And use the arch/arm/boot/dts directory of the device tree file to replace the system...
-
Page 18: Build Filesystem
Copy the Buildroot source package customized by MYIR Tech from 04- Linux_Source/Filesystem/myir-buildroot.tar.gz of our release package to work directory and uncompress it. The content of myir-buildroot.tar.gz is shown below: $ ls -al <WORKDIR>/Filesystem/myir-buildroot... - Page 19 The configuration files for Buildroot are all located at <WORKDIR>/Filesystem/myir- buildroot/configs/ Table 3-3-1 Buildroot Config Files for MYIR Development Boards Config File Description Buildroot configuration without QT5 for MYC- myd_c335x_defconfig AM335X CPU Module with NAND Flash Buildroot configuration without QT5 for MYC-...
- Page 20 For MYD-AM335X-Y development board, the password for root is set to myirtech shown below. If customers do not need to set password, they no need to config the...
- Page 21 Figure 3-3-2 Configuration for System Configuration for Bootloader: The configuration for Bootloader includes the URL of the source code of U-boot, the U-boot configuration file name, the output images of U-boot and so on. They are shown in Figure 3-3-3 below.
- Page 22 Buildroot manual. Create a U-boot git repository from myir-u-boot.tar.gz $ cd ~/ $ tar zxvf myir-u-boot.tar.gz $ cd myir-u-boot $ git init $ git add . -f $ git commit -m "Initial Version" -a And then modify and replace the two items of the configuration files located at <WORKDIR>/Filesystem/buildroot/configs/myd_y335x_defconfig...
- Page 23 Buildroot manual. Create a kernel git repository from myir-kernel.tar.gz $ cd ~/ $ tar zxvf myir-kernel.tar.gz $ cd myir-u-boot $ git init $ git add . -f $ git commit -m "Initial Version" -a...
- Page 24 BR2_TARGET_KERNEL_CUSTOM_REPO_URL="~/myir-kernel/.git" BR2_TARGET_KERNEL_CUSTOM_REPO_VERSION="master" Configuration for Filesystem: The configuration for filesystem determines what filesystem images are generated in myir-buildroot/output/images/ directory after compiling, If we choose in the ramdisk configuration, we will get a ramdisk filesystem image. EXT2/4, UBIFS, and rootfs tar package can also be create if they are choosed in configuration.
- Page 25 Figure 3-3-5 Configuration for Filesystem Configuration for Target Packages: The configuration for target packages is easier, but it is changed more frequently. Customers can choose some hardware tools, such as I2C-tools, spi-tools, can-utils and so on, build them into the filesystem images for debugging. Some network utils, such as DHCP, TFTP, SSH and so on, can aslo be choosed and built into the filesystem images for production.
- Page 26 Figure 3-3-6 Configuration for Target Packages 3.3.3 Build Buildroot Customers can build Buildroot just like building kernel as shown below: $ cd myir-buildroot $ make An output directory is generated during compilation,The resulte output image files are located at the directory.
- Page 27 The bootloader, kernel and all kinds of filesystem images are generated all in one step, they will be introduced in the subsequent section. A cross compile toolchain is also generated at , users can setup this <WORKDIR>/Filesystem/myir-buildroot/output/ toolchain as follows(suppose myir-buildroot is put into $HOME): export PATH="$HOME/myir-buildroot/output/host/usr/bin:$PATH" export PATH="$HOME/myir-buildroot/output/host/usr/sbin:$PATH"...
-
Page 28: Build Qt
3.4 Build QT QT5 is included in Buildroot as a target package, we have provided a config file with QT5 for MYD-AM335X series development board, so it is easy to build filesystem images with QT5 shown as below. $ cd <WORKDIR>/Filesystem/myir-buildroot Build Buildroot: Before making Buildroot, we should choose a configuration. -
Page 29: Linux Applications Development
4. Linux Applications Development This section focuses on application development based on embedded Linux, the following examples provided by MYIR Tech demonstrate how to take the control of some commonly used peripheral devices through Linux applications. The source code of these examples is located at 04-Linux_Source\Examples of our release package. - Page 30 $ make If the binary files have no permission to run, please assign the running permission to them by chmod: # chmod +x *...
-
Page 31: Lcd
Linux Kernel 4.1.18 framebuffer_test application fbv application built by Buildroot Test Steps: Copy cross compiled <WORKDIR>/Examples/framebuffer/framebuffer_test /usr/bin directory of the MYD-AM335X series development board, run framebuffer_test application as below: # chmod 777 /usr/bin/framebuffer_test # framebuffer_test -h Usage: framebuffer_test [options] Version 1.0... - Page 32 Restart the development board,copy a BMP file with 24BPP and resolution of 800*480 to of the MYD-AM335X series development board, display the /media picture on LCD by fbv application: # fbv Usage: fbv [options] image1 image2 image3 ...
- Page 33 After complete, the picture displays just right for the LCD.
-
Page 34: Touch Panel
J7 connection J8 Software Preparation: Linux Kernel 4.1.18 TS_CALIBRATE application Test Steps: Connect MY-TFT070CV2 module to MYD-AM335X series development board, power on the board and view the device node in /dev/input directory. # ls /dev/input by-path event1 event3 mice... - Page 35 -8.078796 -0.002245 0.998305 Calibration constants: -576884 67116 -276 -529452 -147 65424 65536 Power off the MYD-AM335X series development board,connect MY- TFT070RV2 module to MYD-AM335X series development board, power on the board and view the device node in /dev/input directory. # ls /dev/input...
- Page 36 xres = 800, yres = 480 Took 32 samples... Top left : X = 299 Y = Took 21 samples... Top right : X = 3689 Y = Took 29 samples... Bot right : X = 3732 Y = 3463 Took 27 samples...
-
Page 37: Rtc
Linux Kernel 4.1.18 date, hwclock command rtc_test application Test Steps: Copy cross compiled directory of the <WORKDIR>/Examples/rtc/rtc_test /usr/bin MYD-AM335X seriesdevelopment board, run application as below: rtc_test # chmod 777 /usr/bin/rtc_test # rtc_test -h Usage: rtc_test [options] Version 1.0 Options: -d | --device name... - Page 38 # rtc_test -d /dev/rtc Current RTC date/time is 18-11-2016, 18:04:32. Users can also use date and hwclock command to test RTC as below: # date 081518002016.30 -- Set the system time to August 15 , 2016 18:00:30 Mon Aug 15 18:00:30 UTC 2016 # date Mon Aug 15 18:00:38 UTC 2016 # hwclock -w /dev/rtc...
-
Page 39: Rs485
4.4 RS485 This example demonstrates the MYD-AM335X series of the same type of two development board how to use the Linux API configuration development board on the RS485 and send and receive data,please refer to the source code for detail. - Page 40 -w | --write frame frame string. such as: 0123456789 -h | --help Print this message One board is used as sender, the other is used as receiver, they communicate with tty_test application as below: # tty_test -d /dev/ttyO1 -b 9600 -w "123456789" -m 1 -l SEND:123456789 SEND:123456789 SEND:123456789...
-
Page 41: Can Bus
4.5 CAN Bus This example demonstrates the MYD-AM335X series of the same type of two development board how to use Linux APIs to send and receive data from CAN bus, please refer to the source code for detail. Hardware Preparation: Hardware debugging environment to see chapter second. - Page 42 -h | --help Print this message # ip link set can1 down # ip link set can1 type can bitrate 50000 triple-sampling on # ip link set can1 up The previous processes are no need to be executed manually. During running , it will be set automatically.
- Page 43 Exchange roles of the two boards, the result is the same.
-
Page 44: Ethernet
Test Steps: Copy cross compiled directory of <WORKDIR>/Examples/network/client /usr/bin the MYD-AM335x series development board,Copy cross compiled to ubuntu 12.04.Assume that the ubuntu12.04 <WORKDIR>/Examples/network/server ip is 192.168.30.114. Configure the development board ip: ifconfig eth0 192.168.30.122 up Configure the network, the development board eth0 connected to the PC with a... - Page 45 # ./client 192.168.30.114 send messages: 1234567890 192.168.30.114 send messages: 1234567890 192.168.30.114 send messages: 1234567890 192.168.30.114 send messages: 1234567890 192.168.30.114 send messages: 1234567890 192.168.30.114 send messages: 1234567890 192.168.30.114 At the same time you can see the virtual machine to receive the data sent by the development board: $ ./server 192.168.30.122...
-
Page 46: Nand Flash
Linux Kernel 4.1.18 mtd_test application Test Steps: Copy cross compiled directory of the <WORKDIR>/Examples/mtd/mtd_test /usr/bin MYD-AM335x series development board,Executing the following command to nandflash erase, write and read data: # ./mtd_test /dev/mtd7 MTD Type: MTD total size: 131072 bytes MTD erase size:... -
Page 47: Keypad
Version 1.0 Options: -d | --device name keypad device name, default: /dev/input/event0 -h | --help Print this message View the device nodes of MYD-AM335X keypad, the following information 。 shows keypads are corresponding to /dev/input/event1 # ls /dev/input/ by-path/ event0... - Page 48 Event: Code = 0, Type = 0, Value=1 Event: Code = 114, Type = 1, Value=0 -- release K3 Event: Code = 0, Type = 0, Value=0 View the device nodes of MYD-AM335X-Y keypad, the following information , shows keypads are corresponding to...
- Page 49 Event: Code = 0, Type = 0, Value=0 Event: Code = 116, Type = 1, Value=0 -- release K5 Event: Code = 0, Type = 0, Value=0 View the device nodes of MYD-AM335X-J keypad, the following information , shows keypads are corresponding to...
- Page 50 Each keypad has a event code as show above. the code should be consistent with the value in device tree source.Users can use command to test keypads as hexdump below,The following to MYD-AM335X, for example, other types of KeyPad test similar. # hexdump /dev/input/event1 0000000 022b 0000 2a83 0005 0001 0073 0001 0000...
-
Page 51: Gpio-Led
Test Steps: Copy cross compiled directory of the <WORKDIR>/Examples/led/led_test /usr/bin MYD-AM335x series development board. View the device node of MYD-AM335X LED devices as below: # ls /sys/class/leds myc:green:user1 myd:green:user2 myd:green:user3 Control the MYD-AM335X LED by command as below: echo D3:... - Page 52 "0" > /sys/class/leds/myc\:green\:user1/brightness D2: #echo "1" > /sys/class/leds/myd\:green\:user2/brightness #echo "0" > /sys/class/leds/myd\:green\:user2/brightness View the device node of MYD-AM335X-J LED devices as below: # ls /sys/class/leds myc:green:user1 myd:green:user2 Control the MYD-AM335X-J LED by command as below: echo D3: # echo "1"...
-
Page 53: Audio
Test Steps: Copy cross compiled directory of <WORKDIR>/Examples/audio/audio_test /usr/bin the MYD-AM335x series development board.Plug the headset into the audio output port, enter the audio input to the audio input port, enter the following command at the Linux terminal: # audio_test rate... -
Page 54: Usb Host
USB host,to achieve the function of reading and writing USB flash disk. Hardware Preparation: Hardware debugging environment to see chapter second. USB flash disk Board Type MYD-AM335X MYD-AM335X-Y MYD-AM335X-J USB Host interface J3 or J4 Software Preparation: Linux Kernel 4.1.18... - Page 55 429.892793] FAT-fs (sda1): Volume was not properly unmounted. Some data may be corr upt. Please run fsck. # cd /mnt # ls 1.bmp rootfs.ubi myd_c335x.dtb audio myir-linux-examples u-boot.img audio1 network zImage Plug out the USB disk, Linux kernel dumps the message as below: 493.899143] usb 2-1.4: USB disconnect, device number 3...
-
Page 56: Usb Device
This example demonstrates how to use USB device interface and verify the driver of USB client. The MYD-AM335X series development board works as a TF card reader, it is connected to the USB host of PC with a USB mini B to USB A cable. - Page 57 /bf2a45cc 687.236802] g_mass_storage gadget: cfg 1/bf2a45cc speeds: high full 687.243534] g_mass_storage gadget: interface 0 = Mass Storage Function/dc896b00 687.252005] g_mass_storage gadget: Mass Storage Gadget, version: 2009/09/11 687.259466] g_mass_storage gadget: userspace failed to provide iSerialNumber 687.266948] g_mass_storage gadget: g_mass_storage ready 687.273141] g_mass_storage musb-hdrc.0.auto: usb_gadget_udc_start After g_mass_storage driver is loaded, a removable disk will be detected on PC.
-
Page 58: Qt Applications Development
QtCreator in our release package at the path 03-Tools/qt- creator-opensource-linux-x86_64-4.1.0.run. In the following sections, we will introduce the installation, configuration of QtCreator, and demonstrate how to create a simple QT5 application running on MYD-AM335x series development board. -
Page 59: Install Qtcreator
5.1 Install QtCreator On Ubuntu 64bit OS, customers can install QtCreator as shown below: $ cd <WORKDIR> $ cp /media/cdrom/03-Tools/Qt/qt-creator-opensource-linux-x86_64-4.1.0.run . $ chmod a+x qt-creator-opensource-linux-x86_64-4.1.0.run $ sudo ./qt-creator-opensource-linux-x86_64-4.1.0.run QtCreator will be installed on Ubuntu OS step by step automatically. -
Page 60: Config Qtcreator
5.2 Config QtCreator Config Build&Run Environment: Open QtCreator, choose -> , then the dialog popups Tools Options Build & Run Compilers` tab to set compiler for QtCreator as shown below: Please choose the Figure 5-2-1 Settings of Compiler Press button at the right side of this dialog, choose in the dropdown list, Custom 和... - Page 61 Figure 5-2-2 Add Compiler for QtCreator At the same dialog, choose Tab to add qmake, at the right side of this Qt Version dialog, press button, then a new dialog popups, please choose the qmake tools described at Chapter 3-4-1. After complete, press to set qmake, and then Open to save.
- Page 62 Figure 5-2-3 Choose Qmake In the window, continue to choose tab, and at the right side of this Build&Run Kits dialog, press button, then add settings of running environment for QT5 application. In the editbox, write the path of cross compile toolchain, in the Sysroot editboxs, write the settings being set before, set Compiler...
- Page 63 Figure 5-2-5 Create a QT Widgets Application After pressing button, the settings dialog popups, Choose... Qt Widgets Application please set the name and path of the project as shown below in Name Create in editboxs as shown below: Figure 5-2-6 Set the Name and Path of the Project...
- Page 64 Press button and choose the setting for as below: Next Kits Figure 5-2-7 Set Kits for the Project Choose the base class of the project as shown below: Figure 5-2-8 Choose Base Class Press button to create and save the project. Finish...
- Page 65 Figure 5-2-9 Finish Creating a New Project...
-
Page 66: Build Qt Application
5.3 Build QT Application In the previous section, a QT5 project named as has been created. It is helloworld shown in the project manage of QtCreator as below: Figure 5-3-1 Project Manager of QtCreator Double click the at the left side to open the view for designing mainwindow.ui Design... - Page 67 Figure 5-3-2 UI Design View After complete, choose -> in the main menu of QtCreator to Build Build Project build the helloworld project. Some log information outputs to the Compile Output window during compiling, in case of any erros and warning, please fix them and build again.
- Page 68 (uses shared libs), for GNU/Linux 4.1.0, not stripped Finaly, please copy the binary format application directory of helloworld /usr/bin MYD-AM335X series development board and execute as below: # helloworld --platform linuxfb:fb=/dev/fb0 A Window with a text label displays on the LCD screen as below:...
-
Page 69: Update System
"board/myir/myd_c335x/" First stage bootloader(SPL) for EMMC, prebuild MLO_emmc by myir from "board/myir/myd_c335x/" First stage bootloader(SPL) for USB Mass MLO_usbmsc Storage, prebuild by myir from "board/myir/myd_c335x/" Second stage bootloader, generated when u-boot.img compiling Buildroot Second stage bootloader for NAND, prebuild by u-boot_nand.img... - Page 70 Environment variables for boot images on EMMC. uEnv_mmc.txt Need to be renamed to uEnv.txt zImage Kernel image Device tree binary for MYD-AM335X with NAND myd_c335x.dtb Flash myd_c335x_emmc.dtb Device tree binary for MYD-AM335X with EMMC Device tree binary for MYD-AM335X-Y with NAND myd_y335x.dtb...
- Page 71 . It consists of two partitions, one is <WORKDIR>/Filesystem/myir-buildroot/output/images FAT partition contains and device tree binary u-boot.img zImage uEnv.txt files for MYD-AM335x series development board, the other partition is EXT4 partition, it will be used as the root partition of Linux.
- Page 72 TF slot(J19), set the board to boot from TF/SD card by J5. Power on the MYD-AM335x series development board, it will boot from TF card and mount the second partition of the TF card as root file system.
- Page 73 Figure 6-2 Formate TF Card with `HP USB Disk Storage Format Tool 2.0.6` Please use “HP USB Disk Storage Format Tool 2.0.6” from CD directory “03-Tools” to format TF card. 1.Insert MMC/SD card into the card reader ,then connect the reader with the computer. 2.Open the HP USB Disk Storage Format Tool, the following steps will show in detail: 3.Select “FAT32”...
- Page 74 MYIR># After entering the u-boot command line, input from the PC keyboard to run updatesys start automatic updating process. If the partitions were changed, users should erase the whole NAND Flash with command nand erase.chip MYIR># nand erase.chip...
- Page 75 NAND erase.chip: device whole chip Erasing at 0x1ffe0000 -- 100% complete. MYIR># run updatesys switch to partitions #0, OK mmc0 is current device reading MLO 55092 bytes read in (5.3 MiB/s) NAND write: device offset 0x0, size 0xd734 55092 bytes written: OK reading myd_c335x.dtb...
- Page 76 . This package can be <WORKDIR>/Filesystem/myir-buildroot/output/images used to work as NFS root for MYD-AM335X series development board. In order to boot from ethernet, TFTP and NFS services should be installed and configed as below: Install TFTP Service...
- Page 77 TFTP service, then users can load these image files to the RAM of MYD-AM335X series development board by TFTP in U-boot console, it is shown below: ># help tftpboot tftpboot - boot image via network using TFTP protocol...
- Page 78 NFS , and then the NFS server is available for /mnt MYD-AM335x series development board.Power Up Modification Startup Mode The jumper cap is started for the nandflash mode,Nandflash must have uboot,The factory has been burned. Copy the zImage and dtb files to the /tftpboot directory, as follows: cp <WORKDIR>/Filesystem/myir-buildroot/output/images/zImage <WORKDIR>/tftpboot...
- Page 79 ># setenv fdtfile myd_c335x.dtb ># echo $fdtfile -- Check if the fdtfile name is correct Save the relevant environment variables,as follows: ># saveenv Under the U-Boot console, execute the netboot command to start the mounted NFS ROOT file system as follows: ># run netboot Note:Ping serverip normal, run runboot after tftp failure, please check the server side tftp service is normal, as follows:...
-
Page 80: Peripheral Module Use
7.Peripheral Module Use This chapter mainly describes the software hardware environment construction and testing process of the MYIR peripheral module on the development board. The peripheral module support of the MYD-AM335X series development board is shown in the following table: MYD-... -
Page 81: Inch Resistive Touch Screen
The configuration of the 4.3-inch screen in the device tree is commented by default. Search for / 4.3 inch, 480x272 resolution LCD, MYiR / in the device tree to release the commented code and comment the configuration of the 7-inch screen. After the... - Page 82 modification is completed, use the command make dtbs to compile the device tree, then copy the compiled device to the SD card and update the software of the development board using the methods in Chapter 6. Test Steps: Copy the executable in the directory framebuffer_test <WORKDIR>/...
- Page 83 Keys: : Redraw the image a, d, w, x : Pan the image : Toggle resizing on/off : Toggle resizing quality : Toggle enlarging on/off : Toggle respecting the image aspect on/off : Rotate the image 90 degrees left : Rotate the image 90 degrees right : Disable all transformations Copyright (C) 2000 - 2004 Mateusz Golicz, Tomasz Sterna.
-
Page 84: Wifi Module
SIDO WIFI on the development board. Hardware Preparation: One MYD-AM335X series development board MY-WF003U module、MY-WF004S module One USB to TTL converter used to connect MYD-AM335X series development board Debug serial port and PC, PC side baud rate setting 115200-8-n-1 Interface MYD-AM335X... - Page 85 # ifconfig -a eth0 Link encap:Ethernet HWaddr 68:9E:19:BC:1C:84 UP BROADCAST MULTICAST MTU:1500 Metric:1 RX packets:0 errors:0 dropped:0 overruns:0 frame:0 TX packets:0 errors:0 dropped:0 overruns:0 carrier:0 collisions:0 txqueuelen:1000 RX bytes:0 (0.0 B) TX bytes:0 (0.0 B) Interrupt:240 eth1 Link encap:Ethernet HWaddr 68:9E:19:BC:1C:86 BROADCAST MULTICAST MTU:1500 Metric:1...
- Page 86 ssid="MYIR_TECH" scan_ssid=1 proto=WPA RSN pairwise=CCMP TKIP NONE key_mgmt=WPA-EAP WPA-PSK IEEE8021X NONE group=TKIP CCMP psk="myir2016" priority=10 2.Connect WIFI AP. wpa_supplicant -i wlan0 -c /etc/wpa_supplicant.conf -B 3.Get the IP address and DNS. #udhcpc -b -i wlan0 udhcpc: started, v1.25.1 udhcpc: sending discover udhcpc: sending select for 192.168.30.115 udhcpc: lease of 192.168.30.115 obtained, lease time 3600 deleting routers...
- Page 87 ssid=myirAP hw_mode=g channel=6 macaddr_acl=0 auth_algs=1 ignore_broadcast_ssid=0 wpa=2 wpa_passphrase=123456789 wpa_key_mgmt=WPA-PSK wpa_pairwise=TKIP rsn_pairwise=CCMP 2.Modify the contents of the /etc/dhcp/dhcpd.conf configuration file as needed. This configuration file is mainly used to provide DHCP services for devices connected to WIFI APs. # cat /etc/dhcp/dhcpd.conf ddns-update-style interim;...
- Page 88 wlan0: AP-ENABLED 4.Configure the ip address and subnet mask of the ap hotspot. This IP address needs to be set according to the value of the routers in /etc/dhcp/dhcpd.conf. # ifconfig wlan0 192.168.43.1 netmask 255.255.255.0 up 5.Start the DHCP service of wlan0. # dhcpd wlan0 Internet Systems Consortium DHCP Server 4.3.5 Copyright 2004-2016 Internet Systems Consortium.
- Page 89 echo 1 > /proc/sys/net/ipv4/ip_forward 3.Configure eth0 as the exit of all packets. iptables -t nat -A POSTROUTING -o eth0 -j MASQUERADE After performing the above three steps, the WIFI device can access the Internet through this AP hotspot.
-
Page 90: Usb Camera Module
Hardware Preparation: One MYD-AM335X series development board MY-CAM002U module One USB to TTL converter used to connect MYD-AM335X series development board Debug serial port and PC, PC side baud rate setting 115200-8-n-1 Interface MYD-AM335X MYD-AM335X-Y... - Page 91 Copy image.jpg to the PC to display. If the development board is connected to the LCD screen, you can use the command to output the captured photos to the LCD for display. # fbv image.jpg fbv - The Framebuffer Viewer image.jpg 640 x 480...
-
Page 92: Gps Module
Hardware Preparation: One MYD-AM335X series development board MY-GPS008C module One USB to TTL converter used to connect MYD-AM335X series development board Debug serial port and PC, PC side baud rate setting 115200-8-n-1 Interface MYD-AM335X MYD-AM335X-Y... - Page 93 $GPGSV,3,2,09,11,45,032,42,17,24,285,54,19,09,059,35,28,40,334,51*7C $GPGSV,3,3,09,32,21,084,27*4B $GPGGA,061102.0,2233.150278,N,11356.386896,E,1,05,2.7,83.5,M,-1.0,M,,*79 $GPVTG,,T,0.0,M,0.0,N,0.0,K,A*0D $GPRMC,061102.0,A,2233.150278,N,11356.386896,E,0.0,,230715,0.0,E,A*2E...
-
Page 94: Gprs Module
GPRS module on the development board. Hardware Preparation: One MYD-AM335X series development board MY-GPRS007C module One USB to TTL converter used to connect MYD-AM335X series development board Debug serial port and PC, PC side baud rate setting 115200-8-n-1 Interface MYD-AM335X... - Page 95 # Usage: root>pppd call gprs /dev/ttyO3 115200 #crtscts modem noauth debug nodetach #hide-password usepeerdns noipdefault defaultroute user "cmnet" 0.0.0.0:0.0.0.0 #ipcp-accept-local #ipcp-accept-remote #lcp-echo-failure #lcp-echo-interval 3 noccp #novj #novjccomp persist connect '/usr/sbin/chat -s -v -f /etc/ppp/peers/gprs-connect-chat' #connect '/bin/chat -v -s -f /etc/ppp/gprs-connect-chat' #disconnect '/bin/chat -v -f /etc/ppp/gprs-disconnect-chat' Use the command to make a dial-up connection.
- Page 96 Service Guarantee MYIR regards the product quality as the life of an enterprise. We strictly check and control the core board design, the procurement of components, production control, product testing, packaging, shipping and other aspects and strive to provide products with best quality to customers.
- Page 97 MYIR will always keep a certain stock for its regular products. If your order quantity is less than the amount of inventory, the delivery time would be within three days; if your order quantity is greater than the number of inventory, the delivery time would be always four to six weeks.
- Page 98 2. Please do not use finger nails or hard sharp object to touch the surface of the LCD. 3. MYIR suggests user purchasing a piece of special wiper to wipe the LCD after long time use, please avoid clean the surface with fingers or hands to leave fingerprint.
- Page 99 During the warranty period, the shipping cost which delivered to MYIR should be responsible by user; MYIR will pay for the return shipping cost to users when the product is repaired. If the warranty period is expired, all the shipping cost will be responsible by users.
- Page 100 Sales Email: sales@myirtech.com Phone: +86-755-22984836 Fax: +86-755-25532724 Website: www.myirtech.com...
Need help?
Do you have a question about the MYD-AM335X and is the answer not in the manual?
Questions and answers