Table of Contents
Advertisement
Advertisement
Table of Contents

Related Manuals for MYiR MYD-C8MMX


Summary of Contents for MYiR MYD-C8MMX
-
Page 2: Table Of Contents
Table of Contents Preface 1 Software Resource 2 Deploy Development Environment 3 Build Linux System 3.1 U-Boot 1.4.1 3.2 Linux Kernel 1.4.2 3.3 Build Filesystem 1.4.3 3.3.1 Yocto build Linux system 1.4.3.1 3.3.2 Yocto build SDK package 1.4.3.2 3.3.3 Yocto build FAQ 1.4.3.3 4 Linux Application Development 4.1 GPIO-KEY 1.5.1 4.2 GPIO-LED 1.5.2 4.3 RTC 1.5.3 4.4 Ethernet 1.5.4 4.5 M.2 1.5.5 4.6 USB Host 1.5.6 4.7 TTL Serial 1.5.7 4.8 Audio 1.5.8 4.9 LCD 1.5.9 4.10 CAMERA 1.5.10 4.11 WiFi 1.5.11 4.12 Buletooth 1.5.12 4.13 4G LTE... -
Page 3: Preface
Preface MYD-C8MMX Linux Development Guide This document introduce the MYD-C8MMX development board about Linux compile and deploy, interface usage on baseboard, Qt application development etc. Version History Version Description Date V1.0 Initialize version 2019.11.09 Hardware Version This document suit list: MYD-C8MMX... -
Page 4: Software Resource
1 Software Resource 1 Software Resource MYD-C8MMX series boards support the Linux kernel version 4.14.98, and provided with rich hardware resource and software resource. Below is MYD-C8MMX software resource table: Categary Name Description Source Bootloader U-boot Responsible for system initialization and boot kernel Linux kernel Linux 4.14.98 Based on official version imx_4.14.98_2.0.0_ga Driver PMIC BD71847MWV Driver USB Host USB Host Driver USB OTG USB OTG driver Driver I2C bus driver Driver Ethernet 10/100/1000Mbps ethernet driver Driver MMC/SDIO/TF Card Driver Support for 10.1-inch, 7-inch and 19-inch screens Driver Read/write real date time Driver Touch Panel Supports Capacity touch panel Driver UART... - Page 5 1 Software Resource...
-
Page 6: Deploy Development Environment
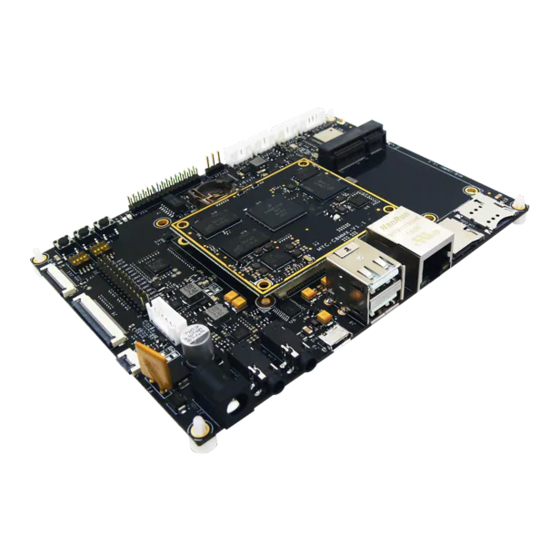
2 Deploy Development Environment 2 Deploy Development Environment You need to install the Linux operating system on the PC. It is recommended to use Ubuntu 16.04 64bit distribution, 8G memory, at least 200G (recommended 500G or more) idle hard disk, connect the network cable and configure the network. Follow-up operations need to connect to the Internet to install or download related software packages. Connect development board with PC 1. PC use USB to TLL cable with DEBUG port(JP25) on board. 2. Open serial program with exist serial device PC serial port configure parameters: Baudrate: 115200 Data bit: 8bit Parity: None Stop bit: 1bit Flow control: Disable User:root ,Passwd:none Product pictures The core module has two model of chip. According to the difference between Flash and RAM, we have three configuration model. MYC-C8MMQ6-8E2D-160-I MYC-C8MMQ6-8E2D-180-C Figure 2-1 MYC-C8MMX... - Page 7 2 Deploy Development Environment Figure 2-2 MYD-C8MMX Install necessary software packages $sudo apt-get install gawk wget git-core diffstat unzip texinfo gcc-multilib build-e ssential chrpath socat libsdl1.2-dev u-boot-tools $sudo apt-get install libsdl1.2-dev xterm sed cvs subversion coreutils texi2html doc book-utils python-pysqlite2 help2man make gcc g++ desktop-file-utils libgl1-mesa-d ev libglu1-mesa-dev mercurial autoconf automake groff curl lzop asciidoc Build work directory Create a working directory to facilitate the creation of an unified environment variable path. Copy the product CD-ROM source code to the working directory, while setting the DEV_ROOT variable to enable the follow-up step path accessed. $mkdir -p ~/MYD-C8MMX-devel $export DEV_ROOT=~/MYD-C8MMX-devel $cp -r <DVDROM>/02-Images $DEV_ROOT $cp -r <DVDROM>/03-Tools $DEV_ROOT $cp -r <DVDROM>/04-Source $DEV_ROOT Yocto toolchain Yocto toolchain: gcc version 7.3.0 (GCC) Yocto provide two kinds toolchain, one is low-level development toolchain meta-toolchain, another is application development toolchain.The low-level toolchain likes Linaro.The another used for application development, include more third-party libaries and header files.The MYD-C8MMX also supports both two kinds, those files are list below. Toolchain File Name Description myir-imx-xwayland-glibc-x86_64-fsl-image-qt5-validation-imx-aarch64-toolchain-4.14- fsl-image-qt5 sumo.sh toolchain...
- Page 8 2 Deploy Development Environment myir-imx-xwayland-glibc-x86_64-meta-toolchain-aarch64-toolchain-4.14-sumo.sh meta-toolchain Yocto toolchain distribute SDK package type. You need install the toolchain SDK package, then use it. Below is install method: Run shell script as normal user.It will request you to input install path, default is under "/opt" directory.Then you will reuquest to set permission to directory. You can use "source" or "." to load toolchain environment to current shell when your installation finish. This example installs the application development tool chain in the /media/hufan/toolschain directory. The user can specify the directory by entering the specified installation directory in the following log. $ ./myir-imx-xwayland-glibc-x86_64-fsl-image-qt5-validation-imx-aarch64-toolchain-4.14-sumo.sh myir i.MX Release Distro SDK installer version 4.14-sumo ======================================================== Enter target directory for SDK (default: /opt/myir-imx-xwayland/4.14-sumo): /media/hufan/ You are about to install the SDK to "/media/hufan/myir-imx-xwayland/4.14-sumo". Proceed[Y/n]? y Extracting SDK..............................................................................done Setting it up...done SDK has been successfully set up and is ready to be used. Each time you wish to use the SDK in a new shell session, you need to source the environment setup script e.g. Load the environment variables into current shell: $ source /media/hufan/myir-imx-xwayland/4.14-sumo/environment-setup-aarch64-poky-linux Check the toolchain SDK is correct after installation.Using the "source" command to load environment file to shell and check the compiler version. $source /media/hufan/myir-imx-xwayland/4.14-sumo/environment-setup-aarch64-poky-linux $echo $CC aarch64-poky-linux-gcc --sysroot=/media/hufan/toolschain/sysroots/aarch64-poky-linux With these steps, you can install the low-level toolchain meta-toolcahin.Please input different path to store the toolchain, otherwize it will cover existing files in same directory.
-
Page 9: Build Linux System
3 Build Linux System 3 Build Linux System This chapter introduces how to build components of Linux system. The MYD-C8MMX includes below parts: ATF: First level bootloader. SPL: First level bootloader. U-Boot: Second level bootloader. Linux Kernel: Linux kernel 4.14.98 and drivers suit for MYD-C8MMX board. Yocto: An open source collaboration project that provides templates, tools and methods to help you create custom Linux- based system for embedded products regardless of the hardware architecture. These software are locating in 04-Source directory.Some packages use ID number in file name. Before compile u-boot and Linux kernel source code, you need install meta-toolchain and load the environment variables into current shell. Load the environment variables into current shell: $ source /media/hufan/myir-imx-xwayland/4.14-sumo/environment-setup-aarch64-poky-linux... -
Page 10: U-Boot
3.1 U-Boot 3.1 Compiling U-Boot Since the i.MX8M MINI bootloader consists of several parts, it is necessary to compile multiple files and combine them. MYIR-i.MX8MM-Uboot imx-atf firmware-imx-8.1 imx-mkimage U-boot Enter Bootloader directory, extract U-boot source tar source package: $ cd $DEV_ROOT/04-Source/ $ tar -xvf MYIR-i.MX8MM-Uboot.tar.gz $ cd MYIR-i.MX8MM-Uboot Compiling: $ make distclean $ make defconfig $ make -j16 After compile completation: u-boot-nodtb.bin spl/u-boot-spl.bin arch/arm/dts/fsl-imx8mm-ddr4-evk.dtb Get firmware and Extract: $ wget http://www.freescale.com/lgfiles/NMG/MAD/YOCTO/firmware-imx-8.1.bin Install: $ chmod +x firmware-imx-8.1.bin $ ./firmware-imx-8.1.bin --auto-accept $ tree -L 2 firmware-imx-8.1 firmware-imx-8.1 ├── COPYING ├── firmware │ ├── ddr │ ├── epdc │ ├── hdmi │ ├── sdma │ ├── seco │ └── vpu... - Page 11 3.1 U-Boot └── SCR.txt Compiling ATF: $ cd 04-Sources/ $ tar xvf imx8mm-atf.tar.gz # cd imx8mm-atf $ make clean PLAT=imx8mm $ LDFLAGS="" make PLAT=imx8mm After compile completation: build/imx8mm/release/bl31.bin Compile imx-mkimage to generate flash.bin: Unzip imx-mkimage first, then copy the previously compiled firmware to the imx-mkimage directory: $ tar xvf imx-mkimage.tar.gz $ cd imx-mkimage $ cp ../MYIR-i.MX8MM-Uboot/tools/mkimage ./iMX8M/mkimage_uboot $ cp ../MYIR-i.MX8MM-Uboot/arch/arm/dts/myb-fsl-imx8mm-ddr4-evk.dtb ./iMX8M/ $ cp ../MYIR-i.MX8MM-Uboot/spl/u-boot-spl.bin ./iMX8M/ $ cp ../MYIR-i.MX8MM-Uboot/u-boot-nodtb.bin ./iMX8M/ $ cp ../firmware-imx-8.1/firmware/ddr/synopsys/ddr4_dmem_1d.bin ./iMX8M/ $ cp ../firmware-imx-8.1/firmware/ddr/synopsys/ddr4_dmem_2d.bin ./iMX8M/ $ cp ../firmware-imx-8.1/firmware/ddr/synopsys/ddr4_imem_1d.bin ./iMX8M/ $ cp ../firmware-imx-8.1/firmware/ddr/synopsys/ddr4_imem_2d.bin ./iMX8M/ $ cp ../imx8mm-atf/build/imx8mm/release/bl31.bin ./iMX8M/ $ make SOC=iMX8MM clean $ make SOC=iMX8MM flash_ddr4_evk $ ls ./iMX8M/ flash.bin Flash.bin is the final generated firmware.
-
Page 12: Linux Kernel
3.2 Linux Kernel 3.2 Linux Kernel Enter Kernel directory, extract it: $ cd $DEV_ROOT/04-Source $ tar -xvf MYIR-i.MX8MM-Linux.tar.gz $ cd MYIR-i.MX8MM-Linux Compiling: $ make distclean $ make defconfig $ LDFLAGS="" CC="$CC" $ make Image dtbs modules -j16 When the compilation is done, the kernel image file Image is generated in the 'arch/arm64/boot/' directory, and the DTB file is generated in the 'arch/arm64/boot/dts/freescalc' directory. DTB File Name Description myb-fsl-imx8mm-lcdif.dtb MYD-C8MMX Device tree loaded by default(10.1-inch) myb-fsl-imx8mm-hontron-7.dtb MYD-C8MMX 7-inch LVDS screen device tree myb-fsl-imx8mm-me190etn01.dtb MYD-C8MMX 19-inch LVDS screen device tree myb-fsl-imx8mm-atk-10-1.dtb MYD-C8MMX 10.1-inch LVDS screen device tree When you build kernel complete, the version tag will changed automatically.If you driver load with module type, you should recompile driver module. $ make modules After compile completation, it will be installed specify path: $ mkdir ../target-kernel $ make INSTALL_MOD_PATH=../target-kernel modules_install Then you can package the target-kernel directory and extract it into /lib directory on file system of MYD-C8MMX board. -
Page 13: Build Filesystem
3.3 Build Filesystem 3.3 Build File System The Linux platform has many open source tools to build filesystem.These tools has some features to help developer build filesystem more easier in system build or customize it.Recently, some are more populator Buildroot, Yocto, OpenEmbedded etc.The Yocto project support more powerful and system method to build a linux system to suit your product. Yocto not only a build tool for file system, it also has full workflow to build and maintain under Linux. It makes platform developer and application developer working together under same framework. And resolve non-united and non-manage on the legacy develop way. Yocto is an open source "umbrella" project.It means has more sub-projects.Yocto just containe all other projects and support an reference build system "Poky". The Poky project will guide developer how to use, build, embedded Linux system.It has Bitbake, OpenEmbedded-Core, BSP package and more kinds of software packages and config files.Through Poky to build different requirment system, eg: the minimal system core-image-minimal, include GUI system fsl-image-gui, include Qt5 graphics system fsl-image-qt5-validation-imx. NXP i.MX8M MNI support build file to apply on Yocto project.These files will build a customization system by NXP.We also provide config files to support MYD-C8MMX series boards.This will help developer to build Linux system that can be programming to MYD-C8MMX series boards. Yocto has more rich development resource, help engineers to learn and customization the system. This document can't cover full usage on Yocto.We recommend developer to build system after reading these documents. Yocto Project Quick start Bitback User Manual Yocto Project Reference Manual Yocto Project Development Manual Yocto Project Complete Documentation Set... -
Page 14: Yocto Build Linux System
3.3.1 Yocto build Linux system 3.3.1 Yocto build Linux system This section suit for developer on customization file system.If you just want to use it, please use the prebuilt file system. The Yocto needs download all third-party software packages from internet.In order to build more speedly, MYD-C8MMX also support a full package, you does not need download again. Attention: Building Yocto does not use previous toolchain, please open new tab for shell or new terminal window. MYD-C8MMX support full Yocto package Extract Yocto source package, and extract the Yocto-downloads.tar.xz into Yocto source direcotry.The Yocto-downloads.tar.xz includes all packages when building MYD-C8MMX from Yocto. Attention: The Yocto-downloads.tar.xz file is more large, it is not include in MYD-C8MMX iso file.Please visit and download it from http://d.myirtech.com/MYD-C8MMX. $cd $DEV_ROOT $tar xvf 04-Source/MYIR-Yocto-i.MX8MM.tar.gz $tar xvf 04-Source/Yocto-downloads.tar.xz -C MYIR-Yocto-i.MX8MM Last, also needs put the kernel and u-boot source into your home directory in linux.It will be fetched with Yocto. $tar xvf 04-Source/MYIR-i.MX8MM-Uboot.tar.gz -C ~/ $tar xvf 04-Source/MYIR-i.MX8MM-Linux.tar.gz -C ~/ Init Yocto build directory Use script by NXP supported, create a build directory, and Yocto will build all under it. The MACHINE is "myd-imx8mm" . $ cd MYIR-Yocto-i.MX8MM $DISTRO=myir-imx-xwayland MACHINE=myd-imx8mm source fsl-setup-release.sh -b build_8m_mini $tree conf/ conf/ ├── bblayers.conf ├── bblayers.conf.org ├── local.conf ├── local.conf.org ├── local.conf.sample ├── sanity_info └── templateconf.cfg Image Name Description Used for core-image-base base file system has more command line feature fsl-image-validation-imx Builds an image with a GUI without any Qt content fsl-image-qt5-validation-imx Builds an opensource Qt 5 image. Build system image with Qt5 package... - Page 15 3.3.1 Yocto build Linux system The first build will cost more time, please take a coffee and wait it completion. $ bitbake fsl-image-qt5-validation-imx Build system image with full command line packages You doesn't need to modify any file, just let Yocto to build it. $ bitbake core-image-base After build process finish, it will output manifest file.This file has each package name and version be installed to target file system. The first build process of Yocto will take more time, this depend on your PC cpu core number and RAM size. The Yocto recommend use eight core CPU and SSD hardware to impove build speed. Additionally, the Yocto will generate cache after first build, the next build process also save more time for you. All output files are in "tmp/deploy/images/myd-imx8mm/" directory after build complete. Below as example: $ ls -lh tmp/deploy/images/myd-imx8mm/ -rw-r--r-- 2 hufan hufan 16K 7⽉ 6 22:15 ddr4_dmem_1d.bin -rw-r--r-- 2 hufan hufan 1.5K 7⽉ 6 22:15 ddr4_dmem_2d.bin -rw-r--r-- 2 hufan hufan 32K 7⽉ 6 22:15 ddr4_imem_1d.bin -rw-r--r-- 2 hufan hufan 24K 7⽉ 6 22:15 ddr4_imem_2d.bin -rw-r--r-- 1 hufan hufan 160K 10⽉ 14 13:31 fsl-image-qt5-validation-imx-myd-imx8mm-20191014052142.testdata.json -rw-r--r-- 1 hufan hufan 160K 10⽉ 18 19:15 fsl-image-qt5-validation-imx-myd-imx8mm-20191018110936.testdata.json -rw-r--r-- 1 hufan hufan 160K 10⽉ 18 20:10 fsl-image-qt5-validation-imx-myd-imx8mm-20191018120710.testdata.json -rw-r--r-- 1 hufan hufan 160K 10⽉ 21 21:35 fsl-image-qt5-validation-imx-myd-imx8mm-20191021121640.testdata.json -rw-r--r-- 2 hufan hufan 1.8G 10⽉ 31 12:00 fsl-image-qt5-validation-imx-myd-imx8mm-20191031034431.rootfs.ext4 -rw-r--r-- 2 hufan hufan 52K 10⽉ 31 11:59 fsl-image-qt5-validation-imx-myd-imx8mm-20191031034431.rootfs.manife -rw-r--r-- 2 hufan hufan 444M 10⽉ 31 12:01 fsl-image-qt5-validation-imx-myd-imx8mm-20191031034431.rootfs.sdcard .bz2 -rw-r--r-- 2 hufan hufan 434M 10⽉ 31 12:00 fsl-image-qt5-validation-imx-myd-imx8mm-20191031034431.rootfs.tar.bz -rw-r--r-- 1 hufan hufan 160K 10⽉ 31 11:59 fsl-image-qt5-validation-imx-myd-imx8mm-20191031034431.testdata.json lrwxrwxrwx 2 hufan hufan 66 10⽉ 31 12:00 fsl-image-qt5-validation-imx-myd-imx8mm.ext4 -> fsl-image-qt5-valida tion-imx-myd-imx8mm-20191031034431.rootfs.ext4 lrwxrwxrwx 2 hufan hufan 70 10⽉ 31 11:59 fsl-image-qt5-validation-imx-myd-imx8mm.manifest -> fsl-image-qt5-va lidation-imx-myd-imx8mm-20191031034431.rootfs.manifest lrwxrwxrwx 2 hufan hufan 72 10⽉ 31 12:01 fsl-image-qt5-validation-imx-myd-imx8mm.sdcard.bz2 -> fsl-image-qt5- validation-imx-myd-imx8mm-20191031034431.rootfs.sdcard.bz2 lrwxrwxrwx 2 hufan hufan 69 10⽉ 31 12:00 fsl-image-qt5-validation-imx-myd-imx8mm.tar.bz2 -> fsl-image-qt5-val idation-imx-myd-imx8mm-20191031034431.rootfs.tar.bz2 lrwxrwxrwx 1 hufan hufan 68 10⽉ 31 11:59 fsl-image-qt5-validation-imx-myd-imx8mm.testdata.json -> fsl-image-q t5-validation-imx-myd-imx8mm-20191031034431.testdata.json lrwxrwxrwx 2 hufan hufan 47 10⽉ 18 19:11 Image -> Image--4.14.98-r0-myd-imx8mm-20191018110936.bin -rw-r--r-- 2 hufan hufan 43K 10⽉ 18 19:11 Image--4.14.98-r0-myb-fsl-imx8mm-atk-10-1-20191018110936.dtb -rw-r--r-- 2 hufan hufan 41K 10⽉ 18 19:11 Image--4.14.98-r0-myb-fsl-imx8mm-ddr4-evk-m4-20191018110936.dtb -rw-r--r-- 2 hufan hufan 41K 10⽉ 18 19:11 Image--4.14.98-r0-myb-fsl-imx8mm-evk-20191018110936.dtb -rw-r--r-- 2 hufan hufan 44K 10⽉ 18 19:11 Image--4.14.98-r0-myb-fsl-imx8mm-hontron-7-20191018110936.dtb -rw-r--r-- 2 hufan hufan 43K 10⽉ 18 19:11 Image--4.14.98-r0-myb-fsl-imx8mm-lcdif-20191018110936.dtb...
- Page 16 3.3.1 Yocto build Linux system lrwxrwxrwx 2 hufan hufan 57 10⽉ 18 19:11 Image-myb-fsl-imx8mm-lcdif.dtb -> Image--4.14.98-r0-myb-fsl-imx8mm-l cdif-20191018110936.dtb lrwxrwxrwx 2 hufan hufan 60 10⽉ 18 19:11 Image-myb-fsl-imx8mm-st2151b0.dtb -> Image--4.14.98-r0-myb-fsl-imx8m m-st2151b0-20191018110936.dtb lrwxrwxrwx 2 hufan hufan 47 10⽉ 18 19:11 Image-myd-imx8mm.bin -> Image--4.14.98-r0-myd-imx8mm-20191018110936. -rwxr-xr-x 2 hufan hufan 6.2K 7⽉ 7 01:16 imx8mm_m4_TCM_hello_world.bin -rwxr-xr-x 2 hufan hufan 17K 7⽉ 7 01:16 imx8mm_m4_TCM_rpmsg_lite_pingpong_rtos_linux_remote.bin -rwxr-xr-x 2 hufan hufan 17K 7⽉ 7 01:16 imx8mm_m4_TCM_rpmsg_lite_str_echo_rtos.bin -rwxr-xr-x 2 hufan hufan 40K 7⽉ 7 01:16 imx8mm_m4_TCM_sai_low_power_audio.bin lrwxrwxrwx 2 hufan hufan 41 9⽉ 29 19:14 imx-boot-myd-imx8mm-sd.bin -> imx-boot-myd-imx8mm-sd.bin-flash_ddr4_ -rw-r--r-- 2 hufan hufan 1.6M 9⽉ 29 19:14 imx-boot-myd-imx8mm-sd.bin-flash_ddr4_evk drwxr-xr-x 2 hufan hufan 4.0K 9⽉ 27 15:36 imx-boot-tools -rw-rw-r-- 2 hufan hufan 3.1M 10⽉ 18 19:11 modules--4.14.98-r0-myd-imx8mm-20191018110936.tgz lrwxrwxrwx 2 hufan hufan 49 10⽉ 18 19:11 modules-myd-imx8mm.tgz -> modules--4.14.98-r0-myd-imx8mm-20191018110 936.tgz lrwxrwxrwx 2 hufan hufan 60 10⽉ 18 19:11 myb-fsl-imx8mm-atk-10-1.dtb -> Image--4.14.98-r0-myb-fsl-imx8mm-atk- 10-1-20191018110936.dtb lrwxrwxrwx 2 hufan hufan 63 10⽉ 18 19:11 myb-fsl-imx8mm-ddr4-evk-m4.dtb -> Image--4.14.98-r0-myb-fsl-imx8mm-d dr4-evk-m4-20191018110936.dtb lrwxrwxrwx 2 hufan hufan 55 10⽉ 18 19:11 myb-fsl-imx8mm-evk.dtb -> Image--4.14.98-r0-myb-fsl-imx8mm-evk-20191 018110936.dtb lrwxrwxrwx 2 hufan hufan 61 10⽉ 18 19:11 myb-fsl-imx8mm-hontron-7.dtb -> Image--4.14.98-r0-myb-fsl-imx8mm-hon tron-7-20191018110936.dtb lrwxrwxrwx 2 hufan hufan 57 10⽉ 18 19:11 myb-fsl-imx8mm-lcdif.dtb -> Image--4.14.98-r0-myb-fsl-imx8mm-lcdif-2 0191018110936.dtb lrwxrwxrwx 2 hufan hufan 60 10⽉ 18 19:11 myb-fsl-imx8mm-st2151b0.dtb -> Image--4.14.98-r0-myb-fsl-imx8mm-st21 51b0-20191018110936.dtb -rw-r--r-- 2 hufan hufan 103K 7⽉ 6 22:15 signed_dp_imx8m.bin -rw-r--r-- 2 hufan hufan 103K 7⽉ 6 22:15 signed_hdmi_imx8m.bin lrwxrwxrwx 2 hufan hufan 16 7⽉ 6 23:34 tee.bin -> tee.mx8mmevk.bin -rwxrwxr-x 2 hufan hufan 318K 7⽉ 6 23:34 tee.mx8mmevk.bin lrwxrwxrwx 2 hufan hufan 24 9⽉ 29 19:14 u-boot.bin -> u-boot-sd-2018.03-r0.bin lrwxrwxrwx 2 hufan hufan 24 9⽉ 29 19:14 u-boot.bin-sd -> u-boot-sd-2018.03-r0.bin lrwxrwxrwx 2 hufan hufan 24 9⽉ 29 19:14 u-boot-myd-imx8mm.bin -> u-boot-sd-2018.03-r0.bin lrwxrwxrwx 2 hufan hufan 24 9⽉ 29 19:14 u-boot-myd-imx8mm.bin-sd -> u-boot-sd-2018.03-r0.bin -rw-r--r-- 2 hufan hufan 818K 9⽉ 29 19:14 u-boot-sd-2018.03-r0.bin lrwxrwxrwx 2 hufan hufan 50 9⽉ 29 19:14 u-boot-spl.bin -> u-boot-spl.bin-myd-imx8mm-2018.03-r0-sd-2018.03-r0 lrwxrwxrwx 2 hufan hufan 50 9⽉ 29 19:14 u-boot-spl.bin-myd-imx8mm -> u-boot-spl.bin-myd-imx8mm-2018.03-r0-sd -2018.03-r0 -rw-r--r-- 2 hufan hufan 85K 9⽉ 29 19:14 u-boot-spl.bin-myd-imx8mm-2018.03-r0-sd-2018.03-r0 lrwxrwxrwx 2 hufan hufan 50 9⽉ 29 19:14 u-boot-spl.bin-myd-imx8mm-sd -> u-boot-spl.bin-myd-imx8mm-2018.03-r0 -sd-2018.03-r0...
- Page 17 3.3.1 Yocto build Linux system Bitbake arguments Description -c fetch Download package from predefined of recipe -c cleanall Clean all build directory -c deploy Deploy image or package to target rootfs Continue when error occure -c compile Recompile image or package...
-
Page 18: Yocto Build Sdk Package
3.3.2 Yocto build SDK package 3.3.2 Yocto build SDK pakcage Yocto supports SDK generating function. It used for low-level or application level to compile source code.You doesn't need to manually handle the dependency softwares or libraries.The SDK package has two different way, one is suit low-level deveop toolchain, used for compile u-boot and linux.Another used for application development, it contains header files and libraries on target sysroot. The developer will be more convenient to development program to target device. The two kinds SDK package use shell self-extra file, it will be installed under "/opt" directory. Build low-level toolchain $ bitbake meta-toolchain After the build is complete, in the "tmp/deploy/sdk" directory: $ ls tmp/deploy/sdk/ myir-imx-xwayland-glibc-x86_64-meta-toolchain-aarch64-toolchain-4.14-sumo.sh myir-imx-xwayland-glibc-x86_64-meta-toolchain-aarch64-toolchain-4.14-sumo.target.manifest myir-imx-xwayland-glibc-x86_64-meta-toolchain-aarch64-toolchain-4.14-sumo.testdata.json Here has two kinds manifest file, "host.manifest" is a list of host software packages, "target.manifest" is a list of target device packages. Build application-level toolchain The application-level toolchain use same name with Image.This case you can use "fsl-image-qt5-validation-imx" as image name argument. $ bitbake -c populate_sdk <image name> After the build is complete, in the "tmp/deploy/sdk" directory: $ ls tmp/deploy/sdk/ myir-imx-xwayland-glibc-x86_64-fsl-image-qt5-validation-imx-aarch64-toolchain-4.14-sumo.host.manifest myir-imx-xwayland-glibc-x86_64-fsl-image-qt5-validation-imx-aarch64-toolchain-4.14-sumo.sh myir-imx-xwayland-glibc-x86_64-fsl-image-qt5-validation-imx-aarch64-toolchain-4.14-sumo.target.manifest myir-imx-xwayland-glibc-x86_64-fsl-image-qt5-validation-imx-aarch64-toolchain-4.14-sumo.testdata.json The ".host.manifest" is a list of host install packages. The ".target.manifest" is a list of target device installed packages.The file "myir-imx-xwayland-glibc-x86_64-fsl-image-qt5-validation-imx-aarch64-toolchain-4.14-sumo.sh" is SDK toolchain. It can be distributed and installed to other Linux system and compile program to target device. -
Page 19: Linux Application Development
4 Linux Application Development 4 Linux Application Development This charpter is about peripherals for using development boards on Linux systems. The hardware peripherals and application examples of MYD-C8MMX development board. Before use, you need use Yocto SDK toolchain to compile all the example code, and copy to the development board directory. Compile example program Load the toolchain environment to current shell, and check the gcc version to verify environment correct. $ source /media/hufan/myir-imx-xwayland/4.14-sumo/environment-setup-aarch64-poky-li nux Compile the sample code: $ cd $DEV_ROOT/04-Sources $ tar xvf example.tar.bz2 $ cd example $ make... -
Page 20: Gpio-Key
4.1 GPIO-KEY 4.4 GPIO-KEY This example demonstrates how to read key state and key values in Linux user space. After running the gpio_key program, press or release the K3 key, the debug serial port will output the relevant status information. Press "Ctrl-C" to end the program. Run the program on board: # ./gpio_key /dev/input/event1 Hit any key on board ..key 3 Pressed key 3 Released key 3 Pressed key 3 Released... -
Page 21: Gpio-Led
4.2 GPIO-LED 4.2 GPIO-LED This example demonstrates using the Linux system API to operate LED(D18 and D19) light on and off. After running the program, D18 and D19 flash alternately. Press "Ctrl-C" to end the program. # ./gpio_led /sys/class/leds/user/brightness /sys/class/leds/cpu/brightness... -
Page 22: Rtc
4.3 RTC 4.3 RTC This sample demostrates how to write and read the RTC time ,as well as when the system power off for a while , the system time whether synchronize to the RTC. Hardware connection Install RTC battery into J20. Software test RTC write and read test : 1.View the system time # date Wed Apr 3 12:09:40 UTC 2019 2.Update the system time to RTC hwclock -w 3.View the time of RTC # hwclock Wed Apr 3 12:11:09 2019 0.000000 seconds 4.Set a system time #date -s 20170402 Sun Apr 2 00:00:00 UTC 201 5.Update the RTC`s time to system #hwclock -s #date Wed Apr 3 12:13:10 UTC 2019 Perform RTC synchronization system time test The above process has set the time for the RTC. Now power off first for a minute, then power on , the system time will be update by RTC . # date Wed Apr 3 12:14:20 UTC 2019... - Page 23 4.3 RTC...
-
Page 24: Ethernet
4.4 Ethernet 4.4 Ethernet This sample uses Linux socket API to implement simple C/S structure. Two programs communicate via the TCP/IP stack. The pc endpoint uses pc_server as service and the development board uses arm_client as clinet to communicate. Hardware connection Insert the USB disk into the development board,which stored the example in the 4 chapters.Connect the linux pc and development board with net cable. Software test Place the program in the linux computer`s home directory,which completed in example/network/pc_server directory. Set a static IP as 192.168.30.3 and start the service,perform below step: ifconfig eth0 192.168.30.3 ./pc_server As a client, the development board also need to set a static IP as 192.168.30.133, then start the arm_client program, perform below step: ifconfig eth0 192.168.30.133 ./arm_client 192.168.30.3 form server: Make Your idea Real! The linux computer will output below: REC FROM: 192.168.30.133... -
Page 25: M.2
4.5 M.2 4.5 M.2 M.2 interface work on the NVME agreement,this sample use nvme2280 SSD hard disk of TOSHIBA RC100 for validation purpose. Hardware connection Insert the SSD into J18 interface. Software test The Kernel has added the NVME protocol by default,so we can use SSD without configure any more. Check the ssd is mounted by below command to check whether it mounted or not. #df -h Filesystem Size Used Avail Use% Mounted on /dev/root 6.4G 1.9G 4.2G 31% / devtmpfs 237M 4.0K 237M 1% /dev tmpfs 494M 0 494M 0% /dev/shm tmpfs 494M 8.6M 485M 2% /run tmpfs 494M 0 494M 0% /sys/fs/cgroup tmpfs 494M 4.0K 494M 1% /tmp tmpfs 494M 144K 494M 1% /var/volatile /dev/nvme0n1p1 110G 560M 104G 1% /run/media/nvme0n1p1 /dev/mmcblk0p1 500M 21M 480M 5% /run/media/mmcblk0p1 tmpfs 99M 88K 99M 1% /run/user/0 # cat /proc/mounts | grep nvme /dev/nvme0n1p1 /run/media/nvme0n1p1 ext4 rw,relatime,data=ordered 0 0 Write and read SSD Write a hello strings to the test.txt on the SSD mount point, and then read it,compare with what bas been written. #cd /run/media/nvme0n1p1 #echo hello > test.txt #cat test.txt hello... -
Page 26: Usb Host
4.6 USB Host 4.6 USB Host Connect the USB flash disk to USB HOST(J8) interface, will output detection device information. At the same time, use this storage device to mount the Linux system under its read and write. # usb 1-2: USB disconnect, device number 6 usb 1-2: new high-speed USB device number 7 using atmel-ehci usb 1-2: New USB device found, idVendor=0bda, idProduct=0316 usb 1-2: New USB device strings: Mfr=1, Product=2, SerialNumber=3 usb 1-2: Product: USB3.0-CRW usb 1-2: Manufacturer: Generic usb 1-2: SerialNumber: 20120501030900000 usb-storage 1-2:1.0: USB Mass Storage device detected scsi host5: usb-storage 1-2:1.0 scsi 5:0:0:0: Direct-Access Generic- SD/MMC 1.00 PQ: 0 ANSI: 4 sd 5:0:0:0: [sda] 31116288 512-byte logical blocks: (15.9 GB/ 14.8 GiB) sd 5:0:0:0: [sda] Write Protect is off sd 5:0:0:0: [sda] Write cache: disabled, read cache: enabled, doesn't support DPO or FUA sda: sda1 sda2 sd 5:0:0:0: [sda] Attached SCSI removable disk # mount /dev/sda1 /mnt/ # echo "hello" > /mnt/hello.txt # cat /mnt/hello.txt hello... -
Page 27: Ttl Serial
4.7 TTL Serial 4.7 TTL Serial This example demonstrates how to test the serial port with different baund rates. There are three serial ports can be used: Serial port Associate device ttymxc2 (default debug serial port) ttymxc0 ttymxc3 Hardware connection Connect to the J24 and use the TTL to USB cable to connect to the PC. Software test Set the device of ttymxc1 baund rate to 115200 and send "hello" words. # ./uart_test -d /dev/ttymxc2 -b 115200 -s hello Use the serial tool to configure ,detail parameter as follows : baund rate:115200 data bits: 8bit parity:None stop bits:1bit flow control:Disable The serial port output: hellohellohello... -
Page 28: Audio
4.8 Audio 4.8 Audio This example demonstrates the development onboard audio interface using the arecord/aplay program in Linux systems. Hareware connection Connect LINE IN(J14) interface on the MYD-C8MMX board, PC Audio-Out via a 3.5mm AUX cable HEADPHONE(J13) connect your headerphone or speaker Software test The PC plays the audio file and execute arecord command on board.It will recored data and save to test.wav file.You can use "ctrl + c" stop it after one minute. # arecord -f cd test.wav Use aplay command to play file that previous step recoreded. # aplay test.wav... -
Page 29: Lcd
4.9 LCD 4.9 LCD This example demonstrates the operation of the FrameBuffer of Linux, enabling color and color grid testing.You need connect the LCD to MYD-C8MMX board LCD interface(J6). Hardware connection Use FPC to connect J6 interface on LVDS display myd-c8mmx board. The LCD screen will display the corresponding color, the following is the terminal output information: # systemctl stop weston # ./framebuffer_test The framebuffer device was opened successfully. vinfo.xres=1280 vinfo.yres=799 vinfo.bits_per_bits=32 vinfo.xoffset=0 vinfo.yoffset=0 red.offset=16 green.offset=8 blue.offset=0 transp.offset=0 finfo.line_length=5120 finfo.type = PACKED_PIXELS The framebuffer device was mapped to memory successfully. # systemctl start weston When using different screens, modify and load the corresponding DTB files. Modify the method in uboot mode as follows: u-boot=> print fdt_file fdt_file=myb-fsl-imx8mm-lcdif.dtb u-boot=> setenv fdt_file myb-fsl-imx8mm-hontron-7.dtb u-boot=> save Saving Environment to MMC... Writing to MMC(1)... OK u-boot=> Table list: DTB File Name Description myb-fsl-imx8mm-lcdif.dtb MYD-C8MMX Device tree loaded by default(10.1-inch) myb-fsl-imx8mm-hontron-7.dtb MYD-C8MMX 7-inch LVDS screen device tree myb-fsl-imx8mm-me190etn01.dtb MYD-C8MMX 19-inch LVDS screen device tree myb-fsl-imx8mm-atk-10-1.dtb... -
Page 30: Camera
4.10 CAMERA 4.10 Camera A mipi-dsi interface (J11) is provided on myd-c8mmx. It can connects camera module of MY-CAM003M model.The module and board connects with FPC wire. Attention: Please do not insert other camera model, this operation maybe damage the board or camera module. Hardware connection Use FPC wire connects MY-CAM003M module and camera interface J11 of MYD-C8MMX. Software test Use gst-play in the system to preview # gst-launch-1.0 v4l2src device=/dev/video0 ! 'video/x-raw,width=640,height=480,frame rate=30/1' ! glimagesink... -
Page 31: Wifi
4.11 WiFi 4.11 WiFi The MYD-C8MMX board has a WiFi module (J7).It's supports Client mode. Hardware Connective Please install the wireless antenna in the J7 position of the development board. Client Mode The Client mode means WiFi module as client device connect to your route or other AccessPoint device. Our Linux prebuilt system has added driver of WiFi module.It will be auto loaded when system startup. root@myd-imx8mm:/etc/wifi-conf# ./ifup_wifi_sta sending signal 15 to procs Successfully initialized wpa_supplicant [ 132.094487] IPv6: ADDRCONF(NETDEV_CHANGE): wlan0: link becomes ready root@myd-imx8mm:/etc/wifi-conf# udhcpc: started, v1.27.2 udhcpc: sending discover udhcpc: sending select for 192.168.40.100 udhcpc: lease of 192.168.40.100 obtained, lease time 7200 /etc/udhcpc.d/50default: Adding DNS 223.5.5.5 /etc/udhcpc.d/50default: Adding DNS 201.104.111.114 root@myd-imx8mm:/etc/wifi-conf# iwconfig eth0 no wireless extensions. wlan0 IEEE 802.11 ESSID:"MYIR_TECH" Mode:Managed Frequency:2.412 GHz Access Point: 30:FC:68:9A:E8:99 Bit Rate=24 Mb/s Tx-Power=31 dBm Retry short limit:7 RTS thr:off Fragment thr:off Encryption key:off Power Management:on Link Quality=70/70 Signal level=-36 dBm Rx invalid nwid:0 Rx invalid crypt:0 Rx invalid frag:0 Tx excessive retries:0 Invalid misc:0 Missed beacon:0 lo no wireless extensions. root@myd-imx8mm:/etc/wifi-conf# ifconfig eth0 Link encap:Ethernet HWaddr 12:db:f0:7e:8d:fe UP BROADCAST MULTICAST MTU:1500 Metric:1 RX packets:0 errors:0 dropped:0 overruns:0 frame:0 TX packets:0 errors:0 dropped:0 overruns:0 carrier:0 collisions:0 txqueuelen:1000 RX bytes:0 (0.0 B) TX bytes:0 (0.0 B) lo Link encap:Local Loopback inet addr:127.0.0.1 Mask:255.0.0.0 inet6 addr: ::1/128 Scope:Host... - Page 32 4.11 WiFi RX packets:14 errors:0 dropped:0 overruns:0 frame:0 TX packets:34 errors:0 dropped:0 overruns:0 carrier:0 collisions:0 txqueuelen:1000 RX bytes:1914 (1.8 KiB) TX bytes:6255 (6.1 KiB) root@myd-imx8mm:/etc/wifi-conf# You can see that the IP was also obtained after the connection was successful. AP Mode root@myd-imx8mm:/etc/wifi-conf# ./ifup_wifi_ap sending signal 15 to procs sending signal 15 to procs Configuration file: /etc/wifi-conf/hostapd.conf [ 364.421584] IPv6: ADDRCONF(NETDEV_UP): wlan0: link is not ready wlan0: Could not connect to kernel driver Using interface wlan0 with hwaddr 18:93:7f:74:5e:2c and ssid "MYIR-WIFI-AP" random: Only 19/20 bytes of strong random data available from /dev/random random: Not enough entropy pool available for secure operations WPA: Not enough entropy in random pool for secure operations - update keys later when the first station connect [ 364.533954] IPv6: ADDRCONF(NETDEV_CHANGE): wlan0: link becomes ready wlan0: interface state UNINITIALIZED->ENABLED wlan0: AP-ENABLED...
-
Page 33: Buletooth
4.12 Buletooth 4.12 Buletooth Connect BT bluetoothctl command can control the BT device to scan or connect. root@myd-imx8mm:~# bluetoothctl Agent registered [bluetooth]# scan on Discovery started [CHG] Controller AA:AA:AA:AA:AA:AA Discovering: yes [CHG] Device 65:E1:78:78:43:AE RSSI: -59 [CHG] Device 45:8D:3F:33:82:53 ManufacturerData Key: 0x004c [CHG] Device 45:8D:3F:33:82:53 ManufacturerData Value: 10 05 17 18 39 34 dc ..94. [CHG] Device C2:10:A8:21:7E:B4 RSSI: -65 [CHG] Device 65:E1:78:78:43:AE RSSI: -72 [NEW] Device 5C:A7:50:14:D2:26 5C-A7-50-14-D2-26 [bluetooth]# devices Device 45:8D:3F:33:82:53 45-8D-3F-33-82-53 Device 65:E1:78:78:43:AE 65-E1-78-78-43-AE Device B0:FC:36:3B:CF:0E MYIR-BT Device 24:31:54:4D:0B:34 MYIR_TECH1 Device 57:13:DB:67:0A:3B 57-13-DB-67-0A-3B [bluetooth]# pair 24:31:54:4D:0B:34 Attempting to pair with 24:31:54:4D:0B:34 [CHG] Device 24:31:54:4D:0B:34 Connected: yes Request confirmation [agent] Confirm passkey 959291 (yes/no): yes [CHG] Device 24:31:54:4D:0B:34 Modalias: bluetooth:v010Fp107Ed1436 [CHG] Device 24:31:54:4D:0B:34 UUIDs: 0000046a-0000-1000-8000-00805f9b34fb [CHG] Device 24:31:54:4D:0B:34 UUIDs: 00001105-0000-1000-8000-00805f9b34fb [CHG] Device 24:31:54:4D:0B:34 UUIDs: 0000110a-0000-1000-8000-00805f9b34fb [CHG] Device 24:31:54:4D:0B:34 UUIDs: 0000110c-0000-1000-8000-00805f9b34fb [CHG] Device 24:31:54:4D:0B:34 UUIDs: 00001112-0000-1000-8000-00805f9b34fb [CHG] Device 24:31:54:4D:0B:34 UUIDs: 00001115-0000-1000-8000-00805f9b34fb [CHG] Device 24:31:54:4D:0B:34 UUIDs: 00001116-0000-1000-8000-00805f9b34fb [CHG] Device 24:31:54:4D:0B:34 UUIDs: 0000111f-0000-1000-8000-00805f9b34fb [CHG] Device 24:31:54:4D:0B:34 UUIDs: 0000112f-0000-1000-8000-00805f9b34fb [CHG] Device 24:31:54:4D:0B:34 UUIDs: 00001132-0000-1000-8000-00805f9b34fb [CHG] Device 24:31:54:4D:0B:34 UUIDs: 00001200-0000-1000-8000-00805f9b34fb [CHG] Device 24:31:54:4D:0B:34 UUIDs: 00001800-0000-1000-8000-00805f9b34fb... -
Page 34: Lte
4.13 4G LTE 4.13 LTE The MYD-C8MMX board support LTE module through MINI PCI-E slot with USB data line.Currently, the MYD-C8MMX boards only support EC20 model from Quectl. Attention: The module not default accessory part.You need buy it from MYiR. Hardware connection Install Quectl EC20 module into MINI PCI-E slot(U22). Software test Our Linux prebuilt system has added driver of 4G module.It will be auto loaded when system startup. And also use ls to confirm # ls /dev/ttyUSB* /dev/ttyUSB0 /dev/ttyUSB1 /dev/ttyUSB2 /dev/ttyUSB3 /dev/ttyUSB4 The Linux system of MYD-C8MMX series board has provider ppp package.You can just enable ppp0 device, it will auto dial-up. # ifup ppp0 # ifconfig ppp0 ppp0 Link encap:Point-to-Point Protocol inet addr:10.163.130.65 P-t-P:10.64.64.64 Mask:255.255.255.255 UP POINTOPOINT RUNNING NOARP MULTICAST MTU:1500 Metric:1 RX packets:5 errors:0 dropped:0 overruns:0 frame:0 TX packets:5 errors:0 dropped:0 overruns:0 carrier:0 collisions:0 txqueuelen:3 RX bytes:62 (62.0 B) TX bytes:86 (86.0 B) # cat /etc/resolv.conf nameserver 202.96.128.86 nameserver 202.96.134.133 Using the ping command to test whether the module is connected to the 4G network. # ping myirtech.com PING myirtech.com (50.6.151.71) 56(84) bytes of data. 64 bytes from 118.123.18.103: icmp_seq=1 ttl=117 time=80.5 ms 64 bytes from 118.123.18.103: icmp_seq=2 ttl=117 time=179 ms 64 bytes from 118.123.18.103: icmp_seq=3 ttl=117 time=378 ms If you happen any issue on above steps, please check the log to find the reason. # cat /var/log/quectel-dial.log... -
Page 35: Qt Application Development
5 QT Application Development 5 QT application development Qt is the faster, smarter way to create innovative devices, modern UIs & applications for multiple screens. Cross-platform software development at its best. The MYD-C8MMX uses Qt 5.10 version. In Qt application development, it is recommended to use QtCreator IDE.It can be developed Qt application more easier, automated cross-compiler for the development board of the ARM architecture. This chapter uses Yocto SDK as cross compile tool to work with QtCreator to quickly develop graphical applications. Before starting this chapter, please complete the Chapter3 to build Qt, get an available ARM version of the Qt graphics library. Please install the Yocto application-level SDK before you start it. -
Page 36: Install Qtcreator
5.1 Install QtCreator 5.1 Install QtCreator QtCreator installation package is a binary program, can be directly installed to your host PC. $ chmod a+x 03-Tools/qt-opensource-linux-x64-5.9.4.run $ sudo 03-Tools/Qt/qt-opensource-linux-x64-5.9.4.run When the installation process is done, click on the next step to complete. The default installation directory is in the "/opt/qtcreator- 5.9.4". In order to QtCreator use Yocto SDK, we need add environment to QtCreator, $ source /media/hufan/myir-imx-xwayland/4.14-sumo/environment-setup-aarch64-poky-linux When you use QtCreator, you need start it from terminal to execute "qtcreator.sh". $ ~/Qt5.9.4/Tools/QtCreator/bin/qtcreator.sh... -
Page 37: Config Qtcreator
5.2 Config QtCreator 5.2 Configure QtCreator It is necessary to configure the toolchain in QtCreator if your want the program can run on the development baord. perform below command to start the qtcreate. Make a new configure: Configure a gcc and g++ compile Configure a QTversion Configure a QTdebug Add a new device Create a kit and add the above 4 items together to compile the QT configuration 1.Configure GCC and G++ After started Qtcreator, first open a sample, make the "project" become configurable, and then click "Project" -> Manage kits, as shown below. Figure 5-2-1 Qtcreate interface Then go to "Options" -> Compiler -> "Add" -> GCC->C/C++. The process is as follows:... - Page 38 5.2 Config QtCreator Figure 5-2-2 Option interface Then configure C and C++, you need to fill in the "name", "compiler path", "abi" select arm architecture Figure 5-2-3 C++ configure The C++ compiler path is: /media/hufan/myir-imx-xwayland/4.14-sumo/sysroots/x86_64-pokysdk-linux/usr/bin/aarch64-poky-linux/aarch64-poky- linux-g++ The C compiler path is: /media/hufan/myir-imx-xwayland/4.14-sumo/sysroots/x86_64-pokysdk-linux/usr/bin/aarch64-poky-linux/aarch64-poky- linux-gcc 2.Configure QT versions "Option"-> Qt Versions -> "Add",select the following file.
- Page 39 5.2 Config QtCreator /media/hufan/myir-imx-xwayland/4.14-sumo/sysroots/x86_64-pokysdk-linux/usr/bin/qt5/qmake Figure 5-2-4 QTversion configure 3.Configure QT debug "Option"->"Debuggers"->"add" ,fill name and path. path : /media/hufan/myir-imx-xwayland/4.14-sumo/sysroots/x86_64-pokysdk-linux/usr/bin/aarch64-poky-linux/aarch64-poky- linux-gdb Figure 5-2-5 QTdebug configure 4.Add new device "device"->"add"->"general Linux device" Then configure the name, IP address, login user name, account number and password.
- Page 40 5.2 Config QtCreator Figure 5-2-6 Device configure01 Figure 5-2-7 Device configure01 5.Create kit "Build and run" -> build kit (kit) -> "add". Here you need to combine the four-step configuration files of the appeal and fill in the sysroot: /media/hufan/myir-imx-xwayland/4.14-sumo/sysroots...
- Page 41 5.2 Config QtCreator Figure 5-2-8 Kit configure...
-
Page 42: Test Qt Exapmle
5.3 Test Qt exapmle 5.3 Test Qt application In order to test previous configure is correct, Create a new project. The first step, in the menu bar, select "File" -> "New File or Project", in the open dialog box. The second step,choose "MYD-C8MM-KIT" option. Figure 5-3-1 config building option Step 3, click the menu bar "Build" -> "Build Project IMX8MM_TEST" button, you can complete the project compilation, while the bottom window will output compile. Figure 5-3-2 Compling output QtCreator build IMX8MM_TEST project, compiled binary files stored in the "build-IMX8MM_TEST-MYD_C8MM_KIT- Debug/" directory, you can use the file command to see whether is the compiler for the ARM architecture. - Page 43 5.3 Test Qt exapmle $ file IMX8MM_TEST IMX8MM_TEST: ELF 64-bit LSB executable, ARM aarch64, version 1 (GNU/Linux), dynamically linked, interpreter /li b/ld-linux-aarch64.so.1, for GNU/Linux 3.14.0, BuildID[sha1]=03985eafba83abbe3b7af7e36ebbbd920e375766, not stri pped Copy the IMX8MM_TEST file to board and run it. # ./IMX8MM_TEST The LCD shows Qt windows。...
-
Page 44: Update System
6 Update System 6 System update MYD-C8MMX series board provides two methods to update system to eMMC of board, USB and SD card. USB method: Using NXP UUU tool to burn files into flash on download mode of chip. SD Card method: Using updatable SD image to write files into flash. Boot switch: Description 10XX XXXX USB Download 0110 1010 Boot from eMMC 0101 0101 Boot from SD... -
Page 45: Usb Update Method
6.1 USB Update Method 6.1 USB Update Method UUU is a programming tool provided by NXP. Is to write the image to the core board memory Update steps: 1 . change the boot switch(USB Download mode) 2 . Use USB cable(Type-A to Micro-B) connect to micro usb port(J9) with PC USB port 3 . Unzip MYD-C8MMX-OTG-DOWNLOAD, double click "fsl-image-qt5-validation-imx-myd-imx8mm.vbs", and you can view the related information through the serial port. You can also manually perform the download via cmd(uuu.exe uuu.auto), at which point the cmd window sees the progress of the download. Manual programming input command to start programming: Figure 6-1-1 Manual programming input command to start programming During the writing process:: Figure 6-1-2 During the writing process: Final: Figure 6-1-2 Final Update iamge: If you need to update their own compilation system image files to development board, replace fsl-image-qt5-validation-imx-myd- imx8mm-20191031034431.rootfs.sdcard and imx-boot-myd-imx8mm-sd.bin-flash_ddr4_evk. The file name specified in uuu.auto can be modified by itself. -
Page 46: Sd Card Method
6.2 SD Card Method 6.2 SD Card Update The sdcard image file needs special tool to write Micro SD storage card.The linux user can directly use dd command.The windows user need "Win32ImageWriter" tool. MYD-C8MMX series boards provide two sdcard file.It's path in directory 02-Images. Build updatable SD Card system image If you modify the Linux kernel, U-Boot or Yocto, then you need a tool for update those files into the board. The MYD-C8MMX board support a tool MYD-C8MMX-mkupdate-sdcard that builds updatable SD Card image.It locates in '03-Tools' directory. The build-sdcard.sh script used to generate a system image that contains update system and update target files. The firmware directory used for the system of the update.Generally, you do not modify it otherwise your NAND flash or other BSP code changed. The "mfgimages-*" directory store need update files.Those name of files are defined in 'Manifest' file, please follow below rules: ubootfile="imx-boot-myd-imx8mm-sd.bin-flash_ddr4_evk" kernelfile="Image" dtbfile="myb-fsl-imx8mm-lcdif.dtb" rootfsfile="fsl-image-qt5-validation-imx-myd-imx8mm-20191018120710.rootfs.ext4" $ sudo ./build-sdcard.sh $ ls boot.img build-sdcard.sh firmware mfg-images MYD-C8MM-Update-System.rootfs.sdcard.img.gz readme.md MYD-C8MM-Update-System.rootfs.sdcard.img.gz is generated file. After builds complete, a sdcard.img.gz suffix file in current directory, 'MYD-C8MM-Update-System.rootfs.sdcard.img.gz'. Making updatable Micro SD Insert Micro SD card to Card Reader, and plug into PC USB port.MYD-C8MMX resource package support some prebuilt sdcard.gz files.You can use the tool to write it into your SD card.Those files locate in 02-Images direcory of resource package. Attention: The date tag of file name is always changed, please follow the actual in 02-Images directory. Windows system Windows users can use the Win32DiskImager tool to write sdcard images to Micro SD. In the "03-Tools" directory, unzip and double-click the "Win32DskImager.exe" application. In the interface after startup, The "Device" on the right side selects the device letter to be written. The "Image File" on the left is to select the image file to be written. Click the folder icon next to it and select the file to be written, as shown below:... - Page 47 6.2 SD Card Method Figure 6-1-2 Burn upgrade image to SD card You can plug out Card Reader after progress bard finish. You need confirm the device and file before write operation.The wrong device will damage your system partition or other storage device. Take the Micro SD card insert into card slot(J21) on MYD-C8MMX,configure the start bit dial switch to the SD card startup mode, and start programming automatically when power is turned on. The D18 indicator will flash during programming, D18 will be off if the programming fails, and (D18) will be on when the programming is completed.
-
Page 48: Appendixa
AppendixA Appendix A Warranty & Technical Support Services MYIR Tech Limited is a global provider of ARM hardware and software tools, design solutions for embedded applications. We support our customers in a wide range of services to accelerate your time to market. MYIR is an ARM Connected Community Member and work closely with ARM and many semiconductor vendors. We sell products ranging from board level products such as development boards, single board computers and CPU modules to help with your evaluation, prototype, and system integration or creating your own applications. Our products are used widely in industrial control, medical devices, consumer electronic, telecommunication systems, Human Machine Interface (HMI) and more other embedded applications. MYIR has an experienced team and provides custom design services based on ARM processors to help customers make your idea a reality. The contents below introduce to customers the warranty and technical support services provided by MYIR as well as the matters needing attention in using MYIR’s products. Service Guarantee MYIR regards the product quality as the life of an enterprise. We strictly check and control the core board design, the procurement of components, production control, product testing, packaging, shipping and other aspects and strive to provide products with best quality to customers. We believe that only quality products and excellent services can ensure the long-term cooperation and mutual benefit. Price MYIR insists on providing customers with the most valuable products. We do not pursue excess profits which we think only for short-time cooperation. Instead, we hope to establish long-term cooperation and win-win business with customers. So we will offer reasonable prices in the hope of making the business greater with the customers together hand in hand. Delivery Time MYIR will always keep a certain stock for its regular products. If your order quantity is less than the amount of inventory, the delivery time would be within three days; if your order quantity is greater than the number of inventory, the delivery time would be always four to six weeks. If for any urgent delivery, we can negotiate with customer and try to supply the goods in advance. Technical Support MYIR has a professional technical support team. Customer can contact us by email (support@myirtech.com), we will try to reply you within 48 hours. For mass production and customized products, we will specify person to follow the case and ensure the smooth production. After-sale Service MYIR offers one year free technical support and after-sales maintenance service from the purchase date. The service covers: Technical support service... - Page 49 Hardware or software problems occurred during customers’ own development; Problems occurred when customers compile or run the OS which is tailored by themselves; Problems occurred during customers’ own applications development; Problems occurred during the modification of MYIR’s software source code. After-sales maintenance service The products except LCD, which are not used properly, will take the twelve months free maintenance service since the purchase date. But following situations are not included in the scope of our free maintenance service: The warranty period is expired; The customer cannot provide proof-of-purchase or the product has no serial number; The customer has not followed the instruction of the manual which has caused the damage the product; Due to the natural disasters (unexpected matters), or natural attrition of the components, or unexpected matters leads the defects of appearance/function; Due to the power supply, bump, leaking of the roof, pets, moist, impurities into the boards, all those reasons which have caused the damage of the products or defects of appearance; Due to unauthorized weld or dismantle parts or repair the products which has caused the damage of the products or defects of appearance; Due to unauthorized installation of the software, system or incorrect configuration or computer virus which has caused the damage of products. Warm tips: 1. MYIR does not supply maintenance service to LCD. We suggest the customer first check the LCD when receiving the goods. In case the LCD cannot run or no display, customer should contact MYIR within 7 business days from the moment get the goods. 2. Please do not use finger nails or hard sharp object to touch the surface of the LCD. 3. MYIR suggests user purchasing a piece of special wiper to wipe the LCD after long time use, please avoid clean the surface with fingers or hands to leave fingerprint. 4. Do not clean the surface of the screen with chemicals. 5. Please read through the product user manual before you using MYIR’s products. 6. For any maintenance service, customers should communicate with MYIR to confirm the issue first. MYIR’s support team will judge the failure to see if the goods need to be returned for repair service, we will issue you RMA number for return maintenance service after confirmation. Maintenance period and charges MYIR will test the products within three days after receipt of the returned goods and inform customer the testing result. Then we will arrange shipment within one week for the repaired goods to the customer. For any special failure, we will negotiate with customers to confirm the maintenance period.
- Page 50 AppendixA For products within warranty period and caused by quality problem, MYIR offers free maintenance service; for products within warranty period but out of free maintenance service scope, MYIR provides maintenance service but shall charge some basic material cost; for products out of warranty period, MYIR provides maintenance service but shall charge some basic material cost and handling fee. Shipping cost During the warranty period, the shipping cost which delivered to MYIR should be responsible by user; MYIR will pay for the return shipping cost to users when the product is repaired. If the warranty period is expired, all the shipping cost will be responsible by users. Products Life Cycle MYIR will always select mainstream chips for our design, thus to ensure at least ten years continuous supply; if meeting some main chip stopping production, we will inform customers in time and assist customers with products updating and upgrading. Value-added Services 1. MYIR provides services of driver development base on MYIR’s products, like serial port, USB, Ethernet, LCD, etc. 2. MYIR provides the services of OS porting, BSP drivers’ development, API software development, etc. 3. MYIR provides other products supporting services like power adapter, LCD panel, etc. 4. ODM/OEM services. MYIR Tech Limited Room 04, 6th Floor, Building No.2, Fada Road, Yunli Inteiligent Park, Bantian, Longgang District. Support Email: support@myirtech.com Sales Email: sales@myirtech.com Phone: +86-755-22984836 Fax: +86-755-25532724 Website: www.myirtech.com...
Need help?
Do you have a question about the MYD-C8MMX and is the answer not in the manual?
Questions and answers