Table of Contents
Advertisement
Quick Links
CW9166 Installation Guide
CW9166 Installation Guide
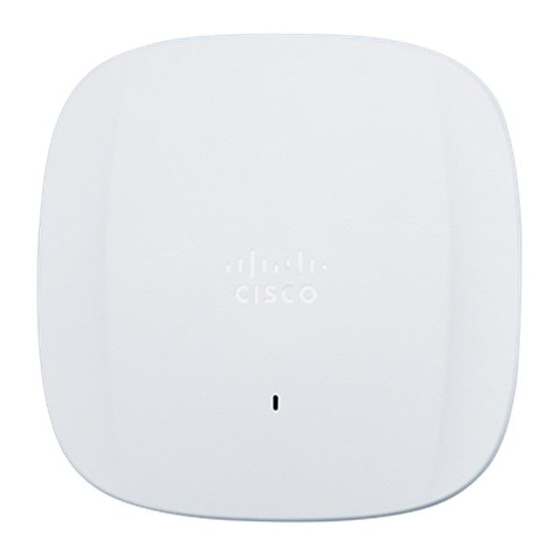
The Cisco Catalyst Wireless 9166 is a tri-band enterprise-class WiFi 6E cloud-managed access point supporting the 2.4
GHz, 5 GHz, and the newly opened unlicensed 6 GHz frequency bands. Designed for the ultra-high capacity and
highest density, these AP meet the needs of the most demanding and mission-critical environments. The access point
includes a fourth radio dedicated to optimizing the RF environment and securing the airwaves. The AP also has an
additional Bluetooth Low Energy (BLE) capable radio used for location and other IoT applications. In addition, the
CW9166 has a USB port.
About this Guide
This guide provides instructions on how to install and configure your CW9166 access points. This guide also provides
mounting instructions and limited troubleshooting procedures. For more wireless installation guides, refer to the
installation guides section
Product Overview
Physical Specifications
Interfaces
• 1x 100/1000/2.5G/5G BASE-T Ethernet (RJ45)
• 1x DC power connector (5.5 mm x 2.5 mm, center positive)
Power
on our documentation website.
CW9166
wireless
1
Advertisement
Table of Contents

Related Manuals for Cisco MERAKI CW9166


Summary of Contents for Cisco MERAKI CW9166
- Page 1 CW9166 has a USB port. About this Guide This guide provides instructions on how to install and configure your CW9166 access points. This guide also provides mounting instructions and limited troubleshooting procedures. For more wireless installation guides, refer to the...
- Page 2 Physical Security • Kensington lock hardpoint * Screws that can be attached to the security hasp of the universal mounting bracket • Concealed mount plate with anti-tamper cable bay Product View and Physical Features Your CW9166 has the following features:...
- Page 3 A - LED indicator B - USB Slot - with protective cover C - Kensington lock hard point D - Rubber Feet/universal mounting bracket slide in points E - Cable access bay The Meraki AP comes with the default Cisco universal mounting bracket (AIR-AP-BRACKET-2) that has the following features:...
-
Page 4: Security Features
2. Kensington lock – The access point contains a hard point that allows it to be secured to any nearby permanent structure using a standard Kensington lock. Ethernet Ports The CW9166 features one RJ45 port capable of operating at 100/1000/2.5G/5G BASE-T Ethernet (RJ45). ETH0, PoE... -
Page 5: Power Source Options
6GHz Scan CW9166 AP can be powered by PoE power in different modes as mentioned above when using a PoE capable switch. They can also be powered by a single 802.3bt capable PoE injector MA-INJ-6 Meraki multiGigabit 802.3bt Power over Ethernet Injector. -
Page 6: Package Contents
Surveys with MR Access Points for more details. The CW9166 access point may be operated in the “Run Dark” mode for additional security and to reduce the visibility of the access point. In this mode, the LED will not be illuminated. This mode may be enabled through the Meraki Dashboard. - Page 7 Cisco Universal Mount Bracket - AIR-AP-BRACKET-2 T-Rail mount attachment (AIR-AP-T-RAIL-R) and screws (5 Nos - 6-32 x 1/4 included)
-
Page 8: Safety And Warnings
Safety and Warnings These operations are to be taken with respect to all local laws. Please take the following into consideration for safe operation: • Power off the unit before you begin. Read the installation instructions before connecting the system to the power source. -
Page 9: Pre-Install Preparation
Pre-install Preparation You should complete the following steps before going on-site to perform an installation. Configure your Dashboard Network The following is a brief overview only of the steps required to add an access point to your network. For detailed instructions about creating, configuring, and managing Meraki wireless networks, refer to the online documentation (documentation.meraki.com). -
Page 10: Static Assignment
Static Assignment • Static IPs are assigned using the local web server on each AP. The following procedure describes how to set the static • Using a client machine (e.g., a laptop), connect to the AP wirelessly (by associating to any SSID broadcast by the AP) or over a wired connection. -
Page 11: Installation Instructions
Note: CW9166 cannot be powered by a single 802.3af power source. Note: CW9166 can be powered by a PoE Switch, PoE Injector or an AC adaptor. Powering up the AP with an AC adapter while connecting to a PoE source is not recommended. Proper functionality of the AP is not guaranteed and this... - Page 12 your selected location. Then, attach the AP to the universal mounting bracket. Attaching the Universal Mounting Bracket The access point universal mounting bracket (AIR-AP-BRACKET-2 - included) can be used to install your access point in a wide range of scenarios including a wall or solid ceiling, below a drop ceiling, or on various electrical junction boxes. Wall or Solid Ceiling Mount Using Universal Mounting Bracket Using included wall anchors and screws, attach the universal mounting bracket to your mounting wall or ceiling.
- Page 13 4. Align the corresponding holes (A, B, or C) on the mounting bracket over the mounting holes on the ceiling grid clip. 5. Hold the mounting bracket and insert a 6-32 x 1/4 in. screw into each of the four corresponding holes (A, B, or C) and tighten.
- Page 14 Wall Mount the AP using Universal Mounting Bracket To mount the AP on the wall first, identify the location of the wall 1. Use the mounting bracket as a template to mark the locations of the mounting holes on the bracket 2.
- Page 15 The AP is not ready to be mounted on the wall Electrical Junction Box Mount Using Universal Mounting Bracket The access point can be mounted to a 4” square cable junction box, a 3.5 or 4” round cable junction box, or various U.S. and European outlet boxes (mounting screws are not included).
-
Page 16: Physical Security
bracket. If mounting to a wall or ceiling, the Ethernet cable will feed from behind the AP. The "Power Source Options" section of this document lists the different powering options and their unique characteristics. Mount the AP Attach the AP to the Universal Mounting Bracket (Picture for Wall mount section and Picture for ceiling mount section ) The AP has four rubber feet that when gently slid in attach to the universal mounting bracket To attach the AP to the universal mounting bracket properly, align the access point feet over the keyhole mounting slots... -
Page 17: Kensington Lock
The out-of-the-box setting of the CW9166 will have the second and third radio both operating in the 5 GHz frequency band (Dual 5 GHz mode). Note: When the CW9166 is operating in Dual 5 GHz mode, the operating channels are restricted to UNII 1 for the first 5 GHz radio and UNII 3 for the second 5 GHz radio... - Page 18 6 GHz channel selection in the RF profile for CW9166 Auto RF configuration will be restricted to a set of PSC capable channels. The list of the PSC channels is indicated above in green. Auto RF will choose a channel that is a PSC-supported channel for 20, 40, 80, and 160 MHz frequencies.
-
Page 19: Basic Troubleshooting
substantial delay in the client connecting to the Access Point if a non-PSC supported channel is selected during manual allocation WPA3 Support WiFi 6E in the 6 GHz frequency band requires the clients to support WPA3 as a mandatory mode of operation. WPA2-WPA3 transition mode is not supported in the 6 GHz frequency. -
Page 20: Warranty
If you are still experiencing hardware issues, please contact Cisco Meraki support by logging in to the Dashboard and using the Help option near the top of the page, then opening an email case or calling using the contact information on that page. - Page 21 Meraki CW9166 devices have been tested and found to comply with the limits for a Class B digital device, pursuant to part 15 of the FCC rules. These limits are designed to provide reasonable protection against harmful interference in a residential installation.
- Page 22 accordance with the organization's disposal procedure. • The equipment should be stored in its original packaging in a room protected from atmospheric precipitation. The permissible temperature and humidity ranges during storage are specified in the Operation (Installation) Manual. • Transportation of equipment should be carried out in the original packaging in covered vehicles by any means of transport.
Need help?
Do you have a question about the CW9166 and is the answer not in the manual?
Questions and answers