Table of Contents
Advertisement
Quick Links
Please read this manual thoroughly in advance for the best performance of the equipment.
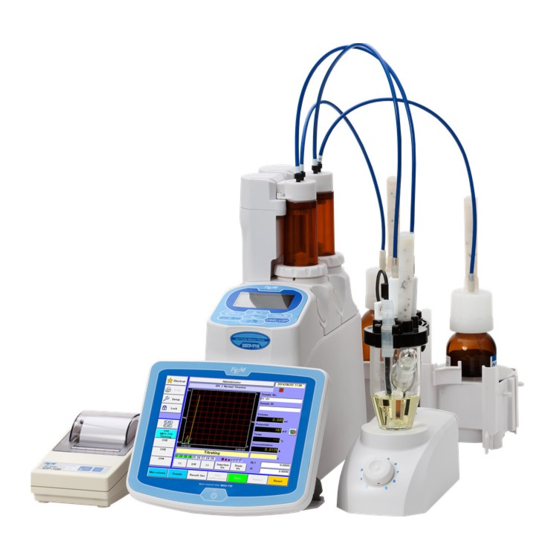
Karl Fischer Moisture Titrator
(for coulometric method)
MKC-710
Operation Manual
Overseas Division: Yamawaki Bldg 9F 4-8-21 Kudan Minami,
Chiyoda-ku, Tokyo 102-0074 JAPAN
FAX: +81-3-3237-0537, Phone: +81-3-3239-7333
AN 59-00392-01 Ver.00
E-mail: overseas-tokyo@kyoto-kem.com
URL:http://www.kyoto-kem.com
Factory: 56-2 Ninodan-cho,Shinden Kisshoin,Minami-ku,KYOTO
601-8317,JAPAN
FAX: +81-75-691-9961, Phone: +81-75-691-4122
Advertisement
Table of Contents

Related Manuals for KEM MKC-710


Summary of Contents for KEM MKC-710
- Page 1 Karl Fischer Moisture Titrator (for coulometric method) MKC-710 Operation Manual Please read this manual thoroughly in advance for the best performance of the equipment. Overseas Division: Yamawaki Bldg 9F 4-8-21 Kudan Minami, Chiyoda-ku, Tokyo 102-0074 JAPAN FAX: +81-3-3237-0537, Phone: +81-3-3239-7333 AN 59-00392-01 Ver.00...
- Page 3 Introduction The MKC-710 you have purchased is Karl Fischer Coulometric Moisture Titrator, by which you can measure micro amount of water content which exists in liquid or in solid sample material. The measurement is easy to perform, fast in operation with its results of high precision and accuracy.
- Page 4 Important: You must observe the following rules in order to prevent physical or property damage of yourself as well as of the others. Meaning of Symbols Warning Danger of severe injury or possible death Caution Risk of physical or property damage This symbol means Prohibition.
- Page 5 Do not attempt overhaul or repair the Do not use the unit in a way other unit by unauthorized person except than specified. authorized by KEM. Danger of fire, electric shock or Danger of electric shock, fire or malfunctioning of the unit.
- Page 6 About the Manual Read this operation manual thoroughly before use. It describes all that are required for routine measurements. Keep this manual beside your equipment so that you can refer to whenever necessary. For detailed test methods, see the separate Function Description. The following symbols indicate the important notes that raise your attention.
-
Page 7: Table Of Contents
Read Data, Store in USB Flash Drive ............... 33 Saving Method Conditions, Setting Up on PC ..............35 4. Method 4-1. Method ............................ 36 4-2. Titration Parameter ......................39 4-3. Calculation parameter ..................... 44 4-4. Calculation formula ......................47 4-5. Report parameter ......................49 5. Function Tools MKC-710... - Page 8 5-1. Function ..........................52 5-1-1. Manual Operation ........................52 5-1-2. Data File ............................53 5-1-3. Method ............................55 5-1-4. Data Copy............................55 5-1-5. History ............................56 5-1-6. Sample ............................56 5-1-7. Reagent ............................58 5-2. Bromine number and index ..................59 5-2-1. Preparation of reagent ......................60 5-2-2. Measurement procedure .....................61 5-3.
- Page 9 9-5. Karl Fischer reagent ..................... 114 9-6. Parameter list ........................117 9-6-1. Setup parameters......................... 117 9-6-2. Method parameters ......................119 9-6-3. Selection of Method parameters and printout ............120 9-7. International standards ....................121 10. Warranty and After-sales Service MKC-710...
-
Page 11: Preparations For Measurement
Stirrer Cable 0.6m 12-04251 Washing Bottle 12-01394-10 Septum (10pcs/set) 12-04232 KF Grease (5g) 20-06380-01 Anode Adjuster 66-00141 Funnel 66-00071 Pipette 10mL MKC-710 Operation Manual(CD-ROM) 12-05186 59-00392-06 MKC-710 Quick Manual 59-00392-07 MKC-710 Quick Manual 20-05627 Inspection Certificate/Warranty 59-00405 Safety Instructions 50-00761 Contact 59-00398 Packing List *Make sure your country’s power requirement. - Page 12 1. Preparations for measurement <Components of Titration Cell Unit> Part Number Part Description Remarks 12-05195 2Component Inner Burette Either 12-05194 1Component Inner Burette 20-07188 Port Plug 19/25 PTFE 12-00661-11 Syringe Inlet (with Septum) 66-00125-06 Stirrer Rotor (35mm) 12-01260 Desiccant Tube φ18x120 with Silica Gel 12-03755 Twin Platinum Electrode / KF M-713 20-04041-00...
- Page 13 12-04539 20-02559-00 Plug for Titration Flask 60-00109-02 Tube 4x8 L=1m Silicone 12-06270 Suction Tube (Bottle Cap- Pump) 20-06823 Bottle holder(1) 20-06823-01 Bottle holder(2) 20-06823-02 Bottle holder(3) Please refer to the section “9-1. Parts list” when ordering these parts. Note MKC-710...
-
Page 14: Installation And Start-Up
1. Preparations for measurement 1-2. Installation and start-up 1-2-1.Assembly of titration cell 1) Put a stirrer rotor into the cell, and install the inner burette, the electrode, desiccant tube, the port plug and syringe inlet. electrode desiccant tube port plug inner burette syringe inlet stirrer rotor... -
Page 15: Installation Of Clamp Filter
Install the clamp filter to AC adapter as figure below. Hold the clip of the clamp filter and open as figure below, and wrap treble remaining the tip by about 30mm. 30mm Clip Installation of the clamp filter to AC adaptor is needed to satisfy the condition of EMC standard. Note MKC-710... -
Page 16: Power Cable
1. Preparations for measurement 1-2-3.Power cable 1) Make sure the power switch is in Off position as figure below. 2) Connect the cables as shown below. Install Power cord to AC adapter and plug in AC adapter on the back of main unit. Power switch Stirrer Cable AC adapter... -
Page 17: Installation Of Solvent Change Unit(Option
If loosely squeezed it in, pressurized air may leak and it may cause malfunction of dispensing KF reagent. There are two kinds of rubber globes, one for drain and the other for discharge of reagent. Both of them Note are indicated by the joint on top of each. MKC-710... - Page 18 1. Preparations for measurement 6) Install the desiccant tube onto the reagent bottle holder. 7) Place the reagent bottle in the bottle holder. If the outside diameter of reagent bottle does not match the holder, use the bottle holder and bottle stand as shown below.
-
Page 19: Installation Of Auto Solvent Change Unit
3) Put the above 1) bottle in reagent bottle holder. If the outside diameter of solvent bottle does not match the holder, use the bottle holder and stand as shown below. 4) Connect the silicon tubes, one to the top of solvent bottle. MKC-710... - Page 20 1. Preparations for measurement 5) Connect the tubes, one for draining to waste bottle and the other for injection to the two bottles respectively. 6) Connect the drain tube to Cell and injection tube to the plug for titration flask . Drain tube waste...
- Page 21 10) Insert the plug for titration cell carefully into the lid. At this point, apply a small amount of KF grease on slide contact area. When handling this chemical, protect yourself with gloves and glasses. If it touches your skin, immediately rinse it with running Caution water. MKC-710...
- Page 22 1. Preparations for measurement The following chloroform-containing reagents (see table below) or oil-based samples deteriorate the drain pump. <Do not use the standard drain pump with the following Anolyte:> Fluka(RdH)& HPC Mitsubishi Anolyte Therefore, when using such reagents or samples, change the connecting of the Auto Solvent Change Unit as follows.
-
Page 23: Parts Configuration And Each Function
The gas fume from titration cell is exhausted through this tube. 4) Titration cell The iodine generated in electrolysis and water in sample reacts here. 5) Stirrer Measuring unit for Karl Fischer titration with a magnetic stirrer. 0(STOP) → 9(FAST) MKC-710... - Page 24 2. Parts configuration and each function <Back> 8)Twin platinum electrode 6) Inner burette 9)Power switch 7)Titration cell holder 6) Inner burette The anode and cathode liquid reacts here for electrolysis. 7) Titration cell holder This is the lid for titration cell. 8) Twin platinum electrode This electrode detects the potential level of the anolyte inside the titration cell.
- Page 25 The inner burette for electrolysis electrode is connected here. 14) Power connecter This is for connecting the power cable. 15) Detection electrode connector The twin platinum electrode is connected here. 16) STIRRER connecter(to MAIN UNIT) The connecting cable to the stirrer is plugged in here. MKC-710...
-
Page 26: Key Functions (General)
2. Parts configuration and each function 2-2. Key functions (general) Each key is positioned as shown below: Description of each key Description START/STOP Key to start titration and to stop measurement on the main screen. Key to return to the previous screen on a screen other than the above. -
Page 27: Basic Key Operation
[←]. Input only the number due to the position of “ . ” is fixed when inputting the number after matching the digit with [←][→]. Table.2-2-1-1 [ ↑ ] Operation key (space)→A→B→C→D→E→F→G→H→I→J→K→L→M→N→O→P Alphabetic parameter →Q→R→S→T→U→V→W→X→Y→Z→0→1→2→3→4→5→6→7 →8→9→ . →-→+→/→×→ ( → ) →%→(space) (space)→0→1→2→3→4→5→6→7→8→9→-→(space) Numeric parameter MKC-710... -
Page 28: Description Of Display Messages
2. Parts configuration and each function 2-2-2.Description of display messages When the power is turned on, the initial displays appear one after another as follows: → When the main screen displays, it is the standby mode ready for titration. < Main screen > Active method number Active method name Current sample number... -
Page 29: Setting Language
2-3. Setting Language Set language displayed on the screen. 1)Press [MENU/HOME]. 2)Press [↑] twice, select 8.Setup and [ENTER] to confirm. 3)Press [↓] 5 times, select 6.Language and confirm with [ENTER]. 4)Select language with [←] [→] and confirm with [ENTER]. MKC-710... -
Page 30: Setting Date And Time
2. Parts configuration and each function 2-4. Setting date and time Set date and time. 1)Press [MENU/HOME]. 2)Press [↑] twice, select 8.Setup and [ENTER] to confirm. 3)Press [↓] 2 times, select 3.Date &Time and confirm with [ENTER]. 4)Select “Date Style” with [←][→] and confirm with [ENTER]. -
Page 31: Basic Operation
3. Basic operation Here is the description on basic measurement sequence. 3-1. Sequence of measurement Assemble the Titration cell ↓ Filling titration reagent ↓ Selection of the method ↓ Measure the sample ↓ Usage of titration data・Use USB flash drive MKC-710... -
Page 32: Assemble The Titration Cell
3. Basic operation 3-2. Assemble the Titration cell Assemble the Titration cell 1) Put a stirrer rotor into the cell, and install the inner burette, the electrode, desiccant tube A, the port plug and syringe inlet. desiccant tube electrode inner burette syringe inlet port plug 2) Place the titration cell onto the titration... -
Page 33: Filling Reagent And Draining
To change the life value of catholyte to zero, press [Reagent]→「Cathode」→「Life」 →Select reagent of current life value→set [0] → [Enter]. <Drain> 3) To drain out the liquid, use the supplied washing bottle for draining. When one component cell is used for inner burette, catholyte is not needed Note MKC-710... -
Page 34: Anolyte
3. Basic operation 3-3-2. Anolyte <When do not use the Auto Solvent Change Unit > <injection> 1) With Funnel, pour a solvent into the titration cell 100mL. (it becomes 100mL when match it with the line Lower the titration cell) 2) After changing anolyte, change the life value of anolyte to zero. - Page 35 [On→Off] at this time. Press Injection Pump again, and injection will stop. 2) After changing anolyte, set the life value of anolyte to 0. To change the life value of anolyte to zero, press [Reagent]→[Anode]→[Life] →current life value→[0]to[ENTER]key MKC-710...
- Page 36 3. Basic operation <Drain> 1) Press Drain Pump [On] key to drain waste liquid. Do not use the Auto Solvent Change Unit for those samples which are hard to dissolve or insoluble in solvent in order to avoid clogging of drain tube. Such waste liquids, if spilled, after measurement may corrode the tube connectors Note causing the Auto Solvent Change Unit malfunction.
-
Page 37: Measure The Sample
3) Press [START/STOP] key.The message “Inject sample” on display. 4) Weigh the syringe with sample in it, and record the weight (Wt1). 5) Press [SAMPLE] key and enter the weight of 4) in [Wt1]. Sample name and sample ID can be entered in the same manner. MKC-710... - Page 38 3. Basic operation 6) inject the sample into the cell, and then, press [Start]。 7) weigh the syringe after sample is injected, and record the weight (Wt2) ※Press [START/STOP] again when the measurement is discontinued on the way. 8) When titration is finished by reaching an endpoint, the results will be shown on the screen.
-
Page 39: Re-Calculate Titration Data
4) Change the sample size, unit, print format with [↑] [↓] [←] [→], and move the cursor to [Execute] and press [ENTER] to re- calculate. ex)Change the sample size Move the cursor to [Exit] and press [ENTER] if the change is not executed. Note MKC-710... - Page 40 3. Basic operation 5) Select “Size” with [↑] [↓] and press [ENTER]. Change the sample size with [↑] [↓] [←] [→] and press [ENTER]. 6) Move the cursor to [Execute] with [↑] [↓] and press [ENTER] to re- calculate. Move the cursor to [Exit] and with [ENTER] to escape from the screen.
-
Page 41: Batch Processing Of Titration Data
[ENTER] to batch. ex)Sort out Method No. and Date 4) Select “Method No.” with [↓] and press [ENTER]. Change “On” with [←] [→] and press [ENTER]. 5) Set Method No. with [↑] [↓] [←] [→] and press [ENTER]. MKC-710... - Page 42 3. Basic operation 6) Change “Titr. Date” to “On” with [←] [→] and press [ENTER]. 7) Set the term of date with [↑] [↓] [←] [→] and press [ENTER]. 8) Press [ENTER] to batch at [Execute] and the result is displayed. Move the cursor to [Exit] and with [ENTER] to escape from the screen.
-
Page 43: Read Data, Store In Usb Flash Drive
2) Select “1.Result Data” and press [ENTER]. 3) Select the stored format, which is CSV or PDF with [←] [→] and confirm with [ENTER]. 4) Insert USB to the USB connecter. 5) Move the cursor to [Execute] with [↑] [↓] and press [ENTER]. MKC-710... - Page 44 [Format] :Select this when saving a file in PDF format or when using data with Tview6. Use this format when sending measurement results to KEM or your nearest distributor. :Saved in CSV file. Select this if you wish to perform your own analysis or...
-
Page 45: Saving Method Conditions, Setting Up On Pc
Copies all data at a time. Select “MKC-710→USB” or 2. All Data “USB→MKC-710.” Then execute copying. [Execute] Copies the titration method to a USB flash drive or to MKC-710 as you have desired. Move the cursor here and press [ENTER]. MKC-710... -
Page 46: Method
The method consists of information on the measuring conditions, calculation of concentration, and the like. MKC-710 can store standard methods (No. 01 through 20). Each method can be named individually. A Method consists of, [Titration parameter], [Calculation parameter] and [Report parameter]. - Page 47 [↓] [ ] [ ] and press [ENTER]. 5) Move the cursor to [Lock] and press [ENTER]. 6) Select “Yes” with [↑] and press [ENTER]. 7) An icon of key will appear next to “Method List,” and method contents are now protected. MKC-710...
- Page 48 4. Method Unlocking method 1) Press [MENU/HOME]. 2) Select “3. Method” and press [ENTER]. 3) Select “Unlock” with [↑] [↓] and press [ENTER]. 4) Enter your password in “Password” with [↑] [↓] [ ] [ ] and press [ENTER]. 5) Move the cursor to [Unlock] and press [ENTER]. Method is now unlocked.
-
Page 49: Titration Parameter
Selection of titration cell type: 2-comp. : This cell is generally used for titration with anode/cathode reagent using an electrolytic electrode with diaphragm. 1-comp. : This cell is generally used for titration using anode reagent (anolyte) only and diaphragm-less electrode. MKC-710... - Page 50 4. Method [t(stir)] Select a time length to wait for titration (electrolysis) start after a sample is discharged into the titration cell, particularly for those samples which are hard to dissolve in the anolyte and difficult to extract moisture. 0~99999s [t(wait)] Enter the shortest time length for a measurement from start to end in case a plural number of inflection points exist or unexpected endpoint is detected due to...
- Page 51 [Rel. ] Here you enter a relative drift level. This entry appears only when “Drift stop” is set to “Rel.”. 0.00~9.99μg/s [Abs.] Enter an absolute drift level. This entry appears only when “Drift stop” is set to “Abs.” 0.00~9.99μg/s MKC-710...
- Page 52 4. Method [Control Gain] Here you enter a coefficient for electrolysis speed, typically 5.0. If reaction speed is so fast that an over-titration is expected, decrease the value. To the contrary, if reaction speed is expected to be slow with a sample which contains a large amount of water, increase this value.
- Page 53 Auto :Titration starts automatically by sensing water increase in the sample after discharged into the cell. [Data sampling time] Select a time interval for data sampling. Titration volume and accumulated amount will be automatically sampled at the interval of an input time. 1~99999s MKC-710...
-
Page 54: Calculation Parameter
4. Method 4-3. Calculation parameter Equation for concentration calculation is set. [Calculation Type)] Selection of calculation type: Sample :Set up a Method for sample measurement. Blank :Set up a Method for blank measurement. Check :Set up a Method for check measurement with standard substance. [Calculation No.] Here you select the numbered equation. - Page 55 :No compensation is made. Select this to know total water content including drift. Manual :Enter offset value. This is useful when there is much difference in drift level between start and the end of titration. Auto :The drift level is automatically corrected with the level at time of start. MKC-710...
- Page 56 4. Method [Standard Value] Enter a standard value to make the evaluation in the following range: 0.0000~99999.9999 [Permit. Error] Enter permit error to determine if the calculation result is off the range against the standard value. 0.0000~99999.9999...
-
Page 57: Calculation Formula
Bromine index mg/100g (k=0.1) Concentration when the volume of Moisture liquid sample is measured in Dens bromine number measurement Unit : Bromine numberg/100g (k=0.0001) Bromine index mg/100g (k=0.1) * “Moisture” in the equation is identical to “Data-Drift×(t – t(stir))-Blank ”. MKC-710... - Page 58 4. Method < Symbols used in calculation formulas > Moisture (μg) : Net water amount Water obtained by subtracting “Drift value x titrating time and Blank value” from total water titrated (electrolyzed). : Compensation coefficient for calculation results Data (ug) : Total water content after electrolysis in the titration cell Drift (ug/s) : Drift level which changes by ambient moisture and carrier gas...
-
Page 59: Report Parameter
100% water at EP is shown on display or printed out. Form2 :Titration volume (electrolysis) per set time and accumulated amount are shown in graph on display or printed out. MKC-710... - Page 60 4. Method < Print contents > Print format Item Short Model/Serial No. Printed date Method name Sample No. LOT No. Titration date Calculation No. Drift compensation Moisture Result Reagent life Titration time Blank Sample size Sample constant Operator...
- Page 61 4. Method < Example of printout:GLP > Model Model : MKC-710 Serial number Serial No. : 10100001 Printed date Print : 2014/01/01 00:00 ***Recalculation*** Method name Method No./Name : 01/ METHOD-01 Sample number Sample No. : 01-02 (#) LOT No.
-
Page 62: Function Tools
5. Function Tools 5. Function Tools Function 5-1. Menu window is a convenient tool to practice exciting features of the unit. To start with, let us learn about Menu window itself. 1) Press [MENU/HOME]. 2) Select. Menu has the following items. Item Description 1. -
Page 63: Data File
:Change a print format of result Data List :Change a print format of data list Graph :Change a print format of titration curve [Execute] Execute to recalculate. A result screen is displayed. [Exit] Cancel to recalculate. A result screen is displayed without recalculation. MKC-710... - Page 64 5. Function Tools [Statistics] Move the cursor to [Statistics] and press [ENTER]. < Search conditions > You can narrow down the data by selecting the following conditions. Set to narrow down the condition as for being intended when condition is “On”. High sample No.
-
Page 65: Method
5-1-3. Method Please refer to “the method” of Chapter 4. 5-1-4. Data Copy Please refer to “3-7. Read Data, Store in USB Flash Drive” and “3-8. Saving Method Conditions, Setting Up on PC”. MKC-710... -
Page 66: History
5. Function Tools 5-1-5. History Check history/record and calibration history/record can be reviewed. Press [MENU/HOME], select “5.History” with [↑][↓] and press [ENTER] Calibration results can be reviewed if you print out with [Print] key. Item Contents 1. Check Shows history/record of a periodic check. The measurement result will appear that set up a Method for check measurement. - Page 67 If you press [SAMPLE] key during titration, the following display will appear and you can enter sample setting. Enter items you wish to set up. Then move the cursor to [Exit] and press [ENTER] key. Sample No. and Method No. cannot be changed once measurement as started. Note MKC-710...
-
Page 68: Reagent
5. Function Tools 5-1-7. Reagent Set up reagent-related parameters. Press [MENU/HOME] key. Select 7.Reagent with [↑][↓] and press [ENTER] key. [Life] Current consumption of reagent and the last date when reagent was replaced are displayed. If you have replaced reagents, enter 0mg and press [ENTER] key. [Alarm Set] Alarm by consumption of reagent can be set. -
Page 69: Bromine Number And Index
When the anolyte turns to white turbidity, change it with new one. When the same anolyte and catholyte are continuously used, the measurement Note results may produce larger amount in value than expected. Change the anolyte in this case. Do not share the titration cell with moisture titration. MKC-710... -
Page 70: Preparation Of Reagent
5. Function Tools 5-2-1.Preparation of reagent Prepare the reagents and samples for measurement of bromine number and bromine index. < Preparation of reagent > Use the following reagent for measurement of bromine number or index: Anode reagent :Mixture of Acetic acid (high grade) 600mL; Methanol (high grade) 260mL; 1M-Potassium bromide solution 140mL. -
Page 71: Measurement Procedure
When discharged samples exceed 100mL in total, change the anolyte. Changing the anolyte may be required each time for those samples, which do Note not dissolve in anolyte or measurement results deviate substantially each time. MKC-710... -
Page 72: Balance Setting
5. Function Tools 5-3. Balance setting Connecting a balance enables the sample size (weight) to automatically be input. A correct setting of the balance is required for automatic input. Make sure to contact your local dealer to see if any particular connecting cable may be required. - Page 73 After tarring the balance, place the sample and then press the “Print” key of the balance. The sample size will be entered in “Size” of the current sample setting. (When “Print” is selected on output mode of the balance.) MKC-710...
-
Page 74: Connecting Usb Devices
5. Function Tools 5-4. Connecting USB Devices The MKC-710 can be connected with various USB devices such as printers, keyboards and foot switches. Connecting USB devices Connect the devices you wish to use to the USB port at the back of the MKC-710. -
Page 75: Connecting Android Devices
Android devices can be connected to this instrument via USB port, and the weight can be input. A titration curve will be shown on the Android device during titration. Android devices can be connected to the MKC-710 via USB port, and the weight can be input with a special app. System requirements Android Ver. -
Page 76: Starting App
This app will not appear in the app list of the menu even after installation. (It will appear in the app management.) 5-5-2.Starting app 1) Connect an Android device and the MKC-710 with a USB cable. 2) A confirmation message will appear when you start the TitrationViewer. -
Page 77: Starting Pre-Titration
If you press “Titration start” or “Reset,” or if titration starts, display of titration results will be cleared. 4) If pre-titration is started, a display will come “pre-titrating”. 5) After pre-titration is completed, a display will be the wait stable drift (or drift stable state). MKC-710... -
Page 78: Starting Measurement
5. Function Tools 5-5-4.Starting measurement 6) If equipment will be in the wait stable drift, and a Drift stable, an upside green button will change to "Titration start." Press "Titration start." 7) A message becomes “Inject sample" by setup of equipment. Inject the sample into the cell, and press"... - Page 79 *When sending entered weight to complete after entry: - Check sent weight box and press [Send] button. *When completing after entry without sending entered weight: - Press [Don’t send] button. *When re-entering weight: - Press [Cancel] button. MKC-710...
-
Page 80: Measurement
5. Function Tools 5-5-5.Measurement 1) When titration is finished by reaching an endpoint, the results will be shown on the screen. 2) If you press “Titration start” or “Reset,” or if titration starts, display of titration results will be cleared. 5-5-6.Entering weight 1) If you touch the edit box on the top of the display, soft keys will appear. -
Page 81: Uninstall Android Apps
5. Function Tools 5-5-7.Uninstall Android apps 1) Apps or Application manager (this may differ depending on your device). 2) Touch the app you’d like to uninstall 「TitrationViewer」. 3) Select Uninstall. The messages will appear on the display, and press “OK.” MKC-710... -
Page 82: Setup
6. Setup 6. Setup Sets up system-related settings. Press [MENU/HOME], select “8.Setup” with [↑][↓] and press [ENTER]. Items and contents, please see below. Items Contents 1. Interface Set up the use of printers, balance , Personal computers and / or USB. 2. -
Page 83: Interface
Data Acquisition Software (SOFT-CAP). But you have to check the version of the Data Acquisition Software because some software cannot be compatible with the titrator. For more information, please contact Note your sales representative nearest to or local dealer. MKC-710... -
Page 84: Date Acquisition Software (Soft-Cap)
6. Setup 6-1-2.Date acquisition software (SOFT-CAP) The optional software SOFT-CAP is Windows -based application and can download the measurement data to Microsoft Excel workbook or store in CSV format through RS232C port. By this software, starting titration or reset can be commanded by the computer. <Receiving date>... - Page 85 Select a type of printer you are going to use: Select “NONE” if no printer is connected. NONE :No printer. IDP- :KEM’s impact dot printer model IDP-100. DP-USB :Select this when connecting our thermal printer (DP-600) to the USB port. OTHER :Other printer than the below.
-
Page 86: Balance Setting
6. Setup How to print Printing out measurement results Set the report format on “Method” to “Short” or “GLP.” When measurement is done, results will automatically be printed out. Printing out parameters Move the cursor to [Print] on wherever [Print] is shown. -
Page 87: Operator
To enter an operator: Move the cursor with [↑] [↓] keys to the number (01 to 10) you wish to enter. Press [ENTER]. Then enter a name with [↑] [↓] [←] [→] keys, and press [ENTER] again. Up to twenty (20) letters can be input. MKC-710... -
Page 88: Date&Time
6. Setup 6-3. Date&Time Date and clock time can be set. Select “3.Date&Time” with [↑][↓] and press [ENTER]. [Date Style] Here you select and update the date of year, month and day. Select with [←][→]and press[ENTER]. YYYY/MM/DD :Christian year/month in number/day of the month MM/DD/YYYY :month in number/day of the month/Christian year DD/MM/YYYY... -
Page 89: Serial No
Multiplication of the operation time for measuring equipment is displayed. 6-5. LCD Contrast The contrast for LCD can be adjusted. Select “5.LCD Contrast” with [↑][↓] and press [ENTER]. [LCD Contrast] Adjust contrast of LCD with 14 steps by [ ], [ ] key and confirm by [ENTER] key. MKC-710... -
Page 90: Language
6. Setup 6-6. Language Select the language you wish to use. Select “6.Language” with [↑][↓] and press [ENTER]. [Language] Move the cursor with [←] [→] keys to the language you wish to use, and press [ENTER]. English : Shows in English. Japanese : Shows in Japanese. -
Page 91: Beep
Type 2 :Beep sound lasts for about four seconds: “pi-pi-pi-pi-pi-pi” Type 3 :Beep sound lasts for about ten seconds: “pi, pea-pea-pea-pea” Type 4 :Beep sound lasts for about one second: “pi-pi-pi-pi-pi-pi” Type 5 :Beep sound lasts for about one second: “pi, pea-pea-pea” MKC-710... -
Page 92: Parameter Clear
6. Setup 6-8. Parameter Clear It is necessary to initialize preset parameters and settings in order to reset the system to default value. In this instrument, partial initialization (measurement data only, etc.) is possible. Select “8.Parameter Clear” with [↑][↓] and press [ENTER]. Select the item to initialize by [ ], [ ] key and confirm by [ENTER] key. -
Page 93: Other
:Auto set in the blank. A mean value of up to five (5) results is obtained. The value for “Auto Set. mean” is cleared when the method No. is changed on sample setting or when the titrator is turned off. MKC-710... -
Page 94: Maintenance
7. Maintenance 7. Maintenance 7-1. Daily Maintenance In order to maintain the system in good conditions for a long period of time, it is important to observe the following instructions. 7-1-1.Karl Fischer grease Twin platinum electrode, inner burette, syringe inlet, desiccant tube, port plug, and plug for titration flask are removed from a titration cell. -
Page 95: Replacement Of Septum
Sponge Nozzle tip Desiccant < Desiccant tube > If the nozzle chip slips from the desiccant tube when replacing the desiccant, ensure that you return the nozzle chip in the tube with its trenches downward Note as shown above. MKC-710... -
Page 96: Replacement Of The Anolyte (Anode Reagent)
7. Maintenance 7-1-4. Replacement of the anolyte (anode reagent) <Exchange timing> When the accumulated moisture measurement (=reagent life) has reached 1000mgH2O after the last replacement with new one When the surface of anolyte exceeds the upper line on cell wall when sample liquid is discharged into the cell. -
Page 97: Check The Instrument
Replace the cable if it is dent or bent. 7-1-8.Check the connectors Make sure the connectors are not dusty or rusted. If dusty clean it by a vacuum cleaner. If rusted, repair is necessary. MKC-710... -
Page 98: Other Maintenance
7. Maintenance 7-2. Other Maintenance 7-2-1.Storage of the instrument Store the instrument, if it is not going to be operated for a long period of time in a place where there is no direct sunlight or under no vibration, and the place is dry, not humid. It is recommended to pack it in the carton box in which the instrument was first delivered. - Page 99 1) Follow the same steps as above for methanol. 2) Drain out the chromate inside the cell, and rinse it with pure water for 5 to 6 times until yellowish color disappears. 3) Clean the inner burette with methanol or with alcohol. MKC-710...
- Page 100 7. Maintenance Chrome is a heavy metal. Do not discard the used mixture or rinsing solvent as wastewater. First, dilute the collected chromic acid mixture down to 1% concentration, and then, reduce it. After confirming no Cr6+ is contained in it, adjust its pH to 7.5 Caution 8.5.
-
Page 101: Cleaning The Titration Cell
7-2-4.Distance adjustment between anode electrode and diaphragm If the anode electrode in the inner burette and the diaphragm are too close together, electrolysis reaction will not run in normal condition. Use the supplied anode adjuster to adjust the distance in between. MKC-710... -
Page 102: Replacement Of Pump Tube
7. Maintenance 7-2-5.Replacement of pump tube Initial pump flow rate is about 20mL/10 sec at the fastest, which may be reduced when the tube is used for a long time. This may result in leakage of samples at the time of measurement. -
Page 103: Replacement Of The Filter
Place the filter for injection pump as a dustproof to the back of auto dispensing part. Since the filter might be dirty when the flow of injection pump becomes lower, change the filter. With no filter, dust may go into the tubing of the injection pump, which may break the inner switching valve. Note MKC-710... -
Page 104: Replacing The Clock Battery
7. Maintenance 7-2-7.Replacing the clock battery If the clock does not function correctly, the inside battery needs to be replaced with new one. Ask your local dealer for its replacement. Open the battery cover on the bottom of the main unit with a slotted screwdriver. Replace the old battery with a new one (CR2032). -
Page 105: Troubleshooting
Sample liquid resistance is too Check on electrode high or the electrode cable is connection. Current Error! broken causing no current Reduce sample size. flow for electrolysis in inner cell. Preamplifier circuit is now Contact your local dealer. defective. Preamp Error! MKC-710... - Page 106 8. Troubleshooting Alarm message Reason Remedies Because the total anode reagent A.Capa. Over! consumed in electrolysis exceeds Change the anolyte and the preset level. clear the reading and Because the total cathode reagent reset the now life to zero. C.Capa. Over! consumed in electrolysis exceeds the preset level.
-
Page 107: Stirrer Does Not Work Properly
Stirrer does not work properly START Stir cable connected? Connect stir cable Stir motor running? Contact your dealer Something in cell? Remove foreign objects and clean the cell Stir rotor spinning? Change with correct rotor (35mm) Repair by manufacturer MKC-710... -
Page 108: Drift Level Is Too High
8. Troubleshooting 8-3. Drift level is too high START Are joints greased? Apply grease Is septum new? Change with new one Is reagent new? Change with new one Is reagent correct? Use correct reagent Is inner burette dry? Dry the burette Is anode in contact with diaphragm? Use anode adjuster to detach... -
Page 109: It Runs Into Over-Titration
Change with new one Is reagent correct? Use correct reagent Is electrode working alright? Clean the electrode Is the length of stirrer rotor normal? Change with correct rotor (35mm) Is stirrer speed appropriate? Make stirrer speed increase Repair by manufacturer MKC-710... -
Page 110: Poor Repeatability Or No Ep Found
8. Troubleshooting 8-5. Poor repeatability or no EP found START Is reagent correct? Use correct reagent Side reaction? Change reagent or use indirect method Is sampling proper? Correct sampling against moisture into sample Sampling size correct? Refer to the attached chart on sampling Start with stable drift? Wait for stable drift... -
Page 111: Glass Contact Area Jammed
Do not try and open solidified jointed parts by force. Glassware may break into piercing pieces for injury. Do not warm up a PTFE port plug when removing it as doing Warning! so may inflate the material and the titration flask may be broken. MKC-710... -
Page 112: When The Drain Pump Is Clogged
8. Troubleshooting 8-7. When the drain pump is clogged The sample which can not be dissolved in the solvent, clogged the piping and pump tube. Please remove the clogging by the following steps when the drainage volume is lowered. 1) Remove the tube. Remove 2) Insert the dropping pipette to the tip of the pump tubing or tube , remove the clogging. -
Page 113: Others
Parts Power Code AC Adapter Plug Adapter Pipette 10mL Cell Holder (for 64-01107 Type4 AC3P-2P 66-00071 Coulometric) 64-00898 12-02170 20-09176 Stirrer Cable Anode MKC-710 Washing Bottle Funnel 0.6m Adjuster Operation 12-04251 66-00141 64-01386 20-06380-01 Manual(CD-RO M) 12-05186 MKC-710... - Page 114 9. Others Parts(Titration Cell) Inner Burette Twin Platinum 12-05195 Electrode / (2Component) KF M-713 12-05194 12-03755 (1Component) Port Plug 19/25 Titration Cell PTFE (Transparency) 20-07188 20-04042-00 Syringe Inlet (with Septum) Stirrer Rotor 12-00661-11 (35mm) (5pcs/set) 12-00661-12 Septum KF Grease (50g) Desiccant Tube KF Grease (5g) Silica Gel (500g)
- Page 115 Suction 12-04875 Stopper(5pcs/set) Reagent Bottle Cap 12-03925 for Injection 12-03926-01 Reagent Bottle Cap Tube 4x8 L=1m with Plug Silicone 12-03926 20-09874-01 Plug for Titration Desiccant Tube Flask No.1 L=160 20-02559-00 12-01250-10 Polyethylene Silica Gel (500g) Bottle 1L 61-00249 69-00028-00 MKC-710...
- Page 116 9. Others Auto Solvent Change Unit Drain Tube to Injection Tube 2×3 Drain Tube to Cell Desiccant Tube Waste Bottle 2×3 L=1180mm PFA 2×3 L=0.7m PFA φ18×120 L=1m PFA 12-02020-11 12-04538-02 12-01260-10 12-04539 1180 Long Male Union Tube 4x8 L=1m 20-05932 Silicone 20-09874-01...
-
Page 117: Options
9. Others 9-2. Options Various convenient peripherals are available as shown below. These options can be purchased from KEM. Contact your local dealer or sales representative Dot Matrix Print out of Printer measurement results IDP-100 Thermal Printer DP-600 Measure the moisture... - Page 118 9. Others Consumables Part code Part name Remarks Sketch 12-00696-10 Micro Sampling Unit カッ プ蓋 × 5 個 微 量 試 料 投 入 器 (for Coulometric) カッ プ× 3 0 個 ピンセッ ト 12-04577-10 Silicone Rubber (5pcs/set) 12-04577-02 Syringe with Needle 12-04577-01...
- Page 119 Titration Cell Unit with One-component cell (10pcs/set) 12-00662-10 Funnel Twin platinum KF grease Funnel electrode / KF and Anode adjuster other attachment 1Component Type Transparent cell Titration Cell Unit with Two-component cell Cock Twin platinum 12-00664 electrode / KF and other attachment MKC-710...
- Page 120 9. Others Software Part code Part name Remarks Sketch 12-03265 Data Acquisition Software Pump Tube Part code Part name Remarks Sketch 64-01473 Fluorine tube Pump Tube WPX1 F-3.2-3 with Grease 12-03961-01 Extraordinary Pump Tube chemical resistance (ePTFE+FKM) WP1000 C3.2-4-K-φ3with Grease...
- Page 121 9. Others Evaporator Part code Part name Remarks Sketch ADP-611 Evaporator ADP-512 Non-CE Evaporator for ores ADP-512S Non-CE Evaporator for high temperature ADP-513 Non-CE Evaporator for high temperature MKC-710...
-
Page 122: Specification
AC100 - 240V 10% 50/60 Hz (Comes with AC Adapter) Power consumption Approx. 20W Main unit 141(W)×292(D)×244(H)mm Dimensions Stirrer 110(W)×206(D)×340(H)mm (not incl. Solvent Change Unit) Weight Approx. 3kg EMC : EN61326 CE marking LVD : Conforming to EN61010-1 *Per KEM standard measurement conditions and standard liquids... -
Page 123: Principle Of Measurement
96500 coulombs, or 10.72 coulombs/ 1 mg H O. The total amount of moisture can thus be determined by measuring the total consumption of electricity. Detection/ Microcomputer Display control Detection electrode (twin platinum electrode) Titration cell Catholyte Cathode Anolyte Membrane Rotor Anode MKC-710... -
Page 124: Karl Fischer Reagent
9. Others 9-5. Karl Fischer reagent For Karl Fischer titration, appropriate reagent must be selected to the sample that you are going to analyze. Below chart shows the type of sample and its corresponding reagents available on the market. < Kyoto electronics manufacturing co.,ltd.> Application Dehydrated Solvent Remarks... - Page 125 Catholyte Coulomat CG General titration (Alcohols ) (Hydrocarbons) 1-compone Coulomat CG** (Ethers) nt cell (Esters) (Amines) (Gases) Note) ** possible to use for only single component cell * possible to use for 2-compoonent cell or 1-component cell MKC-710...
- Page 126 9. Others < Mitsubishi Chemical > Application Dehydrated Solvent Remarks Aquamicron AX/CXU General titration are non-organic Anolyte Aquamicron AX (Alcohols ) chlorines. (Hydrocarbons) (Ethers) Amines (Esters) To use Aquamicron (Gases) Catholyte Aquamicron CXU AX, add 10g (Fats and Oils) salicylate acid to (Amines)...
-
Page 127: Parameter List
Parameter and default Item Default Selection range Beep Set/off Type Type1 Type1 /Type2/Type3 /Type4/Type5 [Operator] Parameter and default Printout Item Default Selection range Item Printing As displayed Current No. 01-10 Current No. As displayed Operator Within 20 characters Operator A-Z, +,-,/,*,(,),.,,% MKC-710... - Page 128 9. Others [Display setup] Parameter and default Item Default Selection range Date Style YYYY/MM/DD YYYY/MM/DD MM/DD/YYYY DD/MM/YYYY Date 2001/01/01 2001/01/01 ~2099/12/31 00:00 00:00~23:59 Time Language English Japanese/English/ Mandarin/Korean/ Russian/Spanish [Other setup] Parameter and default Printout Item Default Selection range Item Printing As displayed Character Disp.lay...
-
Page 129: Method Parameters
Unit mg/100g Weight Input Variable Variable Variable Variable Variable Variable Variable Drift Comp. Auto Auto Auto Auto Auto Auto Auto Drift Standard Value 0.0000 Permit. Error 0.0000 [Report] Format Short Short Short Short Short Short Short Data List Graph MKC-710... -
Page 130: Selection Of Method Parameters And Printout
9. Others 9-6-3.Selection of Method parameters and printout [Titration Parameter] Displays Printout Item Selection Item Printing H2O/ Br2 Mode Titration Mode As displayed 2-Comp./1-Comp. Cell Type Cell Type As displayed 0-99999s t(stir) t(stir) As displayed 15-99999s t(wait) t(wait) As displayed 0-99999s t(max) t(max) -
Page 131: International Standards
(Standard Test Method for Water in Insulating Liquids by U.S.A. Coulometric Karl Fischer Titration) ASTM D 4928 (Standard Test Method for Water in Crude Oils by Coulometric U.S.A. Karl Fischer Titration) ISO 760 (Determination of water -- Karl Fischer method (General International method)) MKC-710... -
Page 132: Warranty And After-Sales Service
9. Others 10. Warranty and After-sales Service 1. Warranty Period Three (3) years from the date of receipt of this product or the date of installation by KEM service personnel or by authorized personnel. 2. Warranty Details, After-sales Service This product passed the strict inspections of KEM and, except for consumables, KEM warrants this product, under normal use, for three (3) years from the date of receipt of this product or the date of installation by KEM service personnel or by authorized personnel.
Need help?
Do you have a question about the MKC-710 and is the answer not in the manual?
Questions and answers