Advertisement
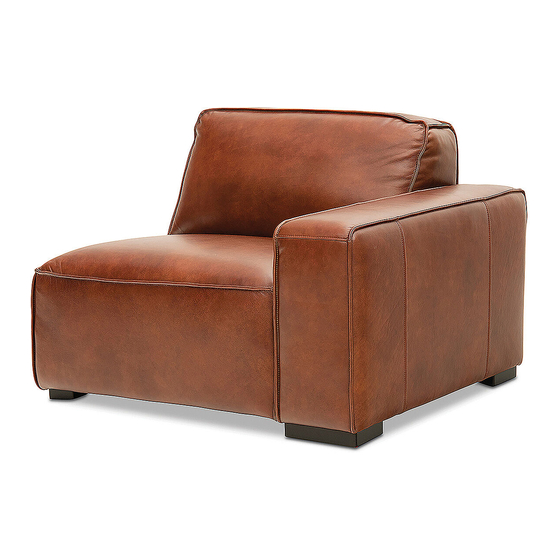
80cm
Imported by Amart Furniture Pty Ltd, Qld, Brisbane Australia.
For any assistance with assembly or for missing parts please phone
Amart Furniture, Customer Service Free call 1800 351 084
ASSEMBLY INSTRUCTION
VERENA
ITEM CODE 64296
Imported by Amart Furniture Pty Ltd, Qld, Brisbane Australia.
For any assistance with assembly or for missing parts please phone
Amart Furniture, Customer Service Free call 1800 351 084
107cm
Depth: 102cm
1 of 6
64296
Advertisement
Table of Contents

Subscribe to Our Youtube Channel
Related Manuals for Amart Furniture SIGNATURE VERENA 64296


Summary of Contents for Amart Furniture SIGNATURE VERENA 64296
- Page 1 VERENA ITEM CODE 64296 Imported by Amart Furniture Pty Ltd, Qld, Brisbane Australia. For any assistance with assembly or for missing parts please phone Amart Furniture, Customer Service Free call 1800 351 084 107cm 80cm Depth: 102cm Imported by Amart Furniture Pty Ltd, Qld, Brisbane Australia. For any assistance with assembly or for missing parts please phone Amart Furniture, Customer Service Free call 1800 351 084 1 of 6 64296...
- Page 2 PRE‐ASSEMBLY PREPARATION Before you start: Choose a clean, level, spacious assembly area. Avoid hard surfaces that may damage the product Take care when lifting. Product should be assembled as near as possible to the point of use Ensure that you have all required contents for complete assembly Always read the assembly instructions carefully before beginning assembly.
- Page 3 PARTS LIST SQUARE LEG “L” SHAPE LEG a. Bolt M8X60 b. Washer c. Allen Key a. Bolt M8X60 1pcs 6pcs 6pcs 3 of 6 64296...
- Page 4 STEP 1: Tighten the legs 1 to the bottom of RHF chair with bolts(a) and washers(b) by Allen Key(c). STEP 2: Tighten one pair of leg 2 to the bottom of LHF chair with bolts(a) and washers(b) by Allen Key(c). Front Back 4 of 6 64296...
- Page 5 STEP 3: Unfold connection clips to poke out from bottom of the sofa. Align your next sofa piece beside the original piece. Extend the clips and ensure the clip and connection pin on both sofa pieces line up. Slide the two pieces together to form a connection. Slide way parts bottom view after connection Unfold connection clip as arrow To Separate Two Lounge Pieces Use two people to lift the lounge and move clear of the connection clips. item offering slide way parts item offering connection clips 5 of 6 64296...
- Page 6 INSERT PAGE NUMBER 6 of 6 64296...
Need help?
Do you have a question about the SIGNATURE VERENA 64296 and is the answer not in the manual?
Questions and answers