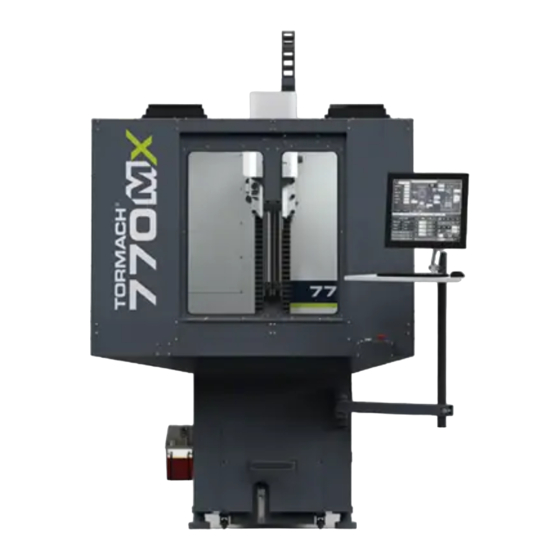
Tormach PathPilot 770M Installation Manual
Operator console assembly
Hide thumbs
Also See for PathPilot 770M:
- Installation manual (17 pages) ,
- Technical document (7 pages) ,
- Installation manual (25 pages)

Related Manuals for Tormach PathPilot 770M


Summary of Contents for Tormach PathPilot 770M
- Page 1 TECHNICAL DOCUMENT Version 0822A INSTALLATION GUIDE PATHPILOT OPERATOR CONSOLE ASSEMBLY FOR 770M/770M+/770MX Page 1 Specifications subject to change without notice. ©Tormach® 2022...
- Page 2 Screw with Washer, M5 × 0.8 - 10 Screw with Washer, M4 × 0.7 - 10 Split Collar Note: If any items are missing, we can help. Create a support ticket with Tormach Technical Support at tormach.atlassian.net/servicedesk for guidance on how to proceed.
-
Page 3: Before You Begin
Machine Enclosure Required If you haven't yet done so, you must first install the machine's enclosure. See the product's documentation for more information. Page 3 ©Tormach® 2022 tormach.com Specifications subject to change without notice. TD10715: Installation Guide: PathPilot Operator Console for 770 (0822A) -
Page 4: Prepare The Machine
4. Put the drill template on the mount arm's top bracket. Then, verify that the holes on the bracket align with the holes on the drill template. If they don't, trace the correct hole pattern on to the drill template. Page 4 ©Tormach® 2022 tormach.com Specifications subject to change without notice. - Page 5 8. Drill into the marks on the enclosure that you made in Step 6 using an electric drill and a 15/64 in. (6 mm) drill bit. Figure 2: Drilling holes into the top of the enclosure. Page 5 ©Tormach® 2022 tormach.com Specifications subject to change without notice. TD10715: Installation Guide: PathPilot Operator Console for 770 (0822A)
- Page 6 12. Put one M5 × 0.8 - 10 screw and washer into the hole that you drilled in Step 11. The mount arm is now secure enough to reliably drill the remaining three holes. Page 6 ©Tormach® 2022 tormach.com Specifications subject to change without notice.
- Page 7 Complete the following steps in the order listed: Assemble the Controller and Keyboard Tray Lift and Secure the Controller Assembly Page 7 ©Tormach® 2022 tormach.com Specifications subject to change without notice. TD10715: Installation Guide: PathPilot Operator Console for 770 (0822A)
- Page 8 Figure 8: Adhering tape on the inside of a split collar. 4. Remove the operator console out of its packaging. Page 8 ©Tormach® 2022 tormach.com Specifications subject to change without notice. TD10715: Installation Guide: PathPilot Operator Console for 770 (0822A)
- Page 9 Note: Don't completely tighten the brackets to the controller. You'll adjust them when you're adjusting the height of the entire console assembly. Figure 10: Two mount brackets attached to the controller. Page 9 ©Tormach® 2022 tormach.com Specifications subject to change without notice. TD10715: Installation Guide: PathPilot Operator Console for 770 (0822A)
- Page 10 10. Find the provided jog pendant bracket. Then, attach it to the left side of the controller (between the two mount arm brackets) with two M4 × 0.7 - 10 screws using a 2.5 mm hex wrench. Page 10 ©Tormach® 2022 tormach.com Specifications subject to change without notice.
- Page 11 3. Align the bottom split collar on the controller with the split collar that you installed on the mount arm in Step 1. Page 11 ©Tormach® 2022 tormach.com Specifications subject to change without notice. TD10715: Installation Guide: PathPilot Operator Console for 770 (0822A)
- Page 12 8. Securely tighten all four split collars using a 8 mm hex wrench. Securely tighten all mount arm brackets using a 2.5 mm hex wrench. Page 12 ©Tormach® 2022 tormach.com Specifications subject to change without notice. TD10715: Installation Guide: PathPilot Operator Console for 770 (0822A)
-
Page 13: Make Electrical Connections
Then, connect them – and the jog pendant cable – to the controller as shown in the following image. Figure 17: Controller connections. Page 13 ©Tormach® 2022 tormach.com Specifications subject to change without notice. TD10715: Installation Guide: PathPilot Operator Console for 770 (0822A) - Page 14 10. Push the corrugated tubing into the bracket on the rear of the keyboard tray. Figure 19: Cords put into corrugated tubing, which is attached to the rear of the keyboard tray. Page 14 ©Tormach® 2022 tormach.com Specifications subject to change without notice.
- Page 15 Figure 21: Loose end of corrugated tubing and all cords put through the access panel. Page 15 ©Tormach® 2022 tormach.com Specifications subject to change without notice. TD10715: Installation Guide: PathPilot Operator Console for 770 (0822A)
- Page 16 17. Connect the operator box extension cable to the existing operator box cable (that you just routed into the machine stand). 18. Connect the Ethernet cable to the Controller Communications port on the side of the electrical cabinet. Page 16 ©Tormach® 2022 tormach.com Specifications subject to change without notice. TD10715: Installation Guide: PathPilot Operator Console for 770 (0822A)
- Page 17 Twist out the machine's red Emergency Stop button, which enables movement to the machine axes and the spindle. c. Press the Reset button. d. Bring the machine out of reset and reference it. Page 17 ©Tormach® 2022 tormach.com Specifications subject to change without notice. TD10715: Installation Guide: PathPilot Operator Console for 770 (0822A)
-
Page 18: Troubleshooting
1 and 2047, but 1000 is generally low humidity. sufficient for most shop spaces. Page 18 ©Tormach® 2022 tormach.com Specifications subject to change without notice. TD10715: Installation Guide: PathPilot Operator Console for 770 (0822A) - Page 19 Examine the green ring around power the power button. It should light button up when you press the power functionality. button. Page 19 ©Tormach® 2022 tormach.com Specifications subject to change without notice. TD10715: Installation Guide: PathPilot Operator Console for 770 (0822A)
- Page 20 Panel Color Depth: 24 5. Select the Esc key, go to Save and Exit, and select Save Changes and Reset. Page 20 ©Tormach® 2022 tormach.com Specifications subject to change without notice. TD10715: Installation Guide: PathPilot Operator Console for 770 (0822A)
- Page 21 (PN 39146). going from the header control on the computer board. motherboard to connector J12 on the control board. Page 21 ©Tormach® 2022 tormach.com Specifications subject to change without notice. TD10715: Installation Guide: PathPilot Operator Console for 770 (0822A)
- Page 22 (PN 39146). motherboard to connector J12 on board. the control board. Page 22 ©Tormach® 2022 tormach.com Specifications subject to change without notice. TD10715: Installation Guide: PathPilot Operator Console for 770 (0822A)
- Page 23 Jog Pendant...
- Page 24 Drill Four Keep edge flush 6 mm Holes with top of enclosure Keep edge flush with right side of enclosure 770M/M+/MX PathPilot Operator Console Drill Template 1” Scale Block To download/print this template, go to tormach.com/docs...
Need help?
Do you have a question about the PathPilot 770M and is the answer not in the manual?
Questions and answers