
Related Manuals for Surveillix IKS-WR7413

Summary of Contents for Surveillix IKS-WR7413
- Page 1 NETWORK CAMERA Model: IKS-WR7413 User’s Manual For information on our latest products and peripheral devices, refer to the following web site: www.toshibasecurity.com If the URL changes, refer to www.toshiba.com 35042AD...
- Page 2 This documentation is copyrighted. All other rights are reserved to TOSHIBA. TOSHIBA, and Surveillix, are registered trademarks of TOSHIBA in the United States and elsewhere; Windows, and Windows XP Embedded are registered trademarks of Microsoft Corporation. All other brand and product names are trademarks or registered trademarks of the respective owners.
-
Page 3: Table Of Contents
Important Safeguards 1. Read Instructions Read all the safety and operating instructions before operating the product. 2. Retain Instructions Retain the safety instructions and user's manual for future reference. 3. Warnings Comply with all warnings on the product and in the user's manual. 4. - Page 4 14. Overloading Do not overload the power supply or extension cords as this can result in a risk of fire or electric shock. 15. Object and Liquid Entry Never push objects of any kind into this camera through openings as they may touch dangerous electrical points or short-out parts that could result in a fire or electrical shock.
- Page 5 Care must be taken when you clean the clear dome cover. Scratches • and dust will ruin the image quality of your camera. Do not use strong or abrasive detergents when cleaning the camera body. Use a dry cloth to clean the camera when it is dirty. In case the dirt is hard to remove, use a mild detergent and wipe the camera gently.
- Page 6 by the camera without permission from the copyright holder. Please also note that transfer of an image or file covered by copyright is restricted to use within the scope permitted by the Copyright Law. Protection of Personal Information Images taken by the camera that reveal the •...
- Page 7 This symbol on the product or on its packaging indicates that this product shall not be treated as household waste in accordance with Directive 2002/96/EC. Instead it shall behanded over to the applicable collection point for the recycling of electrical and electronic equipment.
- Page 8 Warning TO REDUCE THE RISK OF FIRE OR ELECTRIC SHOCK, DO NOT EXPOSE THIS APPLIANCE TO RAIN OR MOISTURE. DANGEROUS HIGH VOLTAGES ARE PRESENT INSIDE THE ENCLOSURE. DO NOT OPEN THE CABINET. THIS INSTALLATION SHOULD BE MADE BY A QUALIFIED SERVICE PERSON AND SHOULD CONFORM TO ALL LOCAL CODES.
-
Page 9: Table Of Contents
TABLE OF CONTENTS Table of Contents ......................3 Introduction ......................... 11 Overview ..............................11 Product Features ..........................11 Getting Started ......................12 Box Contents ............................12 Camera Overview ........................... 13 Camera Dimensions ........................... 13 Connections ............................14 Device search Software ....................14 Installation .................... - Page 10 Mail, HTTP and FTP Setup ........................ 37 SD Card .............................. 37 Network Share ............................ 38 Recording Schedule ........................... 39 Maintenance ............................43 Software.............................. 44 Picture Setting ............................44 Video Mask ............................44 Camera Setup ............................ 44 TV system ............................45 Hot Spot ..............................
-
Page 11: Introduction
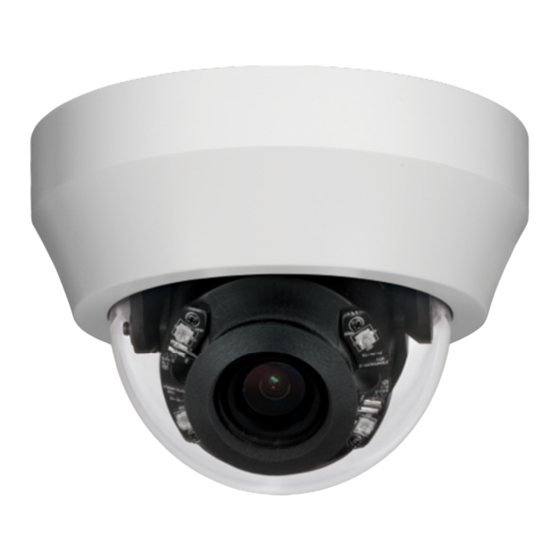
INTRODUCTION OVERVIEW The Toshiba IKS-WR7413 is a compact 3MP mini-dome camera with big camera features like a 3x motorized, autofocus lens. Perfect for users who require an unobtrusive camera but do not wish to sacrifice functionality for a smaller footprint. A crystal clear image and ease of installation are guaranteed, thanks to true WDR, adaptive IR technology, a 3-axis gimbal, and Power over Ethernet (PoE). -
Page 12: Getting Started
Before proceeding, please check that the box contains the items listed here. If any item is missing or has defects, DO NOT install or operate the product and contact your dealer for assistance. IKS-WR7413 IP Dome Mounting Template Camera Torx Tool... -
Page 13: Camera Overview
CAMERA OVERVIEW Before installing or connecting the dome camera, please refer to this section and complete preparations for dome setup and all switch settings. CAMERA DIMENSIONS Side Ø 3.36in (85.3mm) Bottom Ø 4.6in (116.8mm) 35042AD... -
Page 14: Connections
CONNECTIONS Connection Definition microSD card slot Insert the microSD card into the card slot to store videos and snapshots Press the reset button with a proper tool for at least 20 seconds to return the Reset Button camera to factory defaults RJ-45 For network and PoE connections... - Page 15 LOCATE CAMERA TOSHIBA DEVICE SEARCH Toshiba Device search is a software tool that allows you to quickly and easily connect and configure your Toshiba IP Cameras. This software allows you to assign IP addresses and update firmware on multiple cameras at once. The Device search software is available for download on the Toshiba website.
-
Page 16: Camera Configuration
CAMERA CONFIGURATION DEVICE ADDRESSING The functions on the Device Addressing tab allow you to find, configure, and view network cameras. Finding Network Devices 5. Click Find Devices on the Device Addressing tab. 6. To narrow your search by Camera Model, Project, or Camera Name, select your desired criteria from the appropriate lists. - Page 17 Viewing a Network Camera 7. To view a network camera over the web using the camera’s viewer software, double-click the name of the camera. 8. Enter the Username and Password for the camera. The username and password are case sensitive. It is strongly recommended that the password be changed after the initial setup to prevent unauthorized access.
-
Page 18: Connecting To The Camera
CONNECTING TO THE CAMERA 11. Locate the camera on the Device Search list. 12. Double-click the camera to open the Viewer software in your web browser. 13. Click Browse in the pop-up window. 14. Log in to the camera with the appropriate User Name and Password. Note The default Username is “admin”... - Page 19 CONNECTING OVER THE INTERNET There are some challenges with connecting to Toshiba IP cameras over WAN (internet) connections because the camera streams video over RTSP. RTSP is an excellent protocol for media and is now used on many IP cameras (including Toshiba) as the default streaming option. RTSP, however, is not suitable for transmission between two locations that are behind different routers.
-
Page 20: Live
LIVE Full Screen – This will display the live feed in full screen. Snapshot – Click the button, and a JPEG snapshot will automatically be saved in the appointed place. The default location is: C:\.’ Note If you are using Windows Vista or 7, you will need to change the Snapshot location. -
Page 21: Setup
SETUP The Setup menu includes System Settings, Picture Setup, and Streaming Settings. Note The Setup menu displays limited setup options. For a complete list of setup options, see the Advanced section. SYSTEM SETTING Camera Name Host Name – The Host Name is used to identify the camera on your system. - Page 22 search also displays the MAC address for identification). Record your camera’s MAC address for identification in the future. Use Static IP Address To set up a new static IP address: 1. Select the Use static IP address option. 2. Type a new IP address in the IP address box. 3.
-
Page 23: Ipv6 Address Configuration
IPv6 Address Configuration To enable IPv6 select Enable IPv6 and click Save. See your network administrator if you are unsure of your network configuration. 35042AD... -
Page 24: User Setup
USER SETUP Admin Password Manage the password for the Administrator account. To change the administrator password: 1. Type a new Administrator Password, and then type again to confirm the password. 2. Click Save. Add User The user name and passwords are limited to 16 characters with no spaces permitted. -
Page 25: File Location
FILE LOCATION This is the destination location that snapshot photos and recorded videos will be saved to. To select a destination location: 1. Click Select. 2. Choose a location or folder. 3. Click Save in the file window, and then click Save again. PICTURE SETUP Camera Tab Use the Camera Tab section to modify picture settings for the camera. -
Page 26: Picture Adjustment
One Push – Balances color temperature based on a white object within the viewing area. Manual – Change the white balance value by specifying the R gain and B gain. Click Set to save your changes. Picture Adjustment Each of the Picture Adjustment settings is set to the recommended default. -
Page 27: Add Detection Window
Add Detection Window 1. Use the Motion Detection dropdown to select a motion detection preset. 2. Click Add. Note The selected motion detection square will be red. 3. Arrange and size the motion detection window as desired. 4. Click Save. Delete Motion Detection Window 1. -
Page 28: Streaming Settings
STREAMING SETTINGS VIDEO RESOLUTION The camera provides eight codec options under video resolution (two single streaming options, two sets of dual streaming options, two sets of tri-streaming options, and two sets of quad- streaming options): H.264 Only • MJPEG Only •... -
Page 29: Video Frame Rate
Video Orientation Normal Video – The video will be oriented as the camera position dictates. 180 Degree Rotate – Rotate the video 180 degrees. 90 Degree Clockwise – Rotate the video 90 degrees clockwise. 90 Degree Counter Clockwise– Rotate the video 90 degrees counter clockwise. - Page 30 Note Lower frame rate will decrease video smoothness, as well as file size and bandwidth usage.
-
Page 31: Video Compression
VIDEO COMPRESSION You can select an MJPEG / H.264 compression mode on the video compression page appropriate for your application. You can also select to display compression inflation on the Live Screen. MJPEG compression settings include: High compression, low bitrate, low quality •... -
Page 32: Advanced
ADVANCED SYSTEM SETTING NETWORK SETUP The Network Setup settings will automatically be set at the recommended default after the camera connection is made. DDNS DDNS (Dynamic Domain Name Service) is a service that allows a connection to an IP address using a hostname (URL) address instead of a numeric IP address. - Page 33 Enable UPnP – When enabled, the camera will appear in My Network Places on Windows computers running UPnP on the same network. Enable UPnP Port Forwarding – When enabled, the camera will attempt to open the web server port on the router automatically. Friendly Name –...
-
Page 34: Network Security
NETWORK SECURITY HTTP The camera can send alarm messages to a specific Hypertext Transfer Protocol (HTTP) site when motion is detected or when the sensor input is activated. You can assign alarm messages to up to two HTTP sites. IP Filtering IP Filtering allows you limit access to your IP cameras by IP address. -
Page 35: Alarm Application
ALARM APPLICATION The alarms menu is where alarm connections are configured. Alarm Switch – Designate when the alarm will be active; Off, On, or By Schedule. Alarm Type – Designate if the alarm is normally open or normally closed. NOH – NO stands for Normally Open. •... -
Page 36: Tampering And Network Failure Detection
TAMPERING AND NETWORK FAILURE DETECTION Tampering Alarm – Turn the Tampering Alarm On, Off, or On By Schedule. Tampering Duration – Designate the amount of time (in seconds) that tampering must occur in order for a Tampering Alarm to activate. Triggered Action –... -
Page 37: Mail, Http And Ftp Setup
MAIL, HTTP AND FTP SETUP The camera can send an e-mail via Simple Mail Transfer Protocol (SMTP) when a variety of events occur. SMTP is a protocol for sending e-mail messages between servers. SMTP is a relatively simple, text-based protocol, where one or more recipients of a message are specified and the message text is transferred. -
Page 38: Network Share
NETWORK SHARE Network Share is a network protocol that runs a variety of different system platforms, allowing for file sharing between computers operating on Windows and computers operating on Unix. This serves as an additional storage type. Configuration requires the host IP address, share name, and credentials. -
Page 39: Recording Schedule
RECORDING SCHEDULE The recording schedule allows you to set up scheduled recording to the microSD™ card or to Network Sharing. Recording This section allows you to define recording schedules for the camera. For continuous recording: 1. Select type of Recording Storage. microSD card™: save recorded data to the microSD™... - Page 41 Schedule This section allows you to establish schedules to use in other section. To create a schedule: 1. Select a Schedule set (1-10). 2. Check the desired week day check boxes. 3. Select Day or Night. 4. Designate a Start Time and Duration. 5.
- Page 42 Interval Recording Interval recording allows you to record in consistent intervals and save the files for later viewing. 1. Turn Interval Recording On or Off. 2. Designate the Time Interval (seconds). 3. Designate the Trigger Action using the appropriate checkbox, and then use the dropdown menus to further manage the Trigger Action.
-
Page 43: Maintenance
MAINTENANCE On the Maintenance page you can export the cameras current configuration, or import the configuration for a camera. Use the factory default page to reset the IP Camera to factory default settings if necessary. Note Do not import configuration files from different models of cameras. Configuration Export Configuration: 1. -
Page 44: Software
SOFTWARE Note Make sure the software upgrade file is available before starting the software upgrade. 1. Click Browse and find the upgrade file. Note Do not change the file name, or the system will fail to find the file. 2. Select the file name from the list under Step 2. 3. -
Page 45: Tv System
TV SYSTEM Set the desired TV mode for your camera. The default setting is NTSC60, which is optimal for scenes that do not have high contrast. WDR2 enables WDR mode which is the optimal mode for high contrast scenes. HOT SPOT The Spot feature allows you to transmit different parts of the camera image on separate streams. -
Page 47: Specifications
SPECIFICATIONS CAMERA SPECIFICATIONS Model IKS-WR7413 Maximum Resolution Image Sensor 1/3” Progressive CMOS Video H.264 / MJPEG Compression Frame Rate 30IPS @ 3MP H.264 ONVIF Profile S compliant Streaming Up to 4 simultaneous streams Browse Support Internet Explorer (6.0+) / Chrome / Firefox / Safari... - Page 48 Model IKS-WR7413 Tilt / Rotation Tilt :80° / Pan: 355° / Rotation: -100~100° www.toshibasecurity.com 1-877-855-1349 © 2016 Toshiba All rights reserved. No part of this publication may be reproduced by any means without written permission from Toshiba. The information in this publication is believed to be accurate in all respects.
Need help?
Do you have a question about the IKS-WR7413 and is the answer not in the manual?
Questions and answers