ADJ INNO POCKET ROLL User Manual
Hide thumbs
Also See for INNO POCKET ROLL:
- User instructions (12 pages) ,
- User instructions (12 pages)
Advertisement
Quick Links
Advertisement

Subscribe to Our Youtube Channel
Related Manuals for ADJ INNO POCKET ROLL


Summary of Contents for ADJ INNO POCKET ROLL
- Page 1 INNO POCKET ROLL User Manual Rev. 08/09/2022...
-
Page 2: Document Version
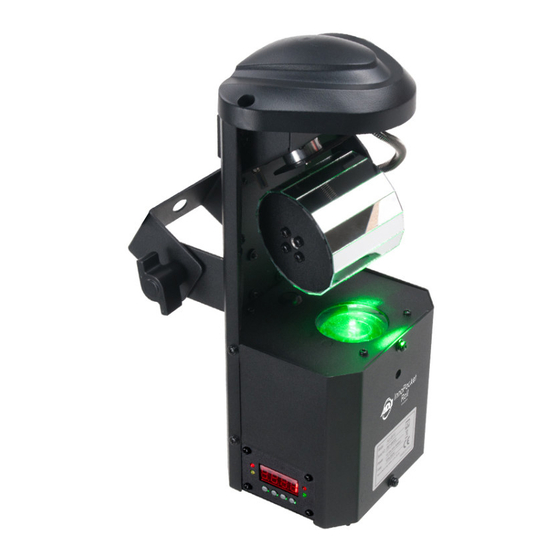
©2022 ADJ Products, LLC all rights reserved. Information, specifications, diagrams, images, and instructions herein are subject to change without notice. ADJ Products, LLC logo and identifying prod- uct names and numbers herein are trademarks of ADJ Products, LLC. Copyright protection claimed includes all forms and matters of copyrightable materials and information now allowed by statutory or judicial law or hereinafter granted. - Page 3 Do not return this unit to your dealer without first contacting customer support. Introduction: The Inno Pocket Roll is a 6 channel DMX intelligent LED scanner. The Inno Pocket Roll has three operating modes: sound active, show mode, DMX controlled. The Inno Pocket Roll can oper- ate as a stand alone fixture or in a primary/secondary configuration.
- Page 4 The sole responsibility of ADJ Products, LLC under this warranty shall be limited to the repair of the product, or replacement thereof, including parts, at the sole discretion of ADJ Products, LLC. All products covered by this warranty were manufactured after August 15, 2012, and bear identifying marks to that effect.
- Page 5 W A R R A N T Y R E G I S T R A T I O N The Inno Pocket Roll carries a 2 year (730 days) limited warranty. Please fill out the enclosed warranty card to validate your purchase and warranty. You may also register your product online at our web site: www.adj.com.
- Page 6 S A F E T Y P R E C A U T I O N S For your own personal safety, please read and understand this manual completely before at- tempting to install or operate this device. • To reduce the risk of electrical shock or fire, do not expose this unit to rain or moisture •...
- Page 7 Data Cable (DMX Cable) Requirements (For DMX and Primary/Secondary Operation): The Inno Pocket Roll can be controlled via DMX-512 protocol. The Inno Pocket Roll is a 6 channel DMX unit. The DMX address is set electronically using the controls on the front panel of the unit. Your unit and your DMX controller require a approved DMX-512 110 Ohm Data cable for data input and data output (Figure 1).
- Page 8 2 and 3 of a male XLR connector (DATA+ and DATA-). This unit is inserted in the female XLR connector of the last unit is your daisy chain to terminate the line. Using a cable terminator (ADJ part number Z-DMX/T) will decrease the possibility of erratic behavior. Termination reduces signal errors and avoids signal transmission problems and interference.
- Page 9 S Y S T E M M E N U Addr 1 - 512 Set DMX address Set unit as primary PISD SEC1 Set unit as secondary, with matching movement SEC2 Set unit as secondary, with contrasting movement ShNd Sh 0 - Sh 12 Select show;...
- Page 10 O F F S E T A D J U S T M E N T M E N U To enter the offset adjustment submenu, press and hold the ENTER button for 5 seconds. In this sub- menu you are able to adjust the pan home position and gobo wheel position. PAN - Adjustment of the pan position.
- Page 11 O P E R A T I O N Operating Modes: This device features three different operating modes. In each mode, you can run the fixture as a stand alone fixture or in a primary/secondary configuration. This next section will detail the differences in the operating modes.
- Page 12 U C I R R E M O T E C O N T R O L The UC IR infrared remote gives you control of various device functions, as described below. To con- trol the device, you must aim the remote at the front of the fixture. Maximum effective range is 30 feet. STAND BY - Press this button to blackout the fixture.
-
Page 13: Wireless Setup
U C I R R E M O T E C O N T R O L WIRELESS SETUP There are many factors that can affect and/or interrupt a wireless signal, including walls, glass, metal, objects, and people. Therefore, the following guidelines are recommended in order to maximize the chances of having a clear path for the wireless signal to reach the device: •... - Page 14 P R I M A R Y - S E C O N D A R Y S E T U P This function will allow you to link up to 16 units together and operate without a controller. The units will be sound activated.
-
Page 15: Continued On Next Page
D M X T R A I T S CHANNEL DMX VALUES FUNCTION 000 - 255 Tilt 000 - 009 Stop 010 - 120 Clockwise Roll, slow to fast 121 - 134 Stop 135 - 245 Counter-Clockwise Roll, slow to fast 246 - 255 Stop Strobe... - Page 16 D M X T R A I T S CHANNEL DMX VALUES FUNCTION Master Dimmer, 0% to 100% 000 - 255 Dimmer Mode 000 - 020 Standard 021 - 040 Stage 041 - 060 061 - 080 Architectural 081 - 100 Theatre 101 - 255 Default Dimmer Setting...
- Page 17 P H O T O M E T R I C C H A R T Distance(m) 0.246 0.491 0.737 0.982 1.228 Diameter(m) D I M M E R C U R V E C H A R T (Fade Time) (Fade Time) Ramp Effect Standard...
- Page 18 F U S E R E P L A C E M E N T The fuse holder is located at the rear of unit, next to the power cord. Use a phillips head screwdriver to remove the fuse holder, then remove the used fuse and replace with a new fuse of the same rating. Insert the fuse holder and fuse into the unit and secure the fuse holder in place.
- Page 19 ADJ Products, LLC 6122 S. Eastern Ave. Los Angeles, CA 90040 USA Tel: 323-582-2650 / Fax: 323-725-6100 Web: www.adj.com / E-mail: info@adj.com A.D.J. Supply Europe B.V. Junostraat 2 6468 EW Kerkrade The Netherlands service@adjgroup.eu / www.americandj.eu...
Need help?
Do you have a question about the INNO POCKET ROLL and is the answer not in the manual?
Questions and answers