Table of Contents
Advertisement
Quick Links
Advertisement
Table of Contents

Related Manuals for Telefunken S760


Summary of Contents for Telefunken S760
- Page 1 MOBILE PHONE S760 INSTRUCTION MANUAL...
-
Page 2: Table Of Contents
TABLE OF CONTENTS 1. SCOPE OF DELIVERY .........................1 2. CONTROL ELEMENTS ........................2 2.1 DESCRIPTION ........................3 3. UNDERSTANDING YOUR PHONE .....................4 4. GETTING STARTED ........................5 4.1 Removing or attaching the back cover ...................5 4.2 Removing or inserting the battery ...................6 4.3 Inserting or removing the micro-SIM card and microSD card ..........6 4.4 Charging the battery .......................6 5. - Page 3 14. CALL LOG ..........................16 15. MESSAGING ..........................16 15.1 Sending a message ......................16 15.2 Dictating a message ......................17 15.3 Managing messages ......................17 15.4 Changing messaging settings .....................17 16. E-MAIL ............................18 16.1 Setting up an email account ....................18 16.2 Writing and sending emails ....................18 17. WHATSAPP ..........................19 17.1 Setting up WhatsApp ......................19 17.2 Adding contacts ........................19 17.3 Starting a chat ........................20...
- Page 4 26. MEMORY CLEANER .........................29 27. OTHER APPS INSTALLED ON THIS PHONE ................30 28. GEOLOCATION ..........................30 29. UPDATING YOUR PHONE'S SOFTWARE ................30 30. RESETTING YOUR PHONE ......................31 31. TURNING ON THE SCREEN LOCK ..................31 32. SETTINGS ..........................31 32.1 Network & Connectivity ......................31 Aeroplane Mode ������������������������������������������������������������������������������������������������������������������31 Mobile network &...
- Page 5 Downloads ��������������������������������������������������������������������������������������������������������������������������36 Battery ���������������������������������������������������������������������������������������������������������������������������������36 Accessibility ������������������������������������������������������������������������������������������������������������������������36 32.6 Account ..........................37 KaiOS Account ��������������������������������������������������������������������������������������������������������������������37 Anti-Theft ����������������������������������������������������������������������������������������������������������������������������37 Other Accounts �������������������������������������������������������������������������������������������������������������������37 33. SAFETY INSTRUCTIONS ......................37 33.1 Mobile phone ........................37 33.2 Network services and costs ....................38 33.3 Radio wave exposure ......................38 33.4 Precautions for use while driving ..................38 33.5 Medical devices/pacemakers .....................38 33.6 Hearing protection ......................38 33.7 Precautions for electronic devices ..................39 33.8 Precautions for use in potentially explosive atmospheres ..........39 33.9 Safety and general use in vehicles ..................39 33.10 Aircraft safety ........................39 33.11 Battery use ...
-
Page 6: Scope Of Delivery
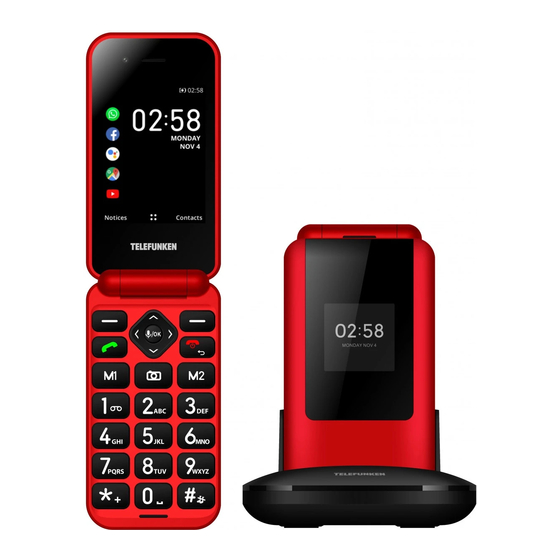
Thank you for choosing our mobile phone. By reading this instruction manual before using your phone, you will gain a good understanding of the phone's key functions. This phone is designed for 2G, 3G, and 4G cellular networks. It is enabled by KaiOS. In addition to the basic calling and messaging functions, it allows you to use the phone book, ringtones, clock/ alarm, calendar, Voice Assistant, Facebook, WhatsApp, video player, camera, FM radio, web browser, and more. This phone meets the 2G, 3G, and 4G standards and has been certified by all relevant organisations worldwide. Please note that the contents of this instruction manual are subject to change without prior notice. 1. SCOPE OF DELIVERY Please make sure all of the following items are included in the box. If anything is missing, contact your retailer immediately. 1. S760 mobile phone 2. Wired earbuds with a microphone 3. Rechargeable Li-ion battery 4. Travel charger 5. Charging cradle 6. Quick Start Guide 7. EU Declaration of Conformity SCOPE OF DELIVERY... -
Page 7: Control Elements
2. CONTROL ELEMENTS CONTROL ELEMENTS... -
Page 8: Description
2.1 DESCRIPTION Front camera Main screen Navigation keys (up, down, left, and right) / Voice Assistant / Central soft key Left soft key Call key M1 - direct memory key Camera shortcut key Keypad International prefix / Symbols 0 / Space key # key / Input method / Ring mode (ring or vibrate only) M2 - direct memory key End call / Return / Power key Right soft key Receiver Wrist strap attachment point Volume keys (up and down) / Wake external screen Rear camera SOS button Speaker External screen... -
Page 9: Understanding Your Phone
3. UNDERSTANDING YOUR PHONE PART DESCRIPTION ƒ Press to make or answer a phone call. Call key ƒ Press to view the call log. ƒ Long press to power the phone on or off. ƒ Press to end a call. End call / Return / Power key ƒ Press to delete characters before the cursor in edit mode. ƒ Press to return to the previous screen or close a dialog box. ƒ Press to go up, down, left, or right in the App List (MENU) or calender. ƒ Press Up on the home screen to open quick settings. ƒ Press Left on the home screen to open the carousel launcher. Navigation keys ƒ... -
Page 10: Getting Started
Allows you to plug in the supplied wired earbuds with a microphone 3.5 mm headset jack or other earphones for hands-free conversations or listening to music. Open the cover to reveal the keypad to dial a number or answer an Flip-opening cover incoming call (if this answer mode has been turned on in Settings). Close the cover to end a call. To make an international call, enter a +, followed by the country code and the desired number without the 0 at the beginning. International call prefix key To enter a +, double-press ƒ Press to dial "1". ƒ Press and hold to connect to your voicemail. ƒ Press to dial "#". ƒ Press to change the input method in edit mode. ƒ Press and hold to toggle between vibrate only and ring modes from the home screen. -
Page 11: Removing Or Inserting The Battery
4.2 Removing or inserting the battery Remove the back cover before removing or inserting the battery. ƒ To remove the battery, insert a fingernail or an opening tool into the gap in the upper-right corner and lift the battery. ƒ To insert the battery, point the battery contacts downwards towards the contact points of the battery compartment. Click the battery into place and attach the back cover. Note: This mobile phone is intended to be used with the supplied battery only. 4.3 Inserting or removing the micro-SIM card and microSD card To use all your mobile phone services you must subscribe to a mobile network that will provide you with a micro-SIM card assigned with a unique mobile number. To make phone calls, a valid micro- SIM card must be inserted. Power off the phone and remove the back cover and battery before inserting or removing the micro-SIM card or microSD card. -
Page 12: External Screen
To do so, go to MENU > Settings > Device > Battery > Power Saving Mode and select On. NOTES: ƒ When a travel charger and its accessories are used to charge the battery, please check if they are original or recognised by the original manufacturer. Using other accessories can damage your mobile phone and present a risk. ƒ Always use the accessories indoors and in a dry place. ƒ Do not throw the battery into a fire. Damaged batteries can cause an explosion. ƒ Refer to the detailed safety instructions concerning the precautions for use of the battery. ƒ Do not leave the battery connected to a charger for longer than 12 hours. Overcharging may shorten its life. 5. EXTERNAL SCREEN The S760 comes with an integrated external screen which allows you to quickly view the details of an incoming call, see if any messages or notifications have been received, and see if any phone calls have been missed. To turn on the external screen when the phone cover is closed, press either of the volume keys on the left-hand side of the phone. The screen will also automatically turn on for a limited time to alert you when a notification is received. When the screen is on, you will be presented with the time and date, as well as the battery level and the name of the network operator you are using. The external screen automatically turns off when the main screen turns on. 5.1 External screen icons ICON... -
Page 13: Set-Up Wizard
6.2 Set-up wizard When your phone is turned on for the first time, you will be guided by the set-up wizard. This wizard allows to you make some basic settings such as language. It also allows you to connect your phone to a Wi-Fi network. All settings you make in the wizard can be modified later in Settings. At the end, the wizard shows you a few handy tips for using the phone. 6.3 Entering the PIN code If a micro-SIM card is installed and it is secured, your phone will request the PIN (Personal Identification Number) code. In this case, please use the keypad to enter the PIN code and select OK to confirm. Notes: - You have only 3 attempts to enter the PIN code every time you switch on your phone. Restarting the phone will allow you to get another 3 attempts. If you enter the wrong PIN code 3 times in a row, the micro-SIM card will be locked and can only be unlocked with the associated PUK (Personal Unblocking Key) code. - If the PUK code was not provided to you, please contact your mobile service provider. If you enter the wrong PUK code 10 times in a row, the micro-SIM card will be permanently locked and you will lose all data stored in it. To set a PIN code for the installed micro-SIM card, go to MENU > Settings > Network & Connectivity >... -
Page 14: Useful Tips
7. USEFUL TIPS 7.1 Entering and editing text ƒ When your phone is in edit mode, the default input method is English letter. ƒ Press the key to cycle through Abc, abc, ABC, 123, and Predictive input modes. ƒ For normal text input, press a number key (2-9) repeatedly until the desired character is displayed. If the character you want is entered by the same key as the previous character, press that key after the little line below the previous character disappears. ƒ To enter a space, press the 0 key. ƒ To move the cursor left or right one step at a time, press the left or right navigation key. Press the up and down navigation keys to move the cursor to the start and end of the line respectively. ƒ To delete the already entered characters or symbols, press to delete anything before the cursor one at a time or long press the key to delete all entered text at once. ƒ To quickly enter a common punctuation mark in "Abc/abc/ABC" input mode, press the 1 key to cycle through the common punctuation marks until the desired punctuation mark is highlighted. ƒ To enter a symbol (including punctuation mark) or emoji, press the key to display the symbol/ emoji table, press the navigation keys to highlight the desired symbol/emoji, and press Alternatively, press the key associated with the desired symbol/emoji when the symbol/emoji table is visible. To view the next page of the symbol/emoji table, press the right soft key . -
Page 15: Personalising Your Phone
9. PERSONALISING YOUR PHONE Tips: ƒ To open the App List (MENU), press from the home screen. ƒ After opening the Settings app, press the left or right navigation key to view different categories of settings (Network & Connectivity, Personalisation, etc.). 9.1 Language To change the language, follow the steps below: Go to MENU > Settings > Personalisation > Language > Language (current language name), and then select the desired language. 9.2 Date and time By default, your phone automatically synchronizes its date and time with those of a time server. So, ... -
Page 16: Voice Assistant
5. Enable or disable Bluetooth 6. Open the Clock app 7. Toggle between Ring, Vibrate, and Silent modes 8. Adjust the volume for Ringtone & Alerts by pressing the left or right navigation key Note: To perform all the above actions except the last one, confirm by pressing 10. VOICE ASSISTANT A Voice Assistant is preinstalled on this phone and can help you enter text by voice, search for information online, translate words and sentences, make notes and calendar appointments, change settings of your phones, and so on. Note: Ensure your phone is connected to the internet before activating the Voice Assistant. When your phone is offline, the Voice Assistant will not work. - To activate the Voice Assistant, press and hold the Voice Assistant key - Once activated, the Voice Assistant automatically enters the listening mode. When listening mode is active, speak clearly to give your instruction. The Voice Assistant will then dictate your voice to text and process the information. - When the Voice Assistant is in the listening mode, you can press the left soft key to return to its home screen, where you can view help information and change its settings. When you are on its home screen, you can press and speak to it. 11. CONTACTS 11.1 Contact list The Contacts app stores your contact list. Your contact list is where you save contact information ... -
Page 17: Searching For A Contact
11.3 Searching for a contact To search for a contact, follow the steps below: 1. Ensure the Search input field at the top is highlighted. Press the up or down navigation key to highlight this field if needed. 2. Enter a keyword using the keypad or Voice Assistant. The keyword is case-insensitive and must be a contact's first/last name, mobile phone, or personal e-mail, or a starting part of one of these details. If there are one or more contacts whose details match the keyword, they will appear below the Search input field. If no contact was found with the keyword, "No match found." is displayed below the Search input field. 3. If one or more contacts were found, press the down navigation key to highlight a contact in the list and press to view the contact's details. 11.4 Editing the contact To edit a contact, follow the steps below: 1. Press the down or up navigation key to highlight the contact. 2. Press the right soft key and select Edit contact. 3. - Page 18 Create a contact group. - Once you have created at least one contact group, a folder named Group containing your contact groups will appear at the top of your contact list (below Favorite contacts if it exists). Create Group - A contact group helps to organise contacts. - To add a contact to a contact group, open the contact group, press the left soft key , and select a contact from your contact list. Note: Only contacts stored in your phone memory can be added to contact ...
-
Page 19: Sos
Set up a Google or Exchange ActiveSync account on your phone. - After you add your Google or Exchange ActiveSync account, you can sync your emails, contacts, calendars, reminders, and notes with your phone. - Before adding an account, ensure you have created the account and connected Add Account your phone to the internet. - Add a Google account: After you choose this option, follow the onscreen instructions to complete adding your account. - Add an Exchange ActiveSync account: After you choose this option, follow the onscreen instructions to complete adding your account. 12. SOS The SOS function allows you to set up to 5 contacts to be your emergency contacts, who will be notified when you require assistance from them. To turn on this function, go to MENU >... -
Page 20: Making A Call
13. MAKING A CALL 13.1 Placing a call and ending a call To call a phone number that is not in your contact list, return to the home screen, use the keypad to dial the desired number, and press Tips: - If you dial the wrong number, delete the incorrect digits by pressing - You can save the dialed number to your contact list by selecting Options > Create New Contact. To call a phone number that is in your contact list, go to MENU > Contacts, select the desired contact from your contact list, and press ... -
Page 21: Call Log
14. CALL LOG To check your call records including Missed, Dialed, and Received calls, go to MENU > Call log, or from the home screen press . To switch between different types of call records, press the left or right navigation key. The call records let you quickly place calls or send messages to recently missed, dialed, or received phone numbers. To make a call using your call records, follow the steps below: 1. Go to MENU > Call log. 2. Choose a phone number from the list. 3. Press to call the chosen phone number. To send a message using your call records, follow the steps below: 1. Go to MENU > Call log. 2. Choose a phone number from the list. 3. Press the right soft key , select Send Message, and select Messages. -
Page 22: Dictating A Message
- Recorder: select an audio recording from the Recorder app. - Music: select a music file from the Music app. - Video: select a video from the Video app. 15.2 Dictating a message To dictate a message, select the message input field, press and hold to activate the Voice Assistant, and speak. You can edit the dictated message before sending it. 15.3 Managing messages The Messages app is designed for threaded messaging. Threaded messaging displays both sides of a conversation (or thread) on one screen, in chronological order. In this way, it also groups messages to and from the same person together. Viewing messages - To open and view all messages in a conversation, go to the Messages home screen, highlight the ... -
Page 23: E-Mail
Select On without roaming to automatically download each multimedia message's header, body, and attachments when your phone is not roaming. Select On with roaming to automatically download each Auto retrieve messages multimedia message's header, body, and attachments even when your phone is roaming. Select Off to always download each multimedia message's header only. The default choice is On without roaming. Choose whether to allow (turn on) WAP push messages. -
Page 24: Whatsapp
17. WHATSAPP WhatsApp is a cross-platform messaging and Voice over IP (VoIP) service. The app allows you to securely send and receive text messages, voice calls, images and other media, documents, and more. You need a valid SIM card to activate WhatsApp. To use WhatsApp, a mobile data or Wi-Fi connection is required. To open WhatsApp, press the left navigation key from the home screen, press the up navigation key to select WhatsApp, and press 17.1 Setting up WhatsApp To set up WhatsApp on your phone, follow the steps below: 1. Ensure you have connected your phone to the internet and open WhatsApp. 2. (Optional step) Press the left soft key to select Terms and Policy. Your phone will then open the web browser and show you the WhatsApp Legal Info page. You may read the Terms of Service and Privacy Policy on this page. When you finish, long press to close the web browser and then manually reopen WhatsApp. 3. Press the right soft key to accept the Terms of Service and Privacy Policy and continue. -
Page 25: Starting A Chat
1. From the Chats tab of the WhatsApp home screen, press the left soft key , and then press the right soft key and select Add new contact. 2. Select Phone memory or SIM memory. 3. Enter the new contact's name and phone number and press to save the contact. 4. The new contact should automatically appear on the Chats tab. If the contact doesn't appear, press keys to select New chat > Options > Reload contacts. 17.3 Starting a chat Once ... -
Page 26: Facebook
18. FACEBOOK You can use Facebook to connect with your family, friends, and others around the world. You must connect your phone to the internet to use Facebook on your phone. To open Facebook, press the left navigation key from the home screen, press the up navigation key to select Facebook, and press . You may change the display language by hovering the cursor over your preferred language and pressing 18.1 Creating a Facebook account If you do not have a Facebook account, you can follow the steps below to create an account with your phone: 1. On the Facebook home screen, press the navigation key to hover the cursor over the Create New Account button and press . Press the right soft key to continue. 2. Press the navigation key to hover the cursor over the First name box and press . Enter your first name. Press the right soft key to continue. 3. Press the navigation key to hover the cursor over the Last name box and press . Enter your ... -
Page 27: Wi-Fi Connection
19. WI-FI CONNECTION Wi-Fi provides wireless internet access over distances of up to 100 meters. To use your phone’s Wi-Fi, you need access to a wireless access point or “hot spot.” The availability and range of the Wi-Fi signal depend on a number of factors, including obstructions and interference from other sources of radio frequency signals. To connect to a Wi-Fi network, follow the steps below: 1. Go to MENU > Settings > Network & Connectivity > Wi-Fi. 2. Select On to turn Wi-Fi on. When Wi-Fi is enabled, you will see the names and security settings of in-range Wi-Fi networks in Available Networks. 3. Choose Available Networks, select a Wi-Fi network to connect, enter the password (if it’s not an open network), and then press the right soft key to connect. Once your phone is connected to the Wi-Fi network, you will see in the status bar. To quickly turn Wi-Fi on or off, select ... -
Page 28: Media
21. MEDIA 21.1 Camera and video You can use the Camera app to take and share photos and videos. Your phone comes with a 3 megapixel rear camera and a 2 megapixel front camera that let you capture sharp photos and videos. To open the Camera app, use either of the following methods: - Press the Camera key from the home screen. - Go to MENU > Camera. Tips: - Press the left or right navigation key to toggle between photo mode and video mode. -
Page 29: Video
When viewing the picture list, you can do the following: - To select/highlight a picture, press any of the four navigation keys. - To view the available options for the highlighted picture and the picture list, press the right soft key . The available options include Delete, Edit, Add to/Remove from favourites, Share, Select Multiple, File Info, and Sort and Group (e.g. by date and time). - To view the highlighted picture in full-screen mode, press . When viewing a picture in full- screen mode, you can press the right soft key to view all the available options including setting the picture as your phone's wallpaper or one of your contacts' picture. 21.3 Video Using the Video ... -
Page 30: Fm Radio
Notes: - If you press to minimize the Music app while an audio file is playing, your phone will keep playing the audio in the background. To stop the playing, you must manually pause the audio in the app. - The Music app's audio player will show you your last played audio when you reopen the app later. 21.5 FM Radio You can use the FM Radio app to listen to the radio. The FM radio has a frequency range of 87.5 to 108.0 MHz. You can listen to radio either with or without earphones or a headset. To open the FM Radio app, go to MENU > Radio. Notes: to minimize the FM Radio app while the FM radio is on, the FM radio will remain - If you press on in the background. To turn off the FM radio, you must select TURN OFF in the app. - The FM Radio app will show you the radio station your last listened to when you reopen the app later. 21.6 File manager You can use the File Manager app to access all your audio, music, photos, videos, downloads, and other files stored in the phone memory and microSD card. - To open the File Manager app, go to MENU > File Manager. - You can open, delete, move, copy, rename, search for, view details of, and share files. -
Page 31: Calendar
To exit the web browser while viewing a web page, press the right soft key and select Quit browser, or long press To minimize the web browser while viewing a web page, press one or more times. The web browser will show you your last viewed web page when you reopen the app later. 23. CALENDAR You can use the Calendar app to view the calendar, and create and manage events, meetings, and appointments. The calendar helps organize your time and reminds you of important events. You can ... -
Page 32: Changing Calendar Settings
23.4 Changing calendar settings To view and change the calendar settings, go to MENU > Calendar, press the right soft key , and select Settings. You can change the following settings: Setting Description Add your Google or Exchange ActiveSync account to sync your emails, contacts, calendars, reminders, and notes with your phone. - Before adding an account, ensure you have created the account and Accounts connected your phone to the internet. - After you choose Google, ActiveSync, or CalDav, follow the onscreen instructions to complete adding your account. Choose to sync your calendar Every 15 minutes, Every 30 minutes, or Update Frequency Manually. The default choice is Every 15 minutes. Choose whether to be reminded by your phone and how long in advance ... -
Page 33: Installing An App
with a computer. 24.3 Installing an app To install an app, follow the steps below: 1. Go to MENU > Store. 2. Highlight the app you want to install and press to view the app's details. 3. Highlight the Get button near the top of the screen if it is not highlighted (GET appears in lower centre of the screen when it is highlighted.). 4. Press to start downloading and installing the app. To stop downloading and installing the app, press 5. After the app is installed, highlight the OPEN button near the top of the screen if it is not highlighted (OPEN appears in lower centre of the screen when it is highlighted.) and press to open the app. The newly installed app will be accessible through the MENU. 24.4 Uninstalling an app To uninstall an app, follow the steps below: 1. Go to MENU > Store. 2. -
Page 34: Recorder
Tips: - To check or uncheck an item in a to-do list, highlight it and press - To edit or delete an item in a to-do list, highlight it, press the right soft key , and select Edit or Delete. - To edit or delete a to-do list, highlight it, press the right soft key , and select Edit or Delete. - The most recently created to-do list always appears at the top on the Todo home screen. - The item most recently added to a to-do list always appears at the bottom of the to-do list. 25.3 Recorder You can use the Recorder app to record audio such as a verbal conversation with someone or any noise you hear on a street. To record audio, follow the steps below: 1. From the Recorder home screen, press the left soft key to begin a new audio recording. 2. Press to begin the recording. -
Page 35: Other Apps Installed On This Phone
To open the Memory Cleaner app, use either of the following methods: - Go to MENU > Memory Cleaner. and select Memory Cleaner from the list. - From the home screen, long press This app provides the following two memory cleanup options: - Basic Memory Cleanup: This type of cleanup removes only the most common unnecessary files from your phone memory and takes less than one minute to complete depending on the amount of files to remove. - Deep Memory Cleanup: This type of cleanup removes all unnecessary files from your phone memory and can take several minutes to complete depending on the amount of files to remove. ... -
Page 36: Resetting Your Phone
downloaded and installed. 30. RESETTING YOUR PHONE Resetting your phone will reset all settings and delete all data on it. The data stored in the micro-SIM card and microSD card will not be affected. You can improve your phone's performance by resetting it. Please note that this action cannot be undone. To reset your phone, go to MENU > Settings > Device > Device Information > Reset Phone and select Reset. After your phone is reset, it restarts and allows you to set it up as new. Tips: - You can reset your phone only when the battery is at least 25% full. - If you are afraid of losing any data stored in the microSD card, you can unmount the card before resetting your phone. 31. TURNING ON THE SCREEN LOCK You can secure your phone and the data stored in it by turning on the screen lock. When the screen lock is on, anyone who attempts to use your phone has to enter the correct passcode before using most functions of your phone. The passcode is requested every time the phone screen turns on. When the screen is locked, the user is only allowed to make emergency calls or use the camera. To turn on the screen lock, follow the steps below: 1. -
Page 37: Bluetooth
The following options are available: Option Description Carrier Display the network operator of the SIM card, if has been inserted. Turn this on to allow apps to use the mobile network when needed. Turn Data Connection this off to avoid incurring charges for data use on your mobile network, particularly if you do not have a mobile data agreement. Turn data roaming on or off. Data Roaming When abroad, this will allow the use of mobile data. Depending on your subscription, this may incur additional charges. APN Settings Adjust various APN settings. -
Page 38: Volte / Vowifi
The following options are available: Option Description Call Waiting Enable/disable call waiting. Caller ID Set how your phone number is displayed when making a call. Set how your calls are forwarded when you are busy, a call is unanswered, Call Forwarding or you are unreachable. Call Barring Set call barring on incoming and outgoing calls. Restrict numbers from being dialed on this phone. Emergency numbers Fixed dialling numbers are not affected by this function and are always dialable. DTMF Tones Set Dual Tone Multi-Frequency tones to normal or long. VoLTE / VoWiFi Turn VoLTE and VoWiFi on or off separately. Internet Sharing This menu is enabled only after you have turned on Data Connection. You can use this menu to turn on Wi-Fi hotspot and configure the Wi-Fi hotspot settings. You can then share your phone’s internet connection via Wi-Fi. Notes: Always have the security turned on when your Wi-Fi hotspot is active to prevent unauthorized use of your internet connection. Turn off the Wi-Fi hotspot feature when you no longer need to share internet access with other devices. When the feature is activated it will drain your phone's battery significantly. You can also use this menu to turn USB tethering on or off. USB tethering can share your phone's ... -
Page 39: Personalisation
You can receive messages on various topics from your network operator, such as weather or traffic conditions in a particular region. For available channels and relevant channel settings, contact your network operator. Notes: Not all network operators provide the cell broadcast messaging function in their networks. Cell broadcast messages cannot be received when your phone is roaming. 32.2 Personalisation Sound ƒ Volume: Adjust the volume for Media, Ringtones & Alerts, and Alarm separately. ƒ Tones: Turn vibration on or off, select a ringtone, select a sound for notice alerts, or manage tones. You can use Manage Tones to play or share System Ringtones and Notice Alerts, and add recordings or music to My Ringtones. ƒ Other Sounds: Enable/disable sounds for the dial pad and camera separately. Display ƒ Wallpaper: Set the home screen wallpaper by selecting a picture from the Gallery or the list of existing wallpapers, or using the camera to take a photo. ƒ Brightness: Adjust the brightness level. ƒ Screen Timeout: Set the length of time before the screen automatically turns off. Note: The longer this time, the shorter the battery life. Search ƒ Search Engine: Set the default search engine. ƒ... -
Page 40: Answer Mode
Answer Mode Turn "Flip open to answer" on or off. When this is on, you can answer an incoming call by opening the flip-opening cover. 32.3 Privacy & Security Screen Lock Turn on the screen lock to protect your phone and personal data from unauthorized access. For more info, see "31. TURNING ON THE SCREEN LOCK" on page 31. App Permissions Configure the permissions for apps or uninstall apps. Note: You cannot uninstall certain apps. For each permission you can choose one of the following options: ƒ Ask: Choose this to let the app ask for the permission every time it needs the permission. ƒ Deny: Choose this to always deny the permission. ƒ Grant: Choose this to always grant the permission. Do Not Track Choose whether you want your behaviour to be tracked by websites and apps. Browsing Privacy Clear the browsing history or cookies and stored data. About KaiOS View information about KaiOS and choose whether you want to send analytics data to KaiOS. 32.4 Storage Clean Up Storage View ... -
Page 41: Device
32.5 Device Device Information You can use this menu to access important phone information, and update or reset your phone. The following options are available: Option Description Phone Number View your phone number. If no SIM card is inserted, this is not visible. Model View your phone's model. Software View your phone's software version. Check for new software update or continue the current software update. Software Update For more info, see "29. UPDATING YOUR PHONE'S SOFTWARE" on page More Information View more information about your phone's software and hardware. Legal information View KaiOS license terms and open source licenses. Erase all data on your phone and restore your phone to its factory settings. Reset Phone For more info, see "30. RESETTING YOUR PHONE" on page 31. Downloads View your downloaded files. -
Page 42: Account
32.6 Account KaiOS Account You can use this menu to set up, sign in to, and manage your KaiOS account. Anti-Theft You can use this menu to enable or disable the Anti-Theft function. This menu is enabled only after you have signed in to your KaiOS account. Your KaiOS account comes with anti-theft capabilities to help locate your phone or prevent others from accessing it in the event that your phone is lost or stolen. To access the anti-theft capabilities, visit https://services.kaiostech.com/antitheft on a computer and sign in to your KaiOS account. After signing in, you will be able to access the following options: ƒ MAKE RING: Make your phone ring to help locate it. ƒ REMOTE LOCK: Lock your phone to prevent access without a given passcode. ƒ REMOTE WIPE: Clear all personal data from your phone. Note: The Anti-Theft function will be automatically enabled when you sign in to your KaiOS account on your phone. Other Accounts See other accounts connected to your phone, or add a new account. 33. SAFETY INSTRUCTIONS Read this instruction manual carefully before use. It contains important information for your ... -
Page 43: Network Services And Costs
ƒ Do not charge the mobile phone without the battery. 33.2 Network services and costs This mobile phone is approved for use on the GSM 850/900/1800/1900, MHz 3G: BAND 1/8, 4G: BAND 1/3/7/8/20 + B38 networks. To use the device, you should subscribe to the services of a mobile service provider. The use of such services can generate data transfer costs. Several device features may require network support, so a subscription is necessary. 33.3 Radio wave exposure ƒ You mobile device is a radio receiver and transmitter. Refer to the Specific Absorption Rate (SAR) section for more information about the exposure level for this device. ƒ During use, the actual SAR values for this device are usually below the indicated values. The better your network reception, the lower the wave emission of your phone (therefore, the operating power of your phone is automatically decreased). Try to make phone calls when your network coverage is 3 or 4 bars (indicated at top left). ƒ The hands-free kit provided with the device can also help to reduce your radio wave exposure. Privilege the use of your hands-free kit when making phone calls. ƒ With a headset, pregnant women are advised to keep the phone away from the belly and teenagers away from the lower abdomen. ƒ If you decide to equip one of your children or adolescents with a mobile phone, it is advisable to encourage them to make moderate and reasonable use of it, for example, by avoiding use at night and limiting the frequency and duration of phone calls. Also, be sure to inform them of the methods described above to reduce their radio wave exposure during phone calls. 33.4 Precautions for use while driving ƒ... -
Page 44: Precautions For Electronic Devices
33.7 Precautions for electronic devices Some electronic devices are susceptible to electromagnetic interferences from mobile phones if inadequately shielded, such as the electronic system of vehicles; consult the manufacturers of devices before using the phone, if necessary. 33.8 Precautions for use in potentially explosive atmospheres ƒ Switch off your phone prior to entering any area with potentially explosive atmospheres, such as fuelling areas, or fuel or chemical storage or transfer facilities. Do not remove, install, or charge batteries in such areas. ƒ Sparks in a potentially explosive atmosphere can cause an explosion or fire resulting in bodily harm or death. To avoid possible interference with detonators, switch off your phone when you are near electric blasting caps, a blasting area, or in areas where "Turn off electronic devices" is posted. Always obey signs and instructions. 33.9 Safety and general use in vehicles ƒ The safety airbag, brakes, speed control system and injection system should not be affected by wireless transmission. If you encounter problems with the elements above, contact your car dealer. ƒ Do not place your phone in the area over an airbag or in the airbag deployment area. Airbags inflate with a force that is proportional to the intensity of the collision. If a phone is placed in the airbag deployment area and the airbag inflates, the phone can be forcefully propelled and cause serious injury to occupants of the vehicle. ... -
Page 45: Power Adaptor
WARNING: If the battery is damaged, do not discard it. In case of a leak and the battery fluid comes in contact with the eyes or skin, wash thoroughly with clear water and consult a doctor. 33.12 Power adaptor ƒ When charging this phone with a power adaptor, only use the provided power adaptor or a power adaptor with identical specifications. ƒ Danger of electric shock! Do not attempt to repair this power adaptor yourself. In case of malfunction, repairs are to be conducted by qualified personnel only. ƒ This power adaptor can only be used in dry indoor locations. ƒ This power adaptor is not waterproof. Do not handle it with wet hands or in humid locations. ƒ Disconnect power adaptor from electrical outlet when not in use and before cleaning. ƒ Provided power adaptor is classified as protection class II and must not be connected to a protective ground. 33.13 Precautions ƒ Keep the mobile phone and all its fittings beyond children's reach. ƒ Keep the mobile phone dry. Keep away from rain, moisture, liquid or other substances that may corrode electronic circuits. ƒ Do not use or store the mobile phone in dusty places, lest that active parts of the mobile phone be damaged. ƒ Do not store the mobile phone in a high-temperature place. High temperature will shorten the life of electronic circuits and damage the battery and some plastic parts. ƒ Do not store the mobile phone in a chilly place. Otherwise, moisture will be formed inside the mobile phone to damage electronic circuits when the mobile phone is moved to a constant temperature place. ƒ... -
Page 46: Technical Data
35. TECHNICAL DATA Network: 2G: 850/900/1800/1900 MHz 3G: BAND 1/8 4G: BAND 1/3/7/8/20 + B38 Dimensions (mm): 110x57x19.8 Weight: S760: 130g (including battery) Battery: 1400 mAh Adaptor Input: 100-240 V~, 50/60 Hz, 0.3 A Adaptor Output: 5.0 V , 1.0 A, 5.0 W Operating frequency range: GSM900: 880.2 - 914.8 MHz (Uplink) and 925.2 - 959.8 MHz (Downlink) DCS1800: 1710.2 - 1784.8 MHz (Uplink) and 1805.2 - 1879.8 MHz (Downlink) Band I: 1922.4 - 1977.6 MHz (Uplink) and 2112.4 – 2167.6 MHz (Downlink) Band VIII: 882.4 - 912.6 MHz (Uplink) and 927.4 – 957.6 MHz (Downlink) FDD Band 1: 1920 - 1980 MHz (Uplink) and 2110 - 2170 MHz (Downlink) FDD Band 3: 1710 - 1785 MHz (Uplink) and 1805 - 1880 MHz (Downlink) FDD Band 7: 2500 - 2570 MHz (Uplink) and 2620 - 2690 MHz (Downlink) FDD Band 8: 880 - 915 MHz (Uplink) and 925 - 960 MHz (Downlink) FDD Band 20: 832 - 862 MHz (Uplink) and 791 - 821 MHz (Downlink) FDD Band 38: 2570 - 2620 MHz (Uplink) and 2570 - 2620 MHz (Downlink) Bluetooth: 2402 MHz - 2480 MHz Max output power: GSM 900: 33 dBm +/-3 dB FDD Band 3: 23 dBm+/-2.7 dB GSM 1800: 30 dBm +/-3 dB FDD Band 7: 23 dBm+/-2.7 dB Band I: 23 dBm+1/-3 dB FDD Band 8: 23 dBm+/-2.7 dB Band VIII: 23 dBm+1/-3 dB... -
Page 47: Disposal Instructions
36. DISPOSAL INSTRUCTIONS Recycling of electrical and electronic equipment Used electrical and electronic devices must not be discarded with household waste. The presence of this symbol on the product or its packaging serves as a reminder of this. Some of the materials of which this product is comprised can be recycled if they are taken to an appropriate recycling centre. By reusing the components and raw materials of used devices, you contribute significantly to protecting the environment. For further information on collection sites for used equipment, you can enquire at your town council, the waste treatment department, or the shop where you have purchased the product. Battery recycling This symbol on the battery indicates that at the end-of-life, the battery should not be discarded with other household waste. Separate the battery from other types of waste and recycle it via the local system of free waste collection of batteries in order to preserve the natural resources and encourage the reuse of materials. 37. WARRANTY AND AFTER-SALES SERVICE This telephone comes with a 24-month warranty, starting from the purchase date. For more information on the applicability of this warranty, please refer to our website at www.befuzze.com, or contact our after-sales service: After-sales service information: In the event of a technical problem, please contact our after-sales service: helpdesk@befuzze.com Manufacturer information BEFUZZE SA Route de Lully 5C 1131 Tolochenaz Switzerland Email: info@befuzze.com...
Need help?
Do you have a question about the S760 and is the answer not in the manual?
Questions and answers