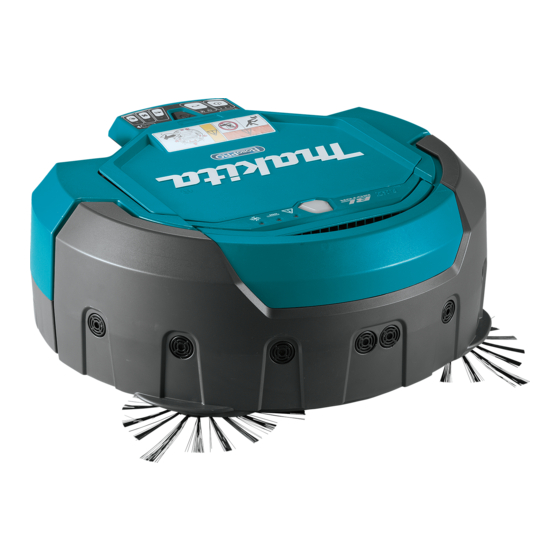
Makita DRC200 Instruction Manual
Hide thumbs
Also See for DRC200:
- Instruction manual (193 pages) ,
- Quick start manual (2 pages) ,
- Notes on use (2 pages)
Table of Contents
Advertisement
Quick Links
Advertisement
Table of Contents

Subscribe to Our Youtube Channel
Related Manuals for Makita DRC200


Summary of Contents for Makita DRC200
- Page 1 Robotic Cleaner INSTRUCTION MANUAL DRC200...
- Page 2 Fig. A Fig. D Fig. B Fig. E Fig. C...
- Page 3 Fig. F Fig. G Fig. H Fig. I...
- Page 4 Fig. J Fig. K Fig. L...
- Page 5 Fig. M Fig. N...
- Page 6 Fig. O Fig. P Fig. Q Fig. R...
-
Page 7: Specifications
ENGLISH (Original instructions) WARNING • This appliance can be used by children aged from 8 years and above and persons with reduced physical, sensory or mental capabilities or lack of experience and knowledge if they have been given supervision or instruction concerning use of the appliance in a safe way and understand the hazards involved. - Page 8 • Carpet cleaner or other foamy substances Do not expose the Robotic Cleaner to direct sunlight or infrared rays. Do not use the Robotic Cleaner in wet locations, Improper operation due to a sensor error may cause the locations that may become wet, or locations with Robotic Cleaner to fall, resulting in injury or malfunction.
- Page 9 Do not use boundary tape (sold separately) that is Do not use the Robotic Cleaner on hard, uneven dirty, peeling or torn. floor surfaces such as concrete floors, etc. This may result in increased brush and wheel wear. This may result in injury due to the Robotic Cleaner falling as a result of operational failure. Do not use the Robotic Cleaner if the brushes or wheels are worn.
- Page 10 Makita warranty for the Makita tool and (3) Do not expose battery cartridge to water or charger. rain.
-
Page 11: Buttons And Indicators
1. Place the side brush on the rotating shaft head on BUTTONS AND the Robotic Cleaner with the groove of the brush fitted to the shaft head. INDICATORS 2. Secure the side brush using the supplied screw. NOTICE: Make sure that the Robotic Cleaner is You can find details of the parts by searching for operated with the side brushes installed. -
Page 12: Basic Operations
• Place obstacles to prevent the Robotic Cleaner from • Deactivate any home security systems, etc. (The entering locations where it may become stuck, such Robotic Cleaner may be mistakenly detected as an intruder.) as under low shelves. • Move tall, thin and unstable objects and other easily • The Robotic Cleaner may not avoid differences in tipped over objects to another room. - Page 13 1. Press the POWER button (Fig. F-8) on the 75% or more Robotic Cleaner. Between 50% and 75% (incl. The Robotic Cleaner enters standby mode and 50%) Battery indicator (Fig. F-5) lights up. (For details, see “Battery indicator on the Robotic Between 25% and 50% Cleaner”...
-
Page 14: Emptying The Bin
Emptying the bin Locating the Robotic Cleaner This feature is useful for locating the Robotic Cleaner Empty the bin after every use to keep the Robotic which may be out of sight on a large floor with desks, Cleaner operating at peak performance. cabinets, and other fixtures. 1. Press and hold the POWER button (Fig. F-8) on Press the Location beacon button on the remote the Robotic Cleaner until all indicators turn OFF, or... -
Page 15: Maintenance
To maintain product SAFETY and RELIABILITY, the Robotic Cleaner will get stuck on repairs, any other maintenance, or adjustment should Preparations be performed by Makita Authorized or Factory Service 1. Select an even and smooth surface on the floor Centers, always using Makita replacement parts. where you plan to place the boundary tape, and Cleaning the side brushes then clean the surface. -
Page 16: Cleaning The Sensors
Robotic Cleaner. 5. Dry the filter (if you have washed it) and the dust box for 1 day in a well-ventilated place to prevent NOTICE: If the problem persists after the remedial unpleasant odor or malfunctions. action is complete, consult your nearest Makita Service Center. NOTICE: Do not dry the wet filter using a hair dryer or other heat source. Indication Cause/Remedy 6. Replace the filter in the dust box in the reverse... -
Page 17: Troubleshooting
(Fig. M-2). NOTE: If the problem persists after the remedial 4 times for each • The Robotic Cleaner passed through action is taken, consult your nearest Makita Service sequence a confined area where its top surface Center. was pushed down. This is not a malfunction. -
Page 18: Reference Information
Soft power brush assy • Combination power brush assy • Bottom plate • Filter • Makita genuine battery and charger NOTE: Some items in the list may be included in the tool package as standard accessories. They may differ from country to country. 18 ENGLISH... - Page 19 19 ENGLISH...
- Page 20 Makita Corporation 3-11-8, Sumiyoshi-cho, Anjo, Aichi 446-8502 Japan www.makita.com Printed in Thailand DRC200-ENAU-2202 TINSJA694VBRZ 22B− TH...
Need help?
Do you have a question about the DRC200 and is the answer not in the manual?
Questions and answers