
Related Manuals for Cata EFGM60SS2


Summary of Contents for Cata EFGM60SS2
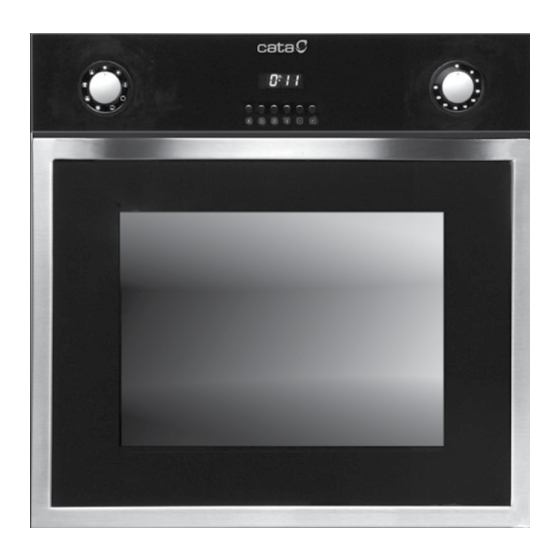
- Page 1 EFGM60SS2 - EFDX60BK - DECOR 7 Multi Function Fan Oven Barcode 8422248600279 / 8422248600378 / 8422248602372...
- Page 2 [02] x 1 [03] x 1 [07] x 4 [04] x 1 (Ø3.9 x 32mm) [05] x 1 [06] x 4...
- Page 3 EFGM60SS2 - EFDX60BK - DECOR 7 Built In Multifunction Fan Oven Installation...
- Page 4 Let's get started... started... Getting Before you start Safety more detail... Product functions Operation Care and maintenance Troubleshooting Recycling and disposal Technical and legal information Guarantee CE Declaration of conformity Appendix Installation...
-
Page 5: Getting Started
Getting Started... Before you start Safety... -
Page 6: Before You Start
Before you start Before you start To avoid the risks that are always present when you use an electrical appliance it is important that this appliance is installed correctly and that you read the safety instructions carefully to avoid misuse and hazards. Please keep this instruction booklet for future reference and pass it on to any future owners. - Page 7 Before you start Instructions This user manual must be kept for future reference and use by someone who is not familiar with the appliance. Before using the oven, carefully clean the inside with a non-abrasive detergent and warm water. Position the grill and tray in their respective runners.
- Page 8 Before you start Tools Required We advise when installing this appliance two people are recommended.
- Page 9 Safety These instructions are for your safety. Please read through them thoroughly prior to installation and retain them for future reference. • All installation work must be carried out by a competent person or qualified electrician. • This appliance must be installed correctly by a suitably qualified person, strictly following the manufacturer’s instructions.
- Page 10 Safety We also recommend that great care be taken during use and cleaning. Read the cleaning and maintenance sections for this appliance carefully. A steam cleaner is not to be used. The appliance is not intended to be operated by means of external timer or separated remote-control system.
-
Page 11: In More Detail
more detail... Product functions Operation Care and maintenance Troubleshooting Recycling and disposal Technical and legal information Guarantee CE Declaration of conformity... -
Page 12: Product Functions
Operation Product functions > The oven is controlled by a thermostat between 50 ºC and 250 ºC, depending on the temperature required. The thermostat pilot light turns on and off to indicate the temperature control during use. > The required cooking mode is selected using the multi-functional control button. - Page 13 Operation The circular rear element and fan come on together and the is is dispersed by force True Fan convection. The oven does not require pre- heating. Grill element comes on and is dispersed Fan Assisted Grill by the rear fan. Even distribution of heat is attained in the cavity.
- Page 14 Operation Cooking instructions TRUE FAN MODE Cakes/Biscuits Temperature Shelf Position Cooking Time °C (Recommended) in min. from the bottom Cake Mixture Desserts in Moulds Sponge cake 150 – 170 60 – 70 Marble, nut cake (tin) 150 – 170 60 – 80 Fresh fruit cake (tray) 150 –...
- Page 15 Operation CONvENTIONAl Cakes/Biscuits Temperature Shelf Position Cooking Time °C (Recommended) in min. from the bottom Cake Mixture Desserts in Moulds Sponge cake 150 – 170 60 – 70 Marble, nut cake (tin) 150 – 170 60 – 80 Fresh fruit cake (tray) 170 –...
- Page 16 Operation CONvENTIONAl Food Recommended Temperature °C 3) Time in min. 4) shelf level from the bottom Roast beef, approx. 1 kg 190 – 210 100 – 120 Beef fillet, approx. 1 kg 200 – 220 45 – 55 Venison, approx. 1 kg 190 –...
- Page 17 Operation TRUE FAN CONvENTIONAl MODE Food Recommended Temperature Time in Temperature in Time in shelf level from in °C 3) min. 4) °C 3) min. 4) the bottom 170 – 190 100 – 120 190 – 210 100 – 120 Roast beef, approx.
- Page 18 Operation FAN GRIll Food to be grilled Recommended Temperature Total grilling shelf level from setting Time in min. the bottom Thin cuts Steak 3 or 4 2) maximum 20 – 25 Kebabs maximum 16 – 20 Chicken kebabs maximum 23 – 27 Cutlets/ Schnitzel 3 or 4 2) maximum...
- Page 19 Operation Temperature Shelf level Time in Notes Food in °C * from the min. * bottom * Potato, pasta or 1 or 2 20 – 25 Place in a suitable dish. vegetable bake Lasagne, cannelloni 1 or 2 35 – 40 Remove the lid.
- Page 20 Operation Operation instructions Using the 6-button electronic timer Description of the button functions: Alarm Automatic cooking (duration) End of cooking time (end time) Manual operation Reducing number in all programmes Adding number in all programmes Auto: Automatic programme 20 00 FIG.
- Page 21 Operation > (Light on): Programmer in automatic position and programmed. > No symbol lit, except the clock numbers means that a waiting time is programmed. Programmer functions: > 24-hour display clock. > Alarm (Maximum 23:59). > Automatic programming (start and end of cooking). >...
- Page 22 Operation Start and End of cooking: 1. Programme the cooking time using 2. Press the buttons to select the cooking time. 3. Press for programming the off time. 4. Select to set the off time. > After these operations, the "AUTO" symbol will appear on the display, indicating that the oven has been programmed.
- Page 23 Operation > The programming can also be cancelled at any time by pressing setting the marker to zero. By then pressing the oven will be ready for manual operation. Electronic alarm > The timer function consists solely of an alarm which can be adjusted for a maximum period of 23:59.
- Page 24 Care and maintenance Care and maintenance IMPORTANT ! Warning Always switch off the electricity supply before As a safety precaution, before beginning to clean the performing maintenance work. In the event of a fault, appliance always switch off at the mains switch. FUSE contact customer services.
- Page 25 Care and maintenance Removing the door from the oven (Fig.2) > To simplify cleaning the interior of the oven, the door can be removed. The process of removing the door is shown below: > Open the door fully to position “C” Lift the two mobile links "A"...
- Page 26 Care and maintenance Cleaning the glass door (Fig.3) > If possible, remove the oven door glass following the manufacturer's instructions. Use warm water with a little detergent to clean the glass sections of the door. > To simplify the cleaning, the inner glass panel can be taken out of the door. The method for removing the glass from the door is shown below.
- Page 27 Care and maintenance Replacement of the oven light bulb (Fig.4) > Not covered by the appliance guarantee. 90’ WARNING: Disconnect the appliance from the electricity supply, open the oven door and remove the oven shelves. The oven has a light with the following characteristics: >...
- Page 28 Care and maintenance WARNING: Disconnect the appliance from the electricity supply, open the oven door and remove the oven shelves. The oven has a light with the following characteristics: > 15 W or 25 W, 300 ºC and type E-14 1.
- Page 29 Care and maintenance Troubleshooting Fault Cause Solution Oven doesn't work Something at the Turn off main supply and connection is wrong, or check if some wire has it's not connected. been disconnected. Power supply Turn off main supply and connections are loose. check if some wire has been disconnected.
- Page 30 Care and maintenance Recycling and Disposal Environmental Protection Waste electrical products should not be disposed of with household waste. Please recycle where facilities exist. Check with your Local Authority or retailer for recycling advice. The symbol on the product or its packaging indicates that this product cannot be treated as normal household waste.
- Page 31 Final Gross Model volume volume Name (lITRES) (lITRES) EFGM60SS2 EFDX60BK DECOR 7 Electrical information: Nominal voltage: 220 V - 240 V ~ 50 Hz Power connection: 13 A (automatic bipolar switch with protected socket, with 3 mm separation between contacts)
- Page 32 Technical and legal information All installation work must be carried out by a competent person or qualified electrician. Before connecting the mains supply ensure that the mains voltage corresponds to the voltage on the rating plate inside the cooker hood. Warning: THIS APPlIANCE MUST BE EARTHED.
- Page 33 Technical and legal information Electrical Requirements Any permanent electrical installation must comply with the latest I.E.E. Regulations and local electricity company regulations. For your own safety a qualified electrician or contractor who is on the roll of the National Inspection Council for Electrical Installation Contracting (NICEIC) should undertake the electrical installation.
- Page 34 Guarantee Manufacturer's Guarantee This appliance is covered by a full manufacturer’s 24 month parts and labour guarantee and covers all parts and labour costs associated with the repair of the appliance in a domestic environment. We will repair any defect that arises due to faulty materials or workmanship and use genuine manufacturers parts.
- Page 35 Guarantee Exclusions to the guarantee (continued) Claims arising from non-domestic use or commercial environment. Any gas appliance not fitted by a gas safe qualified installer. If no fault is found then GAA reserves the right to charge for the call out at the going rate of £55.00 plus VAT.
- Page 36 Technical and legal information CE Declaration of Conformity MANUFACTURER: CATA ADDRESS: C/Ter n° 2, Torelló 08570 – Barcelona (Spain) We hereby certify that the mentioned accessory complies with the essential requirements of the European Directives applicable, including their modifications and the corresponding transpositions from the national law.
- Page 37 Appendix... Installation...
- Page 38 Installation Fitting the appliance Important > The adjacent piece or furniture or cupboard and all the materials used in the installation must resist a minimum temperature increase of 85 ºC above the ambient temperature during use of the appliance. > Certain types of vinyl or laminated kitchen furniture are particularly susceptible to damage due to decolouration at temperatures below those indicated.
- Page 39 Installation 85mm - 90mm FIG.6...
- Page 40 Installation 85 - 90mm 600 mm 60 mm 85 - 90mm 550mm Minimum ventilation gap 80cm...
- Page 41 Installation [06] [07] [06] x 4 [07] x 4 Note: For electrical connection see Technical and legal information section...
- Page 42 Installation Adjusting the shelf position Note: For electrical connection see Technical and legal information section...
- Page 43 Notes...
- Page 44 CNA Trading U.K. ltd Hillbrow House Hillbrow Road Esher Surrey KT10 9NW...
Need help?
Do you have a question about the EFGM60SS2 and is the answer not in the manual?
Questions and answers
All the dials have disappeared on the oven which we can see on what cooking setting to put it on, have you got a picture of the dials