Table of Contents
Advertisement
Quick Links
Advertisement
Table of Contents

Related Manuals for Toshiba RAV-SP302AT2P-UL


Summary of Contents for Toshiba RAV-SP302AT2P-UL
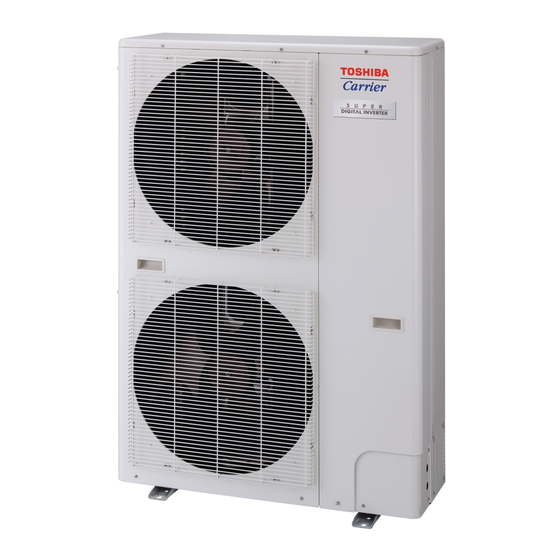
- Page 1 1131501101 AIR CONDITIONER (SPLIT TYPE) Installation Manual Outdoor Unit For commercial use Pour usage commercial Para uso comercial Model name: <Heat Pump Model> RAV-SP302AT2P-UL RAV-SP362AT2P-UL RAV-SP422AT2P-UL RAV-SP482AT2P-UL Installation Manual English...
-
Page 2: Table Of Contents
– 1 – Contents Original instruction Please read this Installation Manual carefully before installing the Air Conditioner. • This Manual describes the installation method of the outdoor unit. Precautions for safety ....................3 • For installation of the indoor unit, refer the Installation Manual attached to the indoor unit. Accessory parts ...................... - Page 3 Thank you for purchasing this Toshiba Carrier air conditioner. Definition of Protective Gear Please read carefully through these instructions that contain important information and ensure that you When the air conditioner is to be transported, installed, maintained, repaired or removed, wear protective gloves understand them.
-
Page 4: Precautions For Safety
– 3 – Warning indications on the air conditioner unit Precautions for safety Warning indication Description Installing, starting up, and servicing air-conditioning equipment can be hazardous due to system pressures, electrical components, CAUTION CAUTION and equipment location (roofs, elevated structures, etc.). BURST HAZARD BURST HAZARD Only trained, qualified installers and service mechanics should... - Page 5 • Tighten the flare nut with a torque wrench in the specified WARNING manner. • Ask an authorized dealer or qualified installation Excessive tightening of the flare nut may cause a crack in the professional to install/maintain the air conditioner. flare nut after a long period, which may result in refrigerant Perform installation work properly according to the leakage.
- Page 6 – 5 – WARNING WARNING • When the air conditioner cannot cool or heat a room well, • After installation work, make sure below before operation. contact the dealer from whom you purchased the air - Connection pipes are connected properly and no leakage. conditioner as refrigerant leakage is considered as the - Packed valves are fully open.
-
Page 7: Accessory Parts
Accessory parts Installation of new refrigerant air conditioner Part name Q’ty Shape Usage CAUTION Installation Manual Booklet Hand this directly to the customer. New refrigerant air conditioner installation • This air conditioner adopts the new HFC refrigerant (R410A) which does not destroy ozone layer. R410A refrigerant is apt to be affected by impurities such as water, oxidizing membrane, and oils because the Drain connector working pressure of R410A refrigerant is approx. -
Page 8: Installation Conditions
– 7 – Installation Location When an outdoor unit is installed in a location that Installation conditions is always exposed to strong winds like a coast or on the high stories of a building, one of the following is recommended. WARNING ... - Page 9 Necessary space for installation (Unit: in (mm)) Multiple unit installation * When the outdoor temperature is high, the cooling capability may be decreased because of an equipment protection operation. Single unit installation When there is an obstacle on the When there are obstacles on the When there is an obstacle on the When there is an obstacle on the...
- Page 10 – 9 – Installation of outdoor unit 3) Place unit on stand. Make sure it is level and fasten securely to the stand. • Before installation, check the strength and horizontal • As shown in the figure below, install the of the base so that abnormal sounds do not foundation and vibration-proof rubber pads to emanate.
-
Page 11: Refrigerant Piping
Tightening of Flare • After the installation work, be sure to check for gas Refrigerant piping leaks of the pipe connections with nitrogen. Connections NO GOOD Piping connections are inside the front panel of the Flaring 1. Align the centers of the flare connections and fully Cover unit and the front panel and pipe cover needs to be tighten the flare nuts with your fingers. -
Page 12: Vacuum
– 11 – System requirements Refrigerant charge Vacuum • Minimum refrigerant line length between the outdoor Length of refrigerant unit and indoor unit is 16’5” (5 m) pipe connected to Additional refrigerant 6. After evacuation is complete, fully close the low side indoor/outdoor unit •... -
Page 13: Electrical Work
Triple Evacuation Method chart CAUTION Electrical work EVACUATE Should be check the compressor operating condition Field wiring while pumping down process. It must not any BREAK VACUUM WITH DRY NITROGEN WARNING abnormal sound, more vibration. It is abnormal condition appears and must turn off the Air Conditioner The dashed lines show field wiring. - Page 14 – 13 – 2. Remove the wire cover from back of the front pipe 5. Pass the wires through the wiring guide of the front 8. Connect 2 conduits. Field power supply System cover. pipe cover, adjust the wire lengths and fold the terminal block interconnection terminal block...
-
Page 15: Grounding
Grounding Functions to be implemented locally Handling existing pipe WARNING Be sure to connect the grounding wire. (grounding work) When using the existing pipe, carefully check for the following: • Wall thickness (within the specified range) Incomplete grounding may cause an electric shock. •... - Page 16 – 15 – Refrigerant recovery Steps taken to recover the refrigerant 1. Operate the indoor unit in the fan mode. When recovering the refrigerant in situations such as when relocating an indoor unit or outdoor unit, the recovery 2. Check that the LED displays are placed in their initial status. If not, place them in the initial status. operation can be performed by operating the SW01 and SW02 switches on the P.C.
- Page 17 Existing piping How to check the existing piping settings You can check whether the existing piping settings are enabled. The following settings are required when using a pipe Ø3/4” (19.1 mm) as the existing piping at the gas pipe side. 1.
-
Page 18: Troubleshooting
– 17 – Troubleshooting Appendix [1] Existing piping 5. When a commercially available dryer is attached to You can perform fault diagnosis of the outdoor unit with the LEDs on the P.C. Board of the outdoor unit in addition the existing pipes. to using the check codes displayed on the wired remote controller of the indoor unit. -
Page 19: Specifications
Specifications Are there scratches or dents on the existing pipes? Existing pipes: Cannot be used. • Use new pipes. Is it possible to operate the existing air conditioner? This product contains fluorinated greenhouse gases covered by the Kyoto Protocol Chemical Name of Gas R410A • After the existing air conditioner is operated in Global Warming Potential (GWP) of Gas 1,975 cooling mode for approx. - Page 20 – 19 – Warnings on refrigerant leakage Check of concentration limit The room in which the air conditioner is to be installed requires a design that in the event of refrigerant gas leaking out, its concentration will not exceed a set limit. The refrigerant R410A which is used in the air conditioner is safe, without the toxicity or combustibility of ammonia, and is not restricted by laws to be imposed which protect the ozone layer.
- Page 21 144 / 9 Moo 5, Bangkadi Industrial Park, Tivanon Road, Tambol Bangkadi, Amphur Muang, Pathumthani 12000, Thailand 1131501101...
Need help?
Do you have a question about the RAV-SP302AT2P-UL and is the answer not in the manual?
Questions and answers