Table of Contents
Advertisement
Quick Links
AIR CONDITIONER (SPLIT TYPE)
Installation manual
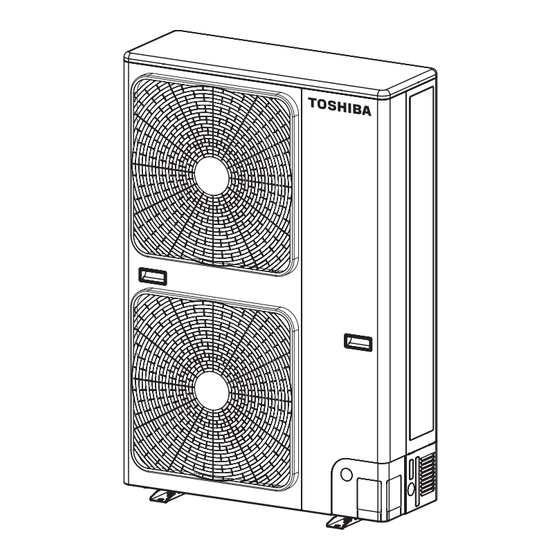
Outdoor Unit
Model name:
RAV-SP1104AT8-E
RAV-SP1104AT8Z-E
RAV-SP1104AT8ZG-E
RAV-SP1404AT8-E
RAV-SP1404AT8Z-E
RAV-SP1404AT8ZG-E
RAV-SP1604AT8-E
RAV-SP1604AT8Z-E
RAV-SP1604AT8ZG-E
Installation manual
Air conditioner
(Split type)
Manuel d'installation
Climatiseur
(Type split)
Installationshandbuch
Klimagerät
(Split-typ)
Manuale di installazione
Condizionatore d'aria
(Tipo split)
Manual de instalación
Aire acondicionado
(Tipo split)
English
1
Français
34
Deutsch
67
Italiano
100
Español
133
Advertisement
Table of Contents

Related Manuals for Toshiba RAV-SP1104AT8-E


Summary of Contents for Toshiba RAV-SP1104AT8-E
-
Page 1: Installation Manual
AIR CONDITIONER (SPLIT TYPE) Installation manual Outdoor Unit Model name: RAV-SP1104AT8-E RAV-SP1104AT8Z-E RAV-SP1104AT8ZG-E RAV-SP1404AT8-E RAV-SP1404AT8Z-E RAV-SP1404AT8ZG-E RAV-SP1604AT8-E RAV-SP1604AT8Z-E RAV-SP1604AT8ZG-E Installation manual English Air conditioner (Split type) Manuel d’installation Français Climatiseur (Type split) Installationshandbuch Deutsch Klimagerät (Split-typ) Manuale di installazione Italiano Condizionatore d’aria... -
Page 2: Table Of Contents
Super Digital Inverter Original instruction ADOPTION OF NEW REFRIGERANT This Air Conditioner is a new type that has adopted a new refrigerant HFC (R410A) instead of the conventional refrigerant R22 in order to prevent destruction of the ozone layer. This equipment complies with IEC 61000-3-12 provided that the short-circuit power Ssc is greater than or equal to Ssc (*1) at the interface point between the user’s supply and the public system. - Page 3 • The qualified installer who is allowed to work at heights has been trained in matters relating to working at heights with the air conditioners made by Toshiba Carrier Corporation or, alternatively, he or she has been instructed in such matters by an individual or individuals who have been trained and is thus thoroughly acquainted with the knowledge related to this work.
- Page 4 Super Digital Inverter Definition of Protective Gear When the air conditioner is to be transported, installed, maintained, repaired or removed, wear protective gloves and “safety” work clothing. In addition to such normal protective gear, wear the protective gear described below when undertaking the special work detailed in the table below.
-
Page 5: Warning Indications On The Air Conditioner Unit
Super Digital Inverter Warning Indications on the Air Conditioner Unit Warning indication Description WARNING WARNING ELECTRICAL SHOCK HAZARD ELECTRICAL SHOCK HAZARD Disconnect all remote Disconnect all remote electric power supplies before servicing. electric power supplies before servicing. WARNING WARNING Moving parts. Moving parts. -
Page 6: Precautions For Safety
Super Digital Inverter PRECAUTIONS FOR SAFETY WARNING General • Before starting to install the air conditioner, read carefully through the Installation Manual, and follow its instructions to install the air conditioner. • Only a qualified installer(*1) or qualified service person(*1) is allowed to install the air conditioner. If the air conditioner is installed by an unqualified individual, a fire, electric shocks, injury, water leakage, noise and/or vibration may result. -
Page 7: Electrical Wiring
Super Digital Inverter Refrigerant piping • Install the refrigerant pipe securely during the installation work before operating the air conditioner. If the compressor is operated with the valve open and without refrigerant pipe, the compressor sucks air and the refrigeration cycles is over pressurized, which may cause a injury. - Page 8 Super Digital Inverter Explanations given to user • Upon completion of the installation work, tell the user where the circuit breaker is located. If the user does not know where the circuit breaker is, he or she will not be able to turn it off in the event that trouble has occurred in the air conditioner. •...
- Page 9 Super Digital Inverter CAUTION New Refrigerant Air Conditioner Installation • THIS AIR CONDITIONER ADOPTS THE NEW HFC REFRIGERANT (R410A) WHICH DOES NOT DESTROY OZONE LAYER. R410A refrigerant is apt to be affected by impurities such as water, oxidizing membrane, and oils because the working pressure of R410A refrigerant is approx.
-
Page 10: Accessory Parts And Refrigerant
Super Digital Inverter ACCESSORY PARTS AND REFRIGERANT Accessory Parts Part name Q’ty Shape Usage Hand this directly to the customer. (For other languages that do not appear in this Outdoor unit installation manual Installation Manual, please refer to the enclosed CD-R.) Drain nipple Waterproof rubber cap... -
Page 11: Installation Of New Refrigerant Air Conditioner
Super Digital Inverter INSTALLATION OF NEW REFRIGERANT AIR CONDITIONER • The R410A refrigerant is more susceptible to impurities such as water, oxide membranes, oils, and fats. With the adoption of the new refrigerant, the refrigerating oil has also been changed. Be careful not to let water, dust, conventional refrigerant, and/or conventional refrigerating oil enter the refrigerating cycle of the new refrigerant air conditioner. - Page 12 Super Digital Inverter Refrigerant Piping New refrigerant (R410A) When using the conventional piping kit • When using the conventional piping kit with no indication of applicable refrigerant types, be sure to use it with a wall thickness of 0.8 mm for Ø6.4 mm, Ø9.5 mm, and Ø12.7 mm, and with a wall thickness of 1.0 mm for Ø15.9 mm. Do not use the conventional piping kit with a wall thickness less than these thicknesses due to insufficient pressure capacity.
-
Page 13: Installation Conditions
Super Digital Inverter INSTALLATION CONDITIONS Before installation Earthing • Proper earthing can prevent charging of electricity on the Be sure to prepare to the following items before installation. outdoor unit surface due to the presence of a high frequency in the frequency converter (inverter) of the Length of refrigerant pipe outdoor unit, as well as prevent electric shock. -
Page 14: Installation Location
Super Digital Inverter Installation Location 1) Install the unit so that its discharge port faces the wall of the building. Keep a distance 500 mm or more between the unit CAUTION and wall surface. 500 mm Install the outdoor unit in a location that meets the following conditions after the customer’s consent is obtained. - Page 15 Super Digital Inverter Necessary Space for Installation Obstacle in front (Unit: mm) Above unit is free 1. Single unit installation Obstacle at rear side Upper side is free 1. Single unit installation 2. Serial installation of two or more units 2.
-
Page 16: Installation Of Outdoor Unit
Super Digital Inverter Serial installation in front and rear • As shown in the figure below, install the foundation and vibration-proof rubber pads to directly support the bottom Open above and to the right and left of the unit. surface of the fixing leg that is in contact with and The height of an obstacle in both the front and rear of the unit underneath the bottom plate of the outdoor unit. -
Page 17: Refrigerant Piping
Super Digital Inverter For Reference • When water is to be drained through the drain hose, attach the following drain nipple and waterproof rubber If a heating operation is to be continuously performed for a cap, and use the drain hose (Inner diam: 16 mm) sold on long time under the condition that the outdoor temperature is the market. -
Page 18: Refrigerant Piping Connection
Super Digital Inverter Optional Installation Parts Flaring (Locally procured) 1. Cut the pipe with a pipe cutter. Be sure to remove burrs that may cause a gas leak. 2. Insert a flare nut into the pipe, and then flare the pipe. Parts name Q’ty Use the flare nuts supplied with the air conditioner or... - Page 19 Super Digital Inverter Tightening of Connecting Part CAUTION 1. Align the centers of the connecting pipes and fully tighten the flare nut with your fingers. Then fix the nut with a 1. Do not put the crescent wrench on the cap or cover. wrench as shown in the figure and tighten it with a torque The valve may break.
- Page 20 Super Digital Inverter Refrigerant Pipe Length Single Allowable pipe length (m) Height difference (Indoor-outdoor H) (m) Total length L Indoor unit: Upper Outdoor unit: Lower Pipe diameter (mm) Number of bent portions Gas side Liquid side 10 or less Ø15.9 Ø9.5 Simultaneous twin, triple Allowable pipe length (m)
-
Page 21: Air Purging
Super Digital Inverter AIR PURGING Airtight test Vacuum pump Before starting an airtight test, further tighten the spindle As shown in the figure, connect the charge hose after the valves on the gas side and liquid side. manifold valve is closed completely. Pressurize the pipe with nitrogen gas charged from the service port to the design pressure (4.15 MPa) to conduct the airtight test. -
Page 22: Replenishing Refrigerant
Super Digital Inverter How to open the valve Replenishing refrigerant Open or close the valve. This model is a 30 m chargeless type that does not need to have its refrigerant replenished for refrigerant pipes up to Liquid side 30 m. When a refrigerant pipe longer than 30 m is used, add Open the valve with a 4 mm hexagon wrench. -
Page 23: Electrical Work
Super Digital Inverter ELECTRICAL WORK • Remove the panel, and you can see electric parts on the WARNING front side. • A metal pipe can be installed through the hole for wiring. 1. Using the specified wires, ensure that the wires are If the hole size does not fit the wiring pipe to be used, drill connected, and fix wires securely so that the external the hole again to an appropriate size. -
Page 24: Wiring Diagram
Super Digital Inverter How to wire Wiring diagram 1. Connect the connecting wire to the terminal as identified For details on the remote controller wiring/installation, with their respective numbers on the terminal block of the refer to the Installation Manual enclosed with the remote indoor and outdoor units. - Page 25 Super Digital Inverter Single system, Twin system, Triple system Stripping length power cord and connecting wire Indoor/outdoor Power supply wire connecting wire 1 2 3 L1 L2 L3 N Earth screw Earth screw Earth line Earth line (mm) Connecting wire Power supply wire Cord clamp Cord clamp...
-
Page 26: Earthing
Super Digital Inverter EARTHING Connect the earth line properly following applicable technical standards. Connecting the earth line is essential to preventing electric shock and to reducing noise and electrical charges on the outdoor unit surface due to the high-frequency wave generated by the frequency converter (inverter) in the outdoor unit. If you touch the charged outdoor unit without an earth line, you may experience an electric shock. -
Page 27: Functions To Be Implemented Locally
Super Digital Inverter FUNCTIONS TO BE IMPLEMENTED LOCALLY Handling Existing Pipe Recovering Refrigerant When using the existing pipe, carefully check for the • Use refrigerant recovery switch SW801 on the P.C. board following: of the outdoor unit to recover refrigerant when the indoor •... -
Page 28: Troubleshooting
Super Digital Inverter TROUBLESHOOTING You can perform fault diagnosis of the outdoor unit with the LEDs on the P.C. board of the outdoor unit in addition to using the check codes displayed on the wired remote controller of the indoor unit. Use the LEDs and check codes for various checks. - Page 29 Super Digital Inverter Display mode 1 Display mode 2 Cause D800 D801 D802 D803 D804 D800 D801 D802 D803 D804 Normal Discharge (TD) sensor error Heat exchanger (TE) sensor error Heat exchanger (TL) sensor error Outside air temperature (TO) sensor error Suction (TS) sensor error Heat sink (TH) sensor error Outdoor temperature sensor (TE/TS) connection error...
-
Page 30: Appendix
Branching pipe for simultaneous operation system may be inadequate, which may cause the pipe to break • In the concurrent twin system, when TOSHIBA has in the worst case. specified that branching pipe is to be used, it can be Pipe diameter and thickness (mm) reused. - Page 31 Super Digital Inverter Are there scratches or dents on the existing pipes? Existing pipes: Cannot be used. • Use new pipes. Is it possible to operate the existing air conditioner? • After the existing air conditioner is operated in cooling mode for approx.
- Page 32 Super Digital Inverter This product contains fluorinated greenhouse gases covered by the Kyoto Protocol Chemical Name of Gas R410A Global Warming Potential (GWP) of Gas 1 975 CAUTION 1. Paste the enclosed refrigerant label adjacent to the charging and/or recovering location. 2.
- Page 33 Country Name of Company responsible for WEEE. Austria AIRCOND, Klimaanlagen Ireland GT Phelan Unit 30 Southern Toshiba Carrier UK Ltd Handelsgesellshcaft m.b.H Cross Business Park Bray Co Porsham Close, Belliver Ind. Petesgasse 45, A-8010 Wicklow, Ireland Est. Plymouth, Devon, PL6...
-
Page 34: Declaration Of Conformity
Manufacturer: Toshiba Carrier Corporation 336 Tadehara, Fuji-shi, Shizuoka-ken 416-8521 JAPAN Authorized Nick Ball Representative/ Toshiba EMEA Engineering Director TCF holder: Toshiba Carrier UK Ltd. Porsham Close, Belliver Industrial Estate, PLYMOUTH, Devon, PL6 7DB. United Kingdom Hereby declares that the machinery described below:... - Page 35 EH99870701-a...
Need help?
Do you have a question about the RAV-SP1104AT8-E and is the answer not in the manual?
Questions and answers