
Related Manuals for Hisense Laser Cinema


Summary of Contents for Hisense Laser Cinema
- Page 1 USER MANUAL Read the manual carefully and ensure you have fully understood its contents before operating this device for the first time. English...
- Page 2 ▌Important Notice Paragraphs beginning with the symbol indicate important instructions, tips or conditions for the following settings. For your own safety and the optimal performance of your device, ensure to read the safety instructions before performing any installation. Compatibility with 3rd party products, software and services are not guaranteed. We cannot be held liable for any damage or loss suffered whilst operating, using or connecting to incompatible devices or apps.
- Page 3 Laser Cinema to a suitable support. - Not placing the Laser Cinema on cloth or other materials that may be located between the Laser Cinema and supporting furniture. - Educating children about the dangers of climbing on furniture to reach the Laser Cinema or its controls.
- Page 4 „ Power Supply „ Power plug and power cable Incorrect voltages can damage the device. Only connect this unit - Do not touch the power plug with wet hands. to a power supply with the correct voltage and frequency noted - Do not place heavy objects on the power cable.
- Page 5 „ Thunder Storms become hot. - Do not insert foreign objects into the device through the vents. Pull out the power plug and all connected antenna cables from the device during a thunderstorm. Overvoltage caused by „ Warning about off-gassing lightning strikes can damage the device via the antenna system, as well as the wall socket.
- Page 6 - Also wipe the power plug with a dry cloth at regular intervals. - Do no use rechargeable batteries. - Do not burn or break up batteries. „ Service/Repair - Be sure to dispose of batteries correctly. - Do not expose batteries to excessive heat such as sunshine, Never remove the cover/back of the device;...
- Page 7 - Clean the lens periodically with a clean cloth and make - Do not place any exposed fire source (e.g. burning candle) sure the Laser Cinema is turned off before you start. on this device. Keep away from high temperature and heat.
-
Page 8: Table Of Contents
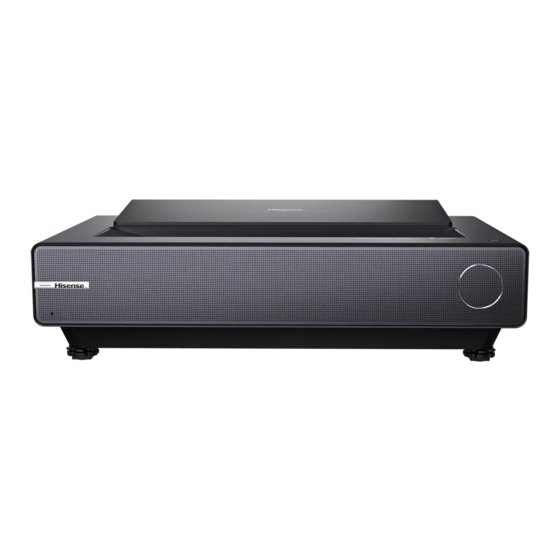
Congratulations on the purchase of your new Laser Cinema! This Manual will walk you through a few easy steps to set up your Laser Cinema. Please visit Hisense official website for more details. Product image is only for reference, actual product may vary in appearance. -
Page 9: Accessories List
• Power Cord × 1 • C-shaped blocks × 2 • Wrench to adjust the bottom of the Laser Cinema × 1 • C-shaped Block Installing Instruction × 1 NOTE: The accessories may be different from the list above due to different models, countries/regions. Please refer to the actual... -
Page 10: Laser Cinema Diagram
Laser Cinema Diagram Power Indicator Air vents Remote control receiver Eye protection sensor Lens with laser Eye protection sensor Power button We strongly recommend that two people handle this device when moving it from one place to another. Be sure to... -
Page 11: Step 1 Mount The Screen
STEP 1 Mount the Screen If you purchased a screen from Hisense to include with your Laser Cinema, then refer to the Screen Installation Guide that’s included in the package. STEP 2 Set up the Laser Cinema To begin setting up the Laser Cinema, we strongly recommend that TWO people move it from one place to another because of the weight. - Page 12 Ports to connect certain cables to Ethernet (you will need a router for Internet connectivity) It may be used to connect to a home automation system or Custom Integrated Audio/Video (A/V) system. It is recommended that it should only be completed by a professional installer. Check to ensure that you have selected the right cables for the ports and that they are connected securely.
- Page 13 External AV devices HDMI DVD Player Set-top Box Video Camera Satellite Receiver Digital audio adapter External audio devices White audio adapter Speakers Audio Amplifier...
- Page 14 The USB3.0 device maximum current consumption is 1A. If the impulse current for an individual non-standard high-capacity mobile hard disk is greater than or equal to 1A, it may cause the Laser Cinema to reboot or lock. The USB port supports a voltage of 5V.
- Page 15 Wired setup LAN ( Connect your Laser Cinema to your network by connecting the LAN port on the back of your Laser Cinema to an external modem or router using a LAN (Ethernet/Cat 5) cable. See the illustration below. Laser Cinema PORT...
-
Page 16: Step 3 Adjust The Display Image And The Screen
NOTE: Before adjusting, fold the wall-mount bracket wands so that screen is vertically level. Rotate feet from an overlooking view, but do not look directely at the lens when the Laser Cinema is on because the laser light may damage your eyes. - Page 17 If the bottom of the image is narrower than the screen, then move the Laser Cinema farther from the screen. front-right foot 2. Now, rotate the Laser Cinema counterclockwise so that the bottom of the image is parallel with the screen. NOTE: Make sure the bottom of the image always stays parallel with the screen.
- Page 18 4. If the upper-right corner is inside the screen after adjusting, use the wrench to rotate the front-right foot and the back- 2. Now, rotate the Laser Cinema clockwise so that the bottom of right foot counterclockwise to the same height, and rotate the Laser Cinema clockwise, to make the image parallel with the screen.
- Page 19 Next, move the projector further from the screen to fill the image to screen width. If the back feet are already at their maximum height, rotate the left- and right-front feet of the Laser Cinema counterclockwise. Rotate the back feet clockwise Rotate the front feet...
-
Page 20: Step 4 Use Your Remote
STEP 4 Use Your Remote BUTTONS ON YOUR REMOTE NOTE: The button labels are provided as a reference. The actual appearance of the remote that is included with the Laser Cinema, may differ from this diagram. Power on/off Display the Home screen... - Page 21 IMPORTANT INFORMATION ABOUT THE REMOTE AND REMOTE CONTROL) BATTERIES 1. Pair the remote to the Laser Cinema after you power it on. • Discard batteries in a designated disposal area. Do not Keep the remote control within 3 metres from the Laser throw them into a fire.
-
Page 22: Step 5 Proceed Through The Screen Setup Menu
Before you use Auto Geometric Correction function, ensure that NOTE: the Laser Cinema and your mobile device are connected to the • Please ensure you are standing in front of the screen to take same Wi-Fi network. - Page 23 1. Press / / < / > buttons on your remote to move focus, and press OK button to choose a point you need to adjust. 2. Long press / / < / > buttons: quick adjustment of the projected image; Short press / / <...
-
Page 24: Maintenance & Quick Problem-Solving Tips
• To turn off this device, press the Power button on the remote control. Do not cut off the power directly when the device is working. Quick Problem-Solving Tips When you experience an issue with your Laser Cinema, turn it off and on again. If this does not resolve the problem, then refer to the tips below. - Page 25 3. Try different Laser Cinema channels. The sound and/or picture is distorted or appears wavy 1. An electric appliance may be affecting the Laser Cinema. Turn off any appliances that are nearby and move it farther away from the Laser Cinema.
-
Page 26: Product Specifications
Product Specifications Model Name PX1G 20.5 × 6.3 × 12.8 inches Dimension (W × H × D) (520 × 160 × 324 mm) Weight 20.3 lbs (9.2 kg) Active Screen Size (Diagonal) 90 ~ 130 inches Screen resolution 3840 × 2160 Audio power 2 ×... - Page 27 Model MW510-1 Bluetooth Module Frequency Range 2402~2480MHz specifications Output Power (Max.) 11.10 dBm EIRP Model ERF3AA90H Remote Control Frequency Range 2.4~2.4835GHz specifications Output Power (Max.) 2.4~2.4835GHz 5dBm Temperature: 41°F - 104°F (5°C - 40°C) Environmental conditions Humidity: 20% - 80% RH Atmospheric pressure: 86 kPa - 106 kPa RGB / 60 Hz (640×480, 800×600, 1024×768) YUV / 60 Hz (480i, 480p, 720p, 1080i, 1080p)
-
Page 28: Recycling / Licenses
Recycling / Licenses ROHS (Restriction of Hazardous Substance) European Directive 2011/65/EU WEEE (Waste Electronic Electric Equipment) European Directive 2012/19/EU This European directive limits the use of dangerous and hazardous substances which are difficult to recycle. This symbol on the product or on its packaging indicates that This allows recycling easily the EEE and contributes to this product must not be disposed of with your household the safeguard of the environment. - Page 29 SIMPLIFIED EU DECLARATION OF CONFORMITY Hereby, Hisense Visual Technology Co., Ltd. declares that the radio equipment type [PX1 / PX1-PRO / PX1G / PX1G- PRO / PX1GU / ERF3AA90H] is in compliance with Directive 2014/53/EU. The full text of the EU declaration of conformity is available at the following internet address: http://global.hisense.com/downloads.
- Page 30 ES--1...
Need help?
Do you have a question about the Laser Cinema and is the answer not in the manual?
Questions and answers