
Related Manuals for Blackmagicdesign Teranex Series


Summary of Contents for Blackmagicdesign Teranex Series
- Page 1 Installation and Operation Manual Teranex Processors June 2017 日本語 English, , Français, Deutsch, Español, 한국어 中文...
- Page 2 Languages To go directly to your preferred language, simply click on the hyperlinks listed in the contents below. English 日本語 Français Deutsch Español 中文 한국어...
- Page 3 English Welcome Thank you for purchasing a Blackmagic Design Teranex converter for your facility. The Teranex converter you have purchased is an amazing quality standards converter that you will spend hours playing with to discover all the wonderful functions it has. I am still playing with it myself to see all the other things I can use it for! We have packed it with the latest SDI, HDMI and analog connections so you can use it to convert and connect anything!
-
Page 4: Table Of Contents
Contents Teranex Processors Getting Started Audio Embedding Plugging in Power Teranex Processor Settings Plugging in Video Video Menu Settings Plugging in Audio Audio Menu Settings Conversions Noise Reduction Menu Settings Setting the Latency for Teranex AV Ancillary Data Menu Settings Installing Admin Software System Setup Menu Settings Software Installation... -
Page 5: Getting Started
Getting Started Plugging in Power Getting started with your Teranex processor is as easy as plugging in power and connecting your signal input and output. To supply power, plug in a standard IEC power cable to your Teranex processor’s power input on the rear panel. -
Page 6: Setting The Latency For Teranex Av
Using the ‘audio’ buttons, select the embedded, AES, or analog audio input. After setting your input, you can now change your output settings for your desired conversion. VIDEO AUDIO FORMAT FRAME RATE ASPECT MENU VIDEO PRESETS AUDIO STATUS PANEL EMBED 23.98 ANAM 14:9 HOME... -
Page 7: Installing Admin Software
Home page. Installation on Mac OS X Download the Blackmagic Teranex Setup software from www.blackmagicdesign.com Unzip the downloaded file and open the resulting disk image to reveal its contents. -
Page 8: Updating The Internal Software
Use Blackmagic Teranex Setup for updating your Teranex processor and for changing settings remotely from a Mac OS X or Windows computer. Updating the Internal Software It is important to ensure that power is connected to your Teranex processor before connecting a USB cable between the computer and your Teranex. -
Page 9: Connectors
Connectors The types of connectors will vary depending on your Teranex processor model. Generally, all Teranex processors can convert SDI signals. Other models can also convert HDMI and analog video, but you will need to check your particular model to know which information in this manual is relevant to your Teranex. -
Page 10: Teranex Av
VIDEO AUDIO FORMAT FRAME RATE ASPECT MENU VIDEO EMBED 23.98 ANAM 14:9 HOME GAIN LBOX CCUT MENU Teranex AV HDMI 1080 PBOX ZOOM ULTRA 29.97 59.94 MENU ANLG SMART SHARP VIDEO AUDIO FORMAT FRAME RATE ASPECT MENU VIDEO REF OUT CH A CH B PUSH... -
Page 11: Teranex 2D
VIDEO AUDIO FORMAT FRAME RATE ASPECT MENU VIDEO 23.98 ANAM 14:9 HOME GAIN EMBED Teranex 2D LBOX CCUT MENU HDMI 1080 PBOX ZOOM 29.97 59.94 MENU ANLG ANLG SMART SHARP 1080 REF IN Y/NTSC/PAL IN B-Y IN R-Y IN Y/NTSC/PAL OUT B-Y OUT R-Y OUT ANALOG AUDIO IN/OUT... -
Page 12: Teranex 3D
VIDEO AUDIO FORMAT FRAME RATE ASPECT MENU VIDEO EMBED 23.98 ANAM 14:9 HOME GAIN LBOX CCUT MENU Teranex 3D HDMI 1080 PBOX ZOOM 29.97 59.94 MENU ANLG ANLG SMART SHARP 1080 VIDEO AUDIO FORMAT FRAME RATE ASPECT MENU VIDEO DOLBY METADATA REMOTE IN/OUT REF IN Y/NTSC/PAL IN... -
Page 13: Changing Settings
Analog Video Inputs Analog Video Outputs 1x BNC – Y/NTSC/PAL 1x BNC – Y/NTSC/PAL component/composite input. component/composite output. 1x BNC – B-Y component input. 1x BNC – B-Y component output. 1x BNC – R-Y component input. 1x BNC – R-Y component output. Changing Settings There are two different ways you can change settings on your Teranex processor. -
Page 14: Setting Your Output
NOTE If selecting analog video on Teranex 2D or 3D, confirm component or composite video on the LCD by turning the rotary knob. On Teranex AV, pressing the SDI button more than once will alternate between the two rear panel SDI inputs, SDI 1 and SDI 2. On the first button press, the LCD will momentarily display which SDI input is currently selected. -
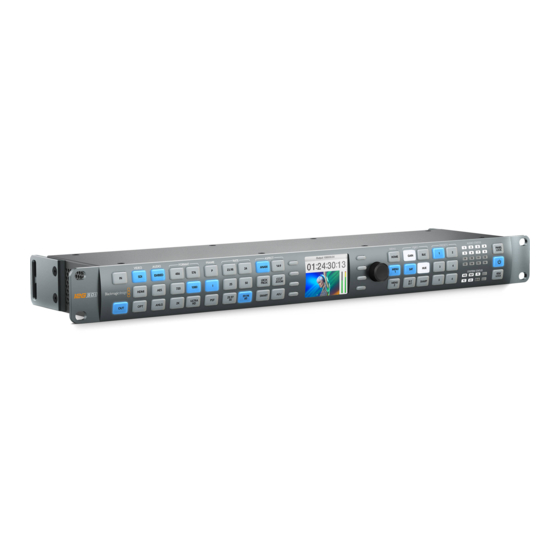
Page 15: Control Panel Overview
VIDEO AUDIO FORMAT FRAME RATE ASPECT MENU VIDEO PRESETS AUDIO STATUS PANEL 23.98 ANAM 14:9 HOME GAIN EMBED LOCK LBOX CCUT MENU HDMI 1080 PBOX ZOOM SYSTEM STATUS 29.97 59.94 MENU ANLG ANLG SMART SHARP 1080 LOCK VIDEO AUDIO FORMAT FRAME RATE ASPECT... - Page 16 Below is an overview of control panel features. VIDEO AUDIO FORMAT FRAME RATE ASPECT MENU VIDEO System Video Main Menu Setup 23.98 ANAM 14:9 HOME GAIN EMBED Audio LBOX CCUT MENU HDMI 1080 PBOX ZOOM Noise Reduction 29.97 59.94 MENU Ancillary ANLG ANLG...
-
Page 17: Presets
Presets Use the six ‘preset’ buttons to save and recall your conversion settings. Presets may also be saved, recalled and given descriptive names via the Blackmagic Teranex Setup utility. Presets wil save all operating parameters of your Teranex for later recall. For example, you could store customized proc amp or aspect ratio settings for instant recall at the moment they are needed in your production. -
Page 18: Connecting To A Network
System Status LEDs indicate the following when illuminated: Input video is present External Reference is selected and External Reference input is present Power Supply 1 is operational Power Supply 2 is operational. For Teranex 2D and Teranex 3D only Timecode is present in input or output video Closed Captions are present in input or output video <-->... -
Page 19: Changing Settings Using Blackmagic Teranex Setup
Changing Settings using Blackmagic Teranex Setup The Blackmagic Teranex Setup utility offers an intuitive way to view the status of your Teranex Processor and provides remote control from any location on your Ethernet network. This convenient application lets you control your Teranex remotely, away from the front panel. All your conversion settings can be set remotely using Blackmagic Teranex Setup. - Page 20 To add a Teranex Processor using Teranex Setup: Press the + button at the bottom left corner of the login pane to add a device. Type in the IP address and press ‘add’. The Teranex Processor will appear as another controllable device on your network. To manually add a Teranex Processor, click the “+”...
- Page 21 Configure The configure tab displays the name and IP address of the Teranex you are controlling. You can assign a unique name to the unit so you can identify it when you have multiple Teranex units in your system. Simply click in the ‘name’ field and enter a new name for the device.
- Page 22 Panel Lock via Remote Control You can remotely lock the Teranex front panel to prevent accidental changes by someone operating the front panel locally. Click on Panel Lock/Unlock in the gear menu to lock or unlock the front panel. The Panel Lock button on the front panel will turn red when locked. When operating the unit locally, you can override this feature by disabling the panel lock, however caution should be exercised as the unit may be in use by another operator.
-
Page 23: Aspect Ratio Conversions
Aspect Ratio Conversions A conversion table is provided so you can easily see how each aspect ratio setting will appear in your conversion. This is a helpful reference tool so you can visually identify each setting and make your selection faster. Up Conversion Input 4:3 Output 16:9... - Page 24 .Widescreen 16:9 SD Conversion to 4:3 SD While most standard definition programming utilizes a 4:3 aspect ratio, some SD sources may have been recorded in widescreen 16:9. To process SD widescreen inputs properly, the Teranex Processor must be configured to recognize the source as a 16:9 signal. Press the ‘in’...
-
Page 25: Conversion Workflows
Conversion Workflows This section of the manual demonstrates the set up workflows for the main conversions you can perform with your Teranex Processor. All conversions such as standards conversion, up, down and cross conversion, follow the same general set up using the front control panel. You will also see how to save and recall presets for frequently used conversions and how to set cadence settings so you can clean or remove cadence in material using 3:2 pull down. -
Page 26: Up Conversion To Ultra Hd Using Teranex Av And Teranex Express
Press the ‘1080’ button. Select the ‘p’ button for progressive output, and the ‘29.97/30’ button to select your frame rate. The format, frame and rate buttons are now illuminated green, ready for you to accept your conversion set up or make changes. Using the soft menu buttons, select ‘change’. -
Page 27: Down Conversion
Setting your Input Press the ‘in’ button on the Teranex control panel and select ‘SDI’ video. Your Teranex will automatically detect the input format, display the input video on the LCD and illuminate the corresponding buttons. ‘Embed’ will be illuminated as the audio input type. VIDEO AUDIO FORMAT... - Page 28 Power your Teranex Processor and connect your inputs and outputs. Setting your Input Press the ‘in’ button on the control panel and select ‘SDI’ video. Teranex will display the input video on the LCD, automatically detect the input format and illuminate the corresponding buttons.
-
Page 29: Cross Conversion
For more information on aspect ratio conversion refer to “Aspect Menu” on page 35 and “Aspect Ratio Conversions” on page 23. Cross Conversion Cross Conversion allows you to change the video resolution and/or aspect ratio of your program material. Cross conversions between 1080 and 720 HD formats are accomplished using a high quality de-interlacing algorithm that permits all conversions to be performed in the progressive domain. -
Page 30: Standards Conversion
Setting your Output Aspect Ratio Press the ‘lbox/pbox’ button to set your aspect ratio to letterbox. Your Teranex Processor is now ready to cross convert your video. 4:3 Ratio Display 16:9 Ratio Image Setting the LBOX/PBOX button on your SD output fits the 16:9 image inside the 4:3 frame. - Page 31 Using the soft menu buttons, select ‘change’. The output video is now displayed on the LCD and sent to all output connectors. The buttons will also illuminate blue to confirm your settings. VIDEO AUDIO FORMAT FRAME RATE ASPECT 23.98 ANAM 14:9 EMBED LBOX...
-
Page 32: Cadence Removal
Cadence Removal Cadence Removal involves the removal of the 3:2 pulldown sequence. 3:2 pulldown is applied when a telecine transfers film at 24 frames per second to video at 59.94 fields per second. Your Teranex processor will remove cadence automatically when converting video with a 3:2 pulldown to 24 frames per second. -
Page 33: Lowest Latency Processing On Teranex Av
Press the ‘home’ menu button, then select Video>Advanced>Clean Cadence. Use the rotary knob or soft button to set clean cadence to ‘on’. The 1080i59.94 output format will now contain a clean 3:2 cadence. Remember to set clean cadence to ‘off’ after completing your conversion. -
Page 34: Audio Embedding
Enabling the Lowest Latency Mode Go to the ‘System Setup’ LCD menu in your Teranex AV, select the ‘processing’ submenu and then select ‘lowest latency.’ You can also access this feature via the Setup tab in the Teranex Setup application. The Teranex AV will load the ‘lowest latency’... -
Page 35: Video Menu Settings
FORMAT FRAME RATE ASPECT MENU VIDEO PRESETS AUDIO STATUS System Video Main Menu PANEL Setup 23.98 ANAM 14:9 HOME GAIN LOCK Audio LBOX CCUT MENU 1080 PBOX ZOOM Noise Reduction SYSTEM STATUS 29.97 59.94 MENU SMART Ancillary SHARP Data LOCK Video Menu Settings The ‘video menu’... - Page 36 Adjust Aspect To customize the aspect ratio size, position and trim settings, use the soft menu buttons and rotary knob. Size The ‘size’ setting adjusts the horizontal and/or vertical image size. The range is approximately -50 to +200 percent. Position Position allows you to move the input image within the output frame. The range of adjustment is dependent on the current image size.
- Page 37 Video Setup Menu The ‘video setup’ menu lets you define the video parameters of your analog, SDI and HDMI inputs and outputs. The Teranex model you are using determines menu availability. No Video Input Menu Use this menu to select black or colorbars to be output when no video input is detected. The default setting is black.
- Page 38 Video Sampling Menu for Teranex 3D Processor only The ‘video sampling’ menu allows selection of the following sampling types for the Teranex 3D Processor. ‚ 4:2:2 – YUV ‚ 4:4:4 – YUV ‚ 4:4:4 – RGB Proc Video No Video Video Setup Color Input Sampling...
- Page 39 The quad HD outputs are assigned as follows: ‚ SDI Output A: Sub image 1 ‚ SDI Output B: Sub image 2 ‚ SDI Input Loop A: Sub image 3 ‚ SDI Input Loop B: Sub image 4 Out A Out B Loop A Loop B...
- Page 40 This setting only applies when outputting 3G-SDI video. For 3G-SDI inputs, ‘level A’ and ‘level B’ signals are detected automatically. Quad SDI Output Menu for Teranex AV only Teranex AV provides continuous quad SDI outputs via four dedicated BNC connectors when Ultra HD output formats are in use.
- Page 41 After adjustment, the associated button will illuminate white to indicate a non-default setting. To reset to its default setting, select the parameter via the ‘proc amp’ menu or control panel button and then push the rotary knob. To easily return all parameters to their default settings, go to the ‘proc amp’...
- Page 42 Res Chart. Grid. Test Patterns in Teranex AV In addition to the video test patterns shown above, the Teranex AV includes a menu for pattern motion and an integrated audio test tone menu. ‚ Test Patterns Select ‘test patterns’ to choose the desired video test signal. ‚...
- Page 43 The Setup page in the Blackmagic Teranex Setup utility provides motion control, selection of video test patterns and audio test tones Advanced Menu Your Teranex processor provides the following advanced cadence correction features: Clean Cadence for Teranex 2D and 3D The clean cadence feature creates a clean 3:2 pull down sequence in your 59.94 output video.
- Page 44 Scene Detect Scene change detection minimizes field blending between cuts for a cleaner looking output. This prevents fields from previous scenes mixing with new scenes. ‚ On Enables ‘scene cut detection’ ‚ Off Disables ‘scene cut detection’ The default mode is ‘on’ Most video is fine with ‘scene detect on’, but some video sequences may “stutter”...
-
Page 45: Audio Menu Settings
Audio Menu Settings The ‘audio’ menu permits output mapping of input audio channels, offers control of audio gain and delay and provides access to certain setup parameters. In Teranex 2D, an ‘input mapping’ menu is available, permitting simultaneous selection of channels from the embedded, AES and/or analog input sources. - Page 46 Output Mapping Output Mapping Output Mapping Prev Next Prev Next Prev Next Channel 1 Source Channel 4 Source Channel 13 Source Input 1 Input 1 Tone .75 kHz Input 2 Input 2 Tone 1.5 kHz Input 3 Input 3 Tone 3 kHz Input 4 Input 4 Tone 6 kHz...
- Page 47 ‚ If Dolby encoded audio is present on your ‘AES’ input, you cannot mix ‘AES’ with other audio input types. In this situation, you should select ‘AES’ as your input type. Input Mapping Input Mapping Prev Next Prev Next Input 1/2 Source Input 3/4 Source Embedded 1/2 AES 5/6...
- Page 48 Turn the knob to adjust. The range of adjustment is -12 to +12dB. Pressing the knob will return the level to zero. System Output Input Analog Analog Video Main Menu Audio Setup Setup Mapping Mapping In Level Input Output Audio Audio Gain Options...
- Page 49 Audio Meters for Teranex AV only The Teranex AV allows you to select which pair of input or output audio channels will be displayed on the front panel LCD. The channel numbers are displayed below the meters for confirmation. System Output Audio Video Main Menu Audio Setup...
- Page 50 In Teranex 3D, Dolby metadata may be derived from incoming Dolby audio, if a Dolby decoder is installed, and may also be input as serial data via the 9-pin Dolby metadata connector on the rear of the Teranex 3D. You may also generate your own metadata in the Teranex 3D by using one of the two commonly used configurations provided in the ‘dolby metadata’...
-
Page 51: Noise Reduction Menu Settings
Metadata Parameter Stereo Original Bitstream Extended Bitstream Info 1 Preferred Stereo Downmix Not Indicated Not Indicated Lt/Rt Center Downmix Level -3 dB -3 dB Lt/Rt Surround Downmix Level -3 dB -3 dB Lo/Ro Center Downmix Level -3 dB -3 dB Lo/Ro Surround Downmix Level -4.5 dB -4.5 dB... - Page 52 Bias Menu Adjust the ‘bias’ level to set the amount of noise reduction. The higher the ‘bias’ value, the more aggressive the noise reduction. ‚ The Bias range is -6 to +6. ‚ The default value is 0. Split Enable Set Value Screen Bias...
-
Page 53: Ancillary Data Menu Settings
Ancillary Data Menu Settings The ‘ancillary data’ menu provides access to closed caption, timecode and video index features. Closed Caption Menu The ‘closed caption’ menu lets you configure closed captions for CEA-608B and CEA-708B standards. CEA-608B is the closed captioning reference standard for SD NTSC analog and SD-SDI. - Page 54 CC Enable ‘CC enable’ is ‘off’ by default. To enable closed captioning, go to Main Menu>Ancillary Data>Closed Caption>CC Enable and select ‘on’ using the soft menu buttons or rotary knob. Disabling captions may be helpful if the incoming closed caption data is incorrect or corrupt. The CC status LED on the front panel is tied to the ‘in’...
- Page 55 Service 1 Language ‘Service 1 language’ is used to select the language for that service in CEA-708 closed captions. ‚ The language choices are: English French German Italian Spanish ‚ The default language is English. Service 2 Set Value Enable Source English Analog...
- Page 56 Timecode Generator The ‘timecode generator’ menu lets you choose from four available timecode modes, or disable manual timecode processing. No timecode data will be inserted into the output video. This is the default setting. Video Closed Ancillary Data Prev Timecode Next Caption Index...
- Page 57 Video Closed Ancillary Data Prev Timecode Next Caption Index Timecode Start Timecode Generator Input Input Regen Start Timecode Source Generate Jam Sync Setup Ancillary Data Menu> Timecode Menu>Input Regen Timecode Generate The timecode generator will generate free running output timecode appropriate for the selected output format, even if timecode is not present on your video input signal.
- Page 58 ‚ Set Timecode The ‘set timecode’ menu options you will have are determined by the selection you make in the ‘start source’ menu. Prev Timecode Next Start Value Timecode Start Input Generator Jam Sync Start Timecode Source 00:00:00:00 Setup Jam Sync>Set Timecode ‚...
- Page 59 AFD Insertion Menu This menu allows you to select the desired AFD code that will be inserted in the output video. The output line on which the code will be inserted can be selected in the AFD Insert Line menu. ‚...
-
Page 60: System Setup Menu Settings
System Setup Menu Settings The ‘system setup’ menu provides access to the ‘ethernet,’ ‘factory reset’ and ‘reference’ menus, as well as a system ‘info’ screen. Teranex AV offers additional selections, including processing latency and still frame capture controls. Ethernet Menu The ‘Ethernet’... - Page 61 DHCP Menu The DHCP menu enables or disables the assignment of an IP address to the chassis using ‘dynamic host configuration protocol’ or DHCP. You can press the DHCP soft button or turn the rotary knob to turn DHCP ‘on’ or ‘off’. If you change this setting, press the ‘save and restart’ button to power cycle the chassis and establish the new IP address.
- Page 62 NOTE Saving a Still to non-volatile memory is a background task that can take up to 30 seconds for Ultra HD still images. If you plan to power down after saving a still, be sure to allow enough time for this process to be completed. ‚...
- Page 63 When loading a graphic from a computer, the file may be of any resolution. Image conversion software will automatically resize the image to the output resolution of the Teranex AV. It’s important to note that this scaling is not done using Teranex algorithms and the quality will be lower than if the scaling was done internally.
- Page 64 ‚ Internal Synchronizes the output of the Teranex AV to its internal freerunning oscillator, which produces constant sync in the output stream, even when changing inputs to the unit. System Factory Video Main Menu Ethernet System Setup Setup Reset Audio Reference Noise Info...
- Page 65 Output Format Reference and Frame Rate Signal 1080PsF29.97 Blackburst 59.94, Tri-level Progressive 29.97, Tri-level Interlaced 59.94 1080p30 Tri-level Progressive 30, Tri-level Interlaced 60 1080PsF30 Tri-level Progressive 30, Tri-level Interlaced 60 1080i50 Blackburst 50, Tri-level Interlaced 50 1080p50 Blackburst 50 1080i59.94 Blackburst 59.94, Tri-level Interlaced 59.94 1080p59.94 Blackburst 59.94...
- Page 66 Generate Menu for Teranex AV only The Teranex AV can be used as a reference generator via its ‘reference output’ connection. The type of reference signal, black burst or Tri-level, is dependent on the output video format of the Teranex AV. Some video formats permit the use of specific reference types only. For example, if NTSC is your Teranex output format, only black burst at 59.94Hz will be generated.
- Page 67 When your output video format is Your choices for generated reference signals are: 1080p60 Not supported 2K DCI 23.98p Tri-level Progressive 23.98 2K DCI 23.98PsF Tri-level Interlaced 47.96 2K DCI 24p Tri-level Progressive 24 2K DCI 24PsF Tri-level Interlaced 48 2160p23.98 Tri-level Progressive 23.98 2160p24...
- Page 68 If you need quick access to the ‘output options’menu, you can assign this menu page to the ‘menu 1’ or ‘menu 2’ buttons on the Teranex AV front panel. Input ‘Input’ refers to the video input that you currently have selected on the front panel. This may be SDI 1, SDI 2, HDMI or the fiber optic input, if installed.
-
Page 69: 3D Menu Settings
‚ The transition setting has no effect on a Freeze frame. When freeze is selected, the Teranex AV will immediately cut to the freeze frame regardless of the transition setting. Audio will be muted. When you’re ready to switch from Freeze to Input, Black or Still, the transition will obey the rules of the transition setting described above. - Page 70 3D Mode Menu In the ‘3D mode’ menu, ‘off’ implies normal 2D processing. The following selections are available to enable 3D processing: ‚ Convert This mode enables processing of stereoscopic left and right eye inputs, which may be input via the SDI or HDMI inputs. This mode will also synchronize the incoming stereoscopic signals, which means that two non-synchronous inputs may be input to the Teranex 3D processor and the outputs will be synchronized.
- Page 71 Output Menu The ‘3D output’ selection determines the output formatting for your 3D image. ‚ Full Frame Provides full resolution outputs for left and right eyes on SDI outputs A and B respectively, while simultaneously providing a frame packed signal on the HDMI output. ‚...
- Page 72 3D Mode Intensity Input Depth Camera Output Align 3D Menu>2D to 3D>Depth Camera Align menu The ‘camera align’ button will be enabled only when you select ‘3D align’ in the ‘3D mode’ menu. The camera alignment application performs a variety of processing adjustments to a stereoscopic stream, including image zoom, flip, horizontal &...
- Page 73 Rotation Menu The ‘rotation menu’ of the ‘camera align’ application permits axial rotation adjustment of the image along the X, Y, and Z axis, either independently or in any combination of the three dimensions. Axial rotational adjustment can be used to compensate for 3D camera rigs that have mechanical misalignments.
- Page 74 Position Camera Align Zoom Roll Z Rotation Left Eye Rotation Trim Tilt X Right Eye Flip Toe-in Y Both Eyes Reset Reset Camera Align>Rotation Rotation Menu>Toe In Y Axis Position Flip Flip Left Eye Camera Align Zoom Rotation Trim Right Eye Horizontal Vertical Flip...
- Page 75 ‚ A negative parameter indicates zooming out on the image, while a positive parameter indicates zooming in on the image. ‚ Pressing ‘both will link the horizontal and vertical zoom parameters, which will maintain the correct aspect ratio while zooming. ‚...
- Page 76 Connections and Other Important Information for 3D Modes Let’s detail some of the connections and ancillary data handling that will affect your workflows. Video Connections Stereoscopic left and right video inputs should be connected to SDI inputs A and B respectively.
-
Page 77: Capture And Playback
Blackmagic Design Desktop Video software. This can be downloaded from the Blackmagic Design support center at www.blackmagicdesign.com/support/family/capture-and-playback. Video Capture When an application is capturing video, the Teranex LCD will show the word ‘capture’ followed by the video format of the input signal. -
Page 78: Davinci Resolve
To capture video using your Teranex processor, you may need to install Blackmagic Design’s latest Desktop Video software. You can download the Desktop Video software from the Blackmagic Design website at www.blackmagicdesign.com/support/family/capture- and-playback. Capture and Playback... - Page 79 Setting Up Launch ‘DaVinci Resolve’ and from the ‘preferences’ menu, select the ‘video I/O and GPU’ tab and select your Teranex from the ‘for capture and playback use’ option. Save your preferences and restart DaVinci Resolve to apply your changes. Start a project and from within the ‘project settings’...
-
Page 80: Avid Media Composer
Playback To playback your clips from the ‘media’ page, click the ‘capture’ icon again to close the ‘capture info’ window. Click on a clip that you have captured to display it in the viewer, then simply click on the viewer transport controls to play your clip. Editing and Color Grading Once you’ve captured your clips, simply click the ‘edit’... -
Page 81: Apple Final Cut Pro 7
Type a project name and set the project options. Capture Choose Tools > Capture to open the capture tool. Click the ‘toggle source’ button so that the button’s icon of a deck shows a red circle- slash symbol. Set the ‘video and audio’ input menus to ‘Blackmagic’. Select your video and the audio source tracks. - Page 82 Apple Final Cut Pro 7 Setting Up Launch Final Cut Pro 7 and select File>New Project. Select File>Save Project As... and name your project. From the Final Cut Pro menu, select ‘easy setup’...to open the ‘easy setup’ window. Choose ‘HD’ for the ‘format’ and ‘25.00 fps’ for the ‘rate’. Select ‘Blackmagic HDTV 1080i 50 - 10 bit’...
- Page 83 Playback You can use the Final Cut Pro timeline to display video on a monitor or TV connected to the output of your Teranex Processor. If you can’t see any video on your Blackmagic output, check the connections again and ensure you have the correct output settings configured within Final Cut Pro by going to the View >...
-
Page 84: Adobe Premiere Pro Cc
Adobe Premiere Pro CC For this example, the converted output from the Teranex will be 1080i50 and we will be capturing from a non-controllable device. Premiere Pro CC 2015. Setting Up Launch Premiere Pro CC. In the Welcome window select ‘create new/new project’. A window will open containing project settings. -
Page 85: Adobe After Effects Cc
Set the Audio and Render Properties to Custom. Capture Select File > Capture. Click the ‘red record’ button to begin capture. Click the ‘stop’ button to stop capture. Playback Playback settings need to be selected each time a new project is created. Go to Preferences >... - Page 86 You can now use a broadcast monitor to view your After Effects compositions in the correct video colorspace. You will always see the correct color and interlace when working, and you don’t have to wait until your composition is rendered to see what it looks like when output as video.
- Page 87 Other codecs including ProRes and DVCPRO HD will be available if you have Final Cut Pro installed. AVI codecs on Windows ‚ Blackmagic 10 bit 4:4:4 uncompressed ‚ Blackmagic 10 bit 4:2:2 uncompressed ‚ Blackmagic HD 8 bit 4:2:2 uncompressed ‚...
-
Page 88: Adobe Photoshop Cc
Adobe Photoshop CC How to grab and output video frames Import an image into Photoshop From Photoshop select File > Import > Blackmagic Image Import. Select the ‘video input format’ and the ‘image bit depth’ and then click ‘import image’. Export an image from Photoshop Select File >... -
Page 89: Waveform Monitoring With Blackmagic Ultrascope
6 scopes simultaneously by using a computer display resolution of 1920 x 1200 or 1920 x 1080 pixels. Please see the support pages at www.blackmagicdesign.com for a comprehensive list of the latest minimum system requirements for Blackmagic UltraScope. - Page 90 Blackmagic UltraScope - Full Screen View 2-Up view Blackmagic UltraScope Displays Blackmagic UltraScope software is a great tool for maintaining accurate broadcast legal video and audio levels from your Teranex’s converted output. Scopes used to monitor your levels include ‘RGB parade’, ‘waveform’, ‘vectorscope’, ‘histogram’ and ‘audio metering display’. RGB Parade Display ‘RGB parade’...
- Page 91 Waveform Display The waveform is great for seeing your black and white levels and overall image contrast. An image with good contrast will display information from 0 IRE to 100 IRE. An image with poor contrast will have the majority of information centered in the display, with little information in the top or bottom areas.
- Page 92 The center of the vectorscope represents zero saturation. The further an object is from the center, the more saturated it appears. If your material appears under or over saturated, press the ‘sat’ button on your Teranex processor and use the rotary knob to either increase or decrease saturation.
- Page 93 Error Logging Display ‘Error logging’ records errors in video and audio and is indispensable for unattended operation, such as during long conversions. Errors may be logged for color, brightness or audio threshold levels as well as loss of video signal, change of video format or audio silence. After setting the parameters which define when an error should be logged, you can choose to start or stop error logging, save the log to a file, or clear the log.
-
Page 94: Format Conversion Tables
Format Conversion Tables Teranex AV and Teranex Express • • • • • • • • • • • • • • • • • • • • • • • • • • • • • • • • • 525i59.94 NTSC •... -
Page 95: Teranex 2D
Format Conversion Tables Teranex 2D • • • • • • • • • • • • • • • • • • • • • • • • • 525i59.94 NTSC • • • • • • • • • • • • • • • • • • • • • • • • • 625i50 PAL •... -
Page 96: Teranex 3D
Format Conversion Tables Teranex 3D • • • • • • • • • • • • • • • • • • • • • • • • • 525i59.94 NTSC • • • • • • • • • • • • • • • • • • • • • • • • • 625i50 PAL •... -
Page 97: Connector Pin-Outs For The Teranex 2D
DB-25 Connector Pin-outs for the Teranex 2D Teranex 2D has a pair of RCA inputs so you can connect 2 channels of analog audio for left and right input, but there is also a DB-25 multi pin connector on the rear panel that lets you connect up to 4 analog audio channels, both input and output. - Page 98 AES/EBU Audio Inputs/Outputs Press the ‘AES’ button on the Teranex 2D front panel to select the AES/EBU digital audio input. The AES/EBU output is always active. A DB-25 connector is used for connecting up to 8 input channels made up of 4 pairs and 8 output channels made up of 4 pairs of balanced, AES/EBU digital audio to the Teranex 2D Processor.
-
Page 99: Installing Optional Blackmagic Design Fiber Optic Sfp
Installing Optional Blackmagic Design Fiber Optic SFP Blackmagic Teranex AV and Teranex Express have a built in optical fiber cage so you can install an optional optical fiber SFP module. When the SFP module is installed, you can reliably connect video signals up to 12G-SDI over longer distances than coaxial cable can provide. Installing the optional Blackmagic Design Fiber Optic SFP in your Teranex Express Processor WARNING... -
Page 100: Teranex Av Chassis Bumpers
Grasp the SFP module and carefully remove it from the cage. Immediately place the SFP module in a static shielding bag. Insert an SFP module cage cover into the optical module cage of your Teranex when no SFP module is installed. Installing the SFP Module into the Teranex Express. -
Page 101: Developer Information
Downloading the Free Blackmagic Design SDK The DeckLink SDK can be downloaded from the ‘capture and playback’ section of the Blackmagic Design support center at www.blackmagicdesign.com/support. Joining the Blackmagic Design Software Developers Forum If you’re looking for answers, feedback or suggestions regarding technologies used by Blackmagic Design, such as codecs, core media, APIs, SDK and more, visit the Blackmagic Design Software Developers forum. - Page 102 Connection The Blackmagic Teranex Ethernet Server listens on TCP port 9800. In a Telnet session, type in “telnet” and a space, followed by the IP address of your Teranex, another space and “9800”. For example: telnet 192.168.90.236 9800 Connection Response Upon connection, the Teranex Server sends a complete dump of the state of the device.
- Page 103 VIDEO ADJUST: ↵ Luma low: 4 ↵ Luma high: 1019 ↵ ↵ ANCILLARY DATA: ↵ AFD output line: 11 ↵ CC enabled: false ↵ ↵ VARIABLE ASPECT RATIO: ↵ Variable Aspect Ratio size X left: 0.000000 ↵ Variable Aspect Ratio size X right: 0.000000 ↵ ↵...
- Page 104 ACK ↵ ↵ VIDEO OUTPUT: ↵ Video mode: 1080i5994 ↵ Aspect ratio: Anamorphic ↵ Video demux mode: SingleLink ↵ Video pixel format: YCbCr422 ↵ Analog output: Component ↵ ↵ Retrieving Device Information The “Teranex Device” command returns information about the connected device: TERANEX DEVICE: ↵...
- Page 105 Protocol Commands Command Command Description Align size X left: 0.000000 Set the Horizontal Size (X) (Zoom) value for the Left Eye. Negative values decrease size; positive values enlarge the image. Default = 0 Align size X right: 0.000000 Set the Horizontal (X) Size (Zoom) value for the Right Eye. Negative values decrease size;...
- Page 106 Ancillary Data Teranex processors support closed captions, timecode and video indexing in the ancillary data. Closed Captions Command Command Description CC enabled: Enable Closed Caption processing. True=ON; False=OFF; (Default = False) CC input line: Analog CC input line selection. Range is 20 to 22. Default = 21 CC output line: Analog CC output line selection.
- Page 107 Video Indexing Command Command Description Index reaction: Values are: On, Off (Default = Off) AFD insert type: Values are: Off, Auto, Bypass, or AFD codes 0000 - 1111. For details, see the AFD Insertion Menu topic in the user manual. AFD output line: Range is format dependent.
- Page 108 Command Command Description AudioInLevel2: Set audio level (gain) for Channel 3 AudioInLevel3: Set audio level (gain) for Channel 4 AudioInLevel4: Set audio level (gain) for Channel 5 AudioInLevel5: Set audio level (gain) for Channel 6 AudioInLevel6: Set audio level (gain) for Channel 7 AudioInLevel7: Set audio level (gain) for Channel 8 AudioInLevel8:...
- Page 109 Command Command Description AudioOut4: Select source to be mapped to output Ch 5. AudioOut5: Select source to be mapped to output Ch 6. AudioOut6: Select source to be mapped to output Ch 7. AudioOut7: Select source to be mapped to output Ch 8. AudioOut8: Select source to be mapped to output Ch 9.
- Page 110 Please note: AudioInPair0: refers to input pair 1, AudioInPair1: refers to input pair 2, etc. Command Command Description AudioInPair0: Select source to be mapped to input pair 1 AudioInPair1: Select source to be mapped to input pair 2 AudioInPair2: Select source to be mapped to input pair 3 AudioInPair3: Select source to be mapped to input pair 4 AudioInPair4:...
- Page 111 MODE3D The MODE3D commands are available in the Teranex 3D only. See the “3D Menu Settings” section of this user manual for details. Example: MODE3D: ↵ 3D MODE: 3DModeAlign ↵ ↵ ACK ↵ ↵ MODE3D: ↵ 3D mode: 3DModeAlign ↵ 3D roll left: 0 ↵...
- Page 112 ACK ↵ ↵ MODE3D: ↵ 3D roll left: 20 ↵ 3D roll right: 0 ↵ ↵ Command Command Description 3D roll left: Adjust the Left Eye Z axis image rotation. Range is -400 to +400 units. (Default = 0) 50 units = 1 degree. (1 unit = 0.02 degree) 3D roll right: Adjust the Right Eye Z axis image rotation.
- Page 113 Noise Reduction Command Command Description Enabled: Enable Noise Reduction. False = OFF; True = ON Bias: Adjust the Bias level. Range is -3 to +3 Split screen: Enable NR before/after split screen. False = OFF; True = ON Red overlay: Enable NR Red Overlay.
- Page 114 Teranex Device Command Command Description Model name: Display the Teranex model name. Software Version: Display the checksum of the installed software release. FPGA Version: Display the FPGA version of the installed software release. Panel lock: Remotely lock the front panel of the device, preventing local operation.
- Page 115 Command Command Description Variable Aspect Ratio size X left: Adjust horizontal image size. Negative values decrease size; positive values enlarge the image. Default = 0 Variable Aspect Ratio size X right: Adjust horizontal image size of the Teranex 3D right eye output.
- Page 116 Command Command Description Luma high: Set luminance high level value to clip overshoots. Range is 5 to 1019 (Default = 1019) Chroma low: Set chrominance low level value to clip undershoots. Range is 4 to 1018 (Default = 4) Chroma high: Set chrominance high level value to clip overshoots.
- Page 117 Command Command Description Audio source: Select the audio input type. Values are model dependent. Teranex 2D: Embedded, AES, RCA, DB25. Teranex 3D: Embedded, AES, RCA, DB25. Teranex Express: Embedded. Teranex AV: Embedded, AES, RCA, DB25. PCIe mode: For Teranex 2D and 3D: Display the status of the Thunderbolt connection.
- Page 118 Command Command Description HDMI Output: For Teranex AV only. Select the color space for the HDMI output. Values are: YCbCR422, RGB444 Output option: For Teranex AV only. Select one of four signals to be used as the output of the unit. Values are: Input, Black, Still, Freeze. The “Transition setting”...
-
Page 119: Front And Rear Diagrams
Front and Rear Diagrams Teranex AV VIDEO AUDIO FORMAT FRAME RATE ASPECT MENU VIDEO PRESETS AUDIO STATUS PANEL 23.98 ANAM 14:9 HOME GAIN EMBED LOCK LBOX CCUT MENU HDMI 1080 PBOX ZOOM SYSTEM STATUS ULTRA 29.97 59.94 MENU ANLG SMART SHARP LOCK VIDEO... -
Page 120: Help
After checking the version of Blackmagic Teranex software installed on your computer, please visit the Blackmagic Design support center at www.blackmagicdesign.com/support to check for the latest updates. While it is usually a good idea to run the latest updates, it is wise to avoid updating any software if you are in the middle of an important project. -
Page 121: Warnings
Warnings Caution: Risk of Electric Shock On the Teranex Processor enclosure you will see a yellow warning label marked ‘Caution: Risk of Electric Shock’. This is intended to warn users that there may be the presence of uninsulated “dangerous” voltage within the Teranex Processor enclosure which may be of sufficient magnitude to constitute a risk of electric shock to the user. -
Page 122: Warranty
Warranty 12 Month Limited Warranty Blackmagic Design warrants that the Teranex family products will be free from defects in materials and workmanship for a period of 12 months from the date of purchase. If a product proves to be defective during this warranty period, Blackmagic Design, at its option, either will repair the defective product without charge for parts and labor, or will provide a replacement in exchange for the defective product. - Page 123 インストール / オペレーション マニュアル Teranex Processors 2017 年 6 月 日本語...
- Page 124 ようこそ この度は、 Blackmagic Design Teranex コンバーターをお買い求めいただき誠にありがとうございます。 ご購入された Teranex コンバーターは、 高品質のスタンダードコンバーターです。 時間をかけてその優 れた機能を発見することを楽しんでください。 私自身、 未だに Teranex をおもちゃにして、 Teranex で何 ができるかを考えています! Teranex は最新の SDI 、 HDMI 、 そしてアナログインター フェースを搭載して いるため、 多様な変換に対応可能で、 様々な機器を接続できます。 Teranex コンバーターのエキサイティングな特徴の 1 つに、 優れた品質の変換が挙げられます。 Teranex はパワフルな SIMD (単一命令複数データ流) プロセッサーを搭載しており、 より複雑な演算が可能 なため、...
- Page 125 目次 Teranex Processor はじめに オーディオのエンベッド 電源の接続 Teranexプロセッサー設定 ビデオの接続 ビデオメニュー設定 (Video Menu) オーディオの接続 オーディオメニュー設定 (Audio Menu) コンバージョン ノイズリダクションメニュー設定 Teranex AVでのレイテンシーの設定 (Noise Reduction) 管理ソフトウェアのインストール 補助データメニュー設定 (Ancillary Data) ソフトウェアのインストール 内部ソフトウェアのアップデート システムセットアップメニュー設定 (System Setup) 接続 3Dメニュー設定 Teranex Express キャプチャー・再生 ...
- Page 126 はじめに 電源の接続 Teranex プロセッサーは、 電源を入れて入力 / 出力信号を接続するだけで簡単に使用できます。 電源を供給するには、 Teranex プロセッサーのリアパネルの電源入力に標準 IEC 電源ケーブルを接続します。 ビデオの接続 Teranex プロセッサーのビデオ入力にソースビデオを接続し、 ビデオ出力を送信先の機器に接続します。 すべてのビデオ出力は同時にアクティブになるので、 必要に応じて複数の機材を接続できます。 コント ロールパネルの LCD で信号を確認します。 「 IN 」 、 「 OUT 」 ボタンを押すと、 LCD はそれぞれ入力ビデオ、 出力 ビデオを表示します。 また、 LCD にはビデオフォーマットやフレームレートの詳細が表示されます。 Teranex Express および AV では、 タイムコードとオーディオレベルも表示されます。 オーディオの接続...
- Page 127 VIDEO AUDIO FORMAT FRAME RATE ASPECT MENU VIDEO PRESETS AUDIO STATUS PANEL 23.98 ANAM 14:9 HOME GAIN EMBED LOCK LBOX CCUT MENU HDMI 1080 PBOX ZOOM SYSTEM STATUS 29.97 59.94 MENU ANLG ANLG SMART SHARP 1080 LOCK VIDEO AUDIO FORMAT FRAME RATE ASPECT...
- Page 128 ソフトウェアのインストール Blackmagic Teranex Setup は、 Teranex プロセッサーのアップデートや、 コンバージョン設定をリモート で変更する際に使用します。 同ソフトウェアは簡単に使用できます。 ホームページでそれぞれのユニット の設定アイコンをクリックすると、 接続した Teranex のすべての設定にアクセスできます。 Mac OS X へのインストール 1 Teranex Setup ソフトウェアを www.blackmagicdesign.com/jp からダウンロードします。 2 ダウンロードしたファイルを解凍し、 さらにディスクイメージを開いてコンテンツを表示します。 3 Installer をダブルクリックし、 画面の指示に従っ てインストールします。 Windows へのインストール...
- Page 129 Blackmagic Teranex Setup を使って Teranex プロセッサーをアップデート。 Mac OS X および Windows コンピューターからリモート設定変更も可能。 内部ソフトウェアのアップデート コンピューターと Teranex を USB で接続する前に、 Teranex プロセッサーに電源が接続されていること を確認してください。 1 Teranex プロセッサーの電源を入れます。 2 USB ケーブルでコンピューターと Teranex を接続します。 3 Blackmagic Teranex Setup ソフトウェアを起動します。 Teranex Setup は Teranex の USB 接続 を検知し、...
- Page 130 接続 コネクターの種類は、 使用している Teranex プロセッサーモデルにより異なります。 一般的には、 すべての Teranex プロセッサーは SDI 信号を変換できます。 HDMI 、 アナログビデオを変換するモデルもありますが、 使用するモデルをチェックして、 同マニュアルのどの情報が該当の Teranex に関連するか確認してください。 同セクションでは、 ユーザーがコネクターをすばやく特定できるよう、 各 Teranex モデルに搭載されてい VIDEO AUDIO FORMAT FRAME RATE ASPECT MENU VIDEO るすべてのコネクターについて説明します。 EMBED 23.98 ANAM 14:9 HOME GAIN LBOX CCUT MENU 1080 PBOX...
- Page 131 VIDEO AUDIO FORMAT FRAME RATE ASPECT MENU VIDEO 23.98 ANAM 14:9 HOME GAIN EMBED Teranex AV LBOX CCUT MENU HDMI 1080 PBOX ZOOM ULTRA 29.97 59.94 MENU ANLG SMART SHARP VIDEO AUDIO FORMAT FRAME RATE ASPECT MENU VIDEO REF OUT CH A CH B PUSH...
- Page 132 VIDEO AUDIO FORMAT FRAME RATE ASPECT MENU VIDEO EMBED 23.98 ANAM 14:9 HOME GAIN Teranex 2D LBOX CCUT MENU HDMI 1080 PBOX ZOOM 29.97 59.94 MENU ANLG ANLG SMART SHARP 1080 REF IN Y/NTSC/PAL IN B-Y IN R-Y IN Y/NTSC/PAL OUT B-Y OUT R-Y OUT...
- Page 133 VIDEO AUDIO FORMAT FRAME RATE ASPECT MENU VIDEO 23.98 ANAM 14:9 HOME GAIN EMBED Teranex 3D LBOX CCUT MENU HDMI 1080 PBOX ZOOM 29.97 59.94 MENU ANLG ANLG SMART SHARP 1080 VIDEO AUDIO FORMAT FRAME RATE ASPECT MENU VIDEO DOLBY METADATA REMOTE IN/OUT REF IN...
- Page 134 17 アナログビデオ入力 18 アナログビデオ出力 BNC 1 系統 - Y/NTSC/PAL BNC 1 系統 - Y/NTSC/PAL コンポーネント / コンポジット入力 コンポーネント / コンポジット出力。 BNC 1 系統 - B-Y コンポーネント入力。 BNC 1 系統 - B-Y コンポーネント出力。 BNC 1 系統 - R-Y コンポーネント入力。 BNC 1 系統...
- Page 135 メモ Teranex 2D あるいは 3D でアナログビデオを選択している場合、 回転ノブを回し て LCD でコンポーネントあるいはコンポジットビデオを確定してください。 Teranex AV では、 SDI ボタンを 2 回以上押すと 2 つのリアパネル SDI 入力 ( SDI 1 、 SDI 2 ) が切り替わ ります。 最初にボタンを押した際に、 現在選択されている SDI 入力が LCD に一時的に表 示されます。 5 秒以内に再度 SDI ボタンを押すと、 Teranex AV は他の SDI 入力 信号に切り替えます。...
- Page 136 VIDEO AUDIO FORMAT FRAME RATE ASPECT MENU VIDEO PRESETS AUDIO STATUS PANEL EMBED 23.98 ANAM 14:9 HOME GAIN LOCK LBOX CCUT MENU HDMI 1080 PBOX ZOOM SYSTEM STATUS 29.97 59.94 MENU ANLG ANLG SMART SHARP 1080 LOCK VIDEO AUDIO FORMAT FRAME RATE ASPECT...
- Page 137 下図は、 コントロールパネル機能の一覧です。 VIDEO AUDIO FORMAT FRAME RATE ASPECT MENU VIDEO System Video Main Menu Setup EMBED 23.98 ANAM 14:9 HOME GAIN Audio LBOX CCUT MENU HDMI 1080 PBOX ZOOM Noise Reduction 29.97 59.94 MENU ANLG ANLG SMART Ancillary SHAR 1080 Data FRAME RATE...
- Page 138 プリセット ( PRESETS ) 6 つの 「 PRESETS 」 ボタンを使っ て、 変換設定を保存 / 呼び出しできます。 プリセットは保存、 呼び出し可 能で、 Blackmagic Teranex Setup ソフトウェアにより、 説明的な名前がつけられます。 プリセットは、 後から呼び出して使用できるように Teranex のすべての操作パラメーターを保存します。 例えば、 カスタマイズしたプロセスアンプやアスペクトレシオ設定を保存しておき、 プロダクションの最 中に必要になった場合、 瞬時に呼び出すことができます。 あるいは、 特殊なタイムコード、 クローズドキャ プション、 オーディオチャンネルマッピングの設定を保存して、 毎日繰り返し使うことも可能です。 ‚ プリセットの保存: 使用したいプリセットボタンを 3 秒長押しします。 ボタンが点滅して、 プリセットが保存されたこ とを示します。...
- Page 139 SYSTEM STATUD の LED は以下の情報を表示: 入力ビデオの有無 外部リファレンスが選択されているか、 外部リファレンス入力の有無 電源 1 の稼働状況 電源 2 の稼働状況。 Teranex 2D および 3D のみ 入力あるいは出力ビデオのタイムコードの有無 入力あるいは出力ビデオのクローズドキャプションの有無 イーサネット接続の有無 <--> Thunderbolt™ 接続の有無。 Teranex 2D および 3D のみ オーディオ、 タイムコード、 クローズドキャプションのステータスライトは、 「 IN 」 「 OUT 」 のどちらが選択 されているかに応じて、...
- Page 140 Blackmagic Teranex Setup ソフトウェア を使用して設定を変更 Blackmagic Teranex Setup ソフトウェアは、 Teranex プロセッサーの状況を直感的に確認し、 イーサネッ トネットワークのどこからでもプロセッサーをリモートコントロールできます。 この便利なアプリケーショ ンにより、 フロントパネルにアクセスできなくても Teranex をリモートコントロールできます。 Blackmagic Teranex Setup ソフトウェアを使い、 すべてのコンバージョン設定を設定。 Blackmagic Teranex Setup のインター フェース Blackmagic Teranex Setup ソフトウェアを起動すると、 はじめにログイン画面が表示されます。 ここでは ネットワークに接続されたすべての Teranex プロセッサーが確認でき、 必要であればさらに Teranex プロ セッサーを追加できます。...
- Page 141 Teranex Setup を使用して Teranex プロセッサーを追加する : 1 ログイン画面の左下にある 「+」 ボタンを押してデバイスを追加します。 2 IP アドレスを入力して 「 Add 」 ボタンを押します。 3 ネットワーク 上のコントロール可能デバイスとして、 Teranex プロセッサーが表示されます。 Teranex プロセッサーをマニュアルで追加するには、 ログイン画面で 「+」 アイコンをクリックし、 「 Add a Teranex 」 ウィンドウを 開いて、 Teranex プロセッサーの IP アドレスを入力します。 メニューおよびボタン...
- Page 142 Configure このタブには、 コントロールしている Teranex の名前と IP アドレスが表示されます。 各ユニットに 固有の名前を付けることで、 システム上に複数の Teranex がある場合でも簡単に識別できます。 「 Name 」 フィールドをクリックするだけで、 デバイスに新しい名前を付けられます。 新しく付け た名前は、 Teranex Setup ユーティリティで Teranex を選択する際に表示されます。 また、 接続し た際にはユーティリティのヘッダーにも表示されます。 各プリセットに記述的な名前を割り当て れば、 持ち主、 目的、 プリセットに保存した設定などを簡単に識別できます。 スライダー調整 調整を行う際は、 マウスを使用してスライダーをクリック&ドラッグします。 スライダーは、 キーボードの 方向キーでも調整できます。 上または右の矢印ではスライダーが 1 単位ずつ増加し、 左または下の矢印で は値が減少します。...
- Page 143 リモートコントロールでパネルをロック Teranex のフロントパネルをリモートでロックし、 パネルの前で作業する人が誤っ て設定を変えてしまう ことを防止します。 ギアメニューの Panel Lock /Unlock をクリックし、 フロントパネルのロック を有効 / 解除します。 ロックされると、 フロントパネルの 「 PANEL LOCK 」 ボタンが赤く点灯します。 この機能はフロントパネル からも解除できますが、 他にユニットで作業をしている人がいる可能性があるので注意が必要です。 プリセットの保存と呼び出し Teranex にはユーザーが指定できる 6 つのプリセットがあります。 設定メニューでは、 必要に応じてプリセ ットの保存・呼び出しが可能です。 「 Save Preset ( プリセットの保存) 」 または 「 Recall Preset ( プリセッ トの呼び出し)...
- Page 144 アスペクトレシオ変換 以下の変換表では、 各アスペクトレシオ設定における変換を簡単に確認できます。 それぞれの設定を視 覚的に識別することで、 すばやい選択が可能です。 アップ コンバージョン 入力 4:3 出力 16:9 4:3 SD イメージを HD 16:9 PBOX (ピラーボックス) フレームの中に表示します。 両側にはブラックバーが表示 されます。 SD 4:3 イメージを、 HD 16:9 ZOOM フレームが完全に埋まるまで ズームインします。 上部 / 下部の イメージは失われます。 「 PBOX 」 と 「 Zoom 」 の間で 14:9 す。...
- Page 145 ワイドスクリーン 16:9 SD を 4:3 SD に変換 多くの SD プログラムでは 4:3 アスペクトレシオが使用されていますが、 SD ソースの中にはワイドスクリーン 16:9 で収録されているものもあります。 SD ワイドスクリーン入力を正しく処理するには、 Teranex プロセッ サーがソースを 16:9 信号として認識するよう設定する必要があります。 1 フロントパネルの 「 IN 」 ボタンを押します。 2 「 ASPECT 」 セクションで 「 LBOX 」 ボタンを押し、 SD 入力を 16:9 ワイドスクリーンとして 設定します。...
- Page 146 変換ワークフロー 同セクションでは、 Teranex プロセッサーで実行できる主要な変換のセットアップワークフローに関して 説明します。 スタンダード変換、 アップ / ダウン / クロスコンバージョンなど、 すべての変換はフロントコント ロールパネルを使っ て、 一般的な設定を行います。 頻繁に使う変換のプリセットの保存および呼び出し、 ケイデンス設定に関しても説明します。 3:2 プルダウンを使っ て素材のケイデンスを除去できます。 作業のこつ 変換の設定をする際は、 コントロールパネルのステータス LED で現在の信号を正確 に確認できます。 「 AUDIO STATUS および SYSTEM STATUS の LED 」 セクションに詳細が 記載されています。 アップコンバージョン アップコンバージョンは、 ビデオを高解像度に変換する処理です。 例えば、 NTSC SD ソースを HD プロダク ションに組み込む必要がある場合などです。...
- Page 147 3 ソフトメニューボタンを使っ て 「 Change 」 を選択します。 これで LCD に出力ビデオが表示され、 すべての出力コネクターに送信されます。 選択したボタンは青く光っ て、 設定を確認できます。 VIDEO AUDIO FORMAT FRAME RATE ASPECT 23.98 ANAM 14:9 EMBED LBOX CCUT HDMI 1080 PBOX ZOOM 29.97 59.94 ANLG ANLG SMART 1080 「 OUT 」 ボタンを押すと、 出力設定を選択できます。 上図では、 出力は ピラーボックスアスペクトレシオの...
- Page 148 入力の設定 1 Teranex コントロールパネルの 「 IN 」 ボタンを押して、 「 SDI 」 を選択します。 Teranex は自動的に 入力フォーマットを検出し、 入力ビデオを LCD に表示します。 対応するボタンが光ります。 2 オーディオ入力の種類は 「 EMBED 」 ボタンが光ります。 VIDEO AUDIO FORMAT FRAME RATE ASPECT 23.98 ANAM 14:9 EMBED LBOX CCUT 1080 PBOX ZOOM 29.97...
- Page 149 入力の設定 1 コントロールパネルの 「 IN 」 ボタンを押して、 「 SDI 」 を選択します。 Teranex は LCD に入力ビデオ を表示し、 入力フォーマットを自動的に検出して、 対応するボタンが光ります。 2 オーディオ入力フォーマットで 「 EMBED 」 を選択します。 VIDEO AUDIO FORMAT FRAME RATE ASPECT 23.98 ANAM 14:9 EMBED LBOX CCUT HDMI 1080 PBOX ZOOM 29.97...
- Page 150 作業のこつ アスペクトレシオ変換に関する詳細は、 156 ページの 「アスペクトメニュー ( Aspect ) 」 および 144 ページの 「アスペクトレシオ変換」 を参照してください。 クロスコンバージョン クロスコンバージョンは、 プログラム素材のビデオ解像度および / あるいはアスペクトレシオを変更しま す。 1080 と 720HD フォーマット間のクロスコンバージョンは、 すべてのコンバージョンをプログレッシブド メインで実行する高品質のデインターレースアルゴリズムを採用しています。 SD フォーマットでは、 4 : 3 および 16 : 9 のアスペクトレシオ変換も簡単に実行できます。 以下の例では、 16:9 アスペクトレシオの 486i59.94 を、 エンベデッドオーディオのついたレターボックス 4:3 SDI に変換します。 Teranex プロセッサーの電源を入れて、...
- Page 151 出力アスペクトレシオの設定 「 LBOX/PBOX 」 ボタンを押してアスペクトレシオをレターボックスに設定します。 これで Teranex プロセッ サーでビデオをクロスコンバージョンする準備が整いました。 4 : 3 比のディスプレイ 16 : 9 比のイメージ LBOX/PBOX ボタンをオンに設定すると、 SD 出力は 4 : 3 フレーム内で 16 : 9 イメージにフィットします。 4 : 3 コンバージョンは上下に黒いバーを表示し、 正確なワイドスクリーン・ ジオメトリが保存されます。 作業のこつ アスペクトレシオ変換に関する詳細は、 156 ページの 「アスペクトメニュー ( Aspect ) 」 および...
- Page 152 3 ソフトメニューボタンを使っ て 「 Change 」 を選択します。 これで LCD に出力ビデオが表示され、 すべての出力コネクターに送信されます。 選択したボタンは青く光っ て、 設定を確認できます。 VIDEO AUDIO FORMAT FRAME RATE ASPECT 23.98 ANAM 14:9 EMBED LBOX CCUT HDMI 1080 PBOX ZOOM 29.97 59.94 ANLG ANLG SMART 1080 「 OUT 」 ボタンを押すと、 出力設定を選択できます。 上図では、...
- Page 153 ケイデンス除去 ケイデンス除去は、 3:2 プルダウンシーケンスの除去を含みます。 3:2 プルダウンは、 テレシネで 24 フレー ム / 秒 のフィルムを、 5 9 . 9 4 フィールド / 秒 のビ デ オに 変 換 する際 に 適 用され ます。 Te r a n e x プロセッサーは、 3:2 プルダウンでビデオを 24fps に変換する際に、 ケイデンスを自動的に除去します。 VIDEO AUDIO FORMAT...
- Page 154 5 「 HOME 」 メニューボタンを押し、 「 Video 」 > 「 Advanced 」 > 「 Clean Cadence 」 を選択します。 回転ノブあるいはソフトボタンを使い、 クリーンケイデンスを 「 ON 」 に設定します。 これで 1080i59.94 出力フォーマットの 3:2 ケイデンスがクリーンになります。 変換が終了したらクリー ンケイデンスを忘れずに 「 OFF 」 にしてください。 Source Proc Clean Color Video Advanced Cadence...
- Page 155 低遅延モードを有効にする 1 Teranex AV で 「 System Setup 」 の LCD メニューに行き、 「 Processing 」 サブメニューを選択して 「 Lowest Latency 」 を選択します。 Teranex Setup ソフトウェアの 「 Setup 」 タブからでも同機能 にアクセス可能です。 2 Teranex AV は、 該当の変換用に 「 Lowest Latency 」 コンフィギュレーションをロードし、 2 フレー ムあるいはそれ以下の最低限の遅延で処理します。...
- Page 156 ビデオメニュー設定 ( Video Menu ) 「 Video Menu 」 のコントロール設定は、 カラー、 クリッピング、 アスペクトレシオなど、 ビデオ出力を調 整できます。 カラーメニュー ( Color ) 赤、 緑、 青のゲイン設定を調整。 回転ノブを各カラーチャンネルで回して調整します。 ‚ カラーコントロールの調整幅は、 − 200 から+ 200 です。 ‚ デフォルト値は 0 です。 System Proc Video Main Menu Color Video Color...
- Page 157 アスペクト調整 ( Adjust Aspect ) ソフトメニューボタンと回転ノブを使って、 アスペクトレシオのサイズ、 ポジション、 トリム設定を カスタマイズします。 Size 水平 / 垂直のイメージサイズを調整します。 範囲は約− 50 から+ 200 パーセントです。 Position 入力イメージを出力フレーム内で移動します。 調整範囲は、 使用しているイメージサイズにより異なります。 Trim 入力イメージのエッジを水平 / 垂直方向にマスクします。 Horizontal サイズ、 ポジション、 トリムの水平方向の調整に使用します。 Vertical サイズ、 ポジション、 トリムの垂直方向の調整に使用します。 Both 水平方向および垂直方向のコントロールをリンクします。...
- Page 158 ビデオ設定メニュー (Video Setup Menu ) 「 Video Setup 」 メニューでアナログ /SDI/HDMI 入出力のビデオパラメーターを設定できます。 Teranex の モデルにより、 使用できるメニューは異なります。 入力なしメニュー ( No Video Input ) 入力ビデオが検出されない場合に出力するビデオを、 ブラックあるいはカラーバーから選択します。 デフォルト設定はブラックになっ ています。 HDMI 出力メニュー ( Teranex AV のみ) HDMI 出力のカラースペースは、 このメニュー、 もしくは Blackmagic Teranex Setup ユーティリティの 「 Setup 」 タブで、...
- Page 159 ビデオサンプリングメニュー ( Teranex 3D Processor のみ) 「 Video Sampling 」 メニューは、 Teranex 3D Processor で以下のサンプリングの種類を選択できます。 ‚ 4:2:2 – YUV ‚ 4:4:4 – YUV ‚ 4:4:4 – RGB Proc Video No Video Color Video Setup Input Sampling 4:2:2 YUV Test Analog Clip Patterns Input Output 4:4:4 YUV 4:4:4 RGB Analog...
- Page 160 クアッド HD 出力は以下の通り割り当てられます: ‚ SDI 出力 A :サブイメージ 1 ‚ SDI 出力 B :サブイメージ 2 ‚ SDI 入力ループ A サブイメージ 3 ‚ SDI 入力ループ B :サブイメージ 4 Out A Out B Loop A Loop B フルフレームの 「 Quad HD Split 」 出力 Ultra HD イメージ...
- Page 161 作業のこつ この設定は、 3G-SDI ビデオを出力する場合にのみ適用されます。 3G-SDI 入力では、 「 Level A 」 および 「 Level B 」 信号が自動的に検出されます。 クアッド SDI 出力メニュー ( Teranex AV のみ) Ultra HD 出力フォーマットが使用されている場合、 Teranex AV は 4 系統の専用 BNC コネクター経由で継 続的なクアッド SDI 出力を行います。 BNC 出力コネクターは 「 CH A 」 、 「 CH B 」 、 「 CH C 」 、 「 CH D 」 と表示され ています。...
- Page 162 調 整 が 終 わったら、関 連 のボタン が 白く光り、設 定 が デ フォルトで は ないことを示します。 デフォルト設定に戻す時は 「 Proc Amp 」 メニューあるいはコントロールパネルボタンからパラメーターを 選択するか、 回転ノブを押します。 すべてのパラメーターをデフォルト設定に戻すには、 「 Proc Amp 」 メニュー へ行き、 「 Reset All 」 を選択します。 ‚ Gain 幅:範囲は -60 ~ +60 です。 デフォルト : 0 ‚...
- Page 163 解像度チャート グリッド Teranex AV のテストパターン 上記のビデオテストパターンに加え、 Teranex AV はパターンモーション ・ メニューおよび総合オーディオ テストトーン ・ メニューを搭載しています。 ‚ テストパターン(Test Patterns) 「 Test Patterns 」 から使用したいビデオテスト信号を選択します。 ‚ オーディオ (Audio) ビデオテスト信号が選択されるまで 「 Audio 」 はグレーで表示されます。 回転ノブを使い、 オー ディオの周波数を選択します。 選択したトーンがすべての出力オーディオチャンネルに適用さ れ、 一時的に既存のオーディオ出力マッピングを無効にします。 ビデオテストパターンまたはオ ーディオメニューをオフにすると、 オリジナルのオーディオ出力マッピングが復元されます。 ‚ 動き (Motion) ビデオテスト信号が選択されるまで...
- Page 164 Blackmagic Teranex Setup ユーティリティの Setup ページでは、 動き方のコントロール、 ビデオテストパターン / オーディオのテストトーンが選択できます。 詳細メニュー ( Advanced ) Teranex プロセッサーでは、 以下の高度なケイデンスコレクション機能を使用できます: クリーンケイデンス ( Teranex 2D および 3D ) クリーンケイデンス機能は、 59.94 出力ビデオで、 クリーンな 3:2 プルダウンシーケンスを作成。 クリーンケイデンスの設定 ソフトメニューボタンと回転ノブを使い 「 Clean Cadence 」 をオン / オフにします。 ‚...
- Page 165 シーン検出 シーン変更の検出機能は、 カット間でのフィールドブレンドを最小限に抑え、 出力のルックがよりクリー ンになります。 前のシーンのフィールドと新しいシーンのフィールドが混合することを防ぎます。 ‚ On シーンカット検出を有効化。 ‚ Off シーンカット検出を無効化。 デフォルトモードは 「 On 」 です。 多くのビデオはシーン検出機能をオンにしていても問題ありませんが、 ビデオシーケンスによっ ては、 一 時的な解像度の変更により映像に 「かくつき」 が生じる場合があります。 これは、 画面の下で文字が流れ るテキストクロールなどで見られます。 画面にかくつきが生じた場合は、 シーン検出機能をオフに してください。 Proc Clean Source Color Video Advanced Cadence Type Test Scene Clip Patterns Detect...
- Page 166 オーディオメニュー設定 ( Audio Menu ) 「 Audio 」 メニューでは、 入力オーディオチャンネルの出力マッピング、 オーディオゲインおよびオーディ オ遅延コントロールが可能で、 特定の設定パラメーターにアクセスできます。 Teranex 2D では、 「 Input Mapping 」 メニューを使用でき、 エンベデッド、 AES/EBU 、 アナログ入力ソースからチャンネルの 同時選択が可能です。 出力マッピングメニュー ( Output Mapping ) Teranex プロセッサーは、 使用している出力オーディオの種類に応じて、 最大 16 チャンネルの出力オー ディオに対応しています。 デフォルト設定では、 入力チャンネルは選択された入力から 16 系統の出力へ、 1 対...
- Page 167 Output Mapping Output Mapping Output Mapping Prev Next Prev Next Prev Next Channel 1 Source Channel 4 Source Channel 13 Source Input 1 Input 1 Tone .75 kHz Input 2 Input 2 Tone 1.5 kHz Input 3 Input 3 Tone 3 kHz Input 4 Input 4 Tone 6 kHz...
- Page 168 Input Mapping Input Mapping Prev Next Prev Next Input 1/2 Source Input 3/4 Source Embedded 1/2 AES 5/6 Embedded 3/4 Embedded 5/6 AES 7/8 Embedded 7/8 ANLG-DB25 1/2 Embedded 9/10 ANLG-DB25 3/4 Reset Reset エンベデッド 1/2 を入力 ANLG-DB25 1/2 を入力 1/2 ソースにマッピング...
- Page 169 回転ノブを回して調整します。 調整幅は -12 から +12dB です。 回転ノブを押すとレベルがゼロに戻ります。 System Output Input Analog Analog Video Main Menu Audio Setup Setup Mapping Mapping In Level Input Output Audio Audio Options Gain Audio Noise Delay Reduction Ancillary Setup Data 「 Main Menu 」 > 「 Audio 」 「...
- Page 170 オーディオメーター ( Teranex AV のみ) Teranex AV は、 どの入力 / 出力オーディオチャンネルのペアをフロントパネル LCD に表示するか選択でき ます。 チャンネル番号を確認できるよう、 メーターの下に番号が表示されます。 System Output Audio Video Main Menu Audio Setup Mapping Meters Channels 1&2 Output Audio Audio Options Gain Channels 3&4 Channels 5&6 Audio Noise Delay Reduction Channels 7&8...
- Page 171 Teranex 3D では、 Dolby デコーダーがインストールされている場合、 Dolby メタデータは入力 Dolby オー ディオから抽出されます。 Teranex 3D の後部にある 9 ピンの Dolby メタデータコネクター経由でシリアル データとしても入力されることもあります。 また、 「 Dolby Metadata 」 メニューの 2 つの一般的な設定、 「 Stereo 」 あるいは 「 5.1 」 のどちらかを使用して、 独自のメタデータを Teranex 3D で生成することもでき ます。 以下の表で、 設定の割り当てを確認できます。 2 つの設定が異なる場合は、 太字で記載されています。 System Output Dolby...
- Page 172 メタデータ ・ パラメーター ステレオ 望ましいステレオダウンミックス 指定なし 指定なし Lt/Rt センターダウンミックス ・ レベル -3 dB -3 dB Lt/Rt サラウンドダウンミックス ・ レベル -3 dB -3 dB Lo/Ro センターダウンミックス ・ レベル -3 dB -3 dB Lo/Ro サラウンドダウンミックス ・ レベル -4.5 dB -4.5 dB 拡張ビットストリーム情報 2 対応...
- Page 173 バイアス ( Bias ) 「 Bias 」 レベルを調整して、 ノイズリダクションの量を設定します。 バイアス値が大きいほど、 ノイズリダ クションの効果が強くなります。 ‚ 設定範囲は -6 ~ +6 です。 ‚ デフォルト値は 0 です。 Split Enable Set Value Screen Bias Overlay 「 Noise Reduction 」 > 「 Bias 」 分割スクリーンメニュー ( Split Screen ) 「...
- Page 174 補助データメニュー設定 ( Ancillary Data ) 「 Ancillar y Data 」 メニューは、 クローズドキャプション、 タイムコード、 ビデオインデックス機能 にアクセスできます。 クローズドキャプションメニュー ( Closed Caption ) 「 Closed Caption 」 メニューでは、 クローズドキャプションを 「 CEA-608B 」 あるいは 「 CEA-708B 」 に設定 できます。 CEA-608B は、 SD NTSC アナログおよび SD-SDI のクローズドキャプションのリファレンス標準 です。...
- Page 175 クローズドキャプションを有効化 ( CC Enable ) 「 CC Enable 」 は、 デフォルトでオフになっ ています。 クローズドキャプションを有効化するには、 ソフトメ ニューボタンあるいは回転ノブを使用して 「 Main Menu 」 > 「 Ancillary Dat 」 > 「 Closed Caption 」 > 「 CC Enable 」 へ行き、 「 On 」 を選択します。 入力信号のクローズドキャプションが不正確であったり破損している場合は、...
- Page 176 サービス 1 言語 ( Service 1 Language ) サービス 1 言語は、 CEA-708 クローズドキャプションで使用する言語を選択します。 ‚ 選択できる言語は以下の通りです: 英語 フランス語 ドイツ語 イタリア語 スペイン語 ‚ デフォルト設定は英語になっ ています。 Service 2 Set Value Enable Source English Analog Service 1 In Line Language French German Analog Service 2 Out Line...
- Page 177 タイムコードジェネレーター ( Timecode Generator ) タイムコードジェネレーターメニューでは、 4 つのタイムコードモードから選択、 あるいはマニュアルタイム コード処理を無効化できます。 タイムコードデータは出力ビデオにインサートされません。 これはデフォルト設定です。 Video Closed Ancillary Data Prev Timecode Next Index Caption Timecode Start Timecode Generator Input Input Regen Start Timecode Source Generate Jam Sync Setup 「 Ancillary Data 」 > 「...
- Page 178 Video Closed Ancillary Data Prev Timecode Next Index Caption Timecode Timecode Start Generator Input Input Regen Start Timecode Source Generate Jam Sync Setup 「 Ancillary Data 」 > 「 Timecode 」 > 「 Input Regen 」 「 Timecode 」 生成 ( Generate ) タイムコードジェネレーターは、...
- Page 179 ‚ タイムコード設定 (Set Timecode) 「 Set Timecode 」 のメニューオプションは、 「 Start Source 」 メニューでの選択によっ て異なります。 Prev Timecode Next Start Value Timecode Start Input Generator Jam Sync Start Timecode Source 00:00:00:00 Setup 「 Jam sync 」 > 「 Set Timecode 」 ‚ 「Start Source」 が 「Imput」 の場合 「...
- Page 180 AFDインサーションメニュー (AFD Insertion) 同メニューは使用したい AFD コードを選択できます。 選択した AFD コードは出力ビデオにインサートされ ます。 コードをインサートする出力ラインは、 「 AFD Insert Line 」 メニューで選択できます。 ‚ 設定オプション: 出力の補助データスペースに AFD コードをインサートしません。 Auto 現在のビデオ出力フォーマットに基づいて適切なコードがインサートされます。 Bypass 入力ビデオストリームに存在するあらゆるコードが出力にパスされます。 AFD codes 0000 – 1111 これらのコードはマニュアル選択し、 必要に応じて使用します。 ‚...
- Page 181 イーサネットメニュー ( Ethernet ) 「 Ethernet 」 メニューは、 現在の設定を表示し、 静的 IP アドレス、 サブネットアドレス、 IP ゲートウェイの新 しい設定を割り当てることができます。 また、 「 DHCP 」 のオン / オフ切り替えも可能です。 DHCP がオンになっ ている場合、 「 IP 」 、 「 Subnet Mask 」 および 「 Gateway 」 メニューには現在 DHCP サー バーにより筐体に割り当てられているアドレスが表示されます。...
- Page 182 ‚ ON Teranex プロセッサーはネットワークルーターにより割り当てられた IP アドレスを受け入れます。 ‚ OFF 事前に静的 IP アドレスが割り当てられている場合、 ユニットはその静的 IP アドレスを使用します。 「 DHCP 」 が 「 On 」 の状態で、 「 IP 」 ボタンを押した時に 「 0.0.0.0 」 と表示される場合、 プロセッサー が DHCP サーバーから IP アドレスを取得できていません。 イーサネットネットワークの接続 を確認してください。 処理メニュー ( Teranex AV のみ) 「...
- Page 183 ‚ プレビュー (Preview) スチルフレームをキャプチャーしたら、 「 Preview 」 ボタンを使っ て Teranex AV の出力でイメージ を 3 秒間確認できます。 現在の出力解像度のスチルフレームが存在しない場合、 「 Preview 」 ボタ ンはグレーアウトしてプレビューできるスチルがないことを示します。 ‚ 削除 (Delete) メモリーからスチルフレームを削除するには 「 Delete 」 ボタンを押します。 確認スクリーンが表示 され、 削除を確認するよう指示が出ます。 「 System Setup 」 > 「 Factory Reset 」 経由で、 Teranex AV を出荷時設定にリセットすることで、...
- Page 184 コンピューターから読み込むグラフィックの解像度に制限はありません。 イメージ変換ソフト ウェアが Teranex AV の出力解像度に合わせて、 自動的にイメージのサイズを変更します。 このス ケーリングは Teranex のアルゴリズムは使用されないので、 内部でスケーリングされた場合に比 べ、 質は低くなります。 最も高い品質でスケーリングする必要がある場合、 SDI/HDMI で Teranex AV にイメージを送信し、 Teranex AV 内のアルゴリズムを使っ てスケーリングを行うことで最良 の結果が得られます。 出荷時設定にリセット ( Factory Reset ) 「 Factory Reset 」 を選択すると、 コンバージョン設定を工場出荷時のデフォルト値にリセットできます。 以下の設定に影響します; ‚ プリセット ‚...
- Page 185 ‚ Internal Teranex AV の出力を内部自励発振器と同期します。 内部自励発振器は、 ユニットへの入力を 変更しても出力ストリームで一定の同期を生成します。 System Factory Video Main Menu Ethernet System Setup Setup Reset Audio Reference Noise Info Reduction Ancillary Data 「 Main Menu 」 > 「 System Setup 」 > 「 System Setup 」 「 Reference 」 Pixel Pixel Reference...
- Page 186 出力フォーマットおよび フレームレート リファレンス信号 ブラックバースト 59.94 、 3 値シンクプログレッシブ 29.97 、 3 値シンクインターレース 59.94 1080PsF29.97 3 値シンクプログレッシブ 30 、 3 値シンクインターレース 60 1080p30 3 値シンクプログレッシブ 30 、 3 値シンクインターレース 60 1080PsF30 ブラックバースト 50 、 3 値シンクインターレース 50 1080i50 ブラックバースト 50 1080p50 ブラックバースト...
- Page 187 生成メニュー (Teranex AVのみ) Teranex AV は、 リファレンス出力接続を介してリファレンスジェネレーターとしても使用できます。 リファ レンス信号の種類 (ブラックバーストおよび 3 値シンク) は、 Teranex AV の出力ビデオフォーマットによっ て異なります。 特定のリファレンス信号しか使用できないフォーマットもあります。 例えば、 Teranex の出 力フォーマットが NTSC の場合、 生成できるのは 59.94Hz ブラックバーストのみです。 同様に 1080p23.98 出力では 3 値シンクのみです。 1080i59.94 などの別のフォーマットでは両方使用できます。 3 値 ( Tri Level ) リファレンスレベルには、 3 値シンクプログレッシブ ( TRI-P ) 、 3 値シンクインターレース ( TRI-I ) があります。 Factory Pixel Ethernet...
- Page 188 出力ビデオフォーマット 生成されたリファレンス信号の対応表 3 値シンクインターレース 47.96 2K DCI 23.98PsF 3 値シンクプログレッシブ 24 2K DCI 24p 3 値シンクインターレース 48 2K DCI 24PsF 3 値シンクプログレッシブ 23.98 2160p23.98 3 値シンクプログレッシブ 24 2160p24 ブラックバースト 50 あるいは 3 値シンクプログレッシブ 25 2160p25 ブラックバースト 59.94 あるいは 3 値シンクプログレッシブ 29.97 2160p29.97 3 値シンクプログレッシブ...
- Page 189 作業のこつ 「 Output Option 」 にすばやくアクセスする必要がある場合、 このメニュー ページを Teranex AV のフロントパネルの 「 MENU 1 」 または 「 MENU 2 」 ボタン に割り当てられます。 入力 ( Input ) 「 Input 」 は、 フロントパネルで現在選択しているビデオ入力です。 SDI 1 、 SDI 2 、 HDMI 、 あるい は光ファイバー (インストールしている場合) 入力です。 「 Home 」 > 「 Video 」 > 「 Test Patterns 」 で選択したビデオテストパターンは、...
- Page 190 ‚ トランジション設定は、 フリーズフレームには影響を与えません。 「 Freeze 」 が選択されてい る場合、 トランジションの設定値に関わらず Teranex AV は瞬時にフリーズフレームにカット します。 オーディオはミュートされます。 「 Freeze 」 から 「 Input 」 、 「 Black 」 、 「 Still 」 に切り替える準備ができると、 上記のトランジショ ン設定のルールにしたがっ てトランジションを実行します。 下記の例では、 ソース 2 のオーディ オは、 ビデオと同じ長さでフェードインします。 フロントパネルのノブを押すか、 反時計回りに一周回転させるとトランジションレートをゼロ にリセットできます。...
- Page 191 3D モードメニュー ( 3D Mode ) 「 3D Mode 」 メニューで 「 Off 」 を選択すると通常の 2D プロセッサーとなります。 3D 処理を可能にするに は、 以下のメニューを選択します。 ‚ Convert 同モードは、 SDI あるいは HDMI 入力経由の、 ステレオスコピックの左右の目の入力を処理でき ます。 また、 入力ステレオスコピック信号を同期することもできます。 つまり、 2 系統の非同期入 力が Teranex 3D Processor に入力された場合でも出力が同期されます。 ‚...
- Page 192 出力メニュー ( Output ) 3D 出力の選択は、 3D イメージの出力フォーマットを決定します。 ‚ Full Frame SDI 出力 A および B で左右の目の映像をフル解像度で出力し、 HDMI 出力ではフレームパッキン グ信号を同時に出力します。 ‚ Side by Side 「 Side by Side 」 出力エンコードを有効にします。 SDI 出力 A および B 、 そして HDMI 出力から 同一の Side by Side 出力信号を出力します。 ‚...
- Page 193 3D Mode Intensity Input Depth Camera Output Align 「 3D 」 > 「 2D to 3D 」 > 「 Depth 」 カメラアラインメント ( Camera Align ) 「 Camera Align 」 ボタンは 「 3D Mode 」 メニューで 「 3D Align 」 を選択したときにのみ使用できます。 カメ ラアラインメントのアプリケーションは、...
- Page 194 回転メニュー (Rotation) 「 Camera Align 」 の 「 Rotation 」 メニューでは、 X 、 Y 、 Z 軸に沿ったイメージの軸回転調整が可能です。 こ の調整は、 各軸でも、 3 軸のどの組み合わせでも可能です。 軸回転調整を使えば、 3D カメラリグの機械的 な誤差を相殺することができます。 Position Camera Align Zoom Roll Z Rotation Left Eye Roll Z Rotation Left Eye Rotation Trim Tilt X...
- Page 195 Position Camera Align Zoom Roll Z Rotation Left Eye Rotation Trim Tilt X Right Eye Flip Toe-in Y Both Eyes Reset Reset 「 Camera Align 」 > 「 Rotation 」 「 Rotation 」 > 「 Toe-In Y 」 Position Camera Align Zoom Flip Flip...
- Page 196 ‚ パラメーターがマイナスの場合はイメージからズームアウト、 プラスの場合はイメージにズーム インしています。 ‚ 「 Both 」 を押すと、 水平ズームと垂直ズームのパラメーターがリンクするので、 ズームしても正確 なアスペクトレシオを保存できます。 ‚ 「 Both Eyes 」 を選択すると、 ステレオスコピックイメージの両目の映 像を同時に同じ ようにズームします。 Position Camera Align Zoom Horizontal Zoom Left Eye Rotation Trim Vertical Right Eye Flip Both Both Eyes Reset Reset 「...
- Page 197 3D モードの接続およびその他重要な情報 ワークフローに影響を及ぼす接続や補助データの扱いに関して詳述します。 ビデオ接続 ステレオスコピックの左右の入力は、 それぞれ SDI 入力 A 、 B に接続します。 同様に左右の処理出力は、 それぞれ SDI 出力 A および B へ送信されます。 HDMI 入出力は、 フルフレームレートの 「フレームパッキング」 信号をサポートしています。 対応ビデオフォーマット 「 2D to 3D 」 機能は SD および HD 入力をサポートしており、 HD 出力に変換します。 「 3D Convert 」 および 「...
- Page 198 編集ソフトウェアによっては、 プラグインをインストールして自動的に Teranex と作業できますが、 そう でない場合は最新の Blackmagic Design Desktop Video ソフトウェアをダウンロード、 インストール する必要があります。 これは Blackmagic Design のサポートセンタ―からダウンロードできます。 https://www.blackmagicdesign.com/jp/support/family/capture-and-playback ビデオキャプチャー アプリケーションがビデオをキャプチャーする際、 Teranex の LCD に 「 Capture 」 と表示され、 次に入力 信号のビデオフォーマットが表示されます。 例えば 「 Capture: 1080p24 」 などです。 DaVinci Resolve 、 Avid Media Composer 、...
- Page 199 DaVinci Resolve を使用して、 Teranex プロセッサーからビデオ / オーディオをキャプチャーできます。 例えば、 古いアナログビデオテープを Teranex でアップコンバートし、 同時に Resolve で HD 出力をキャプ チャーできます。 クリップを Resol ve のメディアプールにキャプチャーしたら、 パワフルな編集 / カラーグレーディングツールを使用して簡単に素材を扱うことができます。 Teranex プロセッサーを使用してビデオをキャプチャーするには、 Blackmagic Design の最新の Desktop Video ソフトウェアをインストールする必要があります。 Desktop Video ソフトウェアは、 Blackmagic Design サポートセンター ( www.blackmagicdesign.com/jp/support/family/capture-and-playback ) からダ ウンロードできます。 キャプチャー ・ 再生...
- Page 200 セットアップ 1 「 DaVinci Resolve 」 を起動し、 「環境設定」 メニューから 「ビデオ I/O と GPU 」 タブを選択し、 さらに 「キャプチャー・再生用」 オプションから Teranex を選択します。 設定を保存し、 DaVinci Resolve を再起動して変更を適用します。 2 プロジェクトを開始し、 プロジェクト設定ウィンドウで、 使用したいタイムラインとモニタリ ング解像度およびフレームレートを設定します。 Teranex プロセッサーは、 マッチする出力を 自動的に設定します。 3 プロジェクト設定ウィンドウを開いている間に、 「キャプチャー・再生」 タブで、 「ビデオキャプ チャーと再生」...
- Page 201 再生 メディアページからクリップを再生するには、 キャプチャーアイコンを再度クリックしてキャプチャー情報 ウィンドウを閉じます。 キャプチャーしたクリップをクリックしてビューアに表示し、 ビューアのトランスポー トコントロールボタンでクリップを再生します。 編集およびカラーグレーディング クリップをキャプチャーしたら、 エディットページへ行き Resolve の豊富な編集機能を使用できます。 カラーグレーディンを行うにはカラーページへ行きます。 これらの機能に関する詳細は、 DaVinci Resolve マニュアルを参照してください。 Avid Media Composer Avid Media Composer は、 Teranex プロセッサーハードウェアを使用して SD/HD のビデオおよびオーディ オをキャプチャー・再生できます。 また、 RS-422 デッキコントロールもサポートしています。 この例では、 Teranex からの変換出力が 1080i59.94 になり、 コントロール不可のデバイスからキャプ チャーします。...
- Page 202 プロジェクト名を入力してオプションを設定します。 キャプチャー 1 「 Tools 」 > 「 Capture 」 を選択し、 「 Capture Tool 」 を開きます。 2 トグルソースボタンをクリックすると、 デッキアイコンのボタンに赤い丸と斜線が表示されます。 3 「 Video 」 および 「 Audio 」 の入力メニューで、 それぞれ 「 Blackmagic 」 を選択します。 4 使用したいビデオとオーディオのソーストラックを選択します。 5 「...
- Page 203 Apple Final Cut Pro 7 セットアップ 1 Final Cut Pro 7 を起動して 「 File 」 > 「 New Project 」 を選択します。 2 「 File 」 > 「 Save Project As... 」 を選択し、 プロジェクトに名前を付けます。 3 Final Cut Pro のメニューから 「 Easy Setup 」 を選択し、 「 Easy Setup 」 ウィンドウを開きます。 4 ...
- Page 204 再生 Final Cut Pro タイムラインを使用して、 Teranex プロセッサーの出力に接続したモニターや TV にビデオを 表示できます。 Blackmagic 出力にビデオが表示されない場合は、 接続を再度チェックし、 「 View 」 > 「 External Video 」 へ行っ て 「 All Frames 」 が選択されていることを確認し、 Final Cut Pro で出力が正確に 設定されていることを確認してください。 Apple Final Cut Pro X Final Cut Pro を使っ...
- Page 205 Adobe Premiere Pro CC この 例で は 、 Te r a n e x からの 変 換 出力が 1 0 8 0 i 5 0 になり、 コントロール 不 可のデバイスから キャプチャーします。 Premiere Pro CC 2015 セットアップ 1 Premiere Pro CC を起動します。...
- Page 206 「オーディオとレンダリングのプロパティ」 を 「カスタム」 に設定します。 キャプチャー 1 「 File 」 > 「 Capture 」 を選択します。 2 赤い 「 Record 」 ボタンを押してキャプチャーを開始します。 3 キャプチャーを終了するには、 「 Stop 」 ボタンをクリックします。 再生 1 再生の設定は、 新規プロジェクトを作成するたびに行う必要があります。 「 Preferences 」 > 「 Playback 」 へ行き、 「 Video Device 」 で、 「 Blackmagic Playback 」 のボックスにチェックを入 れ、...
- Page 207 Adobe After Effects CC Blackmaigc をプレビュー出力フレームバッファーとして使用 Blackmagic ハードウェアを使用して合成をリアルタイムで表示するには、 環境設定 > ビデオプレビュー を選択します。 After Effects CC で Blackmagic ハードウェアを使用するには、 「 Mercury Transmit 」 を有 効にする必要があります。 ビデオデバイスメニューで、 「 Blackmagic Playback 」 を選択します。 After Effects CC の合成が、 正しいビデオカラースペースで放送用モニターに表示されます。 作業中は常 に正確なカラーとインターレースを確認できます。 ビデオとして出力した時のルックを確認するために、 合成のレンダリングを待つ必要はありません。...
- Page 208 Mac OS X の QuickTime コーデック ‚ Blackmagic RGB 10-bit 非圧縮 ‚ Apple 非圧縮 YUV 10-bit 4:2:2 ‚ Apple 非圧縮 YUV 8-bit 4:2:2 ‚ Apple Photo - JPEG 非圧縮 ‚ Apple DV - NTSC 圧縮 ‚ Apple DV - PAL 圧縮 ProRes や...
- Page 209 Adobe Photoshop CC ビデオフレームのキャプチャーおよび出力 Photoshop® CC にイメージを読み込む 1 Photoshop で、 「 File 」 > 「 Import 」 > 「 Blackmagic Image Import 」 を選択します。 2 「 Video Input Format 」 と 「 Image Bit Depth 」 を選択し、 「 Import Image 」 をクリックします。 Photoshop®...
- Page 210 Blackmagic UltraScope ソフトウェアのインター フェースで 2 つのスコープを同時に確認するには、 最低 1280 x 800 ピクセルのコンピューター解像度が必要です。 Blackmagic design は、 解像度 1920 x 1200 、 あるいは 1920 x 1080 ピクセルのコンピューターディスプレイで 6 つのスコープを同時に確認す ることを推奨します。 www.blackmagicdesign.com/jp のサポートページで、 最新の Blackmagic UltraScope 最低システム要件 の総合リストを参照してください。 Blackmagic UltraScope のビューとは Blackmagic UltraScope には 2 つの異なるビューがあり、 ワークフローのニーズやスクリーン解像度に応じ...
- Page 211 Blackmagic UltraScope - フルスクリーン・ ビュー 2-Up ビュー Blackmagic UltraScope のディスプレイ Blackmagic UltraScope ソフトウェアは、 Teranex で変換した後のビデオ / オーディオ出力を、 放送の規定 を満たす正しいレベルに維持できる素晴らしいツールです。 モニタリング用のスコープには、 RGB パレー ド、 波形、 ベクトルスコープ、 ヒストグラム、 オーディオメーターディスプレイが含まれます。 RGB パレード表示 RGB パレードには、 変換された出力のレッド、 グリーン、 ブルーのチャンネルが表示されます。 カラーチャ ンネルのうち 1 つが高くなっ ている場合は、 通常、 色かぶりが生じていることを示しています。 この状態が 望ましくない場合は、...
- Page 212 映像が白がかっ ている、 またはブラックがグレーがかっ ている場合は、 画像情報が 0 IRE のラインよりも 高い位置にあります。 ブラックレベルを調整するには、 Teranex のフロントパネルで 「 BLK 」 ボタンを押し、 回転ノブを使用してブラックレベルを下げます。 ブラックレベルを 0 IRE 以下に下げると、 イメージが黒潰 れし、 シャドウのディテールが損なわれる恐れがあります。 ブラックレベルを調整し、 変更の結果をモニ ターおよび波形で確認してください。 ハイライトが弱い、 またはくすんでいる場合は、 データが 100 IRE ラインよりも低い場所にあります。 ホワ イトレベルを調整するには、 Teranex のフロントパネルで 「 GAIN 」 ボタンを押し、 回転ノブを使用してホワ イトレベルを上げます。...
- Page 213 ヒストグラム表示 ヒストグラムの使用は、 イメージのコントラストを確認するもう一つの方法です。 ヒストグラムの横軸は、 左側がブラック ( 10-bit 画像で 0 ) 、 右側がホワイト ( 10-bit 画像で 1023 ) のルミナンスレンジを表します。 適切なコントラストの映像は、 情報がヒストグラムの横軸全体をカバーするように表示されますが、 低コ ントラストの映像は、 情報の大部分が中央部に表示されます。 Teranex プロセッサーの 「 BLK 」 および 「 GAIN 」 ボタン設定を使用して、 必要な調整を実行できます。 ヒストグラム表示 オーディオメーター表示 オーディオメーター表示は、 Teranex プロセッサーのオーディオレベルを表示します。 オーディオは、 dBFS あるいは...
- Page 214 エラーロギング表示 エラーロギングは、 ビデオとオーディオのエラーの記録です。 長時間の変換など、 自動操作を行う際に不 可欠です。 ログされるエラーには、 カラー、 明度、 オーディオのしきい値レベルや、 ビデオ信号の損失、 ビ デオフォーマットの変更、 オーディオサイレンスなどがあります。 エラーがログされる条件をパラメーター で設定したら、 エラーロギングの開始 / 停止、 ログのファイルへの保存、 ログの消去などが選択できます。 これらの機能は、 エラーロギング 表示にあるボタンや、 エラーロギング・ プルダウンメニューで 選択できます。 エラーはタイムコードおよび時刻と合わせて記録されるため、 後で見つけるのが簡単です。 タイムコード が記録されなかった場合でも、 エラーが記録された時刻を参考にエラーを探し出すことができます。 フルスクリーン ・ ビューでは、 ヒストグラム表示とエラーロギング表示は UltraScope インター フェースの同 じ部分に表示されます。 ヒストグラム表示の下にある 「 LOGGING 」 ボタンを選択すると、 エラーロギング 表示に切り替わります。...
- Page 215 フォーマット変換表 Teranex AV および Teranex Express アウト イン • • • • • • • • • • • • • • • • • • • • • • • • • • • • • • • • • 525i59.94 NTSC •...
- Page 216 フォーマット変換表 Teranex 2D アウト イン • • • • • • • • • • • • • • • • • • • • • • • • • 525i59.94 NTSC • • • • • • • • • • • • • • • • • • • • • • • • • 625i50 PAL •...
- Page 217 フォーマット変換表 Teranex 3D アウト イン • • • • • • • • • • • • • • • • • • • • • • • • • 525i59.94 NTSC • • • • • • • • • • • • • • • • • • • • • • • • • 625i50 PAL •...
- Page 218 Teranex 2D の DB25 コネクターピンアウト Teranex 2D は 1 ペアの RCA 入力を搭載しており、 2 チャンネルの左右アナログオーディオを入力できます。 また、 リアパネルの DB -25 マルチピンコネクターは、 最大 4 チャンネルのアナログオーディオの入 出力に使用できます。 アナログオーディオの入力 / 出力 フロントパネルでオーディオ入力の種類に 「 ANLG 」 ボタンを選択すると、 フロントパネル LCD にメニュー ページが表示され、 2 種類のアナログオーディオソースのうちどちらを使用するかを選択できます。 DB-25 コネクターを使用する際は、 オプションのブレイクアウトケーブルが必要です。 ブレイクアウトケー ブルは、...
- Page 219 AES/EBU オーディオの入力 / 出力 Teranex 2D のフロントパネルで 「 AES 」 ボタンを押し、 AES/EBU デジタルオーディオ入力を選択します。 AES/ EBU 出力は常にアクティブです。 DB-25 コネクターを使用すると、 Teranex 2D Processor に最大 8 入力チャンネル ( 4 ペア) および 8 出力 チャンネル ( 4 ペア) のバランス AES/EBU デジタルオーディオを接続できます。 バランス XLR 接続には、 標準 Yamaha フォーマットのブレイクアウトケーブルが必要です。 このブレイクア ウトケーブルは価格が安く、...
- Page 220 オプションの Blackmagic Design Fiber Optic SFP のインストール Blackmagic Teranex AV および Teranex Express には光ファイバーケージを搭載しており、 オプションの 光ファイバー SFP モジュールをインストールできます。 SFP モジュールをインストールすることで、 同軸 ケーブルよりも長い距離間で 12G-SDI までのビデオ信号を確実に接続できます。 Teranex Express プロセッサーにオプションの Blackmagic Design Fiber Optic SFP をインストール 警告...
- Page 221 SFP モジュールを Teranex Express にインストール Teranex AV 筐体のバンパー Teranex AV には 2 つの筐体バンパーが同梱されており、 筐体の両サイドに取り付けられます。 これらのバンパーは、 Teranex AV を持ち運んだり、 中継車や野外で使用する際に生じる可能性 のあるダメージからリアパネルのコネクターを保護するように設計されています。 またこれらの バンパーは、 ユニットに接続されたケーブルの張力緩和としての役割も果たします。 筐体バンパーは、 ユニットに同梱されている 4 つの M4 スクリューを使用して Teranex AV に取り付 けます。 Teranex AV の両サイドに M4 マウント用に 2 つの穴があります。 同梱のバンパーを...
- Page 222 Downloading the Free Blackmagic Design SDK The DeckLink SDK can be downloaded from the ‘capture and playback’ section of the Blackmagic Design support center at www.blackmagicdesign.com/jp/support. Joining the Blackmagic Design Software Developers Forum If you’re looking for answers, feedback or suggestions regarding technologies used by Blackmagic Design, such as codecs, core media, APIs, SDK and more, visit the Blackmagic Design Software Developers forum.
- Page 223 Connection The Blackmagic Teranex Ethernet Server listens on TCP port 9800. In a Telnet session, type in “telnet” and a space, followed by the IP address of your Teranex, another space and “9800”. For example: telnet 192.168.90.236 9800 Connection Response Upon connection, the Teranex Server sends a complete dump of the state of the device.
- Page 224 VIDEO ADJUST: ↵ Luma low: 4 ↵ Luma high: 1019 ↵ ↵ ANCILLARY DATA: ↵ AFD output line: 11 ↵ CC enabled: false ↵ ↵ VARIABLE ASPECT RATIO: ↵ Variable Aspect Ratio size X left: 0.000000 ↵ Variable Aspect Ratio size X right: 0.000000 ↵ ↵...
- Page 225 ACK ↵ ↵ VIDEO OUTPUT: ↵ Video mode: 1080i5994 ↵ Aspect ratio: Anamorphic ↵ Video demux mode: SingleLink ↵ Video pixel format: YCbCr422 ↵ Analog output: Component ↵ ↵ Retrieving Device Information The “ Teranex Device ” command returns information about the connected device: TERANEX DEVICE: ↵...
- Page 226 Protocol Commands Command Description Command Align size X left: 0.000000 Set the Horizontal Size (X) (Zoom) value for the Left Eye. Negative values decrease size; positive values enlarge the image. Default = 0 Align size X right: 0.000000 Set the Horizontal (X) Size (Zoom) value for the Right Eye.
- Page 227 Ancillary Data Teranex processors support closed captions, timecode and video indexing in the ancillary data. Closed Captions Command Description Command CC enabled: Enable Closed Caption processing. True=ON; False=OFF; (Default = False) CC input line: Analog CC input line selection. Range is 20 to 22. Default = 21 CC output line: Analog CC output line selection.
- Page 228 Video Indexing Command Description Command Index reaction: Values are: On, Off (Default = Off) AFD insert type: Values are: Off, Auto, Bypass, or AFD codes 0000 - 1111. For details, see the AFD Insertion Menu topic in the user manual. AFD output line: Range is format dependent.
- Page 229 Command Description Command AudioInLevel2: Set audio level (gain) for Channel 3 AudioInLevel3: Set audio level (gain) for Channel 4 AudioInLevel4: Set audio level (gain) for Channel 5 AudioInLevel5: Set audio level (gain) for Channel 6 AudioInLevel6: Set audio level (gain) for Channel 7 AudioInLevel7: Set audio level (gain) for Channel 8 AudioInLevel8:...
- Page 230 Command Description Command AudioOut4: Select source to be mapped to output Ch 5. AudioOut5: Select source to be mapped to output Ch 6. AudioOut6: Select source to be mapped to output Ch 7. AudioOut7: Select source to be mapped to output Ch 8. AudioOut8: Select source to be mapped to output Ch 9.
- Page 231 Please note: AudioInPair0: refers to input pair 1, AudioInPair1: refers to input pair 2, etc. Command Description Command AudioInPair0: Select source to be mapped to input pair 1 AudioInPair1: Select source to be mapped to input pair 2 AudioInPair2: Select source to be mapped to input pair 3 AudioInPair3: Select source to be mapped to input pair 4...
- Page 232 MODE3D The MODE3D commands are available in the Teranex 3D only. See the “ 3D Menu Settings ” section of this user manual for details. Example: MODE3D: ↵ 3D MODE: 3DModeAlign ↵ ↵ ACK ↵ ↵ MODE3D: ↵ 3D mode: 3DModeAlign ↵ 3D roll left: 0 ↵...
- Page 233 ACK ↵ ↵ MODE3D: ↵ 3D roll left: 20 ↵ 3D roll right: 0 ↵ ↵ Command Description Command 3D roll left: Adjust the Left Eye Z axis image rotation. Range is -400 to +400 units. (Default = 0) 50 units = 1 degree.
- Page 234 Noise Reduction Command Description Command Enabled: Enable Noise Reduction. False = OFF; True = ON Bias: Adjust the Bias level. Range is -3 to +3 Split screen: Enable NR before/after split screen. False = OFF; True = ON Red overlay: Enable NR Red Overlay.
- Page 235 Teranex Device Command Description Command Model name: Display the Teranex model name. Software Version: Display the checksum of the installed software release. FPGA Version: Display the FPGA version of the installed software release. Panel lock: Remotely lock the front panel of the device, preventing local operation.
- Page 236 Command Description Command Variable Aspect Ratio size X left: Adjust horizontal image size. Negative values decrease size; positive values enlarge the image. Default = 0 Variable Aspect Ratio size X right: Adjust horizontal image size of the Teranex 3D right eye output.
- Page 237 Command Description Command Luma high: Set luminance high level value to clip overshoots. Range is 5 to 1019 (Default = 1019) Chroma low: Set chrominance low level value to clip undershoots. Range is 4 to 1018 (Default = 4) Chroma high: Set chrominance high level value to clip overshoots.
- Page 238 Command Description Command Audio source: Select the audio input type. Values are model dependent. Teranex 2D: Embedded, AES, RCA, DB25. Teranex 3D: Embedded, AES, RCA, DB25. Teranex Express: Embedded. Teranex AV: Embedded, AES, RCA, DB25. PCIe mode: For Teranex 2D and 3D: Display the status of the Thunderbolt connection.
- Page 239 Command Description Command HDMI Output: For Teranex AV only. Select the color space for the HDMI output. Values are: YCbCR422, RGB444 Output option: For Teranex AV only. Select one of four signals to be used as the output of the unit. Values are: Input, Black, Still, Freeze. The “...
- Page 240 フロントおよびリアパネル Teranex AV VIDEO AUDIO FORMAT FRAME RATE ASPECT MENU VIDEO PRESETS AUDIO STATUS PANEL EMBED 23.98 ANAM 14:9 HOME GAIN LOCK LBOX CCUT MENU HDMI 1080 PBOX ZOOM SYSTEM STATUS ULTRA 29.97 59.94 MENU ANLG SMART SHARP LOCK VIDEO AUDIO FORMAT...
- Page 241 ‚ Windows 8 では、 スタートページの 「 Blackmagic Teranex 」 タイルから Blackmagic Teranex Setup を開きます。 「 Help 」 メニューをクリックして 「 About 」 を選択すると、 バージョン番号が表示さ れます。 最新のソフトウェアを入手する コンピューターにインストールされた Blackmagic Teranex ソフトウェアのバージョンを確認した 後、 Blackmagic サポートセンター ( www.blackmagicdesign.com/jp/support ) で最新のソフトウェ ア ・ アップデートをチェックしてください。 常に最新のソフトウェアを使用することを推奨しますが、 重要なプロジェクトの実行中は、 ソフトウェアのアップデートは行わない方がよいでしょう。 ヘルプライン...
- Page 242 注意 警告 : 感電の危険性があります。 Blackmagic Design は、 Teranex プロセッサー本体を開かないよう警告します。 と記載された黄色の警告 ラベルがあります。 これは、 ユーザーに対して、 Teranex プロセッサー内部に非絶縁の 「危険」 電圧が含ま れている可能性を警告するものです。 この電圧はユーザーに感電のリスクをもたらす可能性があります。 技術的なサポートが必要な場合は、 Blackmagic Design サポートセンターまでお問い合わせください。 データポートに接続するデバイスは、 AS/NZS 60950.1. の条項 4.7 に準拠する必要があります。 Achtung: Stromschlaggefahr Auf dem Teranex Processor-Gehäuse befindet sich ein gelbes Warnetikett mit der Aufschrift ʻ Caution: Risk of Electric Shock ʼ...
- Page 243 保証 12 ヶ月限定保証 Blackmagic Design は、 お買い上げの日から 12 ヶ月間、 Teranex ファミリー製品の部品および仕上がりに ついて瑕疵がないことを保証します。 この保証期間内に製品に瑕疵が見つかった場合、 Blackmagic Design は弊社の裁量において部品代および人件費無料で該当製品の修理、 あるいは製品の交換のいずれ かで対応いたします。 この保証に基づいたサービスを受ける際、 お客様は必ず保証期限終了前に Blackmagic Design に瑕疵を 通知し、 適応する保証サービスの手続きを行ってください。 お客様の責任において不良品を梱包 し、 Blackmagic Design が指定するサポートセンターへ配送料前払で送付いただきますようお願い致しま す。 理由の如何を問わず、 Blackmagic Design への製品返送のための配送料、 保険、 関税、 税金、 その他 すべての費用はお客様の自己負担となります。 不適切な使用、...
- Page 244 Manuel d'utilisation et d'installation Teranex Processors Juin 2017 Français...
- Page 245 Bienvenue Nous vous remercions d'avoir fait l'acquisition d'un convertisseur Teranex. Le convertisseur Teranex que vous avez entre les mains est un convertisseur de standards d'excellente qualité. Il dispose de nombreuses fonctionnalités exceptionnelles que vous découvrirez au fur et mesure de son utilisation. À chaque fois que je m’en sers, je découvre de nouvelles fonctionnalités ! Ce convertisseur est doté...
- Page 246 Contenu Teranex Processors Mise en route Audio intégré Brancher l'alimentation Paramètres du Teranex Brancher la vidéo Paramètres du menu Video Brancher l'audio Paramètres du menu Audio Conversions Paramètres du menu Noise reduction Régler la latence sur le Teranex AV Paramètres du menu Ancillary Data Installation du logiciel Paramètres du menu System Setup d'administration...
-
Page 247: Mise En Route
Mise en route Brancher l'alimentation Pour mettre en route votre Teranex, il suffit de le brancher à une source d'alimentation et de connecter le signal d’entrée et de sortie. Pour alimenter l'appareil, branchez un câble d'alimentation CEI standard au connecteur d'alimentation situé... -
Page 248: Régler La Latence Sur Le Teranex Av
Sous le bouton Audio, sélectionnez l'entrée intégrée, AES ou analogique. Après avoir sélectionné l'entrée, vous pouvez changer les paramètres de sortie pour effectuer la conversion de votre choix. VIDEO AUDIO FORMAT FRAME RATE ASPECT MENU VIDEO PRESETS AUDIO STATUS PANEL EMBED 23.98 ANAM... -
Page 249: Installation Du Logiciel D'administration
être contrôlés sur la page d'accueil. Installation sur Mac OS X Téléchargez le logiciel Blackmagic Teranex Setup sur www.blackmagicdesign.com/fr Dézippez le fichier et cliquez sur l'icône pour l'ouvrir. Double-cliquez sur le programme d'installation et suivez les instructions à l’écran pour terminer l’installation. -
Page 250: Mettre À Jour Le Logiciel Interne
Utilisez Blackmagic Teranex Setup pour mettre à jour le Teranex et changer les paramètres de conversions à distance à partir d'un ordinateur Mac OS X ou Windows. Mettre à jour le logiciel interne Il est important de veiller à ce que le Teranex soit branché à une source d’alimentation avant de brancher un câble USB entre l'ordinateur et le convertisseur. -
Page 251: Connecteurs
Connecteurs Les types de connecteurs varient en fonction des modèles Teranex. En général, tous les convertisseurs Teranex convertissent les signaux SDI, cependant, en fonction des modèles, certains convertiront également les signaux HDMI et vidéo analogique. N'hésitez pas à vérifier les spécifications de votre modèle dans ce manuel. VIDEO AUDIO FORMAT... -
Page 252: Teranex Av
VIDEO AUDIO FORMAT FRAME RATE ASPECT MENU VIDEO 23.98 ANAM 14:9 HOME GAIN EMBED LBOX CCUT MENU Teranex AV HDMI 1080 PBOX ZOOM ULTRA 29.97 59.94 MENU ANLG SMART SHARP VIDEO AUDIO FORMAT FRAME RATE ASPECT MENU VIDEO REF OUT CH A CH B PUSH... -
Page 253: Teranex 2D
VIDEO AUDIO FORMAT FRAME RATE ASPECT MENU VIDEO 23.98 ANAM 14:9 HOME GAIN EMBED LBOX CCUT MENU Teranex 2D HDMI 1080 PBOX ZOOM 29.97 59.94 MENU ANLG ANLG SMART SHARP 1080 REF IN Y/NTSC/PAL IN B-Y IN R-Y IN Y/NTSC/PAL OUT B-Y OUT R-Y OUT ANALOG AUDIO IN/OUT... -
Page 254: Teranex 3D
VIDEO AUDIO FORMAT FRAME RATE ASPECT MENU VIDEO 23.98 ANAM 14:9 HOME GAIN EMBED LBOX CCUT MENU Teranex 3D HDMI 1080 PBOX ZOOM 29.97 59.94 MENU ANLG ANLG SMART SHARP 1080 VIDEO AUDIO FORMAT FRAME RATE ASPECT MENU VIDEO DOLBY METADATA REMOTE IN/OUT REF IN Y/NTSC/PAL IN... -
Page 255: Régler Les Paramètres
Entrées vidéo analogique Sorties vidéo analogique 1x BNC - Entrée composante/composite 1x BNC - Sortie composante/composite Y/NTSC/PAL. Y/NTSC/PAL. 1x BNC - Entrée composante B-Y. 1x BNC - Sortie composante B-Y. 1x BNC - Entrée composante B-Y. 1x BNC - Sortie composante R-Y. 1x BNC - Entrée composante R-Y. -
Page 256: Configurer La Sortie
REMARQUE Lorsque vous sélectionnez de la vidéo analogique sur le Teranex 2D ou 3D, confirmez le signal composante ou composite affiché sur l'écran LCD à l'aide de la molette. Sur le Teranex AV, appuyez plusieurs fois sur le bouton SDI pour passer de l'entrée SDI 1 à... -
Page 257: Aperçu Du Panneau De Contrôle
VIDEO AUDIO FORMAT FRAME RATE ASPECT MENU VIDEO PRESETS AUDIO STATUS PANEL EMBED 23.98 ANAM 14:9 HOME GAIN LOCK LBOX CCUT MENU HDMI 1080 PBOX ZOOM SYSTEM STATUS 29.97 59.94 MENU ANLG ANLG SMART SHARP 1080 LOCK VIDEO AUDIO FORMAT FRAME RATE ASPECT... - Page 258 Voici un aperçu des fonctions du panneau de contrôle. VIDEO AUDIO FORMAT FRAME RATE ASPECT MENU VIDEO System Video Main Menu Setup EMBED 23.98 ANAM 14:9 HOME GAIN Audio LBOX CCUT MENU HDMI 1080 PBOX ZOOM Noise Reduction 29.97 59.94 MENU ANLG ANLG...
-
Page 259: Préréglages
Préréglages Utilisez les six boutons Preset pour sauvegarder et rappeler vos paramètres de conversion. Les préréglages peuvent être sauvegardés, rappelés et renommés via l'utilitaire Blackmagic Teranex Setup. Ils permettent de sauvegarder des paramètres réglés sur le Teranex pour une utilisation future. Vous pouvez, par exemple, conserver des paramètres proc amp ou des formats d'image personnalisés pour les rappeler rapidement lorsque vous en avez besoin. -
Page 260: Connexion À Un Réseau
Les LED de la section Sytem Status vous donnent les indications suivantes : Une entrée vidéo est connectée Une référence externe a été sélectionnée et connectée La source d'alimentation 1 est opérationnelle La source d’alimentation 2 est opérationnelle. Uniquement sur les Teranex 2D et Teranex Présence du timecode dans le signal d'entrée ou de sortie vidéo Présence des sous-titres codés dans le signal d'entrée ou de sortie vidéo <-->... -
Page 261: Régler Les Paramètres À L'aide Du Blackmagic Teranex Setup
Régler les paramètres à l'aide du Blackmagic Teranex Setup L'utilitaire Blackmagic Teranex Setup offre une visualisation intuitive de l'état de votre processeur Teranex. Il permet également de contrôler l'appareil à distance de n'importe quel emplacement sur le réseau Ethernet. Ce logiciel permet de contrôler le Teranex à distance, sans toucher au panneau avant. - Page 262 Pour ajouter un processeur Teranex à l'aide du Teranex Setup : Cliquez sur le bouton + situé dans le coin inférieur gauche de la fenêtre. Saisissez l'adresse IP et cliquez sur Add. Le processeur Teranex apparaît en tant qu'appareil pilotable sur votre réseau. Pour ajouter un processeur Teranex manuellement, cliquez sur l'icône + de la fenêtre d'ouverture de session.
- Page 263 Onglet Configure Affiche le nom et l'adresse IP du Teranex que vous utilisez. Vous pouvez attribuer un nom unique à l'appareil afin de pouvoir l'identifier facilement lorsque vous utilisez plusieurs Teranex. Il suffit de cliquer dans le champ Name et de saisir un nouveau nom pour l'appareil.
- Page 264 Verrouillage à distance du panneau Vous pouvez verrouiller à distance le panneau avant du Teranex afin d’éviter tout changement accidentel. Pour verrouiller ou déverrouiller le panneau avant, cliquez sur les paramètres Panel Lock/Unlock dans le menu de la roue dentée. Le bouton Panel Lock du panneau avant s’allume en rouge lorsque le panneau est verrouillé.
-
Page 265: Conversion Du Format De L'image
Conversion du format de l'image Ce tableau de conversion vous permettra de visualiser le format de l’image qui apparaîtra dans la vidéo convertie. Il vous aidera à identifier les paramètres pour faire une sélection rapide. Up-conversion Entrée 4:3 Sortie 16:9 PBOX (Pillarbox) Place l'image SD 4:3 au centre du cadre HD 16:9. - Page 266 Conversion du format SD écran large 16:9 en SD 4:3 Bien que la plupart des programmes en définition standard utilisent un format d'image 4:3, certaines sources SD sont enregistrées au format écran large 16:9. Pour offrir un traitement approprié des entrées en SD écran large, le Teranex doit être configuré...
-
Page 267: Workflows De Conversion
Workflows de conversion Cette section du manuel indique la façon de régler le workflow pour effectuer les principales conversions que vous pouvez réaliser avec le Teranex Processor. Le réglage des conversions, notamment celui des conversions de standard et des up/down/cross-conversions s'effectue à l'aide du panneau de contrôle avant. -
Page 268: Up-Conversion Vers L'ultra Hd Avec Teranex Av Et Teranex Express
Appuyez sur le bouton 1 080. Sélectionnez le bouton P pour une sortie progressive, et le bouton 29.97/30 pour la fréquence d'images. Les boutons des sections Format, Frame et Rate s'allument en vert. Vous pouvez à présent accepter les paramètres de votre conversion ou apporter des modifications. -
Page 269: Down-Conversion
Configurer l'entrée Appuyez sur le bouton In du panneau de contrôle du Teranex et sélectionnez SDI dans la section Video. Le Teranex détecte automatiquement le format de l'entrée, affiche l'entrée vidéo sur l'écran LCD et allume les boutons correspondants. Le bouton Embed s'allume dans la section Audio. VIDEO AUDIO FORMAT... - Page 270 Mettez votre processeur Teranex en marche et connectez les entrées et les sorties. Configurer l'entrée Appuyez sur le bouton In du panneau de contrôle et sélectionnez SDI dans la section Video. Teranex affiche l'entrée vidéo sur l'écran LCD, détecte automatiquement le format de l'entrée et allume les boutons correspondants.
-
Page 271: Cross-Conversion
CONSEIL Pour plus d'informations sur les conversions de format d'image, consultez les sections « Menu Aspect » à la page 277 et « Conversion du format de l’image » à la page 265. Cross-conversion La cross-conversion vous permet de modifier la résolution vidéo et/ou le format de l'image de votre vidéo. -
Page 272: Conversion De Standards
Configurer le format d'image de la sortie Appuyez sur le bouton Ibox/pbox pour configurer le format d'image sur letterbox. Le processeur Teranex est maintenant prêt à cross-convertir votre vidéo. Format d’écran 4:3 Format d’image 16:9 En réglant le bouton LBOX/PBOX avec un signal de sortie en SD, vous pouvez insérer l’image au format 16:9 dans un cadre au format 4:3. - Page 273 Sélectionnez Change à l'aide des boutons de menu multifonctions. La sortie vidéo s'affiche sur l'écran LCD et est envoyée à tous les connecteurs de sortie. Les boutons s'allument en bleu pour confirmer vos paramètres. VIDEO AUDIO FORMAT FRAME RATE ASPECT 23.98 ANAM 14:9...
-
Page 274: Correction De La Cadence
Correction de la cadence La correction de la cadence implique la suppression de la séquence pulldown 3:2. Le pulldown 3:2 est appliqué lorsqu'un télécinéma transfère du film à 24 images par seconde en vidéo à 59.94 images par seconde. Le Teranex corrige automatiquement la cadence lors de la conversion de vidéo intégrant un pulldown 3:2 en 24 images par seconde. -
Page 275: Traitement À Très Faible Latence Sur Le Teranex Av
Appuyez sur le bouton de menu Home, puis sélectionnez Video>Advanced>Clean Cadence. Utilisez la molette ou les boutons multifonctions pour régler le mode Clean Cadence sur On. Le format de sortie 1080i59.94 contient désormais une cadence 3:2 impeccable. N'oubliez pas de régler le mode Clean Cadence sur Off après avoir effectué la conversion. -
Page 276: Audio Intégré
Activer le mode à faible latence Dans le menu à l'écran, allez sur System Setup, sélectionnez le sous-menu Processing, puis sélectionnez Lowest latency. Vous pouvez également y accéder via le logiciel Teranex Setup. Le Teranex AV charge la configuration Lowest latency pour la conversion que vous souhaitez effectuer, qui s'exécute à... -
Page 277: Paramètres Du Menu Video
Paramètres du menu Video Le menu Video permet de modifier les paramètres de sortie, notamment la couleur, l’écrêtage, le format d’image et autres. Menu Color Pour ajuster les paramètres de gain rouge, vert et bleu, tournez la molette pour régler le canal de la couleur concernée. - Page 278 Ajuster le format d'image Pour personnaliser la taille du format d'image, la position et le rognage, utilisez les boutons multifonctions et la molette. Taille Le paramètre Size permet de régler le format horizontal et/ou vertical de l'image. La taille peut être comprise entre -50% et +200%. Position Le paramètre Position vous permet de déplacer l'image dans l’écran de sortie.
- Page 279 Menu Video Setup Le menu Video>Setup vous permet de définir les paramètres vidéo des entrées et des sorties analogiques, SDI et HDMI. La disponibilité des menus dépend du modèle de Teranex utilisé. Menu No Video Input Utilisez le menu No input pour choisir quel signal (Black et Colorbar) doit être acheminé lorsqu'aucune source vidéo n'est détectée.
- Page 280 Menu Video Sampling (Teranex 3D uniquement) Le menu d'échantillonnage du signal vidéo du processeur Teranex 3D permet de sélectionner une des structures suivantes. ‚ 4:2:2 – YUV ‚ 4:4:4 – YUV ‚ 4:4:4 – RGB Proc Video No Video Color Video Setup Sampling...
- Page 281 Les sorties Quad HD sont assignées comme suit : ‚ SDI Output A: Sub image 1 ‚ SDI Output B: Sub image 2 ‚ SDI Input Loop A: Sub image 3 ‚ SDI Input Loop B: Sub image 4 Out A Out B Loop A Loop B...
- Page 282 CONSEIL Ce paramètre s'applique uniquement lorsque de la vidéo 3G-SDI est acheminée. Pour les entrées 3G-SDI, les signaux Level A et Level B sont détectés automatiquement. Menu Quad SDI Output (Teranex AV uniquement) Le Teranex AV fournit des sorties Quad SDI en continu via quatre connecteurs BNC dédiés lorsque l’Ultra HD est utilisée.
- Page 283 Après avoir effectué les modifications, le bouton correspondant s'allume d'une lumière blanche. Pour restaurer le paramètre de ce bouton par défaut, sélectionnez-le via le menu Proc Amp ou à l'aide du bouton situé sur le panneau avant, puis appuyez sur la molette. Pour réinitialiser tous les paramètres, allez dans le menu Proc Amp, puis sélectionnez Reset All.
- Page 284 Res.Chart Grid Mires de réglage du Teranex AV En plus des mires de réglage vidéo illustrées ci-dessus, le Teranex AV intègre un menu relatif au mouvement de la mire et un menu de tonalités d’essai. ‚ Mires de réglage Sélectionnez Test Patterns pour choisir le signal d'essai de votre choix. ‚...
- Page 285 Sur la page Setup de l’utilitaire Blackmagic Teranex Setup, vous pourrez sélectionner la mire de réglage vidéo, son mouvement et la tonalité d’essai audio. Menu Advanced Votre Teranex dispose de fonctions avancées concernant la correction de cadence : Mode Clean Cadence (Teranex 2D et 3D) Cette fonction vous permet de créer une séquence dont le pull down 3:2 est propre sur la sortie vidéo en 59,94 i/s.
- Page 286 Scene detect La détection des changements de scène réduit l’interpolation entre les plans et offre ainsi une meilleure qualité de sortie. Ceci permet d'éviter la fusion des trames. ‚ On Active la détection des scènes ‚ Off Désactive la détection des scènes Par défaut, ce mode est activé.
-
Page 287: Paramètres Du Menu Audio
Paramètres du menu Audio Le menu Audio permet d'assigner les canaux d'entrée audio aux canaux de sortie. Il offre également un contrôle du Gain et du Delay ainsi qu’un accès à certains paramètres Setup. Le menu Input mapping est disponible sur le Teranex 2D. Cela permet de sélectionner simultanément les canaux d'entrée Embedded, AES et/ou Analog. - Page 288 Output Mapping Output Mapping Output Mapping Prev Next Prev Next Prev Next Channel 1 Source Channel 4 Source Channel 13 Source Input 1 Input 1 Tone .75 kHz Input 2 Input 2 Tone 1.5 kHz Input 3 Input 3 Tone 3 kHz Input 4 Input 4 Tone 6 kHz...
- Page 289 ‚ Si l’audio Dolby encodé est envoyé vers l'entrée AES, il n'est pas possible d’utiliser d’autres types de signaux audio. Dans ce cas, choisissez le type d'entrée AES. Input Mapping Input Mapping Prev Next Prev Next Input 1/2 Source Input 3/4 Source Embedded 1/2 AES 5/6 Embedded 3/4...
- Page 290 Tournez la molette pour régler ce paramètre. Le réglage du niveau est compris entre -12 et +12dB. Appuyez sur la molette pour régler le niveau sur zéro. System Output Input Analog Analog Video Main Menu Audio Setup Setup Mapping Mapping In Level Input Output...
- Page 291 Vumètres pour le Teranex AV uniquement Le Teranex AV permet de sélectionner la paire de canaux d’entrée et de sortie audio qui sera affichée sur l’écran LCD. Les numéros des canaux s’affichent sous les vumètres. System Output Audio Video Main Menu Audio Setup Mapping...
- Page 292 Avec Teranex 3D équipé d'un décodeur Dolby, les métadonnées Dolby peuvent être extraites du signal audio Dolby entrant. Elles peuvent également être envoyées comme données en série via le connecteur à 9 broches Dolby Metadata situé sur le panneau arrière du Teranex 3D. Vous avez aussi la possibilité...
-
Page 293: Paramètres Du Menu Noise Reduction
Paramètres des métadonnées Stereo Preferred Stereo Downmix Non indiqué Non indiqué Lt/Rt Center Downmix Level -3 dB -3 dB Lt/Rt Surround Downmix Level -3 dB -3 dB Lo/Ro Center Downmix Level -3 dB -3 dB Lo/Ro Surround Downmix Level -4.5 dB -4.5 dB Extended Bitstream Info 2 Dolby Surround EX Mode... - Page 294 Menu Bias Réglez le niveau de bias pour choisir la quantité de réduction de bruit. Plus le niveau de bias sera élevé, plus la réduction de bruit sera efficace. ‚ Le réglage du bias est compris entre -6 et +6. ‚...
-
Page 295: Paramètres Du Menu Ancillary Data
Paramètres du menu Ancillary Data Le menu Ancillary Data offre un accès aux menus Closed Caption, Timecode et Video Index. Menu Closed Caption Le menu Closed Caption vous permet de configurer les sous-titres codés aux standards CEA-608B et CEA-708B. CEA-608B est le standard de référence pour la SD analogique NTSC et SD-SDI. Les sous-titres sont encodés sur la ligne 21 de suppression verticale. - Page 296 CC Enable Par défaut, les CC sont désactivés. Pour les activer, allez sur le menu Main>Ancillary Data>Closed Caption>CC Enable et sélectionnez On avec les boutons ou la molette. Il peut être utile de désactiver les sous-titres si les informations entrantes sont incorrectes ou endommagées.
- Page 297 Service 1 Language Service 1 Language est utilisé pour sélectionner la langue des sous-titres codés en CEA-708. ‚ Les langues au choix sont les suivantes : Anglais Français Allemand Italien Espagnol ‚ La langue par défaut est l'anglais. Service 2 Set Value Enable Source...
- Page 298 Timecode Generator Le menu Timecode Generator vous permet de choisir entre les quatre modes de timecode disponibles, ou de désactiver le traitement manuel du timecode. Aucune donnée du timecode n'est intégrée à la vidéo sortante. Il s’agit du réglage par défaut. Video Closed Ancillary Data...
- Page 299 Video Closed Ancillary Data Prev Timecode Next Index Caption Timecode Timecode Start Generator Input Input Regen Start Timecode Source Generate Jam Sync Setup Menu Ancillary Data> Menu Timecode>Input Regen Timecode Generate Le générateur de timecode génère un timecode horaire de sortie en fonction du format de sortie, et cela même si le timecode n'est pas présent sur le signal d'entrée vidéo.
- Page 300 ‚ Set Timecode Les options du menu Set Timecode sont disponibles en fonction de votre sélection dans le menu Start Source. Prev Timecode Next Start Value Timecode Start Generator Input Jam Sync Start Timecode Source 00:00:00:00 Setup Jam Sync>Set Timecode ‚...
- Page 301 Menu AFD Insertion Ce menu vous permet de sélectionner le code AFD de votre choix pour qu’il soit inséré au signal sortant. La ligne de sortie sur laquelle le code est inséré peut être sélectionnée dans le menu AFD Insert Line. ‚...
-
Page 302: Paramètres Du Menu System Setup
Paramètres du menu System Setup Le menu System Setup donne accès aux menus Ethernet, Factory Reset et Reference, ainsi qu'à l'écran d'information du système. Le Teranex AV offre davantage de choix, notamment des commandes relatives à la latence et à la capture d'images fixes. Menu Ethernet Le menu Ethernet vous permet d'afficher les paramètres et d'assigner de nouvelles adresses aux menus IP, Subnet Mask et Gateway. - Page 303 Menu DHCP Le menu DHCP active et désactive l'attribution d’une adresse IP à Teranex à l'aide du Dynamic Host Configuration Protocol (DHCP). Vous pouvez soit appuyer sur le bouton DHCP, soit tourner la molette pour activer ou désactiver le DHCP. Si vous modifiez ce réglage, appuyez sur Save and Restart pour redémarrer Teranex et appliquer la nouvelle adresse IP.
- Page 304 REMARQUE La sauvegarde d'une image fixe dans la mémoire non volatile est une tâche en arrière-plan qui peut prendre jusqu'à 30 secondes pour les images fixes en Ultra HD. Si vous souhaitez éteindre l'appareil après avoir sauvegardé une image fixe, veillez à ce que l'opération soit terminée. ‚...
- Page 305 Vous pouvez charger des graphiques de résolutions différentes. Le logiciel de conversion d’image redimensionnera automatiquement l’image pour l’adapter à la résolution de la sortie du Teranex AV. Cependant, veuillez noter que vous perdrez en qualité, car ce redimensionnement ne repose pas sur les algorithmes internes du Teranex. Si vous souhaitez garder une qualité...
- Page 306 ‚ Internal Synchronise la sortie du Teranex AV avec son oscillateur interne, ce qui offre une synchronisation constante du flux de sortie, même lorsque vous changez les entrées de l'appareil. System Factory Video Main Menu Ethernet System Setup Setup Reset Audio Reference Noise...
- Page 307 Formats de sortie et fréquences d'image Signal de référence 1080PsF29.97 Blackburst 59.94, Tri-level progressif 29.97, Tri-level entrelacé 59.94 1080p30 Tri-level progressif 30, Tri-level entrelacé 60 1080PsF30 Tri-level progressif 30, Tri-level entrelacé 60 1080i50 Blackburst 50, Tri-level entrelacé 50 1080p50 Blackburst 50 1080i59.94 Blackburst 59.94, Tri-level entrelacé...
- Page 308 Menu Generate (Teranex AV uniquement) Le Teranex AV peut générer un signal de référence via sa sortie de référence. Le type de signal de référence (Black Burst ou Tri-level) dépend du format vidéo de la sortie du Teranex AV. Certains formats vidéo ne permettent l’utilisation que d’un seul type de signal de référence.
- Page 309 Votre format vidéo de sortie Les signaux de référence compatibles sont : 1080p60 Non pris en charge 2K DCI 23.98p Tri-level progressif 23.98 2K DCI 23.98PsF Tri-level entrelacé 47.96 2K DCI 24p Tri-level progressif 24 2K DCI 24PsF Tri-level entrelacé 48 2160p23.98 Tri-level progressif 23.98 2160p24...
- Page 310 CONSEIL Si vous souhaitez accéder rapidement au menu Output Option, vous pouvez attribuer cette page de menu au bouton Menu 1 ou Menu 2 du panneau avant de Teranex AV. Input L’option Input fait référence à l’entrée vidéo sélectionnée sur le panneau avant. Par exemple, SDI 1, SDI 2, HDMI ou l’entrée fibre optique, si elle est installée.
-
Page 311: Paramètres Du Menu 3D
‚ Les paramètres de transition n’ont pas d’impact sur l’arrêt sur image. Lorsque l’option d’arrêt sur image est sélectionnée, le Teranex AV bascule sur l’arrêt sur image, sans prendre en compte le réglage de la transition, et l’audio est coupé. En revanche, lorsque vous commuterez de Freeze à... - Page 312 Menu 3D Mode Si le 3D Mode est réglé sur Off, cela indique que le traitement se fait en 2D. Les choix suivants sont disponibles pour activer le traitement en 3D : ‚ Convert Ce mode active le traitement des signaux d'entrée stéréoscopiques de l’œil gauche et de l’œil droit, qui peuvent être envoyés via les entrées SDI ou HDMI.
- Page 313 Menu Output Le menu 3D Output vous permet de définir les réglages de sortie de la source 3D. ‚ Full Frame Affichage respectif des images œil gauche et œil droit sur les entrées SDI A et B. Affichage simultané du signal Frame Packing si vous utilisez l’entrée HDMI. ‚...
- Page 314 3D Mode Intensity Input Depth Camera Output Align Menu 3D>2D to 3D>Depth Menu Camera Align Le bouton Camera Align n’est disponible que lorsque le mode 3D Align est sélectionné dans le menu 3D Mode. Le mode Camera Align applique différents réglages aux flux stéréoscopiques, notamment Zoom, Flip, Positionnement (horizontal et vertical) et Rotation.
- Page 315 Menu Rotation Le menu Rotation situé dans le menu Camera Align permet de faire pivoter une image sur les axes X, Y et Z, de façon indépendante ou en combinant les trois dimensions. Le réglage de ce mouvement peut être utilisé pour compenser un alignement mécanique imprécis des rigs 3D. Position Camera Align Zoom...
- Page 316 Position Camera Align Zoom Roll Z Rotation Left Eye Rotation Trim Tilt X Right Eye Flip Toe-in Y Both Eyes Reset Reset Camera Align>Rotation Menu Rotation>Toe In Y Position Camera Align Zoom Flip Flip Left Eye Rotation Trim Right Eye Horizontal Vertical Flip...
- Page 317 ‚ Une valeur négative permet d’effectuer un zoom arrière, tandis qu'une valeur positive permet d’effectuer un zoom avant. ‚ Le bouton Both permet de relier la fonction zoom de façon horizontale et verticale, ce qui permet de conserver un format d'image proportionné pendant le zoom. ‚...
- Page 318 Connexions et autres informations importantes concernant les modes 3D Vous trouverez ici des informations concernant les connexions et les données auxiliaires qui peuvent influencer votre workflow. Connexions vidéo Les entrées vidéo stéréoscopiques gauches et droites doivent être respectivement connectées aux entrées SDI A et B.
-
Page 319: Capture Et Lecture
Teranex, cependant, il sera parfois nécessaire d’installer la dernière version du logiciel Blackmagic Design Desktop Video. Elle peut être téléchargée sur la page d'assistance technique de Blackmagic Design: www.blackmagicdesign.com/fr/support/family/capture-and-playback. Capture vidéo Lorsqu'un logiciel capture de la vidéo, l'écran LCD du Teranex affiche le mot Capture ainsi que le format vidéo du signal d'entrée. -
Page 320: Davinci Resolve
Pour capturer de la vidéo avec Teranex, il est recommandé d'installer la dernière version du logiciel Blackmagic Design Desktop Video. Elle peut être téléchargée sur la page d'assistance technique de Blackmagic Design : www.blackmagicdesign.com/fr/support/family/capture-and-playback. Capture et lecture... - Page 321 Configuration Lancez DaVinci Resolve. Dans le menu Preferences, sélectionnez l'onglet Video I/O and GPU puis sélectionnez votre Teranex sous le paramètre For capture and playback use. Sauvegardez vos préférences et redémarrez DaVinci Resolve pour appliquer les modifications. Commencez un projet. Dans la fenêtre Project Settings, configurez la résolution et la fréquence d'image de la timeline et du monitoring.
-
Page 322: Avid Media Composer
Lecture Pour lire les clips à partir de la page Media, cliquez de nouveau sur l'icône de capture pour fermer la fenêtre Capture info. Sélectionnez un clip que vous avez capturé pour l'afficher dans la fenêtre, puis cliquez simplement sur les commandes de transport de la fenêtre pour le lire. Montage et étalonnage Une fois les clips capturés, il suffit de cliquer sur la page Edit pour utiliser les nombreux outils de montage de DaVinci Resolve. -
Page 323: Apple Final Cut Pro 7
Saisissez un nom de projet et configurez les options du projet. Capture Pour ouvrir la fenêtre Capture Tool (outil de capture), allez sur Tools > Capture. Cliquez sur le bouton permettant la commutation de la source pour qu'un cercle barré rouge s'affiche sur le bouton icône du magnétoscope. - Page 324 Apple Final Cut Pro 7 Configuration Ouvrez Final Cut Pro 7 et sélectionnez File>New Project. Sélectionnez File>Save Project As... et nommez votre projet. Dans le menu Final Cut Pro, sélectionnez Easy setup pour ouvrir la fenêtre. Choisissez HD sous le paramètre Format et 25.00 fps sous le paramètre Rate. Sélectionnez Blackmagic HDTV 1080i50 - 10 bit dans le menu Use.
- Page 325 Lecture Vous pouvez utiliser la timeline Final Cut Pro pour afficher la vidéo sur un moniteur ou un téléviseur connecté à la sortie de votre processeur Teranex. Si vous ne voyez pas de vidéo sur votre sortie Blackmagic, revérifiez les connexions et les paramètres de sortie dans Final Cut Pro. Pour ce faire, allez sur View (Affichage) >...
-
Page 326: Adobe Premiere Pro Cc
Adobe Premiere Pro CC Dans cet exemple, le format de la sortie convertie du Teranex est de 1080i50 et la capture est effectuée à partir d'un appareil non pilotable. Premiere Pro CC 2015. Configuration Lancez Premiere Pro CC. Sur l'écran de bienvenue, sélectionnez Nouveau projet. Une fenêtre contenant les paramètres du projet apparaît. -
Page 327: Adobe After Effects Cc
Sous le paramètre Propriétés audio et de rendu, choisissez l'option Personnaliser. Capture Sélectionnez Fichier > Acquisition. Cliquez sur le bouton d'enregistrement rouge pour commencer la capture. Cliquez sur le bouton Stop pour arrêter l'enregistrement. Lecture Les paramètres de lecture doivent être sélectionnés à chaque fois qu'un nouveau projet est créé. - Page 328 Blackmagic Playback. Vous pouvez à présent utiliser un moniteur broadcast pour visualiser vos compositions After Effects dans l'espace colorimétrique vidéo souhaité. Vous pourrez voir la couleur et l'entrelacement tout en travaillant et n'aurez ainsi pas à attendre que votre composition soit rendue pour la visualiser en tant que sortie vidéo.
- Page 329 Les autres codecs, notamment ProRes et DVCPRO HD sont disponibles si Final Cut Pro est installé sur votre ordinateur. Codecs AVI sur Windows ‚ Blackmagic 10 bit 4:4:4 non compressé ‚ Blackmagic 10 bit 4:2:2 non compressé ‚ Blackmagic HD 8 bit 4:2:2 non compressé ‚...
-
Page 330: Adobe Photoshop Cc
Adobe Photoshop CC Capturer et acheminer des images vidéo Importer une image dans Photoshop Dans Photoshop, sélectionnez Fichier > Importer> Importer les images Blackmagic. Sélectionnez le format de l'entrée vidéo et la profondeur de bits de l'image puis cliquez sur Importer l'image. -
Page 331: Contrôle De Forme D'onde Avec Blackmagic Ultrascope
1920 x 1200 ou 1920 x 1080 pixels pour la visualisation de 6 scopes simultanés. Consultez les pages d'aide sur www.blackmagicdesign.com/fr pour obtenir une liste exhaustive et récente de la configuration minimale requise pour Blackmagic UltraScope. - Page 332 Blackmagic UltraScope - Affichage plein écran Mode « 2-Up » Affichages Blackmagic UltraScope Le logiciel Blackmagic UltraScope est un excellent outil pour maintenir des niveaux vidéo et audio précis sur la sortie convertie du Teranex. Les scopes utilisés pour contrôler les niveaux incluent le Vecteurscope, la Parade RVB, la Forme d'onde, l'Histogramme et les indicateurs de niveaux audio.
- Page 333 Si vous apercevez des noirs « gris » ou « laiteux » sur votre écran vidéo, ils se situent au-dessus de la ligne représentant 0 IRE. Pour ajuster le niveau de noir, appuyez sur le bouton Blk situé sur la face avant du Teranex et utilisez la molette.
- Page 334 Affichage Histogramme L'histogramme est un autre moyen de vérifier le contraste de l'image. L'axe horizontal représente la plage de luminance. Le noir se situe sur la gauche (0 dans une image 10 bits) et le blanc sur la droite (1023 dans une image 10 bits). Si le contraste de l'image est bon, les informations sont affichées sur l'ensemble de l'axe horizontal.
- Page 335 arrêter l'enregistrement des erreurs, mais aussi sauvegarder le registre sur un fichier ou le supprimer. Ces fonctions peuvent être sélectionnées à partir des boutons situés sur l'affichage Registre d'erreurs ou à partir du menu Error Logging. Les erreurs sont enregistrées avec leur timecode et l'heure de l'enregistrement pour que vous puissiez facilement les retrouver.
-
Page 336: Tableau De Conversion Des Formats
Tableau de conversion des formats Teranex AV et Teranex Express Sortie Entrée • • • • • • • • • • • • • • • • • • • • • • • • • • • • • • • • • 525i59.94 NTSC •... -
Page 337: Teranex 2D
Tableau de conversion des formats Teranex 2D Sortie Entrée • • • • • • • • • • • • • • • • • • • • • • • • • 525i59.94 NTSC • • • • • • • • • • • • • • • • • • • • • • • • • 625i50 PAL •... -
Page 338: Teranex 3D
Tableau de conversion des formats Teranex 3D Sortie Entrée • • • • • • • • • • • • • • • • • • • • • • • • • 525i59.94 NTSC • • • • • • • • • • • • • • • • • • • • • • • • • 625i50 PAL •... -
Page 339: Broches Du Connecteur Db25 Pour Le Teranex 2D
Broches du connecteur DB-25 pour le Teranex 2D Teranex 2D est doté de deux entrées RCA afin de pouvoir connecter deux canaux d'audio analogique aux entrées gauche et droite. Il est également équipé d'un connecteur DB-25 multibroches à l'arrière afin de brancher jusqu'à 4 canaux d'entrées ou de sorties audio analogique. Entrées/Sorties audio analogique Lorsque vous sélectionnez le bouton Anlg situé... - Page 340 Entrées/Sorties audio AES/EBU Appuyez sur le bouton AES situé sur la face avant du Teranex 2D pour sélectionner une entrée audio numérique AES/EBU. La sortie AES/EBU est toujours active. Le connecteur DB-25 permet de connecter jusqu'à 8 canaux d'entrée (4 paires) et 8 canaux de sortie (4 paires) audio symétrique numérique AES/EBU au Teranex 2D.
-
Page 341: Installer Un Module Blackmagic Design Fiber Optic Sfp En Option
Installer un module Blackmagic Design Fiber Optic SFP en option Les modèles Blackmagic Teranex AV et Teranex Express intègrent un logement fibre optique, vous pourrez donc y installer un module Blackmagic Design Fiber Optic SFP en option. Quand le module SFP est installé, vous pouvez connecter vos signaux vidéo jusqu'à... -
Page 342: Supports Pour Le Boîtier Teranex Av
Placez le module SFP directement dans un emballage antistatique. Maintenez le couvercle du logement SFP du Teranex en place lorsque celui-ci n'est pas utilisé. Installer le module SFP dans le Teranex Express Supports pour le boîtier Teranex AV Deux supports pour boîtier sont fournis avec le Teranex AV. Ils peuvent être fixés de part et d'autre du boîtier. -
Page 343: Informations Pour Les Développeurs
Downloading the Free Blackmagic Design SDK The DeckLink SDK can be downloaded from the ‘capture and playback’ section of the Blackmagic Design support center at www.blackmagicdesign.com/support. Joining the Blackmagic Design Software Developers Forum If you’re looking for answers, feedback or suggestions regarding technologies used by Blackmagic Design, such as codecs, core media, APIs, SDK and more, visit the Blackmagic Design Software Developers forum. - Page 344 Connection The Blackmagic Teranex Ethernet Server listens on TCP port 9800. In a Telnet session, type in “telnet” and a space, followed by the IP address of your Teranex, another space and “9800”. For example: telnet 192.168.90.236 9800 Connection Response Upon connection, the Teranex Server sends a complete dump of the state of the device.
- Page 345 VIDEO ADJUST: ↵ Luma low: 4 ↵ Luma high: 1019 ↵ ↵ ANCILLARY DATA: ↵ AFD output line: 11 ↵ CC enabled: false ↵ ↵ VARIABLE ASPECT RATIO: ↵ Variable Aspect Ratio size X left: 0.000000 ↵ Variable Aspect Ratio size X right: 0.000000 ↵ ↵...
- Page 346 ACK ↵ ↵ VIDEO OUTPUT: ↵ Video mode: 1080i5994 ↵ Aspect ratio: Anamorphic ↵ Video demux mode: SingleLink ↵ Video pixel format: YCbCr422 ↵ Analog output: Component ↵ ↵ Retrieving Device Information The “Teranex Device” command returns information about the connected device: TERANEX DEVICE: ↵...
- Page 347 Protocol Commands Command Command Description Align size X left: 0.000000 Set the Horizontal Size (X) (Zoom) value for the Left Eye. Negative values decrease size; positive values enlarge the image. Default = 0 Align size X right: 0.000000 Set the Horizontal (X) Size (Zoom) value for the Right Eye. Negative values decrease size;...
- Page 348 Ancillary Data Teranex processors support closed captions, timecode and video indexing in the ancillary data. Closed Captions Command Command Description CC enabled: Enable Closed Caption processing. True=ON; False=OFF; (Default = False) CC input line: Analog CC input line selection. Range is 20 to 22. Default = 21 CC output line: Analog CC output line selection.
- Page 349 Video Indexing Command Command Description Index reaction: Values are: On, Off (Default = Off) AFD insert type: Values are: Off, Auto, Bypass, or AFD codes 0000 - 1111. For details, see the AFD Insertion Menu topic in the user manual. AFD output line: Range is format dependent.
- Page 350 Command Command Description AudioInLevel4: Set audio level (gain) for Channel 5 AudioInLevel5: Set audio level (gain) for Channel 6 AudioInLevel6: Set audio level (gain) for Channel 7 AudioInLevel7: Set audio level (gain) for Channel 8 AudioInLevel8: Set audio level (gain) for Channel 9 AudioInLevel9: Set audio level (gain) for Channel 10 AudioInLevel10:...
- Page 351 Command Command Description AudioOut4: Select source to be mapped to output Ch 5. AudioOut5: Select source to be mapped to output Ch 6. AudioOut6: Select source to be mapped to output Ch 7. AudioOut7: Select source to be mapped to output Ch 8. AudioOut8: Select source to be mapped to output Ch 9.
- Page 352 Please note: AudioInPair0: refers to input pair 1, AudioInPair1: refers to input pair 2, etc. Command Command Description AudioInPair0: Select source to be mapped to input pair 1 AudioInPair1: Select source to be mapped to input pair 2 AudioInPair2: Select source to be mapped to input pair 3 AudioInPair3: Select source to be mapped to input pair 4 AudioInPair4:...
- Page 353 MODE3D The MODE3D commands are available in the Teranex 3D only. See the “3D Menu Settings” section of this user manual for details. Example: MODE3D: ↵ 3D MODE: 3DModeAlign ↵ ↵ ACK ↵ ↵ MODE3D: ↵ 3D mode: 3DModeAlign ↵ 3D roll left: 0 ↵...
- Page 354 ACK ↵ ↵ MODE3D: ↵ 3D roll left: 20 ↵ 3D roll right: 0 ↵ ↵ Command Command Description 3D roll left: Adjust the Left Eye Z axis image rotation. Range is -400 to +400 units. (Default = 0) 50 units = 1 degree. (1 unit = 0.02 degree) 3D roll right: Adjust the Right Eye Z axis image rotation.
- Page 355 Noise Reduction Command Command Description Enabled: Enable Noise Reduction. False = OFF; True = ON Bias: Adjust the Bias level. Range is -3 to +3 Split screen: Enable NR before/after split screen. False = OFF; True = ON Red overlay: Enable NR Red Overlay.
- Page 356 Teranex Device Command Command Description Model name: Display the Teranex model name. Software Version: Display the checksum of the installed software release. FPGA Version: Display the FPGA version of the installed software release. Panel lock: Remotely lock the front panel of the device, preventing local operation.
- Page 357 Command Command Description Variable Aspect Ratio size X left: Adjust horizontal image size. Negative values decrease size; positive values enlarge the image. Default = 0 Variable Aspect Ratio size X right: Adjust horizontal image size of the Teranex 3D right eye output. Negative values decrease size;...
- Page 358 Command Command Description Chroma high: Set chrominance high level value to clip overshoots. Range is 5 to 1019 (Default = 1019) Aspect fill luma: Set luminance (Y) value for letterbox or pillarbox fill color. Range is 64 to 940 (Default = 64) Aspect fill Cb: Set B-Y value for letterbox or pillarbox fill color.
- Page 359 Command Command Description Signal present: True indicates presence of input video. False indicates no input video is present. Cannot be changed by the user. Timecode present: Detected indicates presence of timecode. None indicates no timecode is present. Cannot be changed by the user. Closed captioning present: Detected indicates presence of closed captions.
- Page 360 Command Command Description Still frame present: For Teranex AV only. True = still frame has been stored at the current output format. False = no still frame has been stored at the current output format. Cannot be changed by the user. Still load complete: For Teranex AV only.
-
Page 361: Schémas Représentant La Face Avant Et La Face Arrière
Schémas représentant la face avant et la face arrière Teranex AV VIDEO AUDIO FORMAT FRAME RATE ASPECT MENU VIDEO PRESETS AUDIO STATUS PANEL 23.98 ANAM 14:9 HOME GAIN EMBED LOCK LBOX CCUT MENU HDMI 1080 PBOX ZOOM SYSTEM STATUS ULTRA 29.97 59.94 MENU... -
Page 362: Assistance
Après avoir vérifié quelle version du logiciel Blackmagic Teranex Setup est installée sur votre ordinateur, veuillez vous rendre sur la page d’assistance technique Blackmagic Design à l’adresse suivante www.blackmagicdesign.com/fr/support pour vérifier les dernières mises à jour. Même s'il est généralement conseillé d'installer les dernières mises à jour, il est prudent d’éviter d’effectuer ces mises à... -
Page 363: Avertissements
Avertissements Caution: Risk of Electric Shock On the Teranex Processor enclosure you will see a yellow warning label marked ‘Caution: Risk of Electric Shock’. This is intended to warn users that there may be the presence of uninsulated “dangerous” voltage within the Teranex Processor enclosure which may be of sufficient magnitude to constitute a risk of electric shock to the user. -
Page 364: Garantie
Garantie Garantie limitée à 12 mois Blackmagic Design garantit que les produits Teranex seront exempts de défauts matériels et de fabrication pendant une durée de 12 mois à compter de la date d'achat. Si un produit s’avère défectueux pendant la période de garantie, Blackmagic Design peut, à sa seule discrétion, réparer le produit défectueux sans frais pour les pièces et la main-d’œuvre, ou le remplacer. - Page 365 Installations- und Bedienungsanleitung Teranex Processors Juni 2017 Deutsch...
- Page 366 Willkommen Wir freuen uns sehr, dass Sie sich für Ihre Einrichtung für einen Blackmagic Design Teranex entschieden haben. Beim Teranex Prozessor handelt es sich um einen Normwandler von beeindruckender Qualität. Entdecken Sie seine zahlreichen tollen Funktionen und genießen Sie viele Stunden des Experimentierens.
- Page 367 Inhaltsverzeichnis Teranex Processors Erste Schritte Teranex Processor Einstellungen Anschließen an das Stromnetz Einstellungen im „Video“-Menü Anschließen von Videogeräten Einstellungen im „Audio“-Menü Anschließen von Audiogeräten „Noise Reduction“ (Rauschreduzierungs-Menü) Konvertierungen Einstellungen im „Ancillary Data“-Menü Einstellen der Latenz beim Teranex AV „System Setup“ (Systemkonfiguration) Installation der Verwaltungssoftware Einstellungen im „3D“-Menü...
-
Page 368: Erste Schritte
Erste Schritte Anschließen an das Stromnetz Die Inbetriebnahme des Teranex Prozessors ist denkbar einfach: Schließen Sie ein Stromkabel an und verbinden Sie Ihre Geräte für die Ein- und Ausgabe von Signalen. Stecken Sie hierfür ein IEC-Kabel in die Strombuchse am Geräterücken Ihres Teranex und in eine Steckdose. -
Page 369: Einstellen Der Latenz Beim Teranex Av
Nachdem Sie die Eingabe vorgegeben haben, können Sie die Ausgabeeinstellungen für Ihre gewünschte Konvertierung auswählen. VIDEO AUDIO FORMAT FRAME RATE ASPECT MENU VIDEO PRESETS AUDIO STATUS PANEL EMBED 23.98 ANAM 14:9 HOME GAIN LOCK LBOX CCUT MENU HDMI 1080 PBOX ZOOM SYSTEM STATUS 29.97... -
Page 370: Installation Der Verwaltungssoftware
Zugriff auf alle Einstellungen für angeschlossene Teranex Normwandler erfolgt per Klick auf das Einstellungs-Icon des jeweiligen Geräts auf der Startseite. Installation unter Mac OS X Laden Sie die Blackmagic Teranex Setup Software von www.blackmagicdesign.com/de herunter. Entpacken Sie die heruntergeladene Datei und öffnen Sie das angezeigte Disk-Image, um den Inhalt zu sichten. -
Page 371: Aktualisierung Der Produktsoftware
Benutzen Sie Blackmagic Teranex Setup, um Ihren Teranex Prozessor zu aktualisieren und um über einen Mac-OS-X- oder Windows-Computer aus der Ferne Einstellungen zu ändern Aktualisierung der Produktsoftware Vergewissern Sie sich unbedingt, dass Ihr Teranex Prozessor mit Strom versorgt wird, ehe Sie ihn über ein USB-Kabel an Ihren Rechner anschließen. -
Page 372: Anschlüsse
Anschlüsse Die Art der vorhandenen Anschlüsse richtet sich nach dem Modell Ihres Teranex Prozessors. In der Regel können alle Teranex Prozessoren SDI-Signale wandeln. Einige Modelle beherrschen überdies Konvertierungen von HDMI- und Analogvideo. Orientieren Sie sich bitte an den für Ihr jeweiliges Teranex Modell relevanten Informationen in diesem Handbuch. -
Page 373: Teranex Av
VIDEO AUDIO FORMAT FRAME RATE ASPECT MENU VIDEO 23.98 ANAM 14:9 HOME GAIN EMBED LBOX CCUT MENU Teranex AV HDMI 1080 PBOX ZOOM ULTRA 29.97 59.94 MENU ANLG SMART SHARP VIDEO AUDIO FORMAT FRAME RATE ASPECT MENU VIDEO REF OUT CH A CH B PUSH... -
Page 374: Teranex 2D
VIDEO AUDIO FORMAT FRAME RATE ASPECT MENU VIDEO EMBED 23.98 ANAM 14:9 HOME GAIN LBOX CCUT MENU Teranex 2D HDMI 1080 PBOX ZOOM 29.97 59.94 MENU ANLG ANLG SMART SHARP 1080 REF IN Y/NTSC/PAL IN B-Y IN R-Y IN Y/NTSC/PAL OUT B-Y OUT R-Y OUT ANALOG AUDIO IN/OUT... -
Page 375: Teranex 3D
VIDEO AUDIO FORMAT FRAME RATE ASPECT MENU VIDEO 23.98 ANAM 14:9 HOME GAIN EMBED LBOX CCUT MENU Teranex 3D HDMI 1080 PBOX ZOOM 29.97 59.94 MENU ANLG ANLG SMART SHARP 1080 VIDEO AUDIO FORMAT FRAME RATE ASPECT MENU VIDEO DOLBY METADATA REMOTE IN/OUT REF IN Y/NTSC/PAL IN... -
Page 376: Einstellungen Ändern
DOLBY METADATA Analoge Videoeingänge 1 DB9-Anschluss unterstützt 1 BNC-Buchse für die Eingabe von Y-, Dolby-Metadaten bei Einsatz NTSC-, PAL-, Komponenten- und von RS-485 FBAS-Signalen. 1 BNC-Buchse für eingehende B-Y- REMOTE IN/OUT Komponentensignale. 1 DB9-Buchse dient als Sony™- 1 BNC-Buchse für eingehende R-Y- kompatibler RS-422- Komponentensignale. -
Page 377: Ausgabeeinstellungen
Wählen Sie anhand der VIDEO-Tasten den gewünschten SDI-, HDMI-, Analog- oder Glasfasereingang. Welche Eingänge verfügbar sind, richtet sich nach Ihrem Teranex Modell. Nach Auswahl der Videoeingabe erscheint das entsprechende Bild auf dem integrierten LCD. Ihr Teranex erkennt das Eingabeformat automatisch und lässt die korrespondierenden Tasten inklusive Format und Framerate aufleuchten. -
Page 378: Die Frontblende Im Überblick
Ihr konvertiertes Video erscheint nun auf dem LCD und liegt an allen relevanten Videoausgängen an. Die Konvertierungsqualität lässt sich durch Justieren der Einstellungen in den Menüs „Proc Amp“ und „Video“ optimieren. Bspw. Rauschreduzierung, Kadenzbereinigung, Farbkorrektur, Schärfe und mehr. Weitere Informationen zu den Einstellungen Ihres Teranex und wie sie in Einklang miteinander funktionieren finden in den Abschnitten „Teranex Processor Einstellungen“... - Page 379 VIDEO AUDIO FORMAT FRAME RATE ASPECT MENU VIDEO System Video Main Menu Setup 23.98 ANAM 14:9 HOME GAIN EMBED Audio MENU LBOX CCUT HDMI 1080 PBOX ZOOM Noise Reduction 29.97 59.94 MENU Ancillary ANLG ANLG SMART SHAR 1080 Data FRAME RATE ASPECT MENU...
-
Page 380: Presets (Voreinstellungen)
Presets (Voreinstellungen) Benutzen Sie die sechs PRESET-Tasten, um Ihre Konvertierungseinstellungen zu speichern und später wieder abzurufen. Presets lassen sich auch anhand des Blackmagic Teranex Setup Dienstprogramms speichern, abrufen und und mit deskriptiven Namen versehen. Presets speichern alle Betriebsparameter Ihres Teranex für den späteren Abruf. Sie können bspw. maßgeschneiderte Einstellungen für Proc Amp oder Seitenverhältnisse ablegen, um sie für eine Produktion auf Anhieb parat zu haben. -
Page 381: Anschluss An Ein Netzwerk
Leuchtende Systemstatus-LEDs zeigen Ihnen Folgendes an: Videoeingabe ist vorhanden Externe Referenz ist ausgewählt und eine externe Referenzeingabe ist vorhanden Stromversorgung 1 ist betriebsbereit Stromversorgung 2 ist betriebsbereit. Betrifft nur den Teranex 2D und den Teranex 3D. Videoeingabe oder -ausgabe enthält Timecode Videoeingabe oder -ausgabe enthält geschlossene Untertitel <-->... -
Page 382: Einstellungen Mit Blackmagic Teranex Setup Ändern
Einstellungen mit Blackmagic Teranex Setup ändern Das Blackmagic Dienstprogramm „Blackmagic Teranex Setup“ lässt Sie den Status Ihres Teranex Prozessors intuitiv überblicken und ermöglicht seine ortsunabhängige Fernsteuerung über Ihr Ethernet-Netzwerk. Mit dieser praktischen Software können Sie Ihren Teranex fernsteuern, ohne auf die Frontblende zuzugreifen. - Page 383 So fügen Sie einen Teranex Prozessor mit Teranex Setup hinzu: Klicken Sie auf das „+“-Symbol links unten im Login-Fenster, um ein Gerät hinzuzufügen. Geben Sie die IP-Adresse ein und klicken Sie auf „Add“ (Hinzufügen). Der Teranex Prozessor erscheint nun in Form eines weiteren steuerbaren Geräts in Ihrem Netzwerk.
- Page 384 „Configure“ (Konfigurieren) Die Registerkarte „Configure“ zeigt den Namen und die IP-Adresse des von Ihnen gesteuerten Teranex an. Sie können dem Prozessor einen Eigennamen geben. So ist er auch bei Verwendung mehrerer Teranex Geräte innerhalb Ihres Systems leicht auffindbar. Klicken Sie einfach auf das Feld „Name“ und geben Sie einen neuen Namen für das Gerät ein. Dieser Name erscheint, wenn Sie im Teranex Setup Dienstprogramm einen Teranex Prozessor auswählen und wird nach erfolgtem Anschluss auch in der Kopfzeile des Dienstprogramms eingeblendet.
- Page 385 Sperren des Bedienfelds aus der Ferne Sie können die Teranex Frontblende aus der Ferne sperren, um versehentliche Änderungen durch jemanden zu verhindern, der die Frontblende vor Ort bedient. Klicken Sie im „Gear“-Menü auf „Panel Lock“ oder „Panel Unlock“, um die Frontblende zu sperren bzw. zu entsperren. Die PANEL-LOCK-Taste an der Frontblende leuchtet rot, wenn die Frontblende gesperrt ist.
-
Page 386: Umwandlung Des Bildseitenverhältnisses
Umwandlung des Bildseitenverhältnisses Die Umwandlungstabelle zeigt Ihnen auf übersichtliche Weise, wie die einzelnen Seitenverhältnisse in Ihrer Konvertierung erscheinen werden. Sie dient als praktischer Helfer, damit Sie jede Einstellung optisch identifizieren und Ihre Auswahl schneller treffen können. Upkonvertierung Eingabe 4:3 Ausgabe 16:9 PBOX Stellt ein 4:3-SD-Bild in einem Pillarbox... - Page 387 Konvertierung von 16:9-SD-Breitbild zu 4:3-SD Während SD-Programme in der Regel im Bildseitenverhältnis von 4:3 vorliegen, gibt es einige Quellen, die im Breitbildformat 16:9 aufgezeichnet wurden. Um SD-Breitbildeingaben richtig verarbeiten zu können, muss der Teranex Prozessor so konfiguriert sein, dass er die Quelle als 16:9-Signal erkennt.
-
Page 388: Konvertierungs-Workflows
Konvertierungs-Workflows Dieser Abschnitt der Bedienungsanleitung erklärt die Einrichtung von Workflows für die wichtigsten Konvertierungen, die mit Ihrem Teranex Prozessor möglich sind. Alle Umwandlungen wie bspw. Normwandlungen, Up-, Down- und Crosskonvertierungen erfolgen in den gleichen generellen Setup-Schritten über das Bedienfeld. Sie erfahren wie man Presets (Voreinstellungen) für häufig gebrauchte Konvertierungen speichert und wieder abruft, und wie man Kadenzeinstellungen zum Bereinigen oder Entfernen von Kadenzfehlern in Material mit 3:2 Pull-Down vorgibt. -
Page 389: Upkonvertierung Zu Ultra Hd Mit Dem Teranex Av Und Teranex Express
Drücken Sie die 1080-Taste. Betätigen Sie nun die P-Taste zur Ausgabe progressiver Signale und dann die 29.97/30-Taste zur Wahl der Bildwechselfrequenz. Die FORMAT-, FRAME- und RATE-Tasten leuchten grün auf. Sie können nun Ihre Konvertierungseinstellungen anwenden oder Änderungen vornehmen. Wählen Sie mithilfe der Menü-Multifunktionstasten „Change“ (Ändern). Die Videoausgabe wird nun auf dem LCD angezeigt und an alle Ausgänge ausgegeben. -
Page 390: Downkonvertierung
Eingabeeinstellungen Drücken Sie die IN-Taste im Bedienfeld des Teranex und wählen Sie in der VIDEO- Tastenreihe SDI aus. Ihr Teranex erkennt automatisch das Eingabeformat, stellt die Videoeingabe auf dem LCD dar und lässt die entsprechenden Tasten aufleuchten. Der Audioeingabetyp EMBED ist illuminiert. VIDEO AUDIO FORMAT... - Page 391 Versorgen Sie Ihren Teranex Prozessor mit Strom und schließen Sie Ihre Videoein- und -ausgabequellen an. Eingabeeinstellungen Drücken Sie die IN-Taste im Bedienfeld und wählen Sie anschließend SDI in der VIDEO- Tastenreihe aus. Der Teranex zeigt daraufhin die Videoeingabe auf dem LCD an. Er erkennt das Eingabeformat automatisch und lässt die entsprechenden Tasten aufleuchten.
-
Page 392: Crosskonvertierung
TIPP Weitere Informationen zur Umwandlung von Bildseitenverhältnissen finden Sie im Abschnitt „Aspect“ auf Seite 398 und Umwandlung des Bildseitenverhältnisses auf Seite 386. Crosskonvertierung Mithilfe der Crosskonvertierung können Sie die Auflösung und/oder das Seitenverhältnis Ihres Videos verändern. Dank eines erstklassigen Deinterlacing-Algorithmus können Crosskonvertierungen von HD-Formaten zwischen 1080 und 720 mit progressiver Abtastung vorgenommen werden. -
Page 393: Normwandlung
Einstellen des Bildseitenverhältnisses für die Ausgabe Drücken Sie die LBOX/PBOX-Taste, um das Bildseitenverhältnis auf „Letterbox“ einzustellen. Ihr Teranex Prozessor ist nun für die Crosskonvertierung Ihres Videos bereit. Ansicht im 4:3-Format Bild im 16:9-Format Durch Betätigung der LBOX/PBOX-Taste wird das 16:9-Bild Ihrer SD-Ausgabe an das 4:3-Format angepasst. - Page 394 Wählen Sie mithilfe der Menü-Multifunktionstasten „Change“ (Ändern). Die Videoausgabe wird nun auf dem LCD angezeigt und an alle Ausgänge ausgegeben. Die Tasten leuchten außerdem blau, was Ihre Einstellungen bestätigt. VIDEO AUDIO FORMAT FRAME RATE ASPECT 23.98 ANAM 14:9 EMBED LBOX CCUT HDMI 1080...
-
Page 395: Kadenzentfernung
Kadenzentfernung Die Kadenzentfernung beinhaltet auch das Entfernen der 3:2-Pulldown-Sequenz. Das 3:2-Pulldown- Verfahren wird für die Umwandlung von Telecine Film mit 24 Vollbildern pro Sekunde in Video mit 59,94 Halbbildern pro Sekunde angewendet. Teranex Prozessoren entfernen die Kadenz bei der Konvertierung von Video mit 3:2-Pulldown zu 24 Vollbildern pro Sekunde automatisch. VIDEO AUDIO FORMAT... -
Page 396: Geringste Latenz Bei Normwandlungen Mit Dem Teranex Av
Drücken Sie die HOME-Taste in der MENU-Tastenreihe und wählen Sie dann „Video“ > „Advanced“ > „Clean Cadence“. Benutzen Sie den Drehregler oder die Menü-Multifunktionstasten, um die Option „Clean Cadence“ auf „On“ (Eingeschaltet) zu setzen. Das Ausgabeformat in 1080i/59,94 wird somit über eine reine 3:2-Kadenz verfügen. Vergessen Sie nicht, die Option „Clean Cadence“... -
Page 397: Einbetten Von Audio
Drücken Sie die UltraHD-Taste. Die Taste leuchtet grün auf. Betätigen Sie nun die P-Taste zur progressiven Abtastung und dann die 59.94-Taste zur Wahl der Bildwechselfrequenz. Diese Tasten leuchten ebenfalls grün auf. Wählen Sie mithilfe der Menü-Multifunktionstasten „Change“ (Ändern). Die Videoausgabe wird nun auf dem LCD angezeigt und an alle Ausgänge ausgegeben. -
Page 398: Einstellungen Im „Video"-Menü
Die Taste leuchtet auf, was auf eine gespeicherte Seite hinweist. Künftig wird das LCD bei Drücken der Taste direkt zur gespeicherten Seite wechseln. FORMAT FRAME RATE ASPECT MENU VIDEO PRESETS AUDIO STATUS System Video Main Menu PANEL 23.98 ANAM 14:9 Setup HOME GAIN... - Page 399 „Adjust Aspect“ Verwenden Sie die Menü-Multifunktionstasten und den Drehregler, um die Bildseitenverhältnis-, Positions- und Trimm-Einstellungen zu definieren. Size Die Größeneinstellung passt die horizontalen und/oder vertikalen Bildmaße an. Der Bereich liegt zwischen circa -50 bis +200 Prozent. Position Hiermit können Sie die Positionierung des Eingabebildes im ausgegebenen Bild ändern. Der Bereich möglicher Positionierungen hängt von der Größe des aktuellen Bildes ab.
- Page 400 „Setup“ im „Video“-Menü Über den Menüpunkt „Setup“ im „Video“-Menü können Sie die Videoparameter für Ihre analogen, SDI- und HDMI-Eingaben bzw. -Ausgaben vorgeben. Welche Menüs verfügbar sind, hängt vom verwendeten Modell ab. „No Video Input“-Menü Wählen Sie in diesem Menü, ob Sie schwarzen Bildinhalt oder Farbbalken ausgeben wollen, wenn keine Videoeingabe erkannt wird.
- Page 401 „Video Sampling“ (nur beim Teranex 3D Processor) Der Menüpunkt „Video Sampling“ (Videoabtastfrequenz) erlaubt für den Teranex 3D Processor die folgenden Samplingtypen: ‚ 4:2:2 – YUV ‚ 4:4:4 – YUV ‚ 4:4:4 – RGB Proc Video No Video Color Video Setup Input Sampling 4:2:2 YUV...
- Page 402 Die Quad-HD-Ausgänge werden wie folgt belegt: ‚ SDI-Ausgang A: Teilbild 1 ‚ SDI-Ausgang B: Teilbild 2 ‚ SDI-Eingang mit Durchschleifung A: Teilbild 3 ‚ SDI-Eingang mit Durchschleifung B: Teilbild 4 Out A Out B Loop A Loop B Ultra-HD-Vollbild Quad HD Split Ausgabe Proc No Video Color...
- Page 403 TIPP Diese Einstellungen sind nur dann gültig, wenn 3G-SDI-Video ausgegeben wird. Bei 3G-SDI-Eingaben werden Level-A- und Level-B-Signale automatisch erkannt. „Quad SDI Output“ (nur beim Teranex AV) Der Teranex AV bietet kontinuierliche Quad-SDI-Ausgaben über vier dedizierte BNC-Verbinder, wenn Ultra-HD-Ausgabeformate verwendet werden. Die Anschlüsse für die BNC-Ausgabe sind mit„CH A“, „CH B“, „CH C“...
- Page 404 Nach der Anpassung leuchten die betroffenen Tasten weiß, um eine nicht standardgemäße Einstellung anzuzeigen. Um zu den Standardeinstellungen zurückzukehren, wählen Sie den jeweiligen Parameter im Menü „Proc Amp“ aus und drücken Sie den Drehregler. Um alle Parameter mühelos auf ihre Standardeinstellungen zurückzusetzen, gehen Sie ins Menü „Proc Amp“ und wählen Sie „Reset All“...
- Page 405 Res Chart (Auflösungstabelle) Grid (Raster) Testmuster beim Teranex AV Zusätzlich zu den oben abgebildeten Testmustern verfügt der Teranex AV über ein Menü für Musterbewegungen und ein integriertes Audio-Testtonmenü. ‚ Test Patterns Wählen Sie „Test Patterns“ (Testmuster), um das gewünschte Videotestsignal auszuwählen. ‚...
- Page 406 Die „Setup“-Registerkarte im Blackmagic Teranex Setup Dienstprogramm enthält eine Bewegungssteuerung, eine Auswahl an Videotestmustern sowie Audiotesttöne „Advanced“ Ihr Teranex Prozessor verfügt über die folgenden Features zur Kadenzberichtigung: „Clean Cadence“ beim Teranex 2D und 3D Kreiert eine saubere 3:2-Pulldown-Sequenz in Ihrer 59,94-Videoausgabe. „Clean Cadence“-Einstellungen Schalten Sie „Clean Cadence“...
- Page 407 „Scene Detect“ Die Erkennung von Szenenwechseln minimiert das Vermischen der Schnitte zwischen Halbbildern und bewirkt reiner aussehende Ausgaben. Diese Funktion verhindert, dass Halbbilder aus vorherigen Szenen in neue Szenen geraten. ‚ On (Ein) Aktiviert die Erkennung von Schnitten zwischen Szenen ‚...
-
Page 408: Einstellungen Im „Audio"-Menü
Einstellungen im „Audio“-Menü Im „Audio“-Menü kann man über „Output Mapping“ eingehenden Audiokanälen Ausgänge zuordnen, Verstärkung und Verzögerung steuern und auf gewisse Parameter für das Setup zugreifen. Beim Teranex 2D gestattet der Menüpunkt „Input Mapping“ (Eingangsbelegung) die gleichzeitige Auswahl von Kanälen aus eingebetteten, AES- und/oder anlogen Eingabequellen. „Output Mapping“... - Page 409 Output Mapping Output Mapping Output Mapping Prev Next Prev Next Prev Next Channel 1 Source Channel 4 Source Channel 13 Source Input 1 Input 1 Tone .75 kHz Input 2 Input 2 Tone 1.5 kHz Input 3 Input 3 Tone 3 kHz Input 4 Input 4 Tone 6 kHz...
- Page 410 ‚ Bei Belegung Ihres AES-Eingangs mit Dolby-verschlüsseltem Ton kann AES nicht mit anderen Audioeingabetypen gemischt werden. Geben Sie in dieser Situation als Eingabetyp AES vor. Input Mapping Input Mapping Prev Next Prev Next Input 1/2 Source Input 3/4 Source Embedded 1/2 AES 5/6 Embedded 3/4 Embedded 5/6...
- Page 411 HINWEIS Der Eingabepegel von RCA-Audio bleibt durch diese Einstellung unberührt. Bewegen Sie zum Justieren den Drehregler. Der Anpassungsbereich liegt zwischen -12 bis +12 dB. Durch Drücken des Drehreglers wird der Pegel auf Null zurückgesetzt. System Output Input Analog Analog Video Main Menu Audio Setup Setup...
- Page 412 Audiopegelmesser (nur beim Teranex AV) Beim Teranex AV können Sie wählen, welches Audioeingabe- oder Audioausgabepaar auf dem LCD an der Frontblende angezeigt werden soll. Die Kanalnummern werden zur Bestätigung unter den Metern eingeblendet. System Output Audio Video Main Menu Audio Setup Mapping Meters...
- Page 413 Beim Teranex 3D lassen sich Dolby-Metadaten – sofern ein Dolby-Dekodierer installiert ist – dem eingehenden Dolby-Audio entnehmen. Die Eingabe von Metadaten geht auch in Form serieller Daten über den 9-poligen Dolby-Metadatenanschluss an der Rückseite des Teranex 3D. Der Teranex 3D erlaubt Ihnen auch die Erstellung eigener Metadaten.
-
Page 414: Noise Reduction" (Rauschreduzierungs-Menü)
Parameter der Metadaten Stereo Original Bitstream Extended Bitstream Info 1 Preferred Stereo Downmix Nicht angezeigt Nicht angezeigt Lt/Rt Center Downmix Level -3 dB -3 dB Lt/Rt Surround Downmix Level -3 dB -3 dB Lo/Ro Center Downmix Level -3 dB -3 dB Lo/Ro Surround Downmix Level -4.5 dB -4.5 dB Extended Bitstream Info 2 Dolby Surround EX Mode... - Page 415 „Bias“ Justieren Sie das „Bias“-Level, um das Maß der Rauschreduzierung festzulegen. Je höher der „Bias“-Wert, desto aggressiver die Rauschreduzierung. ‚ Der „Bias“-Bereich liegt zwischen -6 und +6 ‚ Der Standardwert beträgt 0 Split Enable Set Value Screen Bias Overlay „Noise Reduction“-Menü > „Bias“ „Split Screen“...
-
Page 416: Einstellungen Im „Ancillary Data"-Menü
Einstellungen im „Ancillary Data“-Menü Über das Menü „Ancillary Data“ (Zusätzliche Daten) erhalten Sie Zugriff auf Features wie „Closed Captions“ (geschlossene Untertitel), „Timecode“ und „Video Index“. „Closed Caption“ (Geschlossene Untertitel) Über das Menü „Closed Caption“ können Sie geschlossene Untertitel für die Standards CEA-608B und CEA-708B konfigurieren. - Page 417 „CC Enable“ „CC Enable“ ist standardmäßig ausgeschaltet („Off“). Um geschlossene Untertitel zu aktivieren, gehen Sie zu „Main Menu“ > „Ancillary Data“ > „Closed Caption“ > „CC Enable“ und wählen Sie mithilfe der Menü-Multifunktionstasten oder des Drehreglers „On“. Die Deaktivierung von Untertiteln kann hilfreich sein, wenn Untertiteldaten fehlerhaft oder nicht lesbar sind.
- Page 418 „Service 1 Language“ Über „Service 1 Language“ (Service-1-Sprache) können Sie die für den Service genutzte Sprache im Untertitelformat CEA-708 wählen. ‚ Folgende Sprachen stehen zur Wahl: Englisch Französisch Deutsch Italienisch Spanisch ‚ Die voreingestellte Sprache ist Englisch. Service 2 Set Value Enable Source English...
- Page 419 „Timecode Generator“ Über den Menüpunkt „Timecode Generator“ können Sie zwischen vier vorhandenen Timecode-Modi wählen oder eine manuelle Verarbeitung des Timecodes deaktivieren. „Off“ Es werden keine Timecode-Daten in die Videoausgabe eingefügt. Dies ist die Standardeinstellung. Video Closed Ancillary Data Prev Timecode Next Caption Index...
- Page 420 Video Closed Ancillary Data Prev Timecode Next Caption Index Timecode Start Timecode Generator Input Input Regen Start Timecode Source Generate Jam Sync Setup „Timecode“-Menü > „Ancillary Data“-Menü > „Input Regen“ „Timecode“ „Generate“ Der Timecode-Generator erzeugt entsprechend des gewählten Ausgabeformats einen unabhängigen fortlaufenden Timecode, auch wenn in Ihrem Videoeingabesignal kein Timecode enthalten ist.
- Page 421 ‚ Set Timecode Die Menüoptionen unter „Set Timecode“ (Timecode einstellen) werden von Ihrer Auswahl im Menü „Start Source“ (Startquelle) bestimmt. Prev Timecode Next Start Value Timecode Start Generator Input Jam Sync Start Timecode Source 00:00:00:00 Setup „Jam Sync“ > „Set Timecode“ ‚...
-
Page 422: System Setup" (Systemkonfiguration)
„AFD Insertion“ Dieser Menüpunkt gestattet die Auswahl des AFD-Codes, der in das Ausgabevideo eingefügt wird. Die Auswahl der Ausgabezeile, in die der Code eingefügt wird, erfolgt im Menüpunkt „AFD Insert Line“. ‚ Verfügbare Einstellungen sind: Es wird kein AFD-Code an der für Zusatzdaten vorgesehenen Stelle der Ausgabe eingefügt. Auto Der entsprechende Code wird basierend auf dem Format der aktuellen Videoausgabe eingefügt. - Page 423 „Ethernet“ Über den Menüpunkt „Ethernet“ können Sie sich die aktuellen Einstellungen anzeigen lassen und neue Einstellungen für eine statische IP-Adresse, Subnetz-Adresse und ein IP-Gateway vorgeben. In diesem Menüpunkt können Sie DHCP ein- oder ausschalten („On“ oder „Off“). Wenn DHCP aktiviert ist („On“), werden unter den Menüpunkten „Subnet Mask“ und „Gateway“ die dem Gerät aktuell vom DHCP-Server zugewiesenen Adressen angezeigt.
- Page 424 ‚ ON In diesem Status akzeptiert der Teranex Prozessor eine durch Ihren Netzwerkrouter zugeordnete IP-Adresse. ‚ OFF Wurde dem Gerät bereits eine statische IP-Adresse zugeordnet, wird diese benutzt. Wenn Sie bei eingeschaltetem DHCP („On“) die IP-Taste drücken, ist die IP-Adresse 0.0.0.0 zu sehen.
- Page 425 ‚ Preview Sobald ein Standbild erfasst wurde, ermöglicht der „Preview“-Button die drei-sekündige Vorschau des Bildes über die Ausgabe des Teranex AV. Ist kein Standbild mit der derzeitigen Ausgabeauflösung vorhanden, wird der „Preview“-Button ausgegraut, um anzuzeigen, dass keine Vorschau abrufbar ist. ‚...
- Page 426 Wenn Sie eine Grafik von einem Computer laden, kann die Datei eine beliebige Auflösung haben. Die Bildkonvertierungssoftware skaliert das Bild automatisch gemäß der Ausgabeauflösung des Teranex AV. Bitte beachten Sie, dass die Skalierung nicht per Teranex Algorithmen vorgenommen wird. Daher erfolgt die Skalierung mit geringerer Qualität als wenn sie intern ausgeführt wird.
- Page 427 ‚ Internal Synchronisiert die Ausgabe des Teranex AV mit seinem internen freischwingenden Oszillator, der für eine kontinuierliche Synchronisierung des ausgehenden Signals sorgt. Das gilt auch, wenn das Eingabesignal geändert wird. System Factory Video Main Menu Ethernet System Setup Setup Reset Audio Reference Noise...
- Page 428 Ausgabeformat und Bildwechselfrequenz Referenzsignal 1080PsF/29,97 Black Burst 59,94; Tri Level Progressive 29,97; Tri Level Interlaced 59,94 1080p/30 Tri Level Progressive 30; Tri Level Interlaced 60 1080PsF/30 Tri Level Progressive 30; Tri Level Interlaced 60 1080i/50 Black Burst 50, Tri Level Interlaced 50 1080p/50 Black Burst 50 1080i/59,94...
- Page 429 „Generate“ (nur beim Teranex AV) Der Teranex AV kann über seinen Referenzausgang als Referenzgenerator genutzt werden. Die Art des Referenzsignals – Black Burst oder Tri Level – hängt vom Ausgabevideoformat des Teranex AV ab. Einige Videoformate gestatten ausschließlich die Verwendung bestimmter Referenztypen. Ein Beispiel: Ist NTSC das Ausgabeformat Ihres Teranex, kann lediglich Black Burst mit 59,94 Hz generiert werden.
- Page 430 Videoausgabeformat Diese Referenzsignale können generiert werden: 1080p/60 Nicht unterstützt 2K DCI 23,98p Tri Level Progressive 23,98 2K DCI 23,98PsF Tri Level Interlaced 47,96 2K DCI 24p Tri Level Progressive 24 2K DCI 24PsF Tri Level Interlaced 48 2160p/23,98 Tri Level Progressive 23,98 2160p/24 Tri Level Progressive 24 2160p/25...
- Page 431 TIPP Wenn Sie schnell auf das Menü „Output Options“ zugreifen möchten, können Sie diese Menüseite der Taste MENU 1 oder MENU 2 an der Frontblende des Teranex AV zuweisen. Input „Input“ bezieht sich auf die Videoeingabe, die zurzeit auf der Frontblende ausgewählt ist. Hierbei kann es sich um SDI 1, SDI 2, HDMI oder den Glasfasereingang handeln, sofern dieser installiert ist.
-
Page 432: Einstellungen Im „3D"-Menü
‚ Die Übergangseinstellung hat keine Auswirkungen auf Freeze Frames. Ist „Freeze“ ausgewählt, schneidet der Teranex AV ungeachtet der Übergangseinstellung sofort zum Freeze Frame. Ton wird dabei stumm geschaltet. Wenn Sie vom Freeze Frame zu einer Eingabe, schwarzem Bildinhalt oder einem Standbild überblenden möchten, werden die oben beschriebenen Regeln der Übergangseinstellung angewandt. - Page 433 „3D Mode“ Im Menüpunkt „3D Mode“ (3D-Modus) signalisiert die Position „Off“ reguläre 2D-Verarbeitung. Zur Aktivierung der 3D-Verarbeitung sind folgende Auswahlmöglichkeiten verfügbar: ‚ Convert Dieser Modus aktiviert die Verarbeitung der stereoskopischen Eingaben für das linke und rechte Auge. Diese können über die SDI- oder HDMI-Eingänge zugeführt werden. In diesem Modus werden auch eingehende stereoskopische Signale synchronisiert.
- Page 434 „Output“ Die Auswahl unter „Output“ im „3D“-Menü gibt die Ausgabeformatierung für Ihr 3D-Bild vor. ‚ Full Frame Liefert voll aufgelöste Ausgaben der Bilder für das linke und rechte Auge über die SDI-Ausgänge A und B. Gleichzeitig wird ein Frame-Packing-Signal am HDMI-Ausgang bereitgestellt. ‚...
- Page 435 Die Tiefeneinstellung verleiht dem gesamten Bild mehr Tiefe. Dies kann zwar den 3D-Effekt intensivieren, meistens empfiehlt es sich jedoch, die Standardeinstellung beizubehalten. ‚ Der Einstellbereich liegt zwischen -12 und +12. Die Standardeinstellung beträgt 0. 3D Mode Intensity Input Depth Camera Output Align „3D“-Menü...
- Page 436 „Rotation“ Das „Rotation“-Menü der Anwendung „Camera Align“ erlaubt Anpassungen der Achsendrehung entlang der X-, Y- und Z-Achse eines Bildes. Diese können entweder individuell oder in beliebiger Kombination der drei Dimensionen vorgenommen werden. Mit Anpassungen der Achsendrehung lassen sich mechanische Ausrichtungsfehler von 3D-Kamerarigs ausgleichen. Position Camera Align Zoom...
- Page 437 Position Camera Align Zoom Roll Z Rotation Left Eye Rotation Trim Tilt X Right Eye Flip Toe-in Y Both Eyes Reset Reset „Camera Align“ > „Rotation“ „Rotation“-Menü > „Toe-In Y“ Position Camera Align Zoom Flip Flip Left Eye Rotation Trim Right Eye Horizontal Vertical...
- Page 438 „Zoom“ Über den Menüpunkt „Zoom“ im „Camera Align“-Menü können Sie das linke und rechte Bild unabhängig voneinander horizontal oder vertikal oder gleichzeitig in beide Richtungen zoomen. ‚ Ein negativer Parameter bedeutet, dass herausgezoomt wird, während ein positiver Parameter anzeigt, dass herangezoomt wird. ‚...
- Page 439 Anschlüsse und weitere wichtige Informationen zu den 3D-Modi In diesem Abschnitt finden Sie Details zu Anschlüssen und zur Handhabung zusätzlicher Daten, die Ihren Workflow beeinflussen. Videoanschlüsse Stereoskopische Videoeingaben für links und rechts sollten jeweils an die SDI-Eingänge A und B angeschlossen werden.
-
Page 440: Aufzeichnung Und Wiedergabe
Programme ist es jedoch ggf. notwendig, die neueste Version der Blackmagic Design Desktop Video Software zu installieren. Diese kann im Blackmagic Design Support Center unter dem folgenden Link heruntergeladen werden www.blackmagicdesign.com/de/support/family/capture-and-playback. Videoaufzeichnung Wenn mit einer Anwendung Video aufgezeichnet wird, erscheint auf dem LCD des Teranex das Wort „Capture“... -
Page 441: Davinci Resolve
Um mit Ihrem Teranex Prozessor Video aufzeichnen zu können, müssen Sie ggf. die neueste Version der Blackmagic Design Desktop Video Software installieren. Die Desktop Video Software können Sie von der Blackmagic Design Website unter dem folgenden Link herunterladen: www.blackmagicdesign.com/de/support/family/capture-and-playback. Aufzeichnung und Wiedergabe... - Page 442 Einrichtung Öffnen Sie „DaVinci Resolve“, klicken Sie im „Preferences“-Menü (Einstellungen) auf die Registerkarte „Video I/O and GPU“ (Videoeingabe/-ausgabe und GPU) und wählen Sie Ihren Teranex unter „For capture and playback use“ (Für Aufzeichnung und Wiedergabe) aus. Speichern Sie Ihre bevorzugten Einstellungen und starten Sie DaVinci Resolve neu, um Ihre Änderungen anzuwenden.
-
Page 443: Avid Media Composer
Wiedergabe Um Ihre Clips im Arbeitsraum „Media“ wiederzugeben, klicken Sie erneut auf das Aufzeichnungssymbol, um das „Capture Info“-Fenster zu schließen. Klicken Sie auf einen von Ihnen aufgezeichneten Clip, um diesen im Viewer anzuzeigen. Benutzen Sie dann lediglich die Transporttasten des Viewers, um Ihren Clip abzuspielen. Schnitt und Farbkorrektur Sobald Sie Ihre Clips aufgezeichnet haben, klicken Sie einfach auf den Arbeitsraum „Edit“... -
Page 444: Apple Final Cut Pro 7
Geben Sie den Projektnamen und die Projektoptionen vor Capture Wählen Sie „Tools“ > „Capture“ aus, um die Registerkarte „Capture Tool“ (Aufzeichnungswerkzeug) zu öffnen. Klicken Sie auf die Schaltfläche „Toggle Source“ (Quelle umschalten), deren Rekordersymbol nun als roter Kreis mit Schrägstrich erscheint. Stellen Sie die Eingabemenüs „Video and Audio“... - Page 445 Apple Final Cut Pro 7 Einrichtung Starten Sie Final Cut Pro 7 und wählen Sie „File“ > „New Project“ (Datei > Neues Projekt) aus. Wählen Sie „File“ > „Save Project As…“ (Datei > Projekt speichern als…) und benennen Sie Ihr Projekt. Klicken Sie im Final Cut Pro Menü...
- Page 446 Wiedergabe Sie können über die Timeline in Final Cut Pro Video auf einem an den Teranex Prozessor angeschlossenen Monitor oder Fernseher anzeigen. Ist auf Ihrem Blackmagic Ausgabegerät kein Video zu sehen, überprüfen Sie erneut die Anschlüsse und stellen Sie sicher, dass Ihre Ausgabeeinstellungen in Final Cut Pro korrekt sind.
-
Page 447: Adobe Premiere Pro Cc
Adobe Premiere Pro CC In diesem Beispiel wird die konvertierte Ausgabe des Teranex im Format 1080i/50 vorliegen und mit einem nicht steuerbaren Gerät aufgezeichnet. Premiere Pro CC 2015 Einrichtung Starten Sie Premiere Pro CC. Wählen Sie im Willkommensfenster „Create New“ > „New Project“... -
Page 448: Adobe After Effects Cc
Stellen Sie die Audio- und Rendereigenschaften auf „Custom“ ein Capture Wählen Sie „File“ > „Capture“ (Datei > Aufzeichnen) aus. Klicken Sie auf die rote Aufnahmeschaltfläche, um mit dem Aufzeichnen zu beginnen. Um die Aufnahme zu stoppen, klicken Sie auf das Stoppsymbol. Wiedergabe Die Wiedergabeeinstellungen müssen für jedes neue Projekt ausgewählt werden. - Page 449 Jetzt können Sie mit einem Broadcast-Monitor Ihre After-Effects-Kompositionen im richtigen Videofarbraum ansehen. So werden Ihnen beim Arbeiten Farbe und Interlacing immer richtig angezeigt und Sie können ohne Warten auf das fertige Rendern sehen, wie sich Ihre Komposition bei der Ausgabe als Video macht. Um auch den Ton über Ihren Teranex Prozessor zu hören, geben Sie unter „Preferences“...
- Page 450 Weitere Codecs einschließlich ProRes und DVCPRO HD sind verfügbar, sofern Final Cut Pro installiert ist. AVI-Codecs unter Windows ‚ Blackmagic 10 Bit 4:4:4 unkomprimiert ‚ Blackmagic 10 Bit 4:2:2 unkomprimiert ‚ Blackmagic HD 8 Bit 4:2:2 unkomprimiert ‚ Blackmagic SD 8 Bit 4:2:2 unkomprimiert ‚...
-
Page 451: Adobe Photoshop Cc
Adobe Photoshop CC Aufgreifen und Ausgeben von Video-Frames Importieren eines Bildes in Photoshop Wählen Sie in Photoshop „File“ > „Import“ > „Blackmagic Image Import“ (Datei > Importieren > Blackmagic Bildimport) aus. Wählen Sie das Videoeingabeformat und die Bild-Bittiefe aus und klicken Sie dann auf „Import Image“... -
Page 452: Verwendung Von Blackmagic Ultrascope Fürs Wellenform-Monitoring
1920 x 1200 oder 1920 x 1080 Pixeln. Die aktuellsten Mindestsystemvoraussetzungen für Blackmagic UltraScope entnehmen Sie bitte der Aufstellung auf den Support-Seiten unter www.blackmagicdesign.com/de. So funktionieren die Blackmagic UltraScope Ansichten Je nach Arbeitserfordernissen und Bildschirmauflösung bietet die Blackmagic UltraScope Software zwei verschiedene Ansichtsmodi. - Page 453 Blackmagic UltraScope – Vollbildansicht Doppelbildansicht Blackmagic UltraScope Anzeigen Die Blackmagic UltraScope Software ist ein hervorragendes Werkzeug zur Erhaltung der akkuraten und zulässigen Broadcastlevel für Video und Audio Ihrer vom Teranex konvertierten Ausgabe. Die für das Monitoring verwendeten Scopes umfassen die Anzeigen RGB-Parade, Wellenform, Vektorskop, Histogramm und Audiometer.
- Page 454 Wenn Sie milchige oder gräuliche Schwarztöne in Ihrer Videoanzeige wahrnehmen, werden diese über der 0-IRE-Linie angezeigt. Um die Schwarztonwerte anzupassen, drücken Sie die BLK-Taste im Bedienfeld des Teranex und verringern Sie den Schwarztonwert mithilfe des Drehreglers. Wenn Sie den Schwarzton auf unter 0 IRE reduzieren, wird das Bild erdrückt und Sie entfernen ggf. Details in den dunklen Bereichen.
- Page 455 Histogramm-Anzeige Auch mit der Histogramm-Anzeige können Sie den Kontrast Ihres Bildes überprüfen. Die horizontale Achse reflektiert das Luminanzspektrum mit Schwarz auf der linken bzw. 0 bei einem 10-Bit-Bild und Weiß auf der rechten Seite bzw. 1023 bei einem 10-Bit-Bild. Bei einer Aufnahme mit guten Kontrasten erfolgt die Anzeige der Bilddaten entlang der gesamten horizontalen Achse.
- Page 456 starten oder stoppen, das Protokoll als Datei speichern oder es löschen. Diese Funktionen werden über die Schaltflächen im „Error Logging Display“ (Fehlerprotokoll-Anzeige) oder über das Pulldown- Menü „Error Logging“ (Fehlerprotokollierung) ausgewählt. Um sie leicht auffindbar zu machen, werden Fehler mit Timecode und Uhrzeit versehen aufgezeichnet.
-
Page 457: Formatkonvertierungstabelle
Formatkonvertierungstabelle Teranex AV und Teranex Express AUSGABE EINGABE • • • • • • • • • • • • • • • • • • • • • • • • • • • • • • • • • 525i/59,94 NTSC •... -
Page 458: Teranex 2D
Formatkonvertierungstabelle Teranex 2D AUSGABE EINGABE • • • • • • • • • • • • • • • • • • • • • • • • • 525i/59,94 NTSC • • • • • • • • • • • • • • • • • • • • • • • • • 625i/50 PAL •... -
Page 459: Teranex 3D
Formatkonvertierungstabelle Teranex 3D AUSGABE EINGABE • • • • • • • • • • • • • • • • • • • • • • • • • 525i/59,94 NTSC • • • • • • • • • • • • • • • • • • • • • • • • • 625i/50 PAL •... -
Page 460: Pinbelegung Des Db25-Anschlusses Beim Teranex 2D
Pinbelegung des DB25-Anschlusses beim Teranex 2D Der Teranex 2D verfügt über zwei RCA-Eingänge, sodass Sie zwei analoge Audiokanäle für links und rechts anschließen können. Außerdem gibt es einen DB25-Multipin-Anschluss an der Rückseite, an den Sie bis zu vier analoge Audiokanäle – sowohl Eingaben als auch Ausgaben – anschließen können. - Page 461 AES/EBU-Audioeingänge/-ausgänge Drücken Sie die AES-Taste auf der Frontblende des Teranex 2D, um den digitalen AES/EBU- Audioeingang anzuwählen. Der AES/EBU-Ausgang ist immer aktiv. Ein DB25-Anschluss dient zur Verbindung von bis zu acht Eingabe- und acht Ausgabekanälen, bestehend aus je vier Paaren, mit symmetrischem digitalem AES/EBU-Audio zum Teranex 2D Processor.
-
Page 462: Installation Des Optionalen Blackmagic Design Fiber Optic Sfp Moduls
Installation des optionalen Blackmagic Design Fiber Optic SFP Moduls Der Blackmagic Teranex AV und der Teranex Express verfügen über einen eingebauten Glasfaserkäfig. Somit können Sie ein optionales SFP-Glasfasermodul installieren. Wenn ein SFP- Modul installiert ist, können Sie Videosignale von bis zu 12G-SDI zuverlässig anschließen. Dies funktioniert über längere Distanzen als es mit einem Koaxialkabel möglich ist. -
Page 463: Teranex Av Stoßfänger Fürs Gehäuse
Setzen Sie eine Abdeckung auf den SFP-Glasfasermodulkäfig Ihres Teranex, wenn kein SFP- Modul installiert ist. Installation des SFP-Moduls in den Teranex Express Teranex AV Stoßfänger fürs Gehäuse Der Teranex AV wird mit zwei Stoßfängern fürs Gehäuse geliefert, die an beiden Seiten des Gehäuses befestigt werden können. -
Page 464: Informationen Für Entwickler In Englischer Sprache
Downloading the Free Blackmagic Design SDK The DeckLink SDK can be downloaded from the ‘capture and playback’ section of the Blackmagic Design support center at www.blackmagicdesign.com/de/support. Joining the Blackmagic Design Software Developers Forum If you’re looking for answers, feedback or suggestions regarding technologies used by Blackmagic Design, such as codecs, core media, APIs, SDK and more, visit the Blackmagic Design Software Developers forum. - Page 465 Connection The Blackmagic Teranex Ethernet Server listens on TCP port 9800. In a Telnet session, type in “telnet” and a space, followed by the IP address of your Teranex, another space and “9800”. For example: telnet 192.168.90.236 9800 Connection Response Upon connection, the Teranex Server sends a complete dump of the state of the device.
- Page 466 VIDEO ADJUST: ↵ Luma low: 4 ↵ Luma high: 1019 ↵ ↵ ANCILLARY DATA: ↵ AFD output line: 11 ↵ CC enabled: false ↵ ↵ VARIABLE ASPECT RATIO: ↵ Variable Aspect Ratio size X left: 0.000000 ↵ Variable Aspect Ratio size X right: 0.000000 ↵ ↵...
- Page 467 ACK ↵ ↵ VIDEO OUTPUT: ↵ Video mode: 1080i5994 ↵ Aspect ratio: Anamorphic ↵ Video demux mode: SingleLink ↵ Video pixel format: YCbCr422 ↵ Analog output: Component ↵ ↵ Retrieving Device Information The “Teranex Device” command returns information about the connected device: TERANEX DEVICE: ↵...
- Page 468 Protocol Commands Command Command Description Align size X left: 0.000000 Set the Horizontal Size (X) (Zoom) value for the Left Eye. Negative values decrease size; positive values enlarge the image. Default = 0 Align size X right: 0.000000 Set the Horizontal (X) Size (Zoom) value for the Right Eye. Negative values decrease size;...
- Page 469 Ancillary Data Teranex processors support closed captions, timecode and video indexing in the ancillary data. Closed Captions Command Command Description CC enabled: Enable Closed Caption processing. True=ON; False=OFF; (Default = False) CC input line: Analog CC input line selection. Range is 20 to 22. Default = 21 CC output line: Analog CC output line selection.
- Page 470 Video Indexing Command Command Description Index reaction: Values are: On, Off (Default = Off) AFD insert type: Values are: Off, Auto, Bypass, or AFD codes 0000 - 1111. For details, see the AFD Insertion Menu topic in the user manual. AFD output line: Range is format dependent.
- Page 471 Command Command Description AudioInLevel4: Set audio level (gain) for Channel 5 AudioInLevel5: Set audio level (gain) for Channel 6 AudioInLevel6: Set audio level (gain) for Channel 7 AudioInLevel7: Set audio level (gain) for Channel 8 AudioInLevel8: Set audio level (gain) for Channel 9 AudioInLevel9: Set audio level (gain) for Channel 10 AudioInLevel10:...
- Page 472 Command Command Description AudioOut6: Select source to be mapped to output Ch 7. AudioOut7: Select source to be mapped to output Ch 8. AudioOut8: Select source to be mapped to output Ch 9. AudioOut9: Select source to be mapped to output Ch 10. AudioOut10: Select source to be mapped to output Ch 11.
- Page 473 Command Command Description AudioInPair0: Select source to be mapped to input pair 1 AudioInPair1: Select source to be mapped to input pair 2 AudioInPair2: Select source to be mapped to input pair 3 AudioInPair3: Select source to be mapped to input pair 4 AudioInPair4: Select source to be mapped to input pair 5 AudioInPair5:...
- Page 474 MODE3D The MODE3D commands are available in the Teranex 3D only. See the “3D Menu Settings” section of this user manual for details. Example: MODE3D: ↵ 3D MODE: 3DModeAlign ↵ ↵ ACK ↵ ↵ MODE3D: ↵ 3D mode: 3DModeAlign ↵ 3D roll left: 0 ↵...
- Page 475 ↵ ACK ↵ ↵ MODE3D: ↵ 3D roll left: 20 ↵ 3D roll right: 0 ↵ ↵ Command Command Description 3D roll left: Adjust the Left Eye Z axis image rotation. Range is -400 to +400 units. (Default = 0) 50 units = 1 degree.
- Page 476 Noise Reduction Command Command Description Enabled: Enable Noise Reduction. False = OFF; True = ON Bias: Adjust the Bias level. Range is -3 to +3 Split screen: Enable NR before/after split screen. False = OFF; True = ON Red overlay: Enable NR Red Overlay.
- Page 477 Teranex Device Command Command Description Model name: Display the Teranex model name. Software Version: Display the checksum of the installed software release. FPGA Version: Display the FPGA version of the installed software release. Panel lock: Remotely lock the front panel of the device, preventing local operation.
- Page 478 Command Command Description Variable Aspect Ratio size X left: Adjust horizontal image size. Negative values decrease size; positive values enlarge the image. Default = 0 Variable Aspect Ratio size X right: Adjust horizontal image size of the Teranex 3D right eye output. Negative values decrease size;...
- Page 479 Command Command Description Chroma high: Set chrominance high level value to clip overshoots. Range is 5 to 1019 (Default = 1019) Aspect fill luma: Set luminance (Y) value for letterbox or pillarbox fill color. Range is 64 to 940 (Default = 64) Aspect fill Cb: Set B-Y value for letterbox or pillarbox fill color.
- Page 480 Command Command Description Signal present: True indicates presence of input video. False indicates no input video is present. Cannot be changed by the user. Timecode present: Detected indicates presence of timecode. None indicates no timecode is present. Cannot be changed by the user. Closed captioning present: Detected indicates presence of closed captions.
- Page 481 Command Command Description Still frame present: For Teranex AV only. True = still frame has been stored at the current output format. False = no still frame has been stored at the current output format. Cannot be changed by the user. Still load complete: For Teranex AV only.
-
Page 482: Vorder- Und Hinteransichten
Vorder- und Hinteransichten Teranex AV VIDEO AUDIO FORMAT FRAME RATE ASPECT MENU VIDEO PRESETS AUDIO STATUS PANEL 23.98 ANAM 14:9 HOME GAIN EMBED LOCK LBOX CCUT MENU HDMI 1080 PBOX ZOOM SYSTEM STATUS ULTRA 29.97 59.94 MENU ANLG SMART SHARP LOCK VIDEO AUDIO... -
Page 483: Hilfe
Prüfen Sie zunächst die Versionsnummer der auf Ihrem Computer installierten Blackmagic Teranex Software. Sehen Sie dann im Blackmagic Design Support Center unter https://www.blackmagicdesign.com/de/support nach den neuesten Aktualisierungen. In der Regel empfiehlt es sich, die neuesten Updates zu laden. Vermeiden Sie Software-Updates jedoch mitten in einem wichtigen Projekt. -
Page 484: Warnhinweise
Warnhinweise Caution: Risk of Electric Shock On the Teranex Processor enclosure you will see a yellow warning label marked ‘Caution: Risk of Electric Shock’. This is intended to warn users that there may be the presence of uninsulated “dangerous” voltage within the Teranex Processor enclosure which may be of sufficient magnitude to constitute a risk of electric shock to the user. -
Page 485: Garantie
Garantie 12 Monate eingeschränkte Garantie Für Geräte der Teranex Produktfamilie gewährt Blackmagic Design eine Garantie auf Material- und Verarbeitungsfehler von 12 Monaten ab Kaufdatum. Sollte sich ein Produkt innerhalb dieser Garantiezeit als fehlerhaft erweisen, wird die Firma Blackmagic Design nach ihrem Ermessen das defekte Produkt entweder ohne Kostenerhebung für Teile und Arbeitszeit reparieren oder Ihnen das defekte Produkt ersetzen. - Page 486 Manual de instalación y funcionamiento Procesadores Teranex Junio 2017 Español...
- Page 487 Bienvenido Gracias por haber adquirido este producto. El procesador Teranex desarrollado por Blackmagic Design permite realizar conversiones entre distintos formatos con una calidad extraordinaria y ofrece una gran cantidad de funciones asombrosas que el usuario irá descubriendo poco a poco. De hecho, aún sigo poniendo a prueba su versatilidad, a fin de encontrar nuevas maneras de utilizarlo.
- Page 488 Índice Procesadores Teranex Primeros pasos Procesamiento con latencia baja en el modelo Teranex AV Conexión del cable de alimentación Integración de audio Conexión de video Ajustes del procesador Teranex Conexión de audio Conversiones Ajustes de video Configuración de la latencia en Ajustes de audio el modelo Teranex AV Ajustes para la reducción del ruido...
- Page 489 Primeros pasos Conexión del cable de alimentación Para comenzar a utilizar el conversor, solo es necesario suministrarle energía eléctrica y conectar las fuentes y los equipos de destino. Enchufe un cable IEC convencional a la entrada para fuentes de alimentación, situada en el panel trasero del dispositivo, a fin de suministarle corriente eléctrica.
- Page 490 Determine el tipo de señal de audio mediante los botones del módulo AUDIO. Luego de indicar los parámetros para la señal entrante, podrá seleccionar el formato en el que desea obtener el material convertido. VIDEO AUDIO FORMAT FRAME RATE ASPECT MENU VIDEO PRESETS...
- Page 491 Instalación en Mac OS X Descargue el programa desde el sitio www.blackmagicdesign.com/es. Descomprima el archivo y abra la imagen de disco para ver su contenido.
- Page 492 Utilice el programa Teranex Setup para actualizar el dispositivo y modificar su configuración desde un equipo con sistema operativo Mac OS X o Windows. Actualización del sistema operativo interno Es importante cerciorarse de que el conversor cuente con suministro eléctrico antes de conectarlo a un equipo informático mediante el cable USB.
- Page 493 Conexiones Las conexiones varían según el modelo. Por lo general, todos los dispositivos de la línea Teranex pueden procesar señales SDI. Algunas versiones también son capaces de convertir contenidos en formato analógico o HDMI. Verifique el nombre del modelo adquirido para determinar la información relevante en este manual.
- Page 494 VIDEO AUDIO FORMAT FRAME RATE ASPECT MENU VIDEO 23.98 ANAM 14:9 HOME GAIN EMBED LBOX CCUT MENU Teranex AV HDMI 1080 PBOX ZOOM ULTRA 29.97 59.94 MENU ANLG SMART SHARP VIDEO AUDIO FORMAT FRAME RATE ASPECT MENU VIDEO REF OUT CH A CH B PUSH...
- Page 495 VIDEO AUDIO FORMAT FRAME RATE ASPECT MENU VIDEO 23.98 ANAM 14:9 HOME GAIN EMBED LBOX CCUT MENU Teranex 2D HDMI 1080 PBOX ZOOM 29.97 59.94 MENU ANLG ANLG SMART SHARP 1080 REF IN Y/NTSC/PAL IN B-Y IN R-Y IN Y/NTSC/PAL OUT B-Y OUT R-Y OUT ANALOG AUDIO IN/OUT...
- Page 496 VIDEO AUDIO FORMAT FRAME RATE ASPECT MENU VIDEO 23.98 ANAM 14:9 HOME GAIN EMBED LBOX CCUT MENU Teranex 3D HDMI 1080 PBOX ZOOM 29.97 59.94 MENU ANLG ANLG SMART SHARP 1080 VIDEO AUDIO FORMAT FRAME RATE ASPECT MENU VIDEO DOLBY METADATA REMOTE IN/OUT REF IN Y/NTSC/PAL IN...
- Page 497 REMOTE IN/OUT : 1 x DB9 – Puerto Entradas analógicas (video) 1 x BNC – Y/NTSC/PAL de control RS-422 compatible con (señales compuestas / por dispositivos Sony®. componentes). REF IN 1 x BNC – B-Y (señales por 1 x BNC – Entrada para señales de componentes).
- Page 498 Determine el tipo de señal mediante los botones del módulo VIDEO. Las entradas disponibles dependen del modelo empleado. Al seleccionar la fuente, la imagen correspondiente podrá verse en la pantalla. El dispositivo detectará automáticamente el formato y la frecuencia, y se encenderán los botones correspondientes en el panel frontal. Por su parte, el botón iluminado en el módulo FRAME indica el modo de exploración.
- Page 499 El material convertido podrá verse en la pantalla del dispositivo y estará listo para transmitirse mediante las salidas correspondientes. Es posible ajustar la reducción del ruido en la imagen, la cadencia, el color, la nitidez y otros parámetros para mejorar la calidad del material convertido. Consulte los apartados correspondientes en este manual para obtener información adicional al respecto.
- Page 500 A continuación se proporciona una descripción general de las funciones disponibles a través del panel de control. VIDEO AUDIO FORMAT FRAME RATE ASPECT MENU VIDEO System Video Main Menu Setup EMBED 23.98 ANAM 14:9 HOME GAIN Audio LBOX CCUT MENU HDMI 1080 PBOX...
- Page 501 Configuraciones predeterminadas Los seis botones situados en el módulo PRESETS permiten guardar y aplicar distintas configuraciones al realizar una conversión. Asimismo, es posible asignarles nombres descriptivos mediante el programa Teranex Setup. La configuración de funcionamiento del dispositivo se almacena en la memoria, a fin de poder cargarla posteriormente cuando resulte necesario.
- Page 502 Los indicadores de funcionamiento del sistema proporcionan la siguiente información al encenderse: Fuente detectada. Señal de referencia externa seleccionada y entrada correspondiente activa. Fuente de alimentación 1 activa. Fuente de alimentación 1 activa. Solo en modelos Teranex 2D y Teranex 3D. Código de tiempo detectado en la señal.
- Page 503 Configuración mediante el programa Teranex Setup El programa utilitario Teranex Setup permite conocer el estado del procesador de manera intuitiva y brinda la posibilidad de controlarlo a distancia mediante una red Ethernet. Es una aplicación sumamente conveniente que ofrece una manera alternativa para modificar los ajustes del dispositivo.
- Page 504 Para agregar un dispositivo, siga los pasos descritos a continuación: Haga clic en el botón + situado en la esquina inferior izquierda de la pantalla de inicio. Ingrese la dirección IP y haga clic en el botón Add. El procesador Teranex aparecerá como uno de los dispositivos que se pueden controlar mediante la red.
- Page 505 Configuración La pestaña Configure muestra el nombre y la dirección IP del dispositivo controlado. Es posible asignar diferentes nombres a las unidades que componen el sistema a fin de facilitar su identificación. Basta con hacer clic en el campo Name e ingresar la denominación deseada.
- Page 506 Menú de configuración Al hacer clic en la rueda dentada, situada en la parte inferior izquierda de la ventana, se accede un menú que permite bloquear en forma remota el panel frontal, así como guardar y aplicar parámetros predeterminados. Asimismo, es posible almacenar los ajustes actuales del procesador en un equipo informático o aplicarlos al dispositivo.
- Page 507 Conversión de la relación de aspecto A continuación se brinda una tabla que permite apreciar cómo se verá la imagen luego de realizar una conversión. Esta constituye una referencia útil para identificar cada opción, a fin de poder seleccionar rápidamente la más adecuada. Relación de Relación de Mayor definición...
- Page 508 Conversión de la relación de aspecto de 16:9 a 4:3 en definición estándar. Aunque el formato 4:3 es el más utilizado para la programación televisiva en definición estándar, cabe la posibilidad de que algunos contenidos hayan sido grabados con una relación de aspecto de 16:9.
- Page 509 Procesos de conversión Este apartado describe cómo utilizar el panel de control frontal del dispositivo para realizar distintos tipos de conversiones, a fin de obtener contenidos de mayor o menor definición o modificar el estándar de la señal. Asimismo, se explica el procedimiento para guardar y aplicar configuraciones predeterminadas que se emplean con frecuencia, y se muestra la forma de eliminar fotogramas al efectuar conversiones tipo 3:2.
- Page 510 Presione el botón 1080. A continuación, presione el botón P en el módulo FRAME para seleccionar el modo de exploración y seleccione la opción 29.97/30 en el módulo RATE para la frecuencia de imagen. En los módulos FORMAT, FRAME y RATE, los botones correspondientes se encenderán de color verde, a fin de confirmar la configuración o realizar cambios.
- Page 511 Configuración de la señal entrante Presione el botón IN en el panel de control y seleccione la opción SDI. El procesador Teranex mostrará las imágenes en la pantalla LCD, detectará el formato de manera automática y encenderá los botones correspondientes en el panel de control. El botón EMBED se enciende para indicar el modo en que se transmite el audio.
- Page 512 Encienda el procesador y conecte los dispositivos de entrada y salida. Configuración de la señal entrante Presione el botón IN en el panel de control y seleccione la opción SDI. Al detectarse el formato, se encienden los botones que indican la características de la señal y esta se visualiza en la pantalla del dispositivo.
- Page 513 SUGERENCIA: Para obtener información adicional sobre la conversión de la relación de aspecto, consulte los apartados «Menú de la relación de aspecto» en la página 519 y «Conversión de la relación de aspecto» en la página 507. Conversión a formatos de igual definición Este procedimiento permite modificar la resolución de las imágenes o la relación de aspecto del material final.
- Page 514 Ajuste de la relación de aspecto en la señal saliente Presione el botón LBOX/PBOX a fin de seleccionar el modo apaisado. El procesador Teranex ahora está listo para convertir los contenidos. Relación 4:3 Imagen 16:9 Al seleccionar la opción LBOX/PBOX para la señal SD que se desea obtener, la imagen en formato 16:9 se mantiene dentro de un fotograma con una relación de 4:3.
- Page 515 Presione el botón 1080. Este se encenderá de color verde. Presione los botones I y 50 para determinar tanto el modo de exploración como la frecuencia de imagen. Estos también se encenderán de color verde. Seleccione la opción Change presionando el botón contextual correspondiente. La señal saliente se mostrará...
- Page 516 Eliminación de la cadencia Este procedimiento se aplica al llevar a cabo conversiones tipo 3:2, por ejemplo cuando se emplea un telecine para transferir cintas de 24 f/s para obtener imágenes de video a 59.94 f/s. El procesador Teranex elimina la cadencia en forma automática al realizar una conversión de este tipo a partir de material grabado a 24 f/s.
- Page 517 Presione el botón HOME. Seleccione la opción Video, a continuación Advanced y luego Clean Cadence. Active la función mediante el mando giratorio o los botones contextuales. De este modo, el material convertido al formato 1080i59.94 incluirá una cadencia 3:2 limpia. Recuerde desactivar esta función una vez finalizada la conversión.
- Page 518 Cómo activar el modo de menor latencia En el menú System Setup del modelo Teranex AV, seleccione la opción Processing y a continuación Lowest Latency. También es posible acceder a estos ajustes desde la pestaña Setup del programa Teranex Setup. El procesador Teranex AV aplicará...
- Page 519 Ajustes de video El menú Video permite modificar parámetros de las señales transmitidas por el dispositivo, incluidos los componentes cromáticos, los umbrales de distorsión de la imagen y la relación de aspecto. Color La opción Color brinda la posibilidad de ajustar la ganancia de los canales rojo, verde y azul mediante el mando giratorio.
- Page 520 Size Esta opción permite ajustar el tamaño de la imagen en sentido horizontal o vertical. El rango oscila entre -50 y +200 %. Position Esta opción permite mover la imagen de la señal recibida dentro del marco correspondiente a la señal transmitida. El rango de ajuste está...
- Page 521 Fuente no detectada El menú No Input permite seleccionar si en la imagen correspondiente a la señal transmitida se ven barras de color o la pantalla en negro cuando no se detecta una fuente. La opción predeterminada es Black. Salida HDMI (solo para el modelo Teranex AV) Este menú...
- Page 522 Muestreo de video (solo disponible en el modelo Teranex 3D) El menú Video Sampling permite seleccionar una de las siguientes opciones: ‚ 4:2:2 – YUV ‚ 4:4:4 – YUV ‚ 4:4:4 – RGB Proc No Video Video Color Video Setup Sampling Input 4:2:2 YUV...
- Page 523 Las salidas Quad HD se asignan de la siguiente manera: ‚ OUT A: Imagen subdividida 1 ‚ OUT B: Imagen subdividida 2 ‚ LOOP A: Imagen subdividida 3 ‚ LOOP B: Imagen subdividida 4 Out A Out B Loop A Loop B Imagen UHD completa Imagen dividida en cuatro salidas HD...
- Page 524 SUGERENCIA: Este ajuste solo es válido al transmitir señales SDI 3G. En el caso de las entradas SDI 3G, las señales de nivel A y B se detectan automáticamente. Salida SDI mediante cuatro enlaces (solo disponible para el modelo Teranex AV) Este modelo permite transmitir señales SDI 3G mediante cuatro conectores BNC al emplear formatos UHD 2160p50/59.94/60.
- Page 525 Una vez establecidos dichos parámetros, los botones vinculados a estos se encienden de color blanco para indicar que los valores predeterminados se han modificado. Para restablecerlos, seleccione el ajuste correspondiente en el menú Proc Amp y presione el mando giratorio. Seleccione la opción Reset All si desea restaurar la configuración preestablecida de todos los parámetros.
- Page 526 Diagrama de resolución Cuadrícula Patrones de prueba en el modelo Teranex AV Además de los patrones de prueba para la imagen, este modelo ofrece un tono de verificación integrado para comprobar el sonido. ‚ Patrones de prueba Seleccione la opción Test Patterns para elegir la señal de prueba. ‚...
- Page 527 La pestaña Setup en el programa Blackmagic Teranex Setup permite controlar el movimiento, seleccionar patrones de prueba y ajustar los tonos de audio. Opciones avanzadas A efectos de corregir la cadencia en la señal obtenida, los distintos modelos Teranex ofrecen las siguientes opciones avanzadas: Cadencia limpia (solo disponible en los modelos Teranex 2D y 3D) La opción Clean Cadence permite evitar errores al realizar una conversión 3:2 para obtener una...
- Page 528 Detección de escenas La opción Scene Detect permite reducir al mínimo la superposición de campos entre cortes directos, a fin de que las imágenes transmitidas tengan una apariencia más uniforme. De este modo, es posible evitar que se mezclen fotogramas previos en las escenas nuevas. ‚...
- Page 529 Ajustes de audio Este menú permite asignar salidas a los canales de audio, controlar la ganancia, ajustar el retraso y acceder a ciertos parámetros de configuración. La opción Input Mapping disponible en el modelo Teranex 2D brinda la posibilidad de seleccionar canales a partir de señales integradas, analógicas o digitales en forma simultánea.
- Page 530 Output Mapping Output Mapping Output Mapping Prev Next Prev Next Prev Next Channel 1 Source Channel 4 Source Channel 13 Source Input 1 Input 1 Tone .75 kHz Input 2 Input 2 Tone 1.5 kHz Input 3 Input 3 Tone 3 kHz Input 4 Input 4 Tone 6 kHz...
- Page 531 ‚ No es posible mezclar las señales Dolby que el dispositivo recibe a través de la entrada AES con otras fuentes. En tal caso, deberá seleccionar AES para la señal de audio recibida. Input Mapping Input Mapping Prev Next Prev Next Input 1/2 Source Input 3/4 Source...
- Page 532 Gire la perilla para ajustar el valor deseado dentro de un rango que oscila entre -12 y +12 dB. Al presionar la perilla, el valor se restablecerá a cero. System Output Input Analog Analog Video Main Menu Audio Setup Setup Mapping Mapping In Level...
- Page 533 Indicadores de volumen en el modelo Teranex AV El modelo Teranex AV permite seleccionar el par de canales de audio entrantes o salientes que se muestran en la pantalla del dispositivo. A modo informativo, los números de los canales aparecen debajo del indicador.
- Page 534 En el modelo Teranex 3D, estos datos pueden obtenerse a partir de la señal Dolby entrante si el dispositivo cuenta con un decodificador. De manera alternativa, es posible utilizar el conector de 9 pines situado en en panel trasero. Por otro lado, los metadatos pueden generarse mediante cualquiera de las dos configuraciones incluidas en el menú...
- Page 535 Parámetro de los metadatos Estéreo Volumen de mezcla (sonido -3 dB -3 dB envolvente-Lt/Rt) Volumen de mezcla (central-Lo/Ro) -3 dB -3 dB Volumen de mezcla (sonido -4.5 dB -4.5 dB envolvente-Lo/Ro) Datos de secuencia extendida (2) Sí Sí Sonido Dolby envolvente (modo EX) No se indica No se indica Auriculares...
- Page 536 Intensidad La opción Bias permite ajustar en qué medida se reduce el ruido en la imagen. Cuanto mayor sea el valor seleccionado, el proceso se aplicará de manera más drástica. ‚ El rango oscila entre -6 y +6. ‚ El valor predeterminado es 0. Split Enable Set Value...
- Page 537 Ajustes para datos auxiliares El menú Ancillary Data permite modificar parámetros relativos a datos auxiliares tales como el código de tiempo y los subtítulos opcionales. Subtítulos opcionales (CC) El menú Closed Caption brinda opciones para configurar subtítulos según los estándares CEA- 608B y CEA-708B.
- Page 538 Activación de subtítulos Por defecto, la función CC Enable se encuentra desactivada. Para activarla, seleccione Ancillary Data en el menú principal y luego CC Enable mediante los botones contextuales. A continuación, utilice el mando giratorio para escoger la opción On. Deshabilitar los subtítulos puede ser útil si no son correctos o presentan alguna falla.
- Page 539 Idioma Service 1 La opción Service 1 Language se utiliza a fin de seleccionar el idioma para este servicio en el formato CEA-708. ‚ Los idiomas disponibles son: Inglés Francés Alemán Italiano Español ‚ El idioma preestablecido es inglés. Service 2 Set Value Enable Source...
- Page 540 Generador de código de tiempo El menú Timecode Generator permite seleccionar entre cuatro modos de código de tiempo disponibles, o desactivar el procesamiento manual. Al seleccionar este modo, no se incluye el código de tiempo en la señal transmitida. Esta es la opción predeterminada.
- Page 541 Video Closed Ancillary Data Prev Timecode Next Index Caption Timecode Timecode Start Generator Input Input Regen Start Timecode Source Generate Jam Sync Setup Ancillary Data > Timecode Timecode > Input Regen Generar La opción Generate permite generar un código de tiempo independiente para el formato de salida seleccionado, aunque este no esté...
- Page 542 ‚ Set Timecode Esta opción está determinada por los parámetros seleccionados en la opción Start Source. Prev Timecode Next Start Value Timecode Start Generator Input Jam Sync Start Timecode Source 00:00:00:00 Setup Jam Sync > Set Timecode ‚ Start Source = “Input” Al seleccionar la opción Input en el menú...
- Page 543 Inserción del código AFD El menú AFD Insertion permite seleccionar el código AFD deseado para insertarlo en la señal transmitida. La opción AFD Insert Line brinda la posibilidad de determinar una línea a estos efectos. ‚ Este menú incluye las siguientes opciones: No se inserta código AFD en el espacio asignado para datos auxiliares en la señal saliente.
- Page 544 Conexión Ethernet El menú Ethernet permite ver la configuración actual del dispositivo y determinar nuevos valores para la dirección IP, la máscara de subred y la puerta de enlace. Por otra parte, brinda la posibilidad de activar o desactivar el protocolo DHCP. Cuando la opción DHCP está...
- Page 545 Menú DHCP El menú DHCP permite activar o desactivar la función que asigna una dirección IP al dispositivo mediante este protocolo. Presione el botón contextual correspondiente o utilice el mando giratorio para seleccionar una de las opciones disponibles. Luego de realizar ajustes, seleccione Save and Restart, a fin de reiniciar el dispositivo y establecer la nueva dirección.
- Page 546 NOTA: El almacenamiento de un fotograma en la memoria no volátil es una tarea que se realiza en segundo plano y puede demorar hasta 30 segundos en el caso de una imagen en definición UHD. Asegúrese de que este procedimiento haya finalizado antes de apagar el dispositivo.
- Page 547 Al cargar un elemento gráfico desde un equipo informático, el archivo puede tener cualquier tipo de resolución. El programa de conversión ajustará automáticamente el tamaño de la imagen, según la resolución seleccionada para la señal saliente. Cabe destacar que este redimensionamiento no emplea algoritmos exclusivos de Teranex, por lo que la calidad será...
- Page 548 ‚ Internal Sincroniza la señal transmitida por el procesador Teranex AV con su oscilador interno, lo cual permite lograr una sincronización constante, incluso al cambiar la fuente. System Factory Video Main Menu Ethernet System Setup Setup Reset Audio Reference Noise Info Reduction Ancillary...
- Page 549 Formato y frecuencia de Señal de referencia imagen de la señal saliente 1080PsF29.97 Black Burst 59.94, Tri-level progresivo 29.97, Tri-level entrelazado 59.94 1080p30 Tri-level progresivo 30, Tri-level entrelazado 60 1080PsF30 Tri-level progresivo 30, Tri-level entrelazado 60 1080i50 Black Burst 50, Tri-level entrelazado 50 1080p50 Black Burst 50 1080i59.94...
- Page 550 Generar (solo disponible en el modelo Teranex AV) El modelo Teranex AV dispone de una conexión que permite utilizarlo como un generador de señales de referencia. El tipo de señal (Black Burst o Tri-level) depende del formato seleccionado para el material convertido. Algunos formatos solo permiten emplear un tipo específico de referencia.
- Page 551 Formato de la señal saliente Opciones para señales generadas 1080p60 No disponible DCI 2K 23.98p Tri-level progresivo 23.98 DCI 2K 23.98PsF Tri-level entrelazado 47.96 DCI 2K p24 Tri-level progresivo 24 DCI 2K 24PsF Tri-level entrelazado 48 2160p23.98 Tri-level progresivo 23.98 2160p24 Tri-level progresivo 24 2160p25...
- Page 552 SUGERENCIA: Es posible vincular el menú Output Options a uno de los botones Menu 1 o Menu 2 en el panel frontal del modelo Teranex AV para acceder rápidamente al mismo. Entrada La opción Input hace referencia a la señal recibida mediante la entrada seleccionada en el panel frontal, es decir, SDI 1, SDI 2, HDMI o fibra óptica (si se ha instalado el módulo correspondiente).
- Page 553 ‚ Los ajustes de la transición no afectan a una imagen congelada. Al seleccionar la opción Freeze, el procesador Teranex AV realiza de inmediato un corte directo a la imagen, independientemente del tipo de transición seleccionado. Por otra parte, se silencia el audio.
- Page 554 Modo 3D Seleccione Off para desactivar el modo 3D. Las siguientes opciones están disponibles al activar el procesamiento tridimensional: ‚ Convert Este modo permite procesar los canales estereoscópicos correspondientes al ojo izquierdo y derecho en señales recibidas mediante las conexiones SDI o HDMI. Asimismo, brinda la posibilidad de sincronizarlos al momento de transmitirlos.
- Page 555 Formato de salida Las opciones del menú Output permiten determinar el formato en el que se transmitirán las imágenes tridimensionales. ‚ Full Frame Permite transmitir en resolución completa las imágenes correspondientes a cada ojo mediante las salidas A y B. En forma simultánea, se genera una señal HDMI con fotogramas combinados.
- Page 556 Este aporta profundidad a la imagen para realzar el efecto tridimensional. Sin embargo, en la mayoría de los casos, debe conservarse el valor predeterminado. ‚ Este ajuste oscila entre -12 y +12. El valor predeterminado es 0. 3D Mode Intensity Input Depth Camera...
- Page 557 Rotación El menú Rotation permite controlar la rotación axial de la imagen a lo largo de los ejes X, Y y Z, ya sea de manera independiente o combinando las tres dimensiones. Este ajuste puede utilizarse para compensar las desalineaciones mecánicas que pueden presentarse con las plataformas para montajes tridimensionales.
- Page 558 Position Camera Align Zoom Roll Z Rotation Left Eye Rotation Trim Tilt X Right Eye Flip Toe-in Y Both Eyes Reset Reset Camera Align > Rotation Rotation > Toe In Y Axis Position Camera Align Zoom Flip Flip Left Eye Rotation Trim Right Eye...
- Page 559 ‚ Al seleccionar la opción Both, es posible modificar los valores correspondientes a ambos sentidos en forma simultánea para mantener una relación de aspecto adecuada. ‚ Al seleccionar la opción Both Eyes, los cambios se aplican por igual en ambos canales de la imagen estereoscópica.
- Page 560 Conexiones e información importante para ajustes tridimensionales A continuación se describe el manejo de algunas de las conexiones y los datos auxiliares que incidirán en las distintas dinámicas de trabajo. Conexiones de video Las entradas A y B permiten procesar los canales correspondientes a cada ojo en una señal SDI estereoscópica.
- Page 561 En otros casos, es necesario descargar el programa Desktop Video de Blackmagic Design. Este puede obtenerse en nuestra página de soporte técnico: www.blackmagicdesign.com/es/support/family/capture-and-playback. Captura de imágenes Cuando una aplicación está capturando imágenes, la pantalla del dispositivo muestra la palabra Capture seguida del formato de la señal, por ejemplo, Capture: 1080p24.
- Page 562 Es posible que sea necesario instalar la última versión del programa Desktop Video, a fin de poder capturar contenidos mediante cualquier dispositivo Teranex. Este puede obtenerse en nuestra página de soporte técnico: www.blackmagicdesign.com/es/support/family/capture-and-playback. Captura y reproducción...
- Page 563 Configuración Ejecute DaVinci Resolve. En el menú Preferencias, haga clic en el panel E/S de video y GPU. Seleccione el dispositivo en la opción Captura y reproducción. Guarde la configuración y reinicie el programa para aplicar los cambios. En la ventana Configuración del proyecto, seleccione la resolución y la frecuencia de imagen que se utilizarán en la línea de tiempo y en los procesos de monitorización.
- Page 564 Reproducción Para reproducir clips desde el módulo Medios, haga clic en el ícono de captura situado cerca de la ventana Información de captura. A continuación, seleccione uno de los clips obtenidos y utilice los controles de reproducción del visor para ver las imágenes. Edición y etalonaje Una vez obtenidos los clips, solo es necesario acceder al módulo Edición para comenzar a utilizar la amplia gama herramientas que ofrece Resolve.
- Page 565 Ingrese el nombre del proyecto y seleccione las distintas opciones. Captura Haga clic en Tools y seleccione la opción Capture para abrir la herramienta de captura. Haga clic en el botón Toggle Source situado en la parte superior de la ventana, de forma que muestre un círculo rojo similar al símbolo de prohibido.
- Page 566 Final Cut Pro 7 Configuración Ejecute el programa Final Cut Pro 7 y seleccione la opción New Project en el menú File. Seleccione la opción Save Project As... e ingrese un nombre para el proyecto. En el menú Final Cut Pro, seleccione la opción Easy Setup para acceder a la ventana correspondiente.
- Page 567 Reproducción Es posible utilizar la línea de tiempo de Final Cut Pro para ver las imágenes en el monitor o televisor conectado a la salida del procesador Teranex. Si no es posible visualizar las imágenes en el equipo conectado al dispositivo, verifique las conexiones nuevamente y compruebe que los ajustes de salida se hayan configurado correctamente.
- Page 568 Premiere Pro CC A efectos del presente ejemplo, el formato de la señal convertida por el procesador es 1080i50. La captura se realiza mediante un dispositivo no controlable. Premiere Pro CC (2015) Configuración Ejecute Premiere Pro CC. En la ventana de bienvenida, seleccione la opción Create New/ New Project.
- Page 569 Modifique las opciones de audio y renderización. Captura Haga clic en el menú File y luego en la opción Capture. Haga clic en el botón rojo para comenzar la captura. Haga clic en el mismo botón nuevamente para detenerla. Reproducción Al crear un proyecto nuevo, es necesario seleccionar los ajustes de reproducción.
- Page 570 De esta forma, es posible utilizar un monitor profesional para ver las composiciones realizadas con el programa en un espacio de color adecuado y, por otra parte, no es necesario realizar una renderización previa para apreciar la apariencia final de la imagen. Para escuchar el audio a través del procesador Teranex, este debe configurarse como dispositivo predeterminado.
- Page 571 Codificadores/decodificadores AVI en Windows ‚ 10 bit 4:4:4 (sin compresión, Blackmagic) ‚ 10 bit 4:2:2 (sin compresión, Blackmagic) ‚ HD 8 bit 4:2:2 (sin compresión, Blackmagic) ‚ SD 8 bit 4:2:2 (sin compresión, Blackmagic) ‚ 8 bit MJPEG (sin compresión, Blackmagic) Al instalar Premiere Pro CC, el usuario tendrá...
- Page 572 Adobe Photoshop CC Cómo importar y exportar fotogramas Importar una imagen Haga clic en el menú Archivo, luego en la opción Importar y a continuación seleccione Blackmagic Image Capture. Elija el formato y la profundidad de color. A continuación, haga clic en el botón Import Image.
- Page 573 Mac OS X o Windows mediante un puerto Thunderbolt, es posible supervisar los distintos valores de la señal obtenida a través del proceso de conversión. El programa Blackmagic UltraScope puede descargarse desde la página de soporte técnico de Blackmagic Design: www.blackmagicdesign.com/es/support. SUGERENCIA: El programa Blackmagic UltraScope es ideal para comprobar la calidad de las imágenes convertidas, independientemente del tipo de señal utilizado.
- Page 574 Vista en pantalla completa Vista compartida Representaciones gráficas El programa UltraScope es una herramienta ideal para ajustar con precisión los parámetros de las señales audiovisuales obtenidas mediante el procesador Teranex. Dichos datos se visualizan mediante diferentes representaciones gráficas (componentes cromáticos, forma de la onda, vectorscopio, histograma y vúmetro).
- Page 575 Las zonas grisáceas corresponden a valores que se sitúan por encima de la línea correspondiente al 0. Presione el botón BLK en la parte frontal del procesador y ajuste la intensidad del negro mediante el mando giratorio. Si este valor disminuye demasiado, se perderán detalles en las partes más oscuras de la imagen.
- Page 576 Histograma El histograma también permite comprobar el contraste en la imagen. El eje horizontal representa el rango correspondiente a la luminancia. La porción izquierda de la gráfica corresponde al negro (0 en una imagen de 10 bits) y la derecha al blanco (1023 en una imagen de 10 bits). En imágenes donde el contraste es adecuado, la información cubrirá...
- Page 577 que definen cuándo un error debe registrarse, se puede comenzar o detener el proceso, guardar el registro en un archivo o borrarlo. Dichas funciones pueden realizarse desde los botones correspondientes en este modo de visualización o desde el menú desplegable Error Logging. Los errores se registran según el código de tiempo y la hora para facilitar su búsqueda.
- Page 578 Tabla de conversión de formatos Teranex AV y Teranex Express ENTRADA SALIDA • • • • • • • • • • • • • • • • • • • • • • • • • • • • • • • • • 525i 59.94 (NTSC) •...
- Page 579 Tabla de conversión de formatos Teranex 2D ENTRADA SALIDA • • • • • • • • • • • • • • • • • • • • • • • • • 525i 59.94 (NTSC) • • • • • • • • • • • • • • • • • • • • • • • • • 625i 50 (PAL) •...
- Page 580 Tabla de conversión de formatos Teranex 3D ENTRADA SALIDA • • • • • • • • • • • • • • • • • • • • • • • • • 525i 59.94 (NTSC) • • • • • • • • • • • • • • • • • • • • • • • • • 625i 50 (PAL) •...
- Page 581 Configuración del conector DB-25 en el modelo Teranex 2D El modelo Teranex 2D cuenta con un par de entradas RCA que permiten conectar 2 canales de audio analógico, pero además el conector DB-25 situado en el panel trasero brinda la posibilidad de utilizar hasta 4 canales de entrada o salida. Entradas y salidas para audio analógico Al presionar el botón ANLG en el panel frontal cuando se selecciona el tipo de señal de audio entrante, la pantalla mostrará...
- Page 582 Entradas y salidas para audio digital (AES/EBU) Presione el botón AES en el panel frontal del modelo Teranex 2D para procesar fuentes de audio digitales. La salida AES/EBU siempre está activa. En el modelo Teranex 2D se utiliza un conector DB-25 para recibir y transmitir hasta 8 canales (4 pares) de audio digital balanceado.
- Page 583 Instalación de un transceptor SFP opcional para fibra óptica El modelo Teranex Express dispone de un compartimiento que permite instalar un transceptor SFP para fibra óptica. De esta forma, es posible conectar cables de mayor longitud para transmitir señales a una velocidad de hasta 12 Gb/s. Instalación del módulo óptico opcional ADVERTENCIA Se deben tomar las precauciones necesarias para reducir el riesgo de descarga eléctrica al instalar...
- Page 584 Instalación del módulo en el procesador Teranex Express Paragolpes en el modelo Teranex AV El modelo Teranex AV incluye dos paragolpes que pueden colocarse en los costados del dispositivo. Estos han sido diseñados para proteger la esquinas del panel trasero de posibles daños que puedan ocasionarse al transportar el equipo o utilizarlo en exteriores.
- Page 585 Blackmagic y con otros miembros que pueden responder preguntas específicas y aportar información adicional. Para suscribirse, ingrese a la página https://forum.blackmagicdesign.com. Cómo obtener asistencia Si desea realizar preguntas sin participar en el foro para desarrolladores, póngase en contacto con...
- Page 586 Conexión El servidor Ethernet de este dispositivo escucha el puerto TCP 9800. En una sesión Telnet, escriba «telnet», deje un espacio y a continuación ingrese la dirección IP del equipo Teranex. Deje otro espacio e ingrese el número 9800. Por ejemplo: telnet 192.168.90.236 9800 Respuesta de conexión Una vez conectado, el servidor del procesador envía un volcado de estado completo del dispositivo.
- Page 587 ↵ VIDEO ADJUST: ↵ Luma low: 4 ↵ Luma high: 1019 ↵ ↵ ANCILLARY DATA: ↵ AFD output line: 11 ↵ CC enabled: false ↵ ↵ VARIABLE ASPECT RATIO: ↵ Variable Aspect Ratio size X left: 0.000000 ↵ Variable Aspect Ratio size X right: 0.000000 ↵...
- Page 588 ↵ ↵ ↵ VIDEO OUTPUT: ↵ Video mode: 1080i5994 ↵ Aspect ratio: Anamorphic ↵ Video demux mode: SingleLink ↵ Video pixel format: YCbCr422 ↵ Analog output: Component ↵ Recuperación de la información del dispositivo El comando «Teranex Device» brinda información acerca del equipo conectado. ↵...
- Page 589 Comandos del protocolo Comando Descripción Align size X left: 0.000000 Establece el tamaño sobre el eje X de la imagen correspondiente al ojo izquierdo. Los valores negativos lo reducen, mientras que los positivos lo aumentan. Por defecto = 0. Align size X right: 0.000000 Establece el tamaño sobre el eje X de la imagen correspondiente al ojo derecho.
- Page 590 Datos auxiliares Los procesadores Teranex son compatibles con las funciones de subtítulos opcionales o «Closed Caption», código de tiempo e índice de video, incluidas en el menú Ancillary Data. Subtítulos opcionales (CC) Comando Descripción CC enabled: Activa los subtítulos opcionales. True = ON; False = OFF (por defecto = False).
- Page 591 Indexación de videos Comando Descripción Index reaction: Los parámetros disponibles son: On, Off (por defecto = Off). AFD insert type: Los parámetros posibles son: Off, Auto, Bypass, o los códigos AFD 0000 - 1111. Para obtener más información al respecto, consulte el apartado correspondiente en este manual.
- Page 592 Comando Descripción AudioInLevel2: Determina la intensidad del volumen (ganancia) para el Canal 3. AudioInLevel3: Determina la intensidad del volumen (ganancia) para el Canal 4. AudioInLevel4: Determina la intensidad del volumen (ganancia) para el Canal 5. AudioInLevel5: Determina la intensidad del volumen (ganancia) para el Canal 6. AudioInLevel6: Determina la intensidad del volumen (ganancia) para el Canal 7.
- Page 593 Comando Descripción AudioOut4: Selecciona la fuente asignada al canal 5. AudioOut5: Selecciona la fuente asignada al canal 6. AudioOut6: Selecciona la fuente asignada al canal 7. AudioOut7: Selecciona la fuente asignada al canal 8. AudioOut8: Selecciona la fuente asignada al canal 9. AudioOut9: Selecciona la fuente asignada al canal 10.
- Page 594 Comando Descripción AudioInPair0: Determina la fuente asignada al par de entrada 1. AudioInPair1: Determina la fuente asignada al par de entrada 2. AudioInPair2: Determina la fuente asignada al par de entrada 3. AudioInPair3: Determina la fuente asignada al par de entrada 4. AudioInPair4: Determina la fuente asignada al par de entrada 5.
- Page 595 MODE3D Estos comandos están disponibles solamente para el modelo Teranex 3D. Consulte el apartado «Ajustes del menú 3D» en este manual para obtener información adicional al respecto. Ejemplo: ↵ MODE3D: ↵ 3D MODE: 3DModeAlign ↵ ↵ ↵ ↵ MODE3D: ↵ 3D mode: 3DModeAlign ↵...
- Page 596 ↵ ↵ ↵ ↵ MODE3D: ↵ 3D roll left: 20 ↵ 3D roll right: 0 ↵ Comando Descripción 3D roll left: Ajusta la rotación de la imagen correspondiente al ojo izquierdo sobre el eje Z. El rango abarca desde -400 hasta +400 unidades. (Por defecto = 0).
- Page 597 Reducción de ruido Comando Descripción Enabled: Activa la función de reducción de ruido. False = OFF; True = ON. Bias: Ajusta el nivel de ruido en la imagen. Los valores posibles se sitúan entre -3 y +3. Split screen: Habilita la reducción de ruido antes o después de la división de pantalla.
- Page 598 Dispositivo Teranex Comando Descripción Model name: Muestra el nombre del modelo Teranex. Software Version: Muestra la suma de verificación de la versión del programa instalado. FPGA Version: Muestra la versión de la FPGA del programa instalado. Panel lock: Bloquea en forma remota el panel frontal y, en consecuencia, evita la operación local del dispositivo.
- Page 599 Comando Descripción Variable Aspect Ratio Permite ajustar el tamaño horizontal de la imagen. Los valores size X left: negativos lo reducen, mientras que los positivos lo aumentan. Por defecto = 0. Variable Aspect Ratio En el modelo Teranex 3D, permite ajustar el tamaño horizontal de la size X right: imagen correspondiente al ojo derecho.
- Page 600 Comando Descripción Luma high: Permite establecer el límite máximo de luminancia por encima del cual no se admiten valores. El rango va de 5 a 1019 (por defecto = 1019). Chroma low: Permite establecer el límite mínimo de crominancia por debajo del cual no se admiten valores.
- Page 601 Comando Descripción Timecode present: «Detected» indica la presencia del código de tiempo. «None» que no hay código de tiempo presente en la señal. No admite modificaciones. Closed captioning present: «Detected» indica la presencia de subtítulos. «None» indica que no se han detectado subtítulos. No admite modificaciones.
- Page 602 Command Command Description Still frame present: Solo disponible en el modelo Teranex AV. True = la captura se almacenó en el formato de salida seleccionado. False = la captura no se almacenó en el formato de salida seleccionado. No admite modificaciones.
- Page 603 Vistas frontales y posteriores Teranex AV VIDEO AUDIO FORMAT FRAME RATE ASPECT MENU VIDEO PRESETS AUDIO STATUS PANEL 23.98 ANAM 14:9 HOME GAIN EMBED LOCK LBOX CCUT MENU HDMI 1080 PBOX ZOOM SYSTEM STATUS ULTRA 29.97 59.94 MENU ANLG SMART SHARP LOCK VIDEO...
- Page 604 Asimismo, brinda la posibilidad de encontrar rápidamente respuestas suministradas por usuarios experimentados o por el personal de Blackmagic Design. Para acceder al foro, ingrese a la página http://forum.blackmagicdesign.com. Cómo contactarnos Si no encuentra la ayuda que necesita, solicite asistencia mediante el botón Enviar correo electrónico, situado en la parte inferior de la página de soporte técnico en nuestro sitio web.
- Page 605 Advertencias Advertencia: Riesgo de descarga eléctrica Dentro del dispositivo encontrará una etiqueta de advertencia amarilla que dice: «Caution: Risk of Electric Shock». Esto significa que en su interior podría producirse un voltaje no aislado de una magnitud suficiente como para generar una descarga eléctrica en el usuario. Blackmagic Design recomienda no abrir el dispositivo y ponerse en contacto con el centro de servicio técnico más cercano en caso de necesitar asistencia.
- Page 606 Garantía 12 meses de garantía limitada Blackmagic Design garantiza que el producto adquirido no presentará defectos en los materiales o en su fabricación por un período de 12 meses a partir de su fecha de compra. Si un producto resulta defectuoso durante el período de validez de la garantía, Blackmagic Design podrá...
- Page 607 安装操作手册 Teranex 处理器系列 2017 年 6 月 中文...
- Page 608 欢迎辞 感谢您选购并使用Blackmagic Design Teranex转换器。 Teranex格式转换器拥有的卓越性能和各项强大功能举不胜举, 您可以在实际使用过程中 不断发掘它的巨大潜力。 目前, 我自己也还在使用这款产品, 并正在尝试将它的各项功能应 用到不同的制作领域! 我们为这款产品设计了最新的SDI、 HDMI和模拟接口, 您可以用它来 转换和连接任何设备信号! Teranex转换器的一大优势在于它超凡的转换品质。 它强大的SIMD处理器可进行复杂的计 算工作, 因此能更加出色地完成影像处理、 场抖动移除、 节奏检测、 降噪、 时间码转换、 字 幕转换等更多工作! 我们希望Teranex处理器能为您带来轻松愉快的工作体验, 并期待您成为这款产品的忠实 用户。 我们将不断致力于产品的软件升级, 因此欢迎您提出宝贵意见和建议, 让我们不断完 善和提升这款产品! Grant Petty Blackmagic Design首席执行官...
- Page 609 目录 Teranex 处理器系列 入门 Teranex 处理器的各项设置 连接电源 视频菜单设置 连接视频 宽高比菜单 连接音频 高级菜单 各类转换 音频菜单设置 为Teranex AV设置延迟功能 降噪菜单设置 安装管理软件 辅助数据菜单设置 系统设置菜单 软件安装 3D菜单设置 更新内部软件 各类接口 采集和播放 Teranex Express 使用您喜欢的剪辑软件 Teranex AV DaVinci Resolve Teranex 2D Avid Media Composer Teranex 3D Apple Final Cut Pro 7 Apple Final Cut Pro X 更改设置...
- Page 610 入门 连接电源 Teranex处理器使用前的准备工作非常简单, 只要先连接电源, 然后连接信号输入和输出即可。 请使用标准IEC电源线连接Teranex处理器后面板的电源输入接口。 连接视频 将视频源输入连接到Teranex处理器的视频输入接口, 并将其视频输出接口连接到目标设备。 请注 意, 所有视频输出接口都将同时启用, 以便您在需要时连接更多设备。 请查看控制面板上的LCD屏 幕确认信号画面。 该LCD屏幕可显示输入或输出视频, 按 “IN” 或 “OUT” 即可显示相应画面。 这块 MENU VIDEO PRESETS AUDIO STATUS LCD屏幕可提供视频格式和帧率的具体信息。 Teranex Express和Teranex AV型号上的LCD屏幕还 PANEL HOME GAIN 可显示时间码和音频电平。 LOCK MENU 连接音频 SYSTEM STATUS MENU SHARP LOCK...
- Page 611 VIDEO AUDIO FORMAT FRAME RATE ASPECT MENU VIDEO PRESETS AUDIO STATUS PANEL EMBED 23.98 ANAM 14:9 HOME GAIN LOCK LBOX CCUT MENU HDMI 1080 PBOX ZOOM SYSTEM STATUS 29.97 59.94 MENU ANLG ANLG SMART SHARP 1080 LOCK VIDEO AUDIO FORMAT FRAME RATE ASPECT...
- Page 612 安装管理软件 软件安装 Blackmagic Teranex Setup软件可用来升级Teranex处理器, 并实现远程更改转换设置。 该软件使用 便捷, 并且所有已连接的Teranex的设置都可通过它来实现, 只要点击主页上每台设备相应的设置 图标即可。 在 Mac OS X 系统下安装 请到www.blackmagicdesign.com/cn网站下载Blackmagic Teranex Setup软件。 解压缩下载的文件并打开磁盘图标以显示其中的内容。 双击该安装程序, 根据屏幕提示完成安装。 在 Windows 系统下安装 请到www.blackmagicdesign.com/cn网站下载Blackmagic Teranex Setup软件。 解压缩下载的文件。 您会看到一个名为 “Blackmagic Teranex Setup” 的文件夹, 该文件夹 中含有PDF版操作手册以及Teranex Setup安装程序。 双击该安装程序, 根据屏幕提示完成安装。 完成安装后, 系统会提示您重启计算机。 点击 “Restart” (重启) 来完成安装。...
- Page 613 您可以使用Blackmagic Teranex Setup软件来更新Teranex处理 器, 并从Mac OS X或Windows计算机上远程更改设备设置。 更新内部软件 使用USB线缆连接计算机和Teranex处理器之前, 请务必先确保您的Teranex处理器已连接电源。 为Teranex处理器连接电源。 使用USB线缆连接计算机和Teranex。 运行Blackmagic Teranex Setup程序。 Teranex Setup程序将检测到USB接口上连有Teranex, 并将其显示为 “Local USB” (本地USB) 连接。 通过USB连接的设备将始终位于Teranex Setup中连接设备列表的顶部。 请留意上页截图中位于底部的白点。 点击位于处理器名称下方的图标来建立连接。 如果Blackmagic Teranex Setup中包含高于 您的Teranex当前安装的内部软件版本, 它会提示您进行软件更新。 请根据屏幕提示完成 更新即可。 内部软件更新完毕后, 断开USB线缆。 如果您通过以太网连接Teranex, 则可在 Teranex连接设备列表中根据名称找到您的Teranex, 以便使用实用程序来更改Teranex的 各项设置。 安装管理软件...
- Page 614 各类接口 Teranex处理器的型号不同, 其搭载的各类接口也会有所不同。 一般来说, 所有Teranex处理器均可 转换SDI信号。 其他型号还可转换HDMI和模拟视频, 请查看您所购买的具体型号, 以明确本手册中 的哪些信息适用于您的Teranex。 VIDEO AUDIO FORMAT FRAME RATE ASPECT MENU VIDEO 本节内容将介绍每款Teranex所搭载的接口类型, 以便您快速区分不同型号。 EMBED 23.98 ANAM 14:9 HOME GAIN LBOX CCUT MENU 1080 PBOX ZOOM Teranex Express ULTRA 29.97 59.94 MENU SMART SHARP IN A IN B LOOP A...
- Page 615 VIDEO AUDIO FORMAT FRAME RATE ASPECT MENU VIDEO 23.98 ANAM 14:9 HOME GAIN EMBED LBOX CCUT MENU Teranex AV HDMI 1080 PBOX ZOOM ULTRA 29.97 59.94 MENU ANLG SMART SHARP VIDEO AUDIO FORMAT FRAME RATE ASPECT MENU VIDEO REF OUT CH A CH B PUSH...
- Page 616 VIDEO AUDIO FORMAT FRAME RATE ASPECT MENU VIDEO 23.98 ANAM 14:9 HOME GAIN EMBED Teranex 2D LBOX CCUT MENU HDMI 1080 PBOX ZOOM 29.97 59.94 MENU ANLG ANLG SMART SHARP 1080 REF IN Y/NTSC/PAL IN B-Y IN R-Y IN Y/NTSC/PAL OUT B-Y OUT R-Y OUT ANALOG AUDIO IN/OUT...
- Page 617 VIDEO AUDIO FORMAT FRAME RATE ASPECT MENU VIDEO 23.98 ANAM 14:9 HOME GAIN EMBED LBOX CCUT MENU Teranex 3D HDMI 1080 PBOX ZOOM 29.97 59.94 MENU ANLG ANLG SMART SHARP 1080 VIDEO AUDIO FORMAT FRAME RATE ASPECT MENU VIDEO DOLBY METADATA REMOTE IN/OUT REF IN Y/NTSC/PAL IN...
- Page 618 更改设置 您可通过两种不同的方法来更改Teranex处理器的设置。 这两种方法分别是: 使用前面板更改设置, 或使用Blackmagic Teranex Setup软件更改设置。 本节内容将为您介绍如何使用控制面板或设置软 件来更改Teranex处理器的设置。 使用前面板更改设置 使用设备自带的控制面板更改设置非常简单! 只要您掌握了其中一项转换操作的基本要领之后, 所有其他转换操作都可举一反三。 要设置一类转换, 请先设置好您的输入, 并确认输入信号。 设置输入 按控制面板左侧的 “IN” (输入) 按钮。 选定后, 该按钮会亮起。 VIDEO AUDIO FORMAT FRAME RATE ASPECT MENU VIDEO PRESETS AUDIO STATUS PANEL EMBED 23.98 ANAM 14:9 HOME GAIN LOCK LBOX...
- Page 619 备注 如果在Teranex 2D或3D上选择模拟视频, 只要通过旋钮就可确认LCD上的分量 或合成视频。 使用Teranex AV型号时, 多次按下SDI按钮可在两个后面板SDI输入、 SDI 1 和SDI 2之间选择。 首次按下按钮时, LCD屏幕将短暂显示当前所选的SDI输入。 如果在 五秒内再次按下SDI按钮, Teranex AV将切换到其他SDI输入信号。 当您在Teranex AV的两路SDI视频源之间选择时, LCD屏幕可立即显示您所选的输入。 使用 “AUDIO” 下方的一列按钮来选择EMBED (嵌入) 、 AES或ANLG (模拟) 音频输入类 型。 如果选择模拟, 请确认您的连接是 “XLR” 、 “DB25” 还是 “RCA” , 以便Teranex明确 您需要的是来自XLR接口、 DB25接口还是RCA HiFi线路输入接口的模拟音频。 设置输出...
- Page 620 请参考 “Teranex处理器的各项设置” 和 “转换流程” 部分的内容获取更多关于Teranex设置及其作 用的相关信息。 VIDEO AUDIO FORMAT FRAME RATE ASPECT MENU VIDEO PRESETS AUDIO STATUS PANEL EMBED 23.98 ANAM 14:9 HOME GAIN LOCK LBOX CCUT MENU HDMI 1080 PBOX ZOOM SYSTEM STATUS 29.97 59.94 MENU ANLG ANLG SMART SHARP 1080 LOCK...
- Page 621 以下是控制面板的各项功能简介。 VIDEO AUDIO FORMAT FRAME RATE ASPECT MENU VIDEO System Video Main Menu Setup 23.98 ANAM 14:9 HOME GAIN EMBED Audio LBOX CCUT MENU HDMI 1080 PBOX ZOOM Noise Reduction 29.97 59.94 MENU Ancillary ANLG ANLG SMART SHAR 1080 Data FRAME RATE ASPECT...
- Page 622 各类预设 使用 “PRESET” (预设) 下方的六个按钮可保存和调用您的转换设置。 预设可通过Blackmagic Teranex Setup实用程序被保存、 调用并命名。 预设将保存您Teranex的所有操作参数, 以便之后调用。 例如, 您可以保存自定义Proc Amp或宽高 比设置, 用于在制作需要时即时调用。 或者, 您也可以保存特殊时间码、 隐藏式字幕或音频通道映 射配置, 以便每天重复使用。 ‚ 保存一个预设: 找到 “PRESETS” 下方相应的按钮, 长按三秒钟即可。 该按钮会以闪烁提示 您该预设已保存, 并将保持闪烁状态, 直至您调整某项设置为止。 ‚ 调用一个预设: 按下 “PRESETS” 下方相应的按钮, 并使用多功能菜单按钮选择 “RECALL” 即可。 调用后, 相应的预设按钮将保持闪烁, 直至您更改设置。 VIDEO AUDIO FORMAT...
- Page 623 SYSTEM STATUS (系统状态) LED 灯亮起时提示以下信息: 检测到输入视频 已选择并检测到外部同步输入信号 电源供应1可运行 电源供应2可运行。 仅限Teranex 2D和Teranex 3D 在输入或输出视频上检测到时间码 在输入或输出视频上检测到隐藏式字幕 <--> 检测到以太网通信 检测到Thunderbolt™通信。 仅限Teranex 2D和Teranex 3D “AUDIO STATUS” (音频状态) 、 “TC” (时间码) 以及 “CC” (隐藏式字幕) 状态灯代表输入或输 出视频中的各项参数, 具体取决于 “IN” 或 “OUT” 的选择。 VIDEO AUDIO FORMAT FRAME RATE ASPECT MENU...
- Page 624 使用 Blackmagic Teranex Setup 更改设置 Blackmagic Teranex Setup实用程序界面直观且操作便捷, 您可以通过它来查看Teranex处理器的 状态, 并可以在以太网络的任意位置实现远程控制方案。 这一便捷的程序能让您远程控制Teranex, 无需使用设备的前面板。 所有转换设置均可使用Blackmagic Teranex Setup远程完成。 了解用户界面 运行Blackmagic Teranex Setup后, 您首先看到的将是登录窗口。 该窗口可显示所有联网的Teranex 处理器, 您也可以根据需要添加更多的Teranex处理器。 点击位于Teranex处理器下方的设置图标可 打开实用程序。 调整界面尺寸 点击并来回拖动登录窗口的右下角可将界面尺寸调整到最适合屏幕的大小。 您还可以拖动窗口的边 缘, 以垂直方向或是水平方向调整大小。 选择一台 Teranex 处理器 Teranex Setup实用程序可在以太网内自动定位您的Teranex处理器, 并按照型号名称在登录窗口显 示。 如果找到多台Teranex处理器, 那么每台都将以独立的窗口显示。 只要点击屏幕左右边缘的箭头 就能选择想要的处理器,...
- Page 625 通过 Teranex Setup 软件添加 Teranex 处理器步骤如下: 按下登录界面左下角的 “+” 加号按钮来添加一台设备。 键入IP地址并按下 “Add” (添加) 。 Teranex处理器将作为可控制设备出现在您的网络中。 如需手动添加Teranex处理器, 请在登录界面上点击 “+” 图标打开 “Add a Teranex” (添加一台Teranex) 窗口, 然后输入您Teranex处理器的IP地址。 菜单和按钮 界面里大部分的远程控制功能和参数都非常的直观, 特别是如果您熟悉Teranex处理器前面板操作 更是就轻驾熟。 功能页面栏 设置和操作控制根据功能被分为六个页面。 Setup (设置) 选择视音频输入源、 输出视频格式、 外部同步及其他功能。 不同于前面板运作模式, 更改 输出格式无需确认操作就可立即生效。 Processing (处理) 可实现视频Proc Amp和调色控制,...
- Page 626 Configure (配置) 显示您所控制的Teranex及其IP地址。 您可以为它指派一个专用的名称, 以便系统中出现 多台Teranex时能加以识别。 只要点击 “Name” 栏, 键入新的名称即可。 当您通过Teranex Setup实用程序选中一台Teranex时可以查看相应设备的名称, 并且连接后还将显示在该 实用程序的标题栏里。 您还可以为每个预设指派描述性名称, 以便识别其拥有者、 用途或 是预设中所保存的设置等。 滑块调节 以鼠标点击并拖动滑块即可进行调整。 另一种调整滑块的方法是使用键盘上的方向键。 向上和向右 箭头将以1单位增量移动滑块, 而向左和向下箭头将降低数值。 您还可点击数值框并直接输入滑块的 数值。 如有需要, 您只需点击圆形返回箭头图标即可同时将所有参数恢复到默认值。 更改设置...
- Page 627 使用齿轮图标设置菜单 点击齿轮形状的设置图标可显示设置菜单, 用于远程锁定前面板、 保存或调用预设。 您也可以将当 前的Teranex设置保存在计算机上, 或者将设置载入Teranex。 通过遥控锁定控制面板 您可以远程锁定Teranex的前面板, 从而防止他人在现场使用前面板时因意外触碰所引起的误操作 事故。 点击设备菜单中的 “Panel Lock/Unlock” 可以锁定或解锁前面板。 锁定时, 前面板上的Panel Lock按钮会亮起红色。 直接操作设备时, 只要禁用面板锁定就可以覆盖 这一功能。 但是在执行这一操作时需多加小心, 因为其他人也可能正在操作该设备。 保存和调用预设 Teranex中有六种用户定义预设选项。 设置菜单可让您根据需要保存和调用这些预设。 点击 “Save Preset” (保存预设) 或 “Recall Preset” (调用预设) , 选择想要的 “Preset” (预设) , 然后在对话框 中确认您的选择。...
- Page 628 宽高比转换 这张转换表可帮助您明确显示在您转换中的宽高比需如何设置。 这是一个非常有用的参考工具, 从 而您可以视觉上识别出每个设置并更快做出选择。 上变换 输入 4:3 输出 16:9 PBOX (左右加黑 在16:9高清画幅内显示4:3标 边) 清图像。 左右两侧留有黑边。 ZOOM (缩放) 放大4:3标清图像直到完全填 充16:9高清画幅。 顶部和底部的部分图像将丢失。 14:9 是PBOX和ZOOM的折中方案。 左右两侧留有少量黑边, 顶部 和底部稍作裁切。 SMART (智能) 增量拉伸两侧以适配16:9画 面, 并且不造成4:3主体画面 失真。 ANAM (变形) 将4:3标清画幅水平拉伸到16:9 高清画面。 下变换 输入 16:9 输出 4:3 LBOX (上下加黑...
- Page 629 宽屏 16:9 标清转 4:3 标清 大部分标清节目都是采用4:3宽高比, 但有时某些标清视频源可能是以宽屏16:9宽高比录制的。 想要 恰当地处理标清宽屏输入, Teranex处理器必须设置为可识别16:9信号源的配置。 按下位于前面板上的 “IN” (输入) 按钮。 按下 “ASPECT” (宽高比) 按钮列中的 “LBOX” (上下加黑边) 按钮, 将标清输入设为16:9 宽屏。 按下位于前面板上的 “OUT” (输出) 按钮。 想要输出宽屏标清视频源上下加黑边的版本, 请按下 “LBOX” 按钮。 想要输出宽屏标清视频源左右切边的版本, 请按下 “CCUT” 按钮。 标清到标清的转换 输入为宽屏标清 输出 4:3 输入按LBOX 将整个16:9标清图像缩为4:3画...
- Page 630 转换流程 本手册的这一章节向您介绍了使用Teranex处理器进行主要转换的设置流程。 格式转换、 上下及交 叉转换等所有转换通过前控制面板都遵循同样的通用设置。 您还可以了解到如何保存和调用常用的 转换预设以及如何设定节奏设置, 以便在使用3:2下拉处理的时候清理或是移除节奏。 提示 当设置一个转换时, 控制面板上的LED状态可以让您监看所显示的信号情况。 详情请 参阅 “音频和系统状态LED灯” 部分的内容。 上变换 上变换是一个将视频转换成更高分辨率的过程。 例如, 您可能需要将NTSC SD视频源纳入HD制 作。 NTSC素材可被转换为众多720和1080 HD输出格式及帧率, 具体取决于您的项目制作要 求。 Teranex处理器可运用高品质去隔行技术和上变换算法来确保出色的转换效果。 本例中, 通过 使用Teranex 2D或3D上的缩放宽高比和RCA模拟音频输入, 486i59.94的分量模拟视频被转换到了 1080p29.97格式。 开启您的Teranex处理器并连接输入和输出设备。 设置输入 按控制面板上的 “IN” (输入) 按钮并选择 “ANLG” (模拟) 视频。 LCD屏幕将显 示...
- Page 631 VIDEO AUDIO FORMAT FRAME RATE ASPECT 23.98 ANAM 14:9 EMBED LBOX CCUT HDMI 1080 PBOX ZOOM 29.97 59.94 ANLG ANLG SMART 1080 按OUT按钮可选择输出设置。 在上图中, 输出被设置为1080p29.97, 带Pillarbox (左右加黑边) 宽高比。 设置宽高比 按 “CCUT/ZOOM” 按钮可将宽高比设置为 “ZOOM” 。 您的Teranex处理器已准备就绪, 可以开始进行视频转换了 。 FRAME RATE ASPECT 23.98 ANAM 14:9...
- Page 632 设置输入 按Teranex控制面板上的 “IN” (输入) 按钮并选择 “SDI” 视频。 Teranex将自动检测输入 格式, 并通过LCD屏幕显示输入视频, 同时亮起相应的按钮。 “EMBED” (嵌入) 按钮将亮起显示音频输入类型。 VIDEO AUDIO FORMAT FRAME RATE ASPECT 23.98 ANAM 14:9 EMBED LBOX CCUT 1080 PBOX ZOOM 29.97 59.94 UltraHD SMART 按IN按钮可让控制面板按钮显示输入格式。 在上图中, 输入格式为1080i59.94, 通过SDI并带加嵌音频。 设置输出 按控制面板上的 “OUT” (输出) 按钮。 “SDI” 按钮和 “EMBED” (嵌入) 音频按钮将亮起 蓝色。...
- Page 633 设置输入 按控制面板上的 “IN” (输出) 按钮并选择 “SDI” 视频。 Teranex将通过LCD屏幕显示输入视 频, 并自动检测输入格式, 亮起相应的按钮。 选择 “EMBED” (嵌入) 作为音频输入格式。 VIDEO AUDIO FORMAT FRAME RATE ASPECT 23.98 ANAM 14:9 EMBED LBOX CCUT HDMI 1080 PBOX ZOOM 29.97 59.94 ANLG ANLG SMART 1080 按 “IN” 按钮可让控制面板按钮显示输入格式。 在上图中, 输入格式为1080p25, 通过SDI并带加嵌音频。 设置输出...
- Page 634 交叉变换 交叉变换可转换视频素材的分辨率或宽高比。 1080和720 HD格式之间的交叉变换可通过高品质去 隔行算法加以处理, 使所有转换工作采用逐行扫描的方式进行。 SD格式的4:3和16:9之间的宽高比 转换也非常简单。 本例中, 486i59.94格式的16:9宽高比图像经过交叉变换后成为Letterbox (上下加 黑边) 4:3画幅, 通过SDI接口, 并带加嵌音频。 开启您的Teranex处理器并连接输入和输出设备。 设置输入 按控制面板上的 “IN” (输出) 按钮并选择 “SDI” 视频。 Teranex将通过LCD屏幕显示输入 视频, 并自动检测输入格式, 亮起相应的按钮。 选择 “EMBED” (嵌入) 作为音频输入格式。 VIDEO AUDIO FORMAT FRAME RATE ASPECT 23.98 ANAM 14:9 EMBED LBOX CCUT...
- Page 635 设置输出宽高比 按 “LBOX/PBOX” 按钮可将宽高比设置为Letterbox (上下加黑边) 。 您的Teranex处理器已准备就绪, 可开始视频交叉变换了 。 4:3比例显示 16:9比例画面 使用LBOX/PBOX按钮设置SD输出可将16:9图像置于4:3画幅之中。 4:3转换可在画幅上下加上黑边, 从而保 持正确的宽屏比例。 提示 更多关于宽高比设置的内容, 请参阅第640页 “宽高比菜单” 以及第628页 “宽高比转 换” 部分的内容。 格式转换 格式转换也称 “帧率转换” , 主要用来转换视频帧率, 例如将59.94 fps的NTSC制式转换成50 fps的 PAL制式。 Teranex强大的线性插值算法可分析帧间及帧内像素, 并实时计算新像素来创建新的输出 帧率。 本例中, 通过SDI输入的1080i59.94视频转换成1080i50视频, 并带加嵌音频。 开启您的Teranex处理器并连接输入和输出设备。 设置输入 按控制面板上的...
- Page 636 所有输出接口输出。 这些按钮也会亮起蓝色以确认您的设置。 VIDEO AUDIO FORMAT FRAME RATE ASPECT 23.98 ANAM 14:9 EMBED LBOX CCUT HDMI 1080 PBOX ZOOM 29.97 59.94 ANLG ANLG SMART 1080 按 “OUT” 按钮可选择输出设置。 在上图中, 输出被设置为1080i50。 设置帧率转换幅度 当转换帧率时, 您需要设置合适的帧率幅度。 请根据视频中动态画面的多少, 分别从0 “Drama” (电视 剧) 到3 “Sport” (体育) 之间进行选择完成设置。 这些设置可通过多功能菜单按钮和旋钮进行调整。 按...
- Page 637 移除节奏 移除节奏功能就是移除3:2下拉序列。 通过胶转磁将每秒24帧的胶片影像转换为每秒59.94场的视 频时就会应用3:2下拉。 Teranex处理器可在将带有3:2下拉的视频转换为每秒24帧的视频时自动移 除节奏。 VIDEO AUDIO FORMAT FRAME RATE ASPECT 23.98 ANAM 14:9 EMBED LBOX CCUT HDMI 1080 PBOX ZOOM 29.97 59.94 ANLG ANLG SMART 1080 将NTSC帧率转换成电影帧率时, 设备可自动应用问题节奏移除操作。 例如: 59.94fps转23.98fps。 清理节奏 Teranex 2D和3D型号的清理场序功能可移除不连贯、 非标准以及混合的节奏, 并建立干净的3:2下 拉。 3:2的节奏会出现在59.94节目素材中, 因此清理节奏仅适用于帧率为59.94的视频。 本例中, 我 们将执行交叉变换来清理带嵌入音频的1080i59.94 SDI视频信号上的节奏。...
- Page 638 设置宽高比 “ADJ” 宽高比调节按钮可用于自定义宽高比设置。 完成所有节奏设置和宽高比设置之后, 您的视频应可应用纯净的节奏。 提示 更多关于宽高比设置及其显示方式的内容, 请参阅第628页 “宽高比转换” 以及第 640页 “视频菜单设置” 部分的内容。 Teranex AV 的极低延迟处理性能 Teranex AV设有低延迟模式, 能以大幅低于常规处理的低延迟性能执行各类常见转换。 用于某些格 式转换的最低延迟处理模式能以2帧延迟运行。 这一特性非常适合现场制作环境, 它可显著减少现 场实况和监视器或大屏幕显示画面之间的时间差。 本例是将1080i59.94转换到Ultra HD 2160p59.94格式, 使用的是 “Processing” (处理) 菜单中最低 的延迟模式。 开启您的Teranex AV处理器并连接输入和输出设备。 选择一个支持低延迟的转换, 然后启用低延迟模式。 设置输入 按控制面板上的 “IN” (输出) 按钮并选择 “SDI” 视频。 Teranex将通过LCD屏幕显示输入视频,...
- Page 639 Teranex 处理器的各项设置 本章内容向您介绍了如何通过控制面板的按钮及LCD屏幕为每种转换类型设置Teranex处理器。 此 外, 本章还介绍了如何使用所有可用的设置从而帮您实现转换的最佳质量。 例如, 在格式转换中设 置帧率转换幅度以达到最佳的动态质量, 或是为上、 下变换选择您所想要的宽高比等设置。 有了这 些不同的设置, 您将有更多机会改进转换后的视频质量。 您可以使用清理节奏功能来清除潜在的节 奏问题、 添加降噪、 更改视频级别等操作。 LCD 屏幕菜单 LCD屏幕菜单可通过8个多功能按钮控制并进行选择。 这8个按钮之所以被称作 “多功能按钮” , 是因为它们可根据菜单显示变化功能。 顺时针或逆时针转动旋钮可调整各项参数的数值。 如果参数存在默认设置, 按下旋钮可快速重置 该参数。 HOME (主菜单) 按钮 “HOME” 按钮可将LCD屏幕在视频显示和主菜单之间切换。 MENU 1 (菜单 1 ) 和 MENU 2 (菜单 2 ) 按钮 这些按钮可用来保存常用菜单页面和设置的快捷方式。...
- Page 640 视频菜单设置 “Video” 菜单控制可调整视频输出的色彩、 限幅、 宽高比等设置项。 Color ( 色彩) 菜单 要调整Red (红) 、 Green (绿) 和Blue (蓝) 的增益设置, 请转动旋钮找到每个色彩通道。 ‚ 每个色彩控制的范围在-200到+200之间。 ‚ 默认值是0。 System Proc Video Main Menu Color Video Color Setup Test Audio Clip Green Patterns Noise Aspect Advanced Blue Reduction Ancillary Reset...
- Page 641 Adjust Aspect ( 调整宽高比) 要自定义某项宽高比尺寸、 位置以及修剪设置, 请使用多功能菜单按钮和旋钮进行操作。 Size (尺寸) 可调整画面的水平和/或垂直尺寸。 调整范围大约在-50到+200百分比之间。 Position (位置) 可在输出的画幅范围内移动输入视频的画面。 调整的范围视当前画面尺寸而定。 Trim (修剪) 可在输入画面边缘添加水平和/或垂直遮幅。 Horizontal ( 水平) 可用于进行水平尺寸调整、 位置调整和修剪。 Vertical ( 垂直) 可用于进行垂直尺寸调整、 位置调整和修剪。 Both (二者) 可绑定水平和垂直控制。 例如, 当更改输入画面的尺寸时, 将两项控制绑定在一起可保持 合适的宽高比。 Reset All ( 全部重置) 可将所有设置恢复到其相应的默认值。 Horizontal Size Size...
- Page 642 视频设置菜单 您可以使用 “视频设置” 菜单定义模拟、 SDI和HDMI输入输出的参数。 菜单会根据您使用的Teranex 机型而有所不同。 No Video Input ( 无视频输入) 菜单 当未检测到视频输入信号时, 该菜单可用来选择黑场或彩条输出。 默认设置为 “Black” (黑场) 。 Teranex AV 专有的 HDMI Output ( HDMI 输出) 菜单 HDMI输出的色彩空间可以通过该菜单, 或Blackmagic Teranex Setup实用程序中的 “设置” 选项卡 设置成YUV或RGB。 Proc No Video No Video Color Video SDI Output...
- Page 643 Teranex 3D Processor 专有的 Video Sampling (视频采样) 菜单 “Video Sampling” 菜单可用来为Teranex 3D Processor选择以下采样类型: ‚ 4:2:2 – YUV ‚ 4:4:4 – YUV ‚ 4:4:4 – RGB Proc No Video Video Color Video Setup Sampling Input 4:2:2 YUV Test Analog Clip Patterns Input Output 4:4:4 YUV...
- Page 644 四链路HD输出可通过以下方式指派: ‚ SDI输出A: 子图像 1 ‚ SDI输出B: 子图像 2 ‚ SDI环通输入A: 子图像 3 ‚ SDI环通输入B: 子图像 4 Out A Out B Loop A Loop B 全帧Ultra HD图像 四分屏HD输出 Proc No Video Color Video Setup Output Input Single Link Test 3G SDI Clip Patterns Output...
- Page 645 提示 此设置仅适合在输出3G-SDI视频时使用。 对于3G-SDI输入而言, 设备将会自动检 测 “Level A” 和 “Level B” 信号。 Teranex AV 专有的 Quad SDI Output ( 四链路 SDI 输出) 菜单 当使用Ultra HD输出格式时, Teranex AV可通过其专设的BNC接口提供四链路SDI输出。 这些BNC 输出接口分别标有 “CH A” 、 “CH B” 、 “CH C” 以及 “CH D” 。 Teranex AV支持四链路2 Sample Interleave (2SI)...
- Page 646 完成调整后, 相应的按钮将亮起白色, 表示启用的是非默认设置。 要恢复默认设置, 请到 “Proc Amp” 菜单或控制面板的按钮中选择相应参数, 再按下旋钮即可重置。 如果要将所有参数恢复到默认设 置, 请到 “Proc Amp” 菜单下选择 “Reset All” (全部重置) 即可。 ‚ Gain (增益) 范围: -60到+60。 默认: 0 ‚ Saturate (饱和度) 范围: -60到+60。 默认: 0 ‚ Black (黑电平) 范围: -30到+30。 默认: 0 ‚ Hue (色相) 范围:...
- Page 647 分辨率测试图 网格测试图 Teranex AV 的测试图案 除了以上展示的视频测试图案以外, Teranex AV还配有图案运动菜单和集成音频测试音菜单。 Test Patterns (测试图案) 选中 “Test Patterns” 来挑选相应的视频测试信号。 ‚ 音频 在选择视频测试信号前, “Audio” (音频) 菜单为灰色。 使用旋钮选择需要的音频频率。 测 试音将应用于所有输出声道, 暂时盖过任何之前存在的音频输出映射。 原始音频输出映射 将在视频测试图案或 “Audio” 菜单关闭时恢复。 ‚ Motion (运动) 在选择视频测试图案前, “Motion” (运动) 菜单为灰色。 如下所述, 打开 “运动” 菜单来激 活...
- Page 648 Blackmagic Teranex Setup实用程序中的设置页面提供运动控制、 视频测试图案和音频测试音选择。 高级菜单 Teranex处理器可提供以下高级节奏更正功能: Teranex 2D 和 3D 的清理节奏功能 清理节奏功能可在您的59.94输出视频上建立一个干净的3:2下拉序列。 设置清理节奏 使用多功能菜单按钮和旋钮可开启或关闭 “Clean Cadence” (清理节奏) 功能。 ‚ On (开启) 选中 “Clean Cadence” (清理节奏) 模式 ‚ Off ( 关闭) 选中 “Normal Video” (常规视频) 模式 默认模式为 “Off” 提示 如果您确定原始视频源采用的是3:2下拉序列, 例如通过胶转磁将胶片转换为视频的 影像材料,...
- Page 649 Scene Detect ( 场景探测) 场景变化探测可将剪接画面之间的场融合现象降到最低, 获得更干净的输出画面。 该功能可防止前 一个场景的视频场和新的场景发生混叠。 ‚ On (开启) 启用场景切换探测 ‚ Off ( 关闭) 禁用场景切换探测 默认模式为 “On” 大部分视频开启 “Scene Detect” (场景探测) 时都不会出现问题, 但是有些视频序列可能会因时域 分辨率瞬时变化而出现卡顿现象。 图像底部带有游动文字的视频可能会出现这一现象。 如果出现卡 顿现象, 请确保关闭 “Scene Detection” 功能。 Proc Clean Source Color Video Advanced Cadence Type Test Scene...
- Page 650 音频菜单设置 “Audio” 菜单可在输入声道上映射输出, 为音频增益和延迟提供控制, 并提供某些设置参数。 Teranex 2D机型设有 “Input Mapping” (输入映射) 菜单, 可同时选中多个通道用于嵌入式音频以及AES和/ 或模拟输入源。 Output Mapping (输出映射) 菜单 Teranex处理器可提供多达16个音频输出通道, 具体数量根据所使用的输出音频类型而定。 在其默 认配置中, 输入通道被逐一映射为选中的输入, 最多可达16路输出。 “Output Mapping” (输出映射) 菜单可将输入声道、 杜比解码声道或内部生成的测试音指派到任何输出通道上。 您也可以将单独声 道设为静音。 在前面板上选择音频输入源, 可以是 “EMBED” (嵌入) 、 “AES” 或 “ANLG” (模拟) 。 如 使用Teranex 2D,...
- Page 651 Output Mapping Output Mapping Output Mapping Prev Next Prev Next Prev Next Channel 1 Source Channel 4 Source Channel 13 Source Input 1 Input 1 Tone .75 kHz Input 2 Input 2 Tone 1.5 kHz Input 3 Input 3 Tone 3 kHz Input 4 Input 4 Tone 6 kHz...
- Page 652 Input Mapping Input Mapping Prev Next Prev Next Input 1/2 Source Input 3/4 Source Embedded 1/2 AES 5/6 Embedded 3/4 Embedded 5/6 AES 7/8 Embedded 7/8 ANLG-DB25 1/2 Embedded 9/10 ANLG-DB25 3/4 Reset Reset Embedded 1/2被映射到 ANLG-DB25 1/2被映射到 Input 1/2 Source Input 3/4 Source Audio Gain (音频增益)...
- Page 653 旋转旋钮来进行调整。 调整范围在-12到+12dB之间。 按下旋钮可恢复到零设置。 System Output Input Analog Analog Video Main Menu Audio Setup Setup Mapping Mapping In Level Input Output Audio Audio Options Gain Audio Noise Delay Reduction Ancillary Setup Data Main Menu (主菜单) > Audio (音频) 菜单 > Setup (设置) 菜单 > Analog Audio (音频)...
- Page 654 Teranex AV 专有的音频表 Teranex AV可以让您选择在LCD前面板上显示哪对音频输入或输出通道。 通道号码会显示在音频 表下方供您查看确认。 System Output Audio Video Main Menu Audio Setup Mapping Meters Channels 1&2 Audio Output Audio Options Gain Channels 3&4 Channels 5&6 Audio Noise Delay Reduction Channels 7&8 Channels 9&10 Ancillary Setup Data Main Menu (主菜单) > Audio (音频)...
- Page 655 如果为Teranex 3D型号安装了杜比解码器, 杜比元数据或可从输入的杜比音频中获得, 还可通过 Teranex 3D后侧的9针杜比元数据接口作为串行数据输入。 您还可选择 “Dolby Metadata” (杜比元 数据) 菜单中提供的 “Stereo” (立体声) 和 “5.1” 两个常用配置之一, 在Teranex 3D中生成自己的元 数据。 具体配置选项详见下面的表格。 两类配置的区别以粗体字显示。 System Output Dolby Dolby Dolby Metadata Video Main Menu Audio Setup Mapping Encode Metadata Pass-Thru Audio Dolby Output Audio Options Gain...
- Page 656 元数据参数 立体声 首选立体声缩混 未指定 未指定 Lt/Rt中心缩混级别 -3dB -3dB Lt/Rt环绕声缩混级别 -3dB -3dB Lo/Ro中心缩混级别 -3dB -3dB Lo/Ro环绕声缩混级别 -4.5dB -4.5dB 扩展比特流信息2 支持 支持 杜比环绕声EX模式 未指定 未指定 杜比耳机 未指定 未指定 A/D转换器类型 标准 标准 直流滤波器 启用 启用 低通滤波器 启用 启用 LFE低通滤波器 禁用 启用 环绕声相移 禁用 启用...
- Page 657 Bias (偏差值) 菜单 调节 “Bias” 水平可设定降噪值。 偏差值越高, 降噪强度就越大。 ‚ 调整范围是-6到+6。 ‚ 默认值是0。 Split Enable Set Value Screen Bias Overlay Noise Reduction (降噪) 菜单 > Bias (偏差值) Split Screen (分屏) 菜单 分屏功能可将LCD屏幕一分为二, 一半用于显示降噪效果, 另一半则不显示降噪。 这样能便于您将 降噪设置与原画面进行比对。 要启用分屏功能, 请到Main Menu (主菜单) > Noise Reduction (降噪) > Split Screen (分屏) 菜单 中,...
- Page 658 辅助数据菜单设置 “Ancillary Data” 菜单可用于设置隐藏式字幕、 时间码以及视频索引功能。 Closed Caption (隐藏式字幕) 菜单 “Closed Caption” 菜单可用来配置CEA-608B和CEA-708B标准的隐藏式字幕。 CEA-608B是用于 标清NTSC模拟和SD-SDI影像的隐藏式字幕参考标准。 字幕将在场消隐期的第21行扫描线处进行 编码。 CEA-708B是HD-SDI的标准, 通常在第9行扫描线处进行字幕编码。 Teranex处理器可自动检测SD和HD视频格式的数字字幕。 如果SD信号中未出现数字字幕, 处理器 将在第21行扫描线处查找模拟字幕。 如果该视频资料的第21行含有字幕信息, 但是您无法查看到, 请设置 “Analog in Line” (模拟输入行) 菜单以查找第20行或第22行扫描线中的字幕信息。 提示 隐藏式字幕处理还可通过 “Service 2 Source” 菜单, 将608 CC2和CC3格式的第二 语言服务上变换到708服务2, 即S2。 System Closed Ancillary...
- Page 659 CC Enable (启用 CC ) “CC Enable” 默认设置为 “Off” (关闭) 。 要启用隐藏式字幕, 请到Main Menu (主菜单) > Ancillary Data (辅助数据) > Closed Caption (隐藏式字幕) > CC Enable (启用CC) 菜单下, 并使用多功能菜 单按钮和旋钮选择 “On” (开启) 。 如果输入的隐藏式字幕数据有误或损坏, 禁用字幕功能可能会有帮助。 前面板上标有 “CC” 的LED状态灯可相应显示 “In” 和 “Out” 选项。 如果选择 “In” , 那么该LED状态 灯将会在检测到输入视频中的隐藏式字幕时亮起。...
- Page 660 Service 1 Language (服务 1 语言) “Service 1 Language” 可用于选择CEA-708隐藏式字幕中的服务语言。 ‚ 语言选项有: 英语 法语 德语 意大利语 西班牙语 ‚ 默认语言设置为英语。 Service 2 Set Value Enable Source English Analog Service 1 In Line Language French German Analog Service 2 Out Line Language Italian Spanish Reset...
- Page 661 Timecode Generator ( 时间码发生器) “Timecode Generator” 菜单可用来选择四类可用的时间码模式, 或禁用手动时间码处理功能。 Off ( 关闭) 输出视频中将不会插入任何时间码数据。 该选项是默认设置。 Closed Video Ancillary Data Prev Timecode Next Index Caption Timecode Start Timecode Generator Input Input Regen Start Timecode Source Generate Jam Sync Setup Ancillary Data (辅助数据) 菜单 > Timecode (时间码)...
- Page 662 Video Closed Ancillary Data Prev Timecode Next Caption Index Timecode Start Timecode Generator Input Input Regen Start Timecode Source Generate Jam Sync Setup Ancillary Data (辅助数据) 菜单 > Timecode (时间码) 菜单 > Timecode (时间码) Input Regen (输入重新生成) Generate (生成) 时间码发生器将生成适合所选输出格式的自由运行的输出时间码, 即使视频输入信号中 并未存在时间码。...
- Page 663 ‚ Set Timecode (设置时间码) “Set Timecode” 中的菜单选项取决于您在 “Start Source” (起始源) 菜单中的选择。 Prev Timecode Next Start Value Timecode Start Input Generator Jam Sync Start Timecode Source 00:00:00:00 Setup Jam Sync (拥塞同步) > Set Timecode (设置时间码) ‚ 将 “ Start Source ” (起始源) 设为 “ Input ” (输入) 如果...
- Page 664 AFD Insertion ( AFD 插入) 菜单 该菜单可用来选择想要插入到输出视频上的AFD编码。 将被插入编码的输出视频行可通过AFD Insert Line (AFD输入行) 菜单中选择。 ‚ 选项如下: Off ( 关闭) 输出辅助数据区不会插入任何AFD编码。 Auto (自动) 可根据当前视频输出格式插入相应编码。 Bypass (旁路) 任何出现在输入视频流中的编码都将被输出。 AFD codes 0000 – 1111 ( AFD 编码 0000 – 1111 ) 这些编码可以根据需要手动选择使用。 ‚ 默认设置为 “Off” (关) 。 Index Video Index Reaction...
- Page 665 以太网菜单 “Ethernet” (以太网) 设置菜单可显示当前设置, 还可以为静态 “IP” 地址、 “Subnet Mask” (子网 掩码) 地址和IP “Gateway” (网关) 指派新的设置。 此菜单还可以将DHCP设为 “On” (开) 或 “Off” (关) 。 当DHCP处于 “On” (开) 状态时, IP、 “Subnet Mask “ (子网掩码) 以及 “Gateway” (网关) 菜单可显 示当前由DHCP服务器所指派到本机的地址。 这些值只有当DHCP处于 “Off” (关) 状态时方可调整。 IP 菜单...
- Page 666 ‚ ON (开) Teranex处理器将启用您网络路由器所指派的IP地址。 ‚ OFF (关) 如之前指派有静态IP地址, 则使用该地址。 如果当您按下IP按钮, 使 “DHCP” 处于 “ON” 状态时, 所看到的IP地址是0.0.0.0, 这表示 设备并未从DHCP服务器成功获得IP地址。 请检查您的以太网连接。 Teranex AV 专有的处理菜单 “Processing” (处理) 菜单能用来更改Teranex AV的处理延迟功能。 当Teranex AV应用于现场直 播或制作等场合时, 这一功能会非常有用, 它可以将延迟降低至2帧。 处理模式有: ‚ “ Lowest Latency ” (最低延迟) 该模式下, 格式转换将以最低延迟运行, 通常为两帧。 ‚...
- Page 667 ‚ Preview (预览) 完成静帧采集后, 您可以使用 “Preview” (预览) 按钮在Teranex AV的输出上看到3秒的影 像。 如果不存在采用当前输出分辨率的静帧, 那么预览按钮将以灰色显示, 表明此功能不 可用。 ‚ Delete (删除) 按下 “Delete” (删除) 按钮可从存储器上删掉一个静帧。 此时会弹出一个确认窗口加以提 示。 如果需要删除所有静帧图像, 只要通过 “System Setup” (系统设置) > “Factory Reset” (恢复出厂设置) 菜单对Teranex AV进行恢复出厂操作即可。 Factory Capture Ethernet System Setup Delete Still Frame Reset Mode...
- Page 668 从计算机加载图文时, 对文件分辨率没有要求。 图像转换软件会自动根据Teranex AV的输 出分辨率来调整图像的尺寸。 请注意, 由于尺寸调整不是通过Teranex算法来完成, 所以质 量会比内部尺寸调整的图像低。 如果需要最高质量的尺寸调整, 可以将图像通过SDI或 HDMI发送到Teranex AV, 然后使用Teranex AV内部的算法调整尺寸, 从而获得最佳效果。 恢复出厂设置菜单 选择 “ Factory Reset ” 可将设置恢复到出厂时的默认设置。 以下设置将不受影响: ‚ 各种预设。 ‚ 输出视频设置, 如格式、 帧类型、 帧率等。 ‚ 但是宽高比选择除外, 因为任何可调整的宽高比设置都将被恢复到默认值。 ‚ 以太网IP地址设置。 如使用Teranex AV型号, 进行恢复出厂设置后, 存储在设备中的所有静帧图像都将被删除。 Factory Ethernet System Setup...
- Page 669 ‚ Internal ( 内部) 可将Teranex AV的输出与内部生成器进行同步, 从而在输出中生成持续的同步信号, 即使 是为设备更改输入后仍旧如此。 System Factory Video Main Menu Ethernet System Setup Setup Reset Audio Reference Noise Info Reduction Ancillary Data Main Menu (主菜单) > System Setup (系统设置) > System Setup (系统设置) Reference (同步) Pixel Pixel Reference Reference...
- Page 670 输出格式 同步 和帧率 信号 1080PsF30 三电平逐行30, 三电平隔行60 1080i50 黑场50, 三电平隔行50 1080p50 黑场50 1080i59.94 黑场59.94, 三电平隔行59.94 1080p59.94 黑场59.94 1080i60 三电平隔行60 1080p60 不支持 2K DCI 23.98p 三电平逐行23.98, 三电平隔行47.96 2K DCI 23.98PsF 三电平逐行23.98, 三电平隔行47.96 2K DCI 24p 三电平逐行24, 三电平隔行48 2K DCI 24PsF 三电平逐行24, 三电平隔行48 2160p23.98 三电平逐行23.98,...
- Page 671 Teranex AV 专有的生成菜单 Teranex AV可通过其 “Reference Output” (同步输出) 接口生成同步信号。 同步信号可以是黑场或 是三电平, 具体由Teranex AV的输出视频格式而定。 有些视频格式只能使用某些特定的同步类型。 例如, 如果您的Teranex输出格式为NTSC, 那么只能生成59.94Hz的黑场。 同理, 如果是1080p23.98 输出, 则只能生成三电平同步。 1080i59.94等其他格式则两种类型都可以使用。 不同的三电平同步 有: 三电平逐行, 即TRI-P; 以及三电平隔行, 即TRI-I。 Factory Pixel Reference Ethernet System Setup Type Reset Offset Blackburst Line Processing Reference Generate Offset...
- Page 672 您的输出视频格式 您可以选择生成的同步信号 2K DCI 23.98PsF 三电平隔行47.96 2K DCI 24p 三电平逐行24 2K DCI 24PsF 三电平隔行48 2160p23.98 三电平逐行23.98 2160p24 三电平逐行24 2160p25 黑场50或三电平逐行25 2160p29.97 黑场59.94或三电平逐行29.97 2160p30 三电平逐行30 2160p50 黑场50 2160p59.94 黑场59.94 2160p60 不支持 信息菜单 “Info” (信息) 菜单可显示您Teranex处理器的产品型号名称以及当前所安装的软件的版本号。 Factory Ethernet System Setup Teranex AV Reset SW Version: Processing...
- Page 673 输入 “Input” (输入) 指您当前在前面板上所选的视频输入。 此信号可以是SDI 1、 SDI 2、 HDMI 或是光纤输入 (若已安装的话) 。 视频测试图案可在Home (主页) > Video (视频) > Test Patterns (测试图案) 菜单的 “Input” (输入) 选项中选择。 黑场 按下 “Black” (黑场) 将输出切换到内部黑场发生器。 该模式下不会输出音频。 Still (静帧) 按下 “Still” (静帧) 将显示一个保存的静帧。 若存储器中没有静帧图像, 则 “Still” 按钮将 显示为灰色,...
- Page 674 ‚ 转场设置对冻结帧无效。 选择冻结后, 无论转场如何设置, Teranex AV将立刻硬切到冻 结帧。 音频将被静音。 当您准备将冻结帧切换到输入、 黑场或静帧时, 转场将遵照上述转场设置执行。 在以下 例子中, 信号源2上的音频将按照同样的速度跟视频一起淡入。 按下前面板旋钮或者逆时针旋转, 可将转场速度重置为零。 输出选项、 转场设置和静帧控制也可以通过Blackmagic Teranex Setup实用程序进行远程控制。 3D 菜单设置 只有Teranex 3D Processor型号才具备 “3D” 菜单。 这个菜单可启用Teranex 3D Processor内部的双 重处理器, 为立体输入转换格式或帧率, 或者将2D源转换为模拟3D输出。 System Video Main Menu 3D Mode Intensity Setup Audio Input...
- Page 675 3D 模式菜单 在 “3D Mode” (3D模式) 菜单中, “Off” (关) 选项代表常规2D处理。 以下是启用3D处理的可用选项: ‚ Convert ( 转换) 此模式可启用立体左右眼输入处理, 该处理可经由SDI或HDMI输入。 此模式还可同步输入立 体信号, 换言之, 两路不同步的输入信号可经由 Teranex 3D Processor处理后输出同步信号。 ‚ 将您的左右眼信号分别连接到SDI输入A和B上。 ‚ 2D to 3D ( 2D 转 3D ) 此模式可启用2D转3D运算。 任何2D视频信号都可被转换为模拟3D输出信号。 ‚ 如果您使用的是SDI输入, 请将您的2D源信号连接到 “SDI Input A” 上。 ‚...
- Page 676 输出菜单 “3D Output” (3D输出) 选项可让您定义3D图像的输出格式。 ‚ Full Frame (全帧) 为SDI输出A和B上的左右眼分别提供全分辨率输出, 同时在HDMI输出上提供帧封装信 号。 ‚ Side by Side (并排) 启用并排输出编码。 SDI输出A和B以及HDMI输出将提供相同的并排输出信号。 ‚ Top / Bottom (上下) 启用上下输出编码。 SDI输出A和B以及HDMI输出将提供相同的上下输出信号。 ‚ Line by Line (分行) 启用分行输出编码。 SDI输出A和B以及HDMI输出将提供相同的分行输出信号。 左眼全帧 右眼全帧 并排 上下编码 分行编码 强度菜单 只有在 “3D Mode” (3D模式) 菜单中选择了2D转3D选项, “Intensity” (强度) 选项才可用。 “Intensity”...
- Page 677 3D Mode Intensity Input Depth Camera Output Align 3D菜单 > 2D to 3D (2D转3D) > Depth (深度) 摄影机画面校准菜单 只有在 “3D Mode” (3D模式) 菜单中选择了 “3D Align” (3D对齐) 选项时, “Camera Align” (摄影 机画面校准) 按钮才会被启用。 摄影机画面校准设置可对立体视频流执行一系列处理调整, 包括图 像缩放、 翻转、 水平和垂直位置以及轴线旋转等调整。 您可以对单独的眼进行调整, 或者将左右眼 图像相连并同时以相同的幅度调整双眼通道的立体图像。 ‚...
- Page 678 旋转菜单 “Camera Align” (摄影机画面校准) 里的 “Rotation” (旋转) 菜单可沿X、 Y及Z轴线对图像进行旋 转调整, 既可以独立沿任一轴线, 也可以任意三维组合方式进行调整。 轴向旋转调整可对有机械偏 差的3D摄影机设备进行补偿。 Position Camera Align Zoom Roll Z Rotation Left Eye Roll Z Rotation Left Eye Rotation Trim Tilt X Right Eye Tilt X Right Eye 0.00 Flip Toe-in Y Both Eyes Toe-in Y...
- Page 679 Position Camera Align Zoom Roll Z Rotation Left Eye Rotation Trim Tilt X Right Eye Flip Toe-in Y Both Eyes Reset Reset Camera Align (摄影机画面校准) > Rotation (旋转) 菜单 > Rotation (旋转) Toe In Y Axis (Y轴内倾) Position Camera Align Zoom Flip Flip...
- Page 680 ‚ 参数为负值代表缩小图像, 参数为正值代表放大图像。 ‚ 按下 “Both” (双向) 将绑定水平和垂直缩放参数, 缩放时将保持正确的宽高比。 ‚ 选择 “Both Eyes” (双眼) 将以相同的量同时缩放立体图像的双眼。 Position Camera Align Zoom Horizontal Zoom Left Eye Rotation Trim Vertical Right Eye Flip Both Both Eyes Reset Reset Zoom (缩放) 菜单 > Camera Align (摄影机画面校 Horizontal (...
- Page 681 用于 3D 模式的接口连接及其他重要信息 接下来将详细介绍影响您工作流程的几个接口和辅助数据处理。 视频连接 立体左右视频输入应分别与SDI输入A和B相连。 同理, 处理后的左右输出将发送到SDI输出A和B 上。 HDMI输入和输出接口支持全帧 “帧封装” 信号。 支持的视频格式 2D转3D功能支持SD和HD输入, 并可转换为HD输出。 3D转换和3D摄影机画面校准功能支持所有 Teranex 3D所支持的3D视频格式。 进行 “3D Align” (3D对齐) 时, 输入的左右眼视频流都必须是一 样的格式和帧率。 以下是所支持的视频格式转换: ‚ 输入和输出视频信号最高可达1.5Gb/s。 ‚ 保留不转换, 输出格式与输入格式相同。 ‚ 1080i 50/59.94/60到1080p/PsF 23.98/24/25/29.97/30 ‚ 1080p/PsF 23.98/24/25/29.97/30到1080i 50/59.94/60 ‚ 1080i 50/59.94/60到1080i 50/59.94/60帧率转换 ‚...
- Page 682 效方法, 不论是模拟、 SDI或是HDMI信号。 同样, 您可以通过Teranex播放您的剪辑从而可以立即在 监视屏或电视上进行查看。 使用您喜欢的剪辑软件 一些剪辑软件自动安装插件以便与Teranex顺利工作, 但有些则需要您下载并安装最新的Blackmagic Design Desktop Video软件。 该软件可在Blackmagic Design支持中心网站进行下载, 网址: www.blackmagicdesign.com/cn/support/family/capture-and-playback。 视频采集 视频采集时, Teranex的LCD屏幕会先显示 “Capture” (采集) 字样, 并随后显示输入信号的视频格 式。 例如, “Capture: 1080p24” 。 DaVinci Resolve、 Avid Media Composer、 Apple Final Cut Pro 7、 Adobe Premiere Pro CC以及Adobe Photoshop CC等软件都可以从您的Teranex处理器上采集视...
- Page 683 后显示视频格式。 例如, “Playback: 1080p24” 。 只有与正在播放的视频格式相一致的按钮会亮起。 所有其他按钮均不会亮起也不可用, 因为播放格式由片段而定, 所以不能进行转换。 包括Adobe After Effects及Apple Final Cut Pro X等一些软件始终处于播放模式。 Teranex Installer安装软件可在Mac OS X或Windows计算机上安装 Blackmagic Design Desktop Video Control Panel。 DaVinci Resolve 您可以使用DaVinci Resolve从Teranex处理器上采集视音频。 例如, 您可以使用Teranex将老式模拟 录像带进行上变换并采用Resolve同时采集其HD输出。 一旦片段被采集到Resolve的媒体池内, 您就可以使用强大的剪辑和调色工具对素材进行进一步加工。 想要通过Teranex处理器采集视频, 您可能需要安装Blackmagic Design的最新版Desktop Video软件。 您可从Blackmagic Design支持中心网站下载Desktop Video软件, 网址: www.blackmagicdesign.com/cn/support/family/capture-and-playback。 采集和播放...
- Page 684 准备工作 运行 “DaVinci Resolve” , 到 “偏好设置” 菜单下, 选择 “视频输入/输出和GPU” 选项卡, 并在 “用于采集和播放” 选项中选择您Teranex。 保存偏好设置, 重启DaVinci Resolve以应 用更改。 开启一个项目并在 “项目设置” 窗口中设定您想要的 “时间线” 和 “监看” 的分辨率及帧 率。 Teranex处理器会自动将输出设为相匹配的设置。 当您还在 “项目设置” 窗口时, 找到 “采集和播放” 选项卡, 从 “视频采集和播放” 菜单中选 择您需要的格式。 如果您正在采集音频, 请确保勾选 “启用音频输入” 。 在...
- Page 685 播放 想要从媒体页面播放您的片段, 请再次点击采集图标关闭 “采集信息” 窗口。 点击一个您已经采集完 的片段, 使其显示在检视器中, 然后只要点击检视器上的播放控制就可播放片段。 剪辑和调色 当您采集到片段后, 只要点击 “剪辑” 页面即可开始使用DaVinci Resolve的强大的剪辑功能。 然后 可在调色页面为您的片段进行调色。 更多功能介绍, 请参考DaVinci Resolve操作手册。 Avid Media Composer Avid Media Composer可结合Teranex处理器采集和播放标清和高清视频及音频, 并支持RS-422录 机控制。 在下面这个例子中, Teranex要转换并输出1080i59.94格式视频, 而我们将从一个不可控设备进行采 集。 准备工作 运行Media Composer, 当 “SelectProject” (选择项目) 的窗口弹出时, 点击 “New Project”...
- Page 686 键入项目名称并设置项目选项。 采集 依次进入Tools (工具) > Capture (采集) 菜单, 打开Capture Tool ( 采集工具) 。 点击 “Toggle Source” (源触发器) 按钮后, 录机按钮图标应显示为圆形红色禁止图标。 将 “Video and Audio” (视音频) 输入菜单设置为 “Blackmagic” 。 选择您的视频和音频源轨道。 使用Bin (媒体夹) 菜单选择一个Target Bin (目标媒体夹) 。 从 “Res” (分辨率) 下来菜单中选择您的编解码器。 为采集到的视频和音频选择 “Disk Storage” (硬盘存储) 。 点击...
- Page 687 Apple Final Cut Pro 7 准备工作 运行Final Cut Pro 7, 选择File (文件) > New Project ( 新项目) 。 选择File (文件) > Save Project As... (项目另存为) , 并为项目命名。 到Final Cut Pro菜单里选择 “Easy Setup” (快捷设置) , 从而打开快捷设置窗口。 将 “Format” (格式) 设为 “HD” , 将 “Rate” (帧率) 设为 “25.00 fps” 。 从 “Use” (使用) 菜单里选择...
- Page 688 播放 您可以将显示器或电视机连接到Teranex处理器的输出上, 通过Final Cut Pro时间线来显示视频。 如 果您无法从Blackmagic输出上查看到画面, 请再次检查连接, 并确保Final Cut Pro配置有正确的输 出设置, 具体可以通过查看View (查看) > External Video (外部视频) 设置中是否选中 “All Frames” (所有帧) 加以确认。 Apple Final Cut Pro X 如果想要通过Final Cut Pro X在外部视频显示屏或电视机上播放视频, 您可以使用Final Cut Pro X 10.0.4或更高版本, 通过Teranex处理器输出视频从而实现广播级监看功能。 在此例中, 片段是无压缩10bit 4:2:2 1080p59.94视频, 带有双通道音频。 Final Cut Pro X 准备工作...
- Page 689 Adobe Premiere Pro CC 在下面这个例子中, Teranex要转换并输出1080i50格式视频, 而我们将从一个不可控设备进行采 集。 Premiere Pro CC 2015。 准备工作 运行Premiere Pro CC。 在Welcome欢迎窗口中, 选择Create New/New Project ( 创建/新项 目) 后, 会出现一个项目设置窗口。 为项目命名。 点击 “Browse” (浏览) 选择安装项目的文件夹, 如果Premiere Pro CC的Mercury Playback Engine支持您的图形卡, 那么您就可以使 用 “Renderer” (渲染器) 选项, 并将其切换到Mercury Playback Engine GPU加速。 将...
- Page 690 将Audio and Render Properties (音频和渲染属性) 设置为Custom (自定义) 。 采集 选择File (文件) > Capture (采集) 。 点击红色记录按钮开始采集。 点击 “Stop” (停止) 按钮将停止采集。 播放 每次创建新项目时, 都需要选择播放设置。 依次进入Preferences (偏好设置) > Playback (播放) , 在Video Device (视频设备) 菜单下, 勾选 “Blackmagic Playback” 复 选框, 确保未勾选其余复选框。 播放音频时, 从 “Audio Device” (音频设备) 下拉菜单中选择 “Blackmagic Playback” (Blackmagic播放)...
- Page 691 然后您就能在广播级监视器上以正确的视频色彩空间查看After Effects的合成画面了 。 您可以在运行 时就一直看到准确的色彩和隔行交错, 不需要等到合成渲染后就可以看到输出的视频是怎样的效果。 如果您想要听到Teranex处理器的音频, 请到Preferences (偏好设置) > Audio Hardware and Preferences (音频硬件和偏好) > Audio Output Mapping (音频输出映射) 里将 “Default Device” (默认设备) 设为 “Blackmagic Audio” (Blackmagic音频) 。 After Effects CC 2015。 “Video Preview” 视频预览首选项 渲染 完成画面合成后, 您需要将任务渲染到Teranex处理器硬件支持的像素格式。 您可以渲染一组DPX 图像序列或以下任何一种支持的编解码器:...
- Page 692 如果安装了Final Cut Pro, 您还能 获得ProRes和DVCPRO HD等其他编解码器。 Windows 系统的 AVI 编解码器 ‚ Blackmagic 10bit 4:4:4无压缩 ‚ Blackmagic 10bit 4:2:2无压缩 ‚ Blackmagic HD 8bit 4:2:2无压缩 ‚ Blackmagic SD 8bit 4:2:2无压缩 ‚ Blackmagic 8bit MJPEG压缩 如果安装了Premiere Pro CC, 您还能获得DVCPRO HD和DVCPRO50等其他编解码器。 Windows 系统的 QuickTime 编解码器 ‚...
- Page 693 Adobe Photoshop CC 如何抓取和输出视频帧 将图像导入 Photoshop 在Photoshop中, 选择File (文件) > Import ( 导入) > Blackmagic Image Import ( Blackmagic 图像导入) 。 设置 “Video Input Format” (视频输入格式) 和 “Image Bit Depth” (图像位深) 然后点 击 “Import Image” (导入图像) 。 从 Photoshop 中导出图像 选择File (文件)...
- Page 694 使用 Blackmagic UltraScope 进行波形监看 当Teranex 2D或Teranex 3D通过Thunderbolt连接到兼容的Mac OS X或Windows计算机时, 您可 以使用Blackmagic UltraScope来监看视频转换的输出电平。 Blackmagic UltraScope软件可从Blackmagic Design支持中心下载, 网址: www.blackmagicdesign.com/cn/support。 提示 不论您使用的是SDI、 HDMI、 分量模拟还是合成模拟视频输入, Blackmagic UltraScope 都是您进行质量控制检查转换后的输出的完美方案。 只要将您的Teranex处理器和计算机 通过Thunderbolt线缆相连, 运行Blackmagic UltraScope就可实现! 安装要求 若要同时监看两种波形, Blackmagic UltraScope软件对计算机显示器分辨率的最低要求为1280 x 800像素。 若要同时监看6种波形, Blackmagic Design建议使用显示器分辨率为1920 x 1200或1920 x 1080像素的计算机。...
- Page 695 Blackmagic UltraScope的 “Full Screen” (全屏)视图 2-Up (双联) 视图 Blackmagic UltraScope 的各类显示 Blackmagic UltraScope是一款非常实用的软件, 它能将Teranex转换并输出的信号保持在准确的广 播级合法视音频电平。 您可监看的各类波形包括RGB Parade (RGB分量) 、 Waveform (波形) 、 Vectorscope (矢量图) 、 Histogram (直方图) 以及Audio Metering Display (音频表显示) 。 RGB 分量示波器 RGB分量示波器显示了您转换后输出的红色、 绿色和蓝色通道。 通常, 如果示波器中某个颜色通道 较高, 则表明有色偏。 这可能不是您所喜欢的结果, 您可能想要在后期制作中通过如Blackmagic DaVinci Resolve等调色软件将色偏降低到最小程度。...
- Page 696 Waveform 波形显示 波形示波器是您监看黑白电平以及整体图像对比度的完美选择。 对比度良好的画面会显示从0 IRE 到100 IRE的信息。 对比度不佳的画面则会将大量信息集中显示在中部, 而顶部或底部却只有很少信 息。 如果您在视频显示中看到 “乳白色” 或是 “灰黑色” , 它们将显示在0 IRE线之上。 想要调整黑电平, 请按Teranex前面板上的 “BLK” 按钮, 并使用旋钮来降低黑电平。 如果您将黑电平降低到0 IRE以 下, 那么图像暗部细节可能会丢失。 调整黑电平并在监视器及波形示波器上观察其变化。 同样的, 如果亮部细节看起来太暗淡, 它们的显示将低于100 IRE线。 想要调整白电平, 请按Teranex 前面板上的 “GAIN” 按钮, 并使用旋钮来提高白电平。 如果您将白电平提高到100 IRE以上, 图像将 被裁切,...
- Page 697 直方图显示 直方图是检查图像对比度的另一种方法。 横坐标代表亮度范围, 左侧是黑 (即10bit图像中的0) , 右 侧是白 (即10bit图像中的1023) 。 有着合适对比度的画面会将信息覆盖在整个横坐标, 而低对比度 画面会将信息集中在中间。 使用Teranex处理器的 “BLK” 和 “GAIN” 按钮设置可进行必要的调整。 直方图显示 音频表显示 Teranex处理器的音频表可显示您的音频电平。 音频通常会以dBFS或VU形式显示。 dBFS是衡量数 字音频信号整体情况的必要工具, 它在如今的数字设备中十分常见。 VU表可显示平均信号电平, 它 使用方便, 在老式设备中也较为常用。 请通过VU表监测音频电平, 确保电平峰值不超过0dB限度。 如果峰值超过0dB则代表音频存在限 幅。 您还可通过音频测量显示来监测音频相位和平衡。 音频表显示 使用Blackmagic UltraScope进行波形监看...
- Page 698 Error Logging 错误日志 错误日志可记录下视频和音频中的错误, 如在很长的转换过程中, 它是执行自动操作时不可或缺的 重要功能。 记录的错误可包括色彩、 亮度或音频的阈值电平以及视频信号丢失、 视频格式改变或音 频静音等现象。 设置各项参数界定何时记录错误后, 您可选择开始或停止错误日志记录功能、 将日 志保存为文件或清除日志。 这些功能可在错误日志界面中或在 “Error Logging” 下拉菜单中选择。 为便于您查找, 各类错误将依照时间码或时间进行记录。 如果没有时间码, 可使用录制时的时刻来查 找。 在 “Full Screen” (全屏) 模式下, “Histogram” (直方图) 和 “Error Logging Displays” (错误日志界 面) 使用的是UltraScope界面上的同一个窗口界面。 选择直方图下方的LOGGING按钮可切换到Error Logging错误日志界面。 选择 “HISTOGRAM” (直方图) 按钮可切换回 “Histogram Display” (直方 图显示界面)...
- Page 699 格式转换表 Teranex AV 和 Teranex Express (输出) (输入) • • • • • • • • • • • • • • • • • • • • • • • • • • • • • • • • • 525i59.94 NTSC •...
- Page 700 格式转换表 Teranex 2D (输出) (输入) • • • • • • • • • • • • • • • • • • • • • • • • • 525i59.94 NTSC • • • • • • • • • • • • • • • • • • • • • • • • • 625i50 PAL •...
- Page 701 格式转换表 Teranex 3D (输出) (输入) • • • • • • • • • • • • • • • • • • • • • • • • • 525i59.94 NTSC • • • • • • • • • • • • • • • • • • • • • • • • • 625i50 PAL •...
- Page 702 Teranex 2D 上 DB-25 接口的输出引脚 Teranex 2D配有一对RCA输入, 因此您可连接两通道模拟音频用于左右输入, 但其后面板还设有一 个DB-25多针接口, 这个接口可让您连接多达四个模拟音频通道, 可为输入也可为输出。 模拟音频输入 / 输出 选择前面板的 “ALG” (模拟) 按钮作为音频输入类型时, 前面板上的LCD屏幕将出现菜单页面, 以 便您选择想要使用哪两个模拟音频源。 当使用DB-25接口时, 您需要为平衡XLR接口选配标准雅马哈格式辫子线。 这类辫子线价格经济, 而 且很多商店均有销售, 您也可以购买现成的接头和线缆自行定制。 13 12 25 24 23 22 21 20 19 18 17 16 15 14 DB-25引脚输出还兼容雅马哈™、Mackie™、...
- Page 703 AES/EBU 音频输入 / 输出 在Teranex 2D前面板上按下 “AES” 按钮来选择AES/EBU数字音频输入。 AES/EBU输出始终处于 开启状态。 DB-25接口可将平衡AES/EBU数字音频的8通道输入 (4对) 和8通道输出 (4对) 连接到Teranex 2D Processor上。 您需要为平衡XLR接口选配标准雅马哈格式辫子线。 这类辫子线价格经济, 而且很多商店均有销售, 您也可以购买现成的接头和线缆自行定制。 13 12 25 24 23 22 21 20 19 18 17 16 15 14 DB-25引脚输出还兼容雅马哈™、Mackie™、 索尼™以及Apogee™接口。 模拟 音频通道 正向信号 (+) 反向信号...
- Page 704 安装选购配件 Blackmagic Design 光纤 SFP Blackmagic Teranex AV及Teranex Express内置光纤扩展槽, 可供您选购并安装光纤SFP模块。 安装 SFP模块后, 您可以连接并传输高达12G-SDI的视频信号, 获得比同轴电缆更远的传输距离。 为 Teranex Express 处理器安装选配的 Blackmagic Design 光纤 SFP 警告 请做好防护措施, 以降低安装SFP模块时发生静电漏电现象带来的危险。 安装或卸下该模块 Blackmagic Design光纤SFP模块设有一个拉环, 可协助您卸下或安装该模块。 该模块支持热插拔, 因此无需断开Teranex也可安装或卸下。 Blackmagic Design SFP支持带有LC连接头的单模光纤线缆, 支持双向传输, 并且支持高达Ultra HD 2160p60的视频格式。 Blackmagic Design SFP模块 安装...
- Page 705 将SFP模块安装到Teranex Express上。 Teranex AV 机身保护支架 Teranex AV为您提供了两块机身保护支架, 可安装在机身的两侧。 您可以在将设备用于移 动式制作、 户外广播或是片场等户外环境时使用这些保护支架, 从而避免后面板上接口意 外损坏。 它们还可以对连接到设备上的线缆起到缓解拉扯的作用。 您可以使用设备内附的4枚M4螺丝将机身保护支架安装到Teranex AV上。 Teranex AV机身 两侧均设有两个M4螺丝安装孔。 将内附的保护支架安装到Teranex AV的两侧。 安装选购配件Blackmagic光纤SFP...
- Page 706 Downloading the Free Blackmagic Design SDK The DeckLink SDK can be downloaded from the ‘capture and playback’ section of the Blackmagic Design support center at www.blackmagicdesign.com/cn/support. Joining the Blackmagic Design Software Developers Forum If you’re looking for answers, feedback or suggestions regarding technologies used by Blackmagic Design, such as codecs, core media, APIs, SDK and more, visit the Blackmagic Design Software Developers forum.
- Page 707 Connection The Blackmagic Teranex Ethernet Server listens on TCP port 9800. In a Telnet session, type in “telnet” and a space, followed by the IP address of your Teranex, another space and “9800”. For example: telnet 192.168.90.236 9800 Connection Response Upon connection, the Teranex Server sends a complete dump of the state of the device.
- Page 708 VIDEO ADJUST: ↵ Luma low: 4 ↵ Luma high: 1019 ↵ ↵ ANCILLARY DATA: ↵ AFD output line: 11 ↵ CC enabled: false ↵ ↵ VARIABLE ASPECT RATIO: ↵ Variable Aspect Ratio size X left: 0.000000 ↵ Variable Aspect Ratio size X right: 0.000000 ↵ ↵...
- Page 709 VIDEO OUTPUT: ↵ ↵ ACK ↵ ↵ VIDEO OUTPUT: ↵ Video mode: 1080i5994 ↵ Aspect ratio: Anamorphic ↵ Video demux mode: SingleLink ↵ Video pixel format: YCbCr422 ↵ Analog output: Component ↵ ↵ Retrieving Device Information The “Teranex Device” command returns information about the connected device: TERANEX DEVICE: ↵...
- Page 710 ACK ↵ ↵ ALIGN: ↵ Align pos X left: -20.000000 ↵ Align pos X right: 0.000000 ↵ Align pos Y left: 0.000000 ↵ Align pos Y right: 0.000000 ↵ ↵ Protocol Commands Command Command Description Align size X left: 0.000000 Set the Horizontal Size (X) (Zoom) value for the Left Eye.
- Page 711 Ancillary Data Teranex processors support closed captions, timecode and video indexing in the ancillary data. Closed Captions Command Command Description CC enabled: Enable Closed Caption processing. True=ON; False=OFF; (Default = False) CC input line: Analog CC input line selection. Range is 20 to 22. Default = CC output line: Analog CC output line selection.
- Page 712 Video Indexing Command Command Description Index reaction: Values are: On, Off (Default = Off) AFD insert type: Values are: Off, Auto, Bypass, or AFD codes 0000 - 1111. For details, see the AFD Insertion Menu topic in the user manual. Range is format dependent.
- Page 713 Command Command Description AudioInLevel2: Set audio level (gain) for Channel 3 AudioInLevel3: Set audio level (gain) for Channel 4 AudioInLevel4: Set audio level (gain) for Channel 5 AudioInLevel5: Set audio level (gain) for Channel 6 AudioInLevel6: Set audio level (gain) for Channel 7 AudioInLevel7: Set audio level (gain) for Channel 8 AudioInLevel8:...
- Page 714 Command Command Description AudioOut4: Select source to be mapped to output Ch 5. AudioOut5: Select source to be mapped to output Ch 6. AudioOut6: Select source to be mapped to output Ch 7. AudioOut7: Select source to be mapped to output Ch 8. AudioOut8: Select source to be mapped to output Ch 9.
- Page 715 Please note: AudioInPair0: refers to input pair 1, AudioInPair1: refers to input pair 2, etc. Command Command Description AudioInPair0: Select source to be mapped to input pair 1 AudioInPair1: Select source to be mapped to input pair 2 AudioInPair2: Select source to be mapped to input pair 3 AudioInPair3: Select source to be mapped to input pair 4 AudioInPair4:...
- Page 716 MODE3D The MODE3D commands are available in the Teranex 3D only. See the “3D Menu Settings” section of this user manual for details. Example: MODE3D: ↵ 3D MODE: 3DModeAlign ↵ ↵ ACK ↵ ↵ MODE3D: ↵ 3D mode: 3DModeAlign ↵ 3D roll left: 0 ↵...
- Page 717 ↵ ACK ↵ ↵ MODE3D: ↵ 3D roll left: 20 ↵ 3D roll right: 0 ↵ ↵ Command Command Description 3D roll left: Adjust the Left Eye Z axis image rotation. Range is -400 to +400 units. (Default = 0) 50 units = 1 degree.
- Page 718 Noise Reduction Command Command Description Enabled: Enable Noise Reduction. False = OFF; True = ON Bias: Adjust the Bias level. Range is -3 to +3 Split screen: Enable NR before/after split screen. False = OFF; True = ON Red overlay: Enable NR Red Overlay.
- Page 719 Teranex Device Command Command Description Model name: Display the Teranex model name. Software Version: Display the checksum of the installed software release. FPGA Version: Display the FPGA version of the installed software release. Panel lock: Remotely lock the front panel of the device, preventing local operation.
- Page 720 Command Command Description Variable Aspect Ratio size X left: Adjust horizontal image size. Negative values decrease size; positive values enlarge the image. Default = 0 Variable Aspect Ratio size X right: Adjust horizontal image size of the Teranex 3D right eye output.
- Page 721 Command Command Description Luma high: Set luminance high level value to clip overshoots. Range is 5 to 1019 (Default = 1019) Chroma low: Set chrominance low level value to clip undershoots. Range is 4 to 1018 (Default = 4) Chroma high: Set chrominance high level value to clip overshoots.
- Page 722 Command Command Description Audio source: Select the audio input type. Values are model dependent. Teranex 2D: Embedded, AES, RCA, DB25. Teranex 3D: Embedded, AES, RCA, DB25. Teranex Express: Embedded. Teranex AV: Embedded, AES, RCA, DB25. PCIe mode: For Teranex 2D and 3D: Display the status of the Thunderbolt connection.
- Page 723 Command Command Description HDMI Output: For Teranex AV only. Select the color space for the HDMI output. Values are: YCbCR422, RGB444 Output option: For Teranex AV only. Select one of four signals to be used as the output of the unit. Values are: Input, Black, Still, Freeze. The “Transition setting”...
- Page 724 机身前方及后方图示 Teranex AV VIDEO AUDIO FORMAT FRAME RATE ASPECT MENU VIDEO PRESETS AUDIO STATUS PANEL 23.98 ANAM 14:9 HOME GAIN EMBED LOCK LBOX CCUT MENU HDMI 1080 PBOX ZOOM SYSTEM STATUS ULTRA 29.97 59.94 MENU ANLG SMART SHARP LOCK VIDEO AUDIO FORMAT FRAME...
- Page 725 ‚ 在Mac OS X系统下, 请到 “应用程序” 文件夹下打开Blackmagic Teranex Setup软件。 从标 题栏里选择 “About Blackmagic Teranex Setup” 后即可查看版本号。 ‚ 在Windows 7系统下, 请到开始菜单打开Blackmagic Teranex Setup软件。 点击Help (帮助) 菜单并选择About即可查看版本号。 ‚ 在Windows 8系统下, 请从开始页面的Blackmagic Teranex板块打开Blackmagic Teranex Setup。 点击Help (帮助) 菜单并选择About即可查看版本号。 如何获得更新 检查完您电脑上安装的Blackmagic Teranex软件版本号之后, 请登录网址www.blackmagicdesign. com/cn/support访问Blackmagic Design支持中心查看最新版本。 请及时将软件升级到最新版本, 但切勿在重要项目制作过程中升级软件。 帮助...
- Page 726 警告 警告: 小心触电 Teranex处理器机身外壳上有此黄色警示标签, 上面标有 “警告: Risk of Electric Shock’ . 这是为了 警告使用者Teranex处理器设备内部可能存在非绝缘潜在 “危险” 电压, 其强度可能引发触 电。 Blackmagic Design建议您切勿自行拆解Teranex处理器部件, 如遇问题请联系您所在地区的 Blackmagic Design服务中心获得帮助。 所有连接到数据端口的设备必须符合AS/NZS 60950.1 条款4.7的要求。 Achtung: Stromschlaggefahr Auf dem Teranex Processor-Gehäuse befindet sich ein gelbes Warnetikett mit der Aufschrift ‘Caution: Risk of Electric Shock’ . Dieses warnt den Benutzer vor einer möglichen, nicht isolierten, "gefährlichen"...
- Page 727 保修 12 个月有限保修 Blackmagic Design保证Teranex系列产品自购买之日起12个月内不会有材料和工艺上的缺陷。 若本 产品在保修期内出现质量问题, Blackmagic Design可选择为产品提供免费修理或更换零部件, 或 者更换缺陷产品。 为确保消费者有权享受本保修条款中的服务, 如遇产品质量问题请务必在保修期内联系Blackmagic Design并妥善安排保修事宜。 消费者应将缺陷产品包装并运送到Blackmagic Design的指定服务中 心进行维修, 运费由消费者承担并预先支付。 若消费者因任何原因退货, 所有运费、 保险费、 关税等 各项税务以及其他费用均由消费者承担。 本保修条款不适用于任何因使用、 维护不当或保养不周造成的缺陷、 故障或损坏。 根据本保修服 务, Blackmagic Design的保修服务范围不包括以下内容: 1. 对由非Blackmagic Design专门人员进 行的安装、 维修或保养所造成的损坏进行维修, 2. 对因使用不当或连接到不兼容设备所造成的损 坏进行维修, 3. 对因使用了非Blackmagic Design生产的零部件所导致的损坏或故障进行维修, 及 4.
- Page 728 설치 및 사용 설명서 Teranex Processor 2017 년 6 월 한국어...
- Page 729 환영합니다 . Blackmagic Design 의 Teranex 컨버터를 구입해 주셔서 감사합니다 . 구입하신 Teranex 컨버터는 놀라운 화질을 지원하는 표준 변환기로 훌륭한 기능들을 사용하다 보면 시간 가는 줄 모르실 것입니다 . 저는 컨버터를 사용할 수 있는 다양한 것들을 발견하기 위해 아직도 시도 중입니다 . 저희는 최신 SDI, HDMI, 아날로그 연결을 모두 탑재하여 모든 것을...
- Page 730 목차 Teranex Processors 시작하기 오디오 임베드 전원 연결하기 Teranex Processor 설정 비디오 연결하기 Video 메뉴 설정 오디오 연결하기 Aspect 메뉴 컨버전 Advanced 메뉴 Teranex AV 의 저지연 모드 설정하기 Audio 메뉴 설정 관리 소프트웨어 설치하기 노이즈 리덕션 (Noise Reduction) 메뉴 설정 소프트웨어...
- Page 731 시작하기 전원 연결하기 전원을 연결하고 입 / 출력 신호를 연결하기만 하면 Teranex Processor 의 사용 준비가 완료됩니다 . Teranex Processor 뒷면 패널에 있는 전원 입력에 표준 IEC 전원 케이블을 연결해 전원을 공급합니다 . 비디오 연결하기 Teranex Processor 의 비디오 입력에 소스 비디오 입력을 연결하고 출력하려는 장비에 비디오 출력을...
- Page 732 Audio 버튼을 사용하여 임베디드 , AES 또는 아날로그 입력 유형을 선택하세요 . 입력을 설정하고 나면 원하는 컨버전을 위한 출력 설정을 변경할 수 있습니다 . VIDEO AUDIO FORMAT FRAME RATE ASPECT MENU VIDEO PRESETS AUDIO STATUS PANEL 23.98 ANAM 14:9 HOME GAIN EMBED LOCK...
- Page 733 각 장비의 설정 아이콘을 클릭하면 연결된 모든 Teranex 기기의 모든 설정 사항에 접속할 수 있습니다 . Mac OS X 에 설치하기 Blackmagic Teranex Setup 소프트웨어를 www.blackmagicdesign.com/kr 에서 다운로드하세요 . 다운로드한 파일의 압축을 해제한 뒤 , 디스크 이미지를 열어 콘텐츠를 확인합니다 .
- Page 734 Blackmagic Teranex Setup 소프트웨어를 사용해 Teranex Processor를 업데이트하거나 Mac OS X 또는 Windows 컴퓨터에서 원격으로 설정을 변경할 수 있습니다. 내부 소프트웨어 업데이트하기 컴퓨터와 Teranex 를 USB 케이블로 연결하기 전에 Teranex Processor 가 전원에 연결되어 있는지 반드시 확인하세요 . Teranex Processor 전원을 연결합니다 . USB 케이블로...
- Page 735 커넥터 커넥터 유형은 사용 중인 Teranex Processor 모델에 따라 다릅니다 . 일반적으로 Teranex Processor 에서는 SDI 신호를 변환할 수 있습니다 . 일부 모델의 경우 HDMI 및 아날로그 비디오를 변환할 수도 있기 때문에 본 사용 설명서에서 현재 사용 중인 Teranex 모델에 대한 정확한 정보를 확인하세요 . 이...
- Page 736 VIDEO AUDIO FORMAT FRAME RATE ASPECT MENU VIDEO 23.98 ANAM 14:9 HOME GAIN EMBED LBOX CCUT MENU Teranex AV HDMI 1080 PBOX ZOOM ULTRA 29.97 59.94 MENU ANLG SMART SHARP VIDEO AUDIO FORMAT FRAME RATE ASPECT MENU VIDEO REF OUT CH A CH B PUSH...
- Page 737 VIDEO AUDIO FORMAT FRAME RATE ASPECT MENU VIDEO 23.98 ANAM 14:9 HOME GAIN EMBED LBOX CCUT MENU Teranex 2D HDMI 1080 PBOX ZOOM 29.97 59.94 MENU ANLG ANLG SMART SHARP 1080 REF IN Y/NTSC/PAL IN B-Y IN R-Y IN Y/NTSC/PAL OUT B-Y OUT R-Y OUT ANALOG AUDIO IN/OUT...
- Page 738 VIDEO AUDIO FORMAT FRAME RATE ASPECT MENU VIDEO 23.98 ANAM 14:9 HOME GAIN EMBED LBOX CCUT MENU Teranex 3D HDMI 1080 PBOX ZOOM 29.97 59.94 MENU ANLG ANLG SMART SHARP 1080 VIDEO AUDIO FORMAT FRAME RATE ASPECT MENU VIDEO DOLBY METADATA REMOTE IN/OUT REF IN Y/NTSC/PAL IN...
- Page 739 아날로그 비디오 입력 아날로그 비디오 출력 1 개의 BNC – Y/NTSC/PAL 컴포 1 개의 BNC – Y/NTSC/PAL 넌트 / 컴포지트 입력 . 컴포넌트 / 컴포지트 출력 . 1x BNC – B-Y 컴포넌트 입력 . 1 개의 BNC – B-Y 컴포넌트 출력 . 1 개의...
- Page 740 참고 Teranex 2D 또는 3D 에서 아날로그 비디오를 선택할 경우 회전 노브를 돌려 LCD 화면에서 컴포넌트 또는 컴포지트 비디오를 선택하세요 . Teranex AV 에서 SDI 버튼을 두 번 이상 누를 경우 뒷면 패널의 SDI 두 가지 입력인 SDI 1 및 SDI 2 로 변환됩니다...
- Page 741 VIDEO AUDIO FORMAT FRAME RATE ASPECT MENU VIDEO PRESETS AUDIO STATUS PANEL 23.98 ANAM 14:9 HOME GAIN EMBED LOCK MENU LBOX CCUT HDMI 1080 PBOX ZOOM SYSTEM STATUS 29.97 59.94 MENU ANLG ANLG SMART SHARP 1080 LOCK VIDEO AUDIO FORMAT FRAME RATE ASPECT...
- Page 742 아래에서 제어 패널 기능을 한눈에 확인할 수 있습니다 . VIDEO AUDIO FORMAT FRAME RATE ASPECT MENU VIDEO System Video Main Menu Setup 23.98 ANAM 14:9 HOME GAIN EMBED Audio LBOX CCUT MENU HDMI 1080 PBOX ZOOM Noise Reduction 29.97 59.94 MENU Ancillary ANLG...
- Page 743 프리셋 (Presets) PRESET 버튼을 사용하여 컨버전 설정을 저장 및 불러오기합니다 . Blackmagic Teranex Setup 유틸리티를 사용해 프리셋을 저장하고 불러오거나 관련 설명을 입력할 수 있습니다 . 프리셋에는 모든 Teranex 운영 파라미터가 저장되어 나중에 불러올 수 있습니다 . 예를 들어 , 사용자 지정된...
- Page 744 시스템 상태 LED 에 불이 들어올 경우에는 다음과 같은 사항을 나타냅니다 . 입력 비디오를 사용할 수 있습니다 . 외부 레퍼런스 신호가 선택되었으며 외부 레퍼런스 입력을 사용할 수 있습니다 . Power Supply 1 의 사용 준비가 완료되었습니다 . Power Supply 2 의 사용...
- Page 745 Blackmagic Teranex Setup 에서 설정 변경하기 Blackmagic Teranex Processor Setup 유틸리티는 직관적인 방식으로 Teranex Processor 의 상태를 확인할 수 있으며 이더넷 네트워크를 통해 어디서나 원격으로 제어할 수 있습니다 . 이 편리한 애플리케이션을 통해 제어 패널로부터 멀리 떨어진 곳에서도 Teranex 를 원격으로 제어할 수 있습니다 . Blackmagic Teranex Setup를...
- Page 746 Teranex Setup 으로 Teranex Processor 추가하기 로그인창 좌측 하단에 있는 + 버튼을 눌러 장비를 추가할 수 있습니다 . IP 주소를 입력하고 Add 를 누릅니다 . 사용하는 네트워크에 제어 가능한 장비로 Teranex Processor 가 나타납니다 . Teranex Processor를 수동으로 추가하려면 로그인 패널에 있는...
- Page 747 Configure 사용하는 Teranex 의 이름과 IP 주소가 나타납니다 . Teranex 에 특정 이름을 지정할 수 있어 시스템에서 여러 대의 Teranex 를 사용할 경우 본인의 장비를 찾을 수 있습니다 . Name 란을 클릭하고 원하는 이름을 입력하면 됩니다 . Teranex Setup 유틸리티에서 Teranex 를 선택하면 설정한...
- Page 748 톱니바퀴 아이콘을 사용한 설정 메뉴 톱니바퀴 모양의 설정 아이콘을 클릭하면 원격으로 전면 패널에 잠금 기능을 설정하고 프리셋을 저장하거나 다시 불러올 수 있는 설정 메뉴가 나타납니다 . 현재 사용 중인 Teranex 설정을 컴퓨터에 저장하거나 설정을 Teranex 에 로딩할 수도 있습니다 . 원격...
- Page 749 종횡비 변환 변환표가 제공되기 때문에 각 종횡비 설정이 컨버전에서 어떻게 나타나는지 쉽게 확인할 수 있습니다 . 이는 유용한 참조 도구로 각 설정을 시각적으로 확인할 수 있어 신속한 결정이 가능합니다 . 업 컨버전 입력 4:3 출력 16:9 4:3 SD 이미지를 16:9 HD 프레 PBOX 필러박스...
- Page 750 와이드스크린 16:9 SD 에서 4:3 SD 로 변환하기 SD 프로그래밍 대부분은 4:3 종횡비를 활용하는 반면 SD 소스는 와이드스크린 16:9 에 저장할 수도 있습니다 . SD 와이드스크린 입력을 제대로 처리하려면 Teranex Processor 가 해당 소스를 16:9 신호로 인식하도록 반드시 설정해야 합니다 . 전면...
- Page 751 컨버전 워크플로 이 섹션에서는 Teranex Processor 를 사용해 실행할 수 있는 주요 컨버전을 위한 워크플로 설정 방법을 확인할 수 있습니다 . 표준 컨버전과 업 / 다운 / 크로스 컨버전 등의 모든 컨버전은 전면 제어 패널에서 동일한 일반 설정 작업을 통해 이루어집니다 . 또한 자주 사용하는 컨버전의 프리셋을 저장하고...
- Page 752 1080 버튼을 누르세요 . 프로그레시브 방식의 출력을 위한 P 버튼을 누른 뒤 29.97/30 버튼을 눌러 프레임 속도를 선택하세요 . 포맷 버튼과 프레임 버튼 , 속도 버튼에 모두 초록불이 들어오며 원하는 컨버전 설정 및 변경 준비가 완료됩니다 . 메뉴 버튼에서 Change 버튼을 선택하세요 . 이제 LCD 에 출력 비디오가 나타나며 모든 출력...
- Page 753 입력 설정하기 Teranex 제품의 제어 패널에서 IN 버튼을 누르고 SDI 비디오를 선택하세요 . Teranex 는 자동으로 입력 포맷을 감지하여 입력 비디오를 LCD 에 디스플레이하며 해당 버튼에 불이 들어옵니다 . 오디오 입력 유형인 EMBED 버튼에 불이 들어옵니다 . VIDEO AUDIO FORMAT FRAME RATE ASPECT...
- Page 754 Teranex Processor 전원을 연결하고 입 / 출력을 연결하세요 . 입력 설정하기 제어 패널의 IN 버튼을 누르고 SDI 비디오를 선택하세요 . Teranex 의 LCD 에는 입력 비디오가 나타나며 , 입력 포맷이 자동으로 감지되어 해당 버튼에 불이 들어옵니다 . EMBED 버튼을 눌러 오디오 입력 포맷을 설정하세요 . VIDEO AUDIO FORMAT...
- Page 755 정보 종횡비 설정에 대한 자세한 정보는 761 페이지의 [Aspect 메뉴 ] 와 749 페이지의 [ 종횡비 컨버전 ] 부분을 참고하세요 . 크로스 컨버전 크로스 컨버전은 프로그램 영상의 해상도와 종횡비를 변환하는 것을 말합니다 . 크로스 컨버전은 모든 종류의 컨버전을 프로그레시브 도메인에서 처리하도록 하는 고품질의 디인터레이싱 알고리즘을 사용하여...
- Page 756 출력 종횡비 설정하기 LBOX/PBOX 버튼을 눌러 종횡비를 레터박스로 설정하세요 . Teranex Processor 의 비디오 크로스 컨버전 준비가 완료되었습니다 . 4:3 종횡비 영상 16:9 종횡비 영상 SD 출력에 LBOX/PBOX 버튼을 설정하면 16:9 영상을 4:3 프레임에 맞게 변환합니다. 4:3 컨버전은 화면 위/아래에 검은색 막대를 추가하여 올바른 형태의 와이드스크린을 유지합니다. 정보...
- Page 757 메뉴 버튼에서 Change 버튼을 선택하세요 . 이제 LCD 에 출력 비디오가 나타나며 모든 출력 연결로 전송됩니다 . 버튼에 파란불이 들어오며 설정이 완료됩니다 . VIDEO AUDIO FORMAT FRAME RATE ASPECT 23.98 ANAM 14:9 EMBED LBOX CCUT HDMI 1080 PBOX ZOOM 29.97 59.94 ANLG ANLG...
- Page 758 케이던스 제거 케이던스 제거 기능에는 3:2 풀다운 시퀀스 제거 기능이 포함되어 있습니다 . 텔레시네 장치에서 필름을 초당 24 프레임과 초당 59.94 필드를 가진 비디오로 전환할 시 3:2 풀다운 기능이 적용됩니다 . Teranex 프로세서에서 3:2 풀다운 방식을 사용한 비디오를 초당 24 프레임으로 변환할 시 케이던스가 자동으로...
- Page 759 HOME 메뉴 버튼을 누른 뒤 , Video > Advanced > Clean Cadence 순으로 선택하세요 . 회전 노브 또는 소프트 버튼을 사용하여 클린 케이던스 모드를 ON 으로 설정합니다 . 이제 1080i59.94 출력 포맷에 클린 3:2 케이던스가 포함되었습니다 . 컨버전이 완료되면 클린 케이던스...
- Page 760 저지연 모드 적용하기 Teranex AV 의 LCD 메뉴에서 System Setup 으로 이동한 뒤 Processing 서브 메뉴로 들어가 Lowest Latency 를 선택하세요 . Teranex Setup 애플리케이션의 Setup 탭을 통해 해당 기능에 접속할 수도 있습니다 . Teranex AV 에서는 해당 컨버전에 Lowest Latency 설정을 적용해 최대 두 개의 프레임이 지연됩니다...
- Page 761 Video 메뉴 설정 비디오 메뉴는 컬러 , 클리핑 , 종횡비 등 비디오 출력을 조절하는 설정을 제어합니다 . Color 메뉴 각 컬러 채널의 회전 노브를 돌려 Red 와 Green, Blue 의 게인 설정을 조절합니다 . ‚ 각 컬러의 제어 범위는 -200 에서 +200 까지 입니다 . ‚...
- Page 762 Adjust Aspect 종횡비 크기 및 위치 , 트리밍 설정에는 소프트 메뉴 버튼과 회전 노브를 사용합니다 . Size Size 설정은 이미지의 가로 / 세로 크기를 조절합니다 . 조절 범위는 약 -50 부터 +200 퍼센트까지 입니다 . Position Position 에서는 입력 이미지를 출력 프레임 안으로 이동할 수 있습니다 . 조절...
- Page 763 Video 설정 메뉴 Video Setup 메뉴에서는 사용하는 아날로그 , SDI, HDMI 입 / 출력을 위한 영상 파라미터를 결정합니다 . 사용하시는 Teranex 모델에 따라 사용하는 메뉴가 달라집니다 . No Video Input 메뉴 감지된 비디오 입력이 없을 경우 이 메뉴에서 블랙 또는 컬러바를 출력하도록 선택합니다 . 기본...
- Page 764 Teranex 3D Processor 전용 비디오 샘플링 메뉴 [Video Sampling] 메뉴에서는 Teranex 3D Processor 위해 다음과 같은 유형의 샘플링을 선택할 수 있습니다 . ‚ 4:2:2 – YUV ‚ 4:4:4 – YUV ‚ 4:4:4 – RGB Proc No Video Video Color Video Setup Sampling Input...
- Page 765 쿼드 HD 출력은 다음과 같이 사용할 수 있습니다 . ‚ SDI Output A: 서브 이미지 1 ‚ SDI Output B: 서브 이미지 2 ‚ SDI Input Loop A: 서브 이미지 3 ‚ SDI Input Loop B: 서브 이미지 4 Out A Out B Loop A Loop B...
- Page 766 정보 이러한 설정은 3G-SDI 비디오를 출력할 때만 적용됩니다 . 3G-SDI 입력의 경우 Level A 및 Level B 신호가 자동으로 감지됩니다 . Teranex AV 전용 쿼드 SDI 출력 메뉴 Teranex AV 는 Ultra HD 출력 포맷을 사용 시 4 개의 전용 BNC 커넥터를 통해 쿼드 SDI 출력을 지속적으로...
- Page 767 설정이 완료되면 해당 버튼에 흰색 불빛이 들어와 기본 설정이 변경되었음을 나타냅니다 . 기본값 설정으로 다시 초기화하려면 Proc Amp 메뉴 또는 컨트롤 패널의 버튼을 사용해 파라미터를 선택한 다음 회전 노브를 누르세요 . 모든 파라미터를 기본값으로 초기화하려면 Proc Amp 메뉴에서 Reset All 을 선택합니다 . ‚...
- Page 768 해상도 차트. 그리드. Teranex AV 의 테스트 패턴 Teranex AV 는 위와 같은 비디오 테스트 패턴 외에도 패턴 모션을 위한 메뉴와 통합 오디오 테스트 톤 메뉴를 포함합니다 . ‚ Test Patterns Test Patterns 로 이동해 원하는 비디오 테스트 신호를 선택하세요 . ‚...
- Page 769 Blackmagic Teranex Setup 유틸리티에 있는 Setup 페이지에서 모션을 제어하고 영상 테스트 패턴 및 오디오 테스트 톤을 선택할 수 있습니다. Advanced 메뉴 Teranex 프로세서는 다음과 같은 고급 케이던스 수정 기능을 제공합니다 . Teranex 2D 및 3D 를 위한 클린 케이던스 클린 케이던스 기능을 통해 59.94 출력 비디오에 클린 3:2 풀다운 시퀀스를 생성할 수 있습니다 . 클린...
- Page 770 Scene Detect( 장면 전환점 검출 ) 장면 변화 감지 기능은 컷 사이의 필드 혼합을 최소화하여 깨끗한 출력 영상을 만들어냅니다 . 이 기능은 이전 장면의 필드가 새로운 장면과 섞이지 않도록 방지합니다 . ‚ On 장면 전환점 검출 기능이 활성화됩니다 . ‚ Off 장면...
- Page 771 Audio 메뉴 설정 Audio 메뉴에서는 입력 오디오 채널의 출력을 매핑할 수 있으며 오디오 게인과 오디오 지연을 제어하고 특정 파라미터 설정에 접속할 수 있습니다 . Teranex 2D 에서 사용 가능한 Input Mapping 메뉴에서는 임베디드 및 AES, 아날로그 입력 소스에서 여러 개의 채널을 동시에 선택할...
- Page 772 Output Mapping Output Mapping Output Mapping Prev Next Prev Next Prev Next Channel 1 Source Channel 4 Source Channel 13 Source Input 1 Input 1 Tone .75 kHz Input 2 Input 2 Tone 1.5 kHz Input 3 Input 3 Tone 3 kHz Input 4 Input 4 Tone 6 kHz...
- Page 773 ‚ AES 입력에서 Dolby 인코딩 오디오가 나타난 경우 AES 를 다른 유형의 오디오 입력과 혼합해서 사용할 수 없습니다 . 이러한 상황에서는 입력 유형을 AES 로 선택해야 합니다 . Input Mapping Input Mapping Prev Next Prev Next Input 1/2 Source Input 3/4 Source Embedded 1/2 AES 5/6 Embedded 3/4...
- Page 774 회전 노브를 사용하여 조절합니다 . 조절 범위는 -12dB 에서 +12dB 사이 입니다 . 회전 노브를 누르면 오디오 레벨이 0 으로 되돌아갑니다 . System Output Input Analog Analog Video Main Menu Audio Setup Setup Mapping Mapping In Level Input Output Audio Audio Gain Options...
- Page 775 Teranex AV 전용 오디오 미터 Teranex AV 에서는 전면 패널 LCD 에 디스플레이할 입력 또는 출력 오디오 채널을 선택할 수 있습니다 . 채널 번호가 오디오 미터 아래쪽에 표시되어 쉽게 확인할 수 있습니다 . System Output Audio Video Main Menu Audio Setup Mapping Meters...
- Page 776 Dolby 디코더를 설치한 경우 수신되는 Dolby 오디오에서 Teranex 3D 의 Dolby 메타데이터가 나올 수도 있으며 , Teranex 3D 뒷면의 9 핀 Dolby 메타데이터 커넥터를 통해 시리얼 데이터 입력에서 얻을 수도 있습니다 . Dolby Metadate 메뉴에서 가장 많이 사용되는 Stereo 와 5.1 환경 설정을 사용할 경우...
- Page 777 메타데이터 매개 변수 스테레오 스테레오 다운믹스 선택 미지원 미지원 Lt/Rt 센터 다운믹스 레벨 -3 dB -3 dB Lt/Rt 서라운드 다운믹스 레벨 -3 dB -3 dB Lo/Ro 센터 다운믹스 레벨 -3 dB -3 dB Lo/Ro 서라운드 다운믹스 레벨 -4.5 dB -4.5 dB 확장...
- Page 778 Bias 메뉴 Bias 레벨을 조절하여 노이즈 리덕션 강도를 설정합니다 . Bias 값이 클수록 노이즈 리덕션의 강도가 높아집니다 . ‚ 설정 범위는 -6 에서 +6 입니다 . ‚ 기본 설정값은 0% 입니다 . Split Enable Set Value Screen Bias Overlay Noise Reduction 메뉴>Bias Split Screen 메뉴...
- Page 779 보조 데이터 (Ancillary Data) 메뉴 설정 Ancillary Data 메뉴에서는 폐쇄 자막과 타임코드 , 비디오 인덱스 기능에 접속할 수 있습니다 . 폐쇄 자막 (Closed Caption) 메뉴 Closed Caption 메뉴에서는 CEA-608B 과 CEA-708B 표준으로 폐쇄 자막을 설정할 수 있습니다 . CEA-608B 는 SD NTSC 아날로그와 SD-SDI 를 위한 폐쇄 자막의 레퍼런스 표준입니다 . 캡션은 수직 귀선...
- Page 780 CC Enable CC Enable 은 Off 로 기본 설정되어 있습니다 . 폐쇄 자막을 활성화하려면 Main Menu > Ancillary Data > Closed Caption > CC Enable 로 이동한 뒤 , 소프트 메뉴 버튼과 회전 노브를 사용하여 On 으로 설정합니다 . 수신되는 폐쇄 자막 데이터가 정확하지 않거나 손상된 경우 이 기능을 사용하지 않는...
- Page 781 Service 1 Language Service 1 Language 를 통해 CEA-708 폐쇄 자막에 있는 해당 Service 에 사용할 언어를 선택할 수 있습니다 . ‚ 다음과 같은 언어로 설정할 수 있습니다 . 영어 프랑스어 독일어 이탈리아어 스페인어 ‚ 기본 언어는 영어로 설정되어 있습니다 . Service 2 Set Value Source...
- Page 782 타임코드 생성기 (Timecode Generator) Timecode Generator 메뉴에서는 4 가지 타임코드 모드 중 원하는 모드를 선택하거나 수동 타임코드 프로세싱 기능을 비활성화할 수 있습니다 . 타임코드 데이터가 출력 비디오에 입력되지 않습니다 . 기본 설정은 Off 로 되어있습니다 . Video Closed Ancillary Data Prev Timecode Next...
- Page 783 Closed Video Ancillary Data Prev Timecode Next Index Caption Timecode Start Timecode Generator Input Input Regen Start Timecode Source Generate Jam Sync Setup Ancillary Data 메뉴> Timecode 메뉴>Input Regen Timecode Generate 타임코드 생성기는 비디오 입력 신호에 타임코드가 사용하는 나타나지 않더라도 선택한 출력...
- Page 784 ‚ Set Timecode Set Timecode 메뉴에서 사용 가능한 옵션은 Start Source 메뉴 선택에 따라 결정됩니다 . Prev Timecode Next Start Value Timecode Start Input Generator Jam Sync Start Timecode Source 00:00:00:00 Setup Jam Sync>Set Timecode ‚ Start Source = “ Input ” Start Source 메뉴를...
- Page 785 AFD Insertion 메뉴 이 메뉴에서는 출력 비디오에 삽입할 AFD 코드를 선택할 수 있습니다 . 코드를 삽입할 출력 라인은 AFD Insert Line 메뉴에서 선택할 수 있습니다 . ‚ 설정 옵션은 다음과 같습니다 . 출력의 부수적인 데이터 공간에는 AFD 코드가 삽입되지 않습니다 . Auto 현재...
- Page 786 Ethernet 메뉴 Ethernet 메뉴에서는 현재 설정을 확인하고 , 고정 IP 주소와 서브넷 주소 및 IP Gateway 를 위한 설정을 새롭게 변경할 수 있습니다 . 이 메뉴에서 DHCP 또한 On/Off 할 수 있습니다 . DHCP 서버를 On 으로 설정하면 현재 DHCP 서버로부터 제품에 지정된 주소가 IP 와 Subnet Mask, Gateway 메뉴에...
- Page 787 ‚ ON Teranex Processor 가 사용하는 네트워크 라우터에서 지정한 IP 주소를 받아들입니다 . ‚ OFF 이전에 미리 지정한 IP 주소가 있을 경우 이전 고정 IP 주소를 사용합니다 . DHCP 가 On 으로 되어있는 상태에서 IP 버튼을 누르면 IP 주소에 0.0.0.0 이 나타나며 , 이는 Teranex 프로세서가...
- Page 788 ‚ 미리보기 (Preview) 스틸 프레임을 캡처한 뒤 Preview 버튼을 누르면 Teranex AV 출력 영상을 3 초간 확인할 수 있습니다 . 현재 출력과 동일한 해상도의 스틸 프레임이 존재하지 않는 경우 Preview 버튼이 회색으로 표시되어 해당 기능을 사용할 수 없음을 나타냅니다 . ‚...
- Page 789 컴퓨터에서 그래픽을 로딩할 시 모든 종류의 파일 해상도를 지원합니다 . 이미지 변환 소프트웨어가 자동으로 Teranex AV 출력 해상도에 맞게 이미지 크기를 조절합니다 . 이러한 크기 조절은 Teranex 알고리즘을 사용하여 수행되는 것이 아니며 내부적으로 크기 조절을 할 때보다 화질이 떨어진다는 점을 기억하세요 . 화질을 최대한 높게 유지하면서...
- Page 790 ‚ Internal 해당 제품에 연결된 입력을 변경하더라도 출력 스트림에서 지속적으로 동기 신호를 제공하는 내부의 자체 발진기에 Teranex AV 의 출력을 동기화합니다 . System Factory Video Main Menu Ethernet System Setup Setup Reset Audio Reference Noise Info Reduction Ancillary Data Main 메뉴>System Setup System Setup>Reference Pixel Pixel...
- Page 791 출력 포맷 및 레퍼런스 프레임 속도 신호 1080PsF29.97 Blackburst 59.94, Tri-level Progressive 29.97, Tri-level Interlaced 59.94 1080p30 Tri-level Progressive 30, Tri-level Interlaced 60 1080PsF30 Tri-level Progressive 30, Tri-level Interlaced 60 1080i50 Blackburst 50, Tri-level Interlaced 50 1080p50 Blackburst 50 1080i59.94 Blackburst 59.94, Tri-level Interlaced 59.94 1080p59.94 Blackburst 59.94...
- Page 792 Teranex AV 전용 Generate 메뉴 레퍼런스 출력 연결을 통해 Teranex AV 를 레퍼런스 생성기로 사용할 수도 있습니다 . 레퍼런스 신호와 블랙 버스트 또는 Tri-level 의 종류는 Teranex AV 의 출력 비디오 포맷에 따라 다릅니다 . 일부 비디오 포맷의 경우 특정 레퍼런스 유형만 사용할 수 있습니다 . 예를 들어 , Teranex 출력 포맷이...
- Page 793 사용 비디오 포맷 선택 가능한 지원 레퍼런스 신호 미지원 1080p60 2K DCI 23.98p Tri-level Progressive 23.98 2K DCI 23.98PsF Tri-level Interlaced 47.96 2K DCI 24p Tri-level Progressive 24 2K DCI 24PsF Tri-level Interlaced 48 2160p23.98 Tri-level Progressive 23.98 2160p24 Tri-level Progressive 24 Blackburst 50 또는...
- Page 794 정보 Teranex AV 전면 패널에 있는 MENU 1 또는 MENU 2 버튼에 Output Options 메뉴 페이지를 지정해 신속하게 접속할 수 있습니다 . 입력 (Input) 입력은 전면 패널에 현재 선택된 비디오 입력을 의미합니다 . SDI 1, SDI 2, HDMI 또는 광섬유 입력 ( 설치된 경우 ) 으로 표시됩니다 . Input 을 선택하면 Home > Video > Test Patterns 메뉴...
- Page 795 ‚ 프리즈 프레임 트랜지션에는 효과를 설정할 수 없습니다 . 프리즈 프레임을 선택한 경우 Teranex AV 는 트랜지션 설정과 상관없이 프리즈 프레임으로 바로 컷 전환되며 오디오는 음소거됩니다 . 프리즈 프레임에서 입력 또는 블랙 , 스틸로 전환을 준비하는 경우 트랜지션 설정은 위에 설명된 규칙을 따릅니다 . 아래 그림을 예로 들으면 영상 소스 2 의 오디오는 비디오와...
- Page 796 3D 모드 메뉴 3D Mode 메뉴에서 Off 는 일반 2D 처리를 의미합니다 . 다음과 같이 선택하여 3D 프로세싱을 활성화할 수 있습니다 . ‚ Convert 이 모드를 선택하면 SDI 또는 HDMI 입력을 통해 전송되는 스테레오스코픽의 좌 / 우안 입력 처리가 활성화됩니다 . 컨버트 모드는 수신되는 스테레오스코픽 신호 또한 동기화하므로...
- Page 797 출력 (Output) 메뉴 3D 출력 선택에 따라 사용하는 3D 영상의 출력 포맷팅 방식이 결정됩니다 . ‚ Full Frame SDI 출력 A 와 출력 B 에서 각각 좌 / 우안 영상을 풀 해상도로 출력합니다 . 동시에 , HDMI 출력에서는 프레임 패킹 신호가 출력됩니다 . ‚...
- Page 798 3D Mode Intensity Input Depth Camera Output Align 3D 메뉴>3D Mode>Depth 카메라 정렬 (Camera Align) 메뉴 3D Mode 메뉴에서 3D Align 을 선택해야만 Camera Align 버튼을 사용할 수 있습니다 . 카메라 정렬 기능은 이미지 확대 , 뒤집기 , 가로 / 세로 위치 조절 , 축회전 조절 등 스테레오스코픽 스트림을 위한...
- Page 799 회전 (Rotation) 메뉴 Camera Align 메뉴에서 적용 가능한 Rotation 메뉴를 통해 X, Y, Z 축과 함께 영상의 축회전을 조절할 수 있으며 , 이 세 가지 축회전을 개별적으로 조절하거나 모두 사용하여 3 차원으로 조절할 수 있습니다 . 축회전 조절을 사용하면 3D 카메라 장비로 인한 기계적 오차를 좁힐 수 있습니다 . Position Camera Align Zoom...
- Page 800 Position Camera Align Zoom Roll Z Rotation Left Eye Rotation Trim Tilt X Right Eye Flip Toe-in Y Both Eyes Reset Reset Rotation 메뉴>Toe In Y Axis Camera Align>Rotation Position Camera Align Zoom Flip Flip Left Eye Rotation Trim Right Eye Horizontal Vertical Flip...
- Page 801 ‚ 음수값의 매개 변수는 이미지 축소를 의미하며 , 양수값의 매개 변수는 이미지 확대를 의미합니다 . ‚ Both 버튼을 누르면 가로 방향과 세로 방향의 줌 매개 변수가 서로 연결되어 이미지가 확대 / 축소되는 동안에도 정확한 종횡비가 유지됩니다 . ‚ Both Eyes 를 선택하면 스테레오스코픽의 좌 / 우안 이미지가 동시에 같이 확대...
- Page 802 3D 모드와 관련한 연결 및 기타 중요 정보 사용하는 워크플로에 영향을 끼칠 수 있는 몇 가지 연결 및 보조 데이터 취급에 대해서 알아보겠습니다 . 비디오 연결 스테레오스코픽의 좌 / 우안 영상 입력은 각각 SDI 입력 A 와 입력 B 에 연결해야 합니다 . 마찬가지로 , 프로세싱된...
- Page 803 그렇지 않은 경우에는 최신 Blackmagic Design Desktop Video 소프트웨어를 다운로드해 설치해야 할 수도 있습니다 . 이 소프트웨어는 소프트웨어는 Blackmagic Design 웹사이트 (www.blackmagicdesign.com/kr/support/family/capture-and-playback) 에서 다운로드할 수 있습니다 . 비디오 캡처 한 응용프로그램을 통해 비디오를 캡처할 경우 Teranex 의 LCD 화면에 Capture 라는 글자와 함께...
- Page 804 강력한 편집 및 색보정 도구를 통해 영상을 개선할 수 있습니다 . Teranex 프로세서를 통해 비디오를 캡처하려면 Blackmagic Design 의 최신 Desktop Video 소프트웨어를 설치해야 할 수도 있습니다 . Desktop Video 소프트웨어는 Blackmagic Design 웹사이트 (www.blackmagicdesign.com/kr/support/family/capture-and-playback) 에서 다운로드할 수 있습니다 . 캡처 및 재생...
- Page 805 설정하기 DaVinci Resolve 를 실행하고 Preferences 메뉴에서 [Video I/O and GPU] 탭을 클릭한 뒤 , [For Resolve Live use] 옵션에서 사용하는 Teranex 를 선택합니다 . 환경 설정을 저장한 뒤 DaVinci Resolve 를 다시 실행하면 변경한 설정이 적용됩니다 . 프로젝트를 시작하고 Project Settings 창에서 원하는 타임라인 해상도와 모니터링 해상도...
- Page 806 재생 (Playback) Media 페이지에서 클립을 재생하려면 , Capture 아이콘을 다시 눌러 Capture Info 창을 닫으세요 . 캡처한 클립을 클릭하면 뷰어에 나타납니다 . 그런 다음 트랜스포트 컨트롤을 클릭하기만 하면 클립이 재생됩니다 . 편집 및 컬러 그레이딩 클립을 캡처하고 나면 간단히 Edit 페이지를 눌러 Resolve 의 강력한 편집 기능을 사용할 수 있습니다 . 그...
- Page 807 프로젝트의 이름을 입력한 뒤 프로젝트의 옵션사항을 설정합니다. 캡처 Choose Tools > Capture 로 이동하여 Capture Tool 을 실행합니다 . 토글 소스 버튼을 클릭하면 데크 아이콘에 빨간색 금지 표시가 나타납니다 . 비디오 및 오디오 입력 메뉴를 [Blackmagic] 으로 설정하세요 . 비디오 및 오디오 소스 트랙을 선택하세요 . 빈...
- Page 808 Apple Final Cut Pro 7 설정하기 Final Cut Pro 7 을 실행하고 File > New Project 를 선택하세요 . File > Save Project As 를 선택한 뒤 , 프로젝트 이름을 입력하세요 . Final Cut Pro 메뉴에서 [Easy Setup] 을 선택하면 Easy Setup 창이 나타납니다 . Format 은...
- Page 809 재생 (Playback) Final Cut Pro 의 타임라인을 사용하여 Teranex Processor 출력에 연결된 모니터나 TV 에 영상을 디스플레이할 수 있습니다 . Blackmagic 출력에서 영상을 확인할 수 없는 경우 , 연결 상태를 다시 한 번 확인하고 View > External Video 로 이동하여 Final Cut Pro 시스템 환경에서 출력이 올바르게...
- Page 810 Adobe Premiere Pro CC 여기서는 Teranex 에서 변환된 출력이 1080i50 이며 , 제어가 불가능한 장비에서 캡처하는 것을 예로 듭니다 . Premiere Pro CC 2015. 설정하기 Premiere Pro CC 를 실행하세요 . Welcome 창에서 [Create New/New Project] 를 선택합니다 . 프로젝트 설정 창이 열립니다 . 프로젝트의...
- Page 811 [Audio and Render Properties]를 [Custom]으로 설정하세요. 캡처 File > Capture 를 선택하세요 . [Red Record] 버튼을 누르면 캡처가 시작됩니다 . [Capture Now] 버튼을 다시 누르면 캡처가 중단됩니다 . 재생 (Playback) 새로운 프로젝트를 생성할 때마다 재생 설정을 선택해야 합니다 . Preferences > Playback 로...
- Page 812 이제 방송용 모니터에서 정확한 비디오 색공간을 가진 After Effects 합성을 확인할 수 있습니다 . 재생 시 항상 정확한 색상과 인터레이싱된 영상을 확인할 수 있으며 , 출력 영상의 모습을 확인하기 위해 작업한 합성 영상의 렌더링을 기다릴 필요가 없습니다 . Teranex Processor 를 통해 오디오를 듣고자 할 경우 Preferences > Audio Hardware and Preferences >...
- Page 813 Final Cut Pro 가 설치되어 있는 경우 ProRes 와 DVCPRO HD 를 포함한 다른 코덱 사용이 가능합니다 . AVI 코덱 (Windows 지원 ) ‚ Blackmagic 10 비트 4:4:4 비압축 ‚ Blackmagic 10 비트 4:2:2 비압축 ‚ Blackmagic HD 8 비트 4:2:2 비압축 ‚...
- Page 814 Adobe Photoshop CC 비디오 프레임 캡처 및 출력하기 포토샵에 이미지 불러오기 포토샵에서 파일 > 불러오기 > Blackmagic Image Capture 순서로 선택합니다 . [Video Input Format( 비디오 입력 포맷 )] 을 선택하고 [Image Bit Depth( 이미지 비트 심도 )] 를 선택한 뒤 , 이미지 불러오기를 클릭합니다 . 포토샵에서...
- Page 815 최소 1280x 800 픽셀의 해상도를 지원하는 컴퓨터 화면이 필요합니다 . Blackmagic Design 은 1920 x 1200 또는 1920 x 1080 픽셀의 해상도를 지원하는 컴퓨터 화면을 사용하여 6 개의 스코프를 동시에 사용하도록 권장합니다 . www.blackmagicdesign.com/kr 고객 지원 페이지에서 Blackmagic UltraScope 최소 시스템 요구 사항의 최신 전체 목록을 참조하세요 . Blackmagic UltraScope 보기...
- Page 816 Blackmagic UltraScope - 전체화면 보기 2-Up 보기 Blackmagic UltraScope 디스플레이 Blackmagic UltraScope 소프트웨어는 Teranex 에서 컨버팅된 출력이 방송 규정에 적합한 비디오 및 오디오 레벨을 유지하도록 돕는 훌륭한 도구입니다 . 카메라 레벨을 모니터하기 위한 스코프에는 RGB Parade 와 파형 , 벡타 스코프 , 히스토그램 , 오디오 미터 디스플레이 등이...
- Page 817 파형 디스플레이 파형은 화이트 레벨 및 블랙 레벨을 확인하거나 전체적인 이미지 콘트라스트를 확인할 때 유용합니다 . 콘트라스트가 알맞은 이미지는 0 IRE 에서 100 IRE 에 이르는 정보를 나타냅니다 . 그렇지 않은 경우 , 대부분의 정보가 화면 중심부에 집중되어 상단과 하단에는 거의 정보가 나타나지...
- Page 818 벡터 스코프의 중심은 채도가 0 임을 의미합니다 . 분포의 형태가 중심에서 멀어질수록 채도가 높다는 것을 나타냅니다 . 영상에서 채도가 지나치게 높거나 낮게 나타날 경우 Teranex Processor 에 있는 SAT 버튼을 누른 뒤 , 회전 노브를 사용해 채도를 높이거나 낮추세요 . 이미지...
- Page 819 오류 로깅 표시 비디오와 오디오의 오류를 기록하는 오류 로깅은 시간이 오래 걸리는 변환 등의 부재 작동 사용에 필수적인 기능입니다 . 오류 표시에는 색상과 밝기 , 오디오 최대값 수준 , 비디오 신호의 손실 , 비디오 포맷의 변경 , 오디오 묵음 등이 있습니다 . 오류가 로깅되는 시점을 결정하는 파라미터를...
- Page 820 포맷 변환표 Teranex AV 및 Teranex Express 출력 입력 • • • • • • • • • • • • • • • • • • • • • • • • • • • • • • • • • 525i59.94 NTSC •...
- Page 821 포맷 변환표 Teranex 2D 출력 입력 • • • • • • • • • • • • • • • • • • • • • • • • • 525i59.94 NTSC • • • • • • • • • • • • • • • • • • • • • • • • • 625i50 PAL •...
- Page 822 포맷 변환표 Teranex 3D 출력 입력 • • • • • • • • • • • • • • • • • • • • • • • • • 525i59.94 NTSC • • • • • • • • • • • • • • • • • • • • • • • • • 625i50 PAL •...
- Page 823 Teranex 2D 를 위한 DB25 커넥터 핀 배치도 Teranex 2D 에 한 쌍의 RCA 입력이 탑재되어 있어 좌 / 우 입력을 위한 2 채널 아날로그 오디오를 연결할 수 있으며 , 뒷면 패널에 DB-25 멀티 핀 커넥터 또한 탑재되어 있어 최대 4 개의 오디오 채널 입...
- Page 824 AES/EBU 오디오 입 / 출력 Teranex 2D 전면 패널의 AES 버튼을 눌러 AES/EBU 디지털 오디오 입력을 선택합니다 . AES/EBU 출력은 항상 활성화되어 있습니다 . DB-25 커넥터는 Teranex 2D Processor 에 4 쌍으로 이루어진 최대 8 개의 입력 채널과 4 쌍의 균형...
- Page 825 Blackmagic Fiber Optic SFP 옵션 모듈 설치하기 Blackmagic Teranex AV 및 Teranex Express 에는 광섬유 케이지가 내장되어 있어 옵션 사항인 광섬유 SFP 모듈을 설치할 수 있습니다 . SFP 모듈을 설치하면 최대 12G-SDI 의 비디오 신호를 동축 케이블보다 훨씬 더 먼 거리까지 안정적으로 연결할 수 있습니다 . Teranex Express Processor 에...
- Page 826 SFP 모듈을 쥐고 조심스럽게 케이지에서 분리합니다 . SFP 모듈을 바로 정전기 봉투에 넣습니다 . SFP 모듈이 설치되어 있지 않은 경우 SFP 모듈 케이지 커버를 Teranex 광섬유 케이지에 넣습니다 . Teranex Express에 SFP 모듈 설치하기 Teranex AV 섀시 범퍼 섀시 양 측면에 장착할 수 있는 섀시 범퍼 두 개가 Teranex AV 와 함께 제공됩니다 . 이 범퍼 덕분에...
- Page 827 Downloading the Free Blackmagic Design SDK The DeckLink SDK can be downloaded from the ‘capture and playback’ section of the Blackmagic Design support center at www.blackmagicdesign.com/kr/support. Joining the Blackmagic Design Software Developers Forum If you’re looking for answers, feedback or suggestions regarding technologies used by Blackmagic Design, such as codecs, core media, APIs, SDK and more, visit the Blackmagic Design Software Developers forum.
- Page 828 Connection The Blackmagic Teranex Ethernet Server listens on TCP port 9800. In a Telnet session, type in “telnet” and a space, followed by the IP address of your Teranex, another space and “9800”. For example: telnet 192.168.90.236 9800 Connection Response Upon connection, the Teranex Server sends a complete dump of the state of the device.
- Page 829 VIDEO ADJUST: ↵ Luma low: 4 ↵ Luma high: 1019 ↵ ↵ ANCILLARY DATA: ↵ AFD output line: 11 ↵ CC enabled: false ↵ ↵ VARIABLE ASPECT RATIO: ↵ Variable Aspect Ratio size X left: 0.000000 ↵ Variable Aspect Ratio size X right: 0.000000 ↵ ↵...
- Page 830 ACK ↵ ↵ VIDEO OUTPUT: ↵ Video mode: 1080i5994 ↵ Aspect ratio: Anamorphic ↵ Video demux mode: SingleLink ↵ Video pixel format: YCbCr422 ↵ Analog output: Component ↵ ↵ Retrieving Device Information The “ Teranex Device ” command returns information about the connected device: TERANEX DEVICE: ↵...
- Page 831 Protocol Commands Command Command Description Align size X left: 0.000000 Set the Horizontal Size (X) (Zoom) value for the Left Eye. Negative values decrease size; positive values enlarge the image. Default = 0 Align size X right: 0.000000 Set the Horizontal (X) Size (Zoom) value for the Right Eye. Negative values decrease size;...
- Page 832 Ancillary Data Teranex processors support closed captions, timecode and video indexing in the ancillary data. Closed Captions Command Command Description CC enabled: Enable Closed Caption processing. True=ON; False=OFF; (Default = False) CC input line: Analog CC input line selection. Range is 20 to 22. Default = 21 CC output line: Analog CC output line selection.
- Page 833 Video Indexing Command Command Description Index reaction: Values are: On, Off (Default = Off) AFD insert type: Values are: Off, Auto, Bypass, or AFD codes 0000 - 1111. For details, see the AFD Insertion Menu topic in the user manual. AFD output line: Range is format dependent.
- Page 834 Command Command Description AudioInLevel2: Set audio level (gain) for Channel 3 AudioInLevel3: Set audio level (gain) for Channel 4 AudioInLevel4: Set audio level (gain) for Channel 5 AudioInLevel5: Set audio level (gain) for Channel 6 AudioInLevel6: Set audio level (gain) for Channel 7 AudioInLevel7: Set audio level (gain) for Channel 8 AudioInLevel8:...
- Page 835 Command Command Description AudioOut4: Select source to be mapped to output Ch 5. AudioOut5: Select source to be mapped to output Ch 6. AudioOut6: Select source to be mapped to output Ch 7. AudioOut7: Select source to be mapped to output Ch 8. AudioOut8: Select source to be mapped to output Ch 9.
- Page 836 Please note: AudioInPair0: refers to input pair 1, AudioInPair1: refers to input pair 2, etc. Command Command Description AudioInPair0: Select source to be mapped to input pair 1 AudioInPair1: Select source to be mapped to input pair 2 AudioInPair2: Select source to be mapped to input pair 3 AudioInPair3: Select source to be mapped to input pair 4 AudioInPair4:...
- Page 837 MODE3D The MODE3D commands are available in the Teranex 3D only. See the “ 3D Menu Settings ” section of this user manual for details. Example: MODE3D: ↵ 3D MODE: 3DModeAlign ↵ ↵ ACK ↵ ↵ MODE3D: ↵ 3D mode: 3DModeAlign ↵ 3D roll left: 0 ↵...
- Page 838 ACK ↵ ↵ MODE3D: ↵ 3D roll left: 20 ↵ 3D roll right: 0 ↵ ↵ Command Command Description 3D roll left: Adjust the Left Eye Z axis image rotation. Range is -400 to +400 units. (Default = 0) 50 units = 1 degree. (1 unit = 0.02 degree) 3D roll right: Adjust the Right Eye Z axis image rotation.
- Page 839 Noise Reduction Command Command Description Enabled: Enable Noise Reduction. False = OFF; True = ON Bias: Adjust the Bias level. Range is -3 to +3 Split screen: Enable NR before/after split screen. False = OFF; True = ON Red overlay: Enable NR Red Overlay.
- Page 840 Teranex Device Command Command Description Model name: Display the Teranex model name. Software Version: Display the checksum of the installed software release. FPGA Version: Display the FPGA version of the installed software release. Panel lock: Remotely lock the front panel of the device, preventing local operation.
- Page 841 Command Command Description Variable Aspect Ratio size X left: Adjust horizontal image size. Negative values decrease size; positive values enlarge the image. Default = 0 Variable Aspect Ratio size X right: Adjust horizontal image size of the Teranex 3D right eye output.
- Page 842 Command Command Description Luma high: Set luminance high level value to clip overshoots. Range is 5 to 1019 (Default = 1019) Chroma low: Set chrominance low level value to clip undershoots. Range is 4 to 1018 (Default = 4) Chroma high: Set chrominance high level value to clip overshoots.
- Page 843 Command Command Description Audio source: Select the audio input type. Values are model dependent. Teranex 2D: Embedded, AES, RCA, DB25. Teranex 3D: Embedded, AES, RCA, DB25. Teranex Express: Embedded. Teranex AV: Embedded, AES, RCA, DB25. PCIe mode: For Teranex 2D and 3D: Display the status of the Thunderbolt connection.
- Page 844 Command Command Description HDMI Output: For Teranex AV only. Select the color space for the HDMI output. Values are: YCbCR422, RGB444 Output option: For Teranex AV only. Select one of four signals to be used as the output of the unit. Values are: Input, Black, Still, Freeze.
- Page 845 전면 및 뒷면 다이어그램 Teranex AV VIDEO AUDIO FORMAT FRAME RATE ASPECT MENU VIDEO PRESETS AUDIO STATUS PANEL EMBED 23.98 ANAM 14:9 HOME GAIN LOCK LBOX CCUT MENU HDMI 1080 PBOX ZOOM SYSTEM STATUS ULTRA 29.97 59.94 MENU ANLG SMART SHARP LOCK VIDEO...
- Page 846 최신 버전으로 업데이트하기 컴퓨터에 설치된 Blackmagic Teranex 소프트웨어 버전을 확인한 뒤 , Blackmagic Design 고객 지원 센터 (www.blackmagicdesign.com/kr/support) 에 방문하여 최신 업데이트를 확인하세요 . 최신 버전으로 업데이트하는 것을 권장하지만 , 중요한 프로젝트를 실행하는 도중에는 소프트웨어 업데이트를 하지 않는 것이 좋습니다 .
- Page 847 주의 사항 주의 : 감전 사고 주의 Teranex Processor 에는 [Caution: Risk of Electric Shock] 라고 적힌 노란색 경고 라벨이 포함되어 있습니다 . 이 경고는 사용자가 Teranex Processor 내부의 비전열된 위험 전압에 노출될 시 , 이 전압에 감전될 수도 있음을 경고하기 위한 것입니다 . 지원이 필요한 경우에는 Teranex Processor 를...
- Page 848 보증 12 개월 한정 보증 Blackmagic Design 은 Teranex 제품군의 부품 및 공정 기술에 어떠한 결함도 없음을 제품 구매일로부터 12 개월 동안 보증합니다 . 보증 기간 내에 결함이 발견될 경우 , Blackmagic Design 은 당사의 결정에 따라 무상 수리 또는 새로운 제품으로 교환해드립니다 . 구매...
- Page 849 Процессоры Teranex 2017 .
- Page 850 Добро пожаловать! Благодарим вас за покупку процессора Teranex. Это решение предназначено для высококачественного преобразования видеоматериалов в разных стандартах и отличается широкими функциональными возможностями. Кроме того, процессор оснащен самым современным SDI-интерфейсом, а также HDMI- и аналоговыми разъемами для подключения к любому оборудованию. Одно...
- Page 851 Содержание Teranex Clean Cadence Обработка на Teranex AV со Подключение питания сверхмалой задержкой Подключение источников видео Встраивание звука Подключение источников аудио Teranex Преобразование Установка задержки на Teranex AV Настройки меню Audio Настройки Noise Reduction Настройки Ancillary Data Настройки меню System Setup Установка...
-
Page 852: Подключение Питания
Чтобы начать работу с процессором Teranex, достаточно подключить питание, источники входящего сигнала и оборудование для его приема. Для подачи питания подключите силовой кабель по стандарту IEC к гнезду на задней панели процессора Teranex. Подключите источник видео ко входу процессора Teranex, а выход соедините с оборудованием, предназначенным... -
Page 853: Установка Задержки На Teranex Av
AES или Analog). После выбора входа можно изменить параметры исходящего сигнала в соответствии с выполняемым типом преобразования. VIDEO AUDIO FORMAT FRAME RATE ASPECT MENU VIDEO PRESETS AUDIO STATUS PANEL 23.98 ANAM 14:9 HOME GAIN EMBED LOCK LBOX CCUT MENU HDMI 1080 PBOX ZOOM... -
Page 854: Установка Утилиты
быстро менять любые параметры всех подключенных процессоров путем выбора соответствующего значка на начальной странице. Mac OS X Загрузите утилиту Blackmagic Teranex Setup с веб-сайта www.blackmagicdesign.com/ru. Распакуйте загруженный файл и выберите соответствующий диск для просмотра его содержимого. Дважды щелкните кнопкой мыши по значку установщика и следуйте инструкциям на экране. - Page 855 Утилита Blackmagic Teranex Setup позволяет обновлять внутреннее ПО процессора и менять настройки преобразования с компьютера под управлением Mac OS X или Windows Перед соединением процессора с компьютером через USB-кабель убедитесь, что Teranex подключен к внешнему источнику питания. Подключите процессор Teranex к источнику питания. Соедините...
-
Page 856: Teranex Express
Наличие разъемов определенного типа зависит от используемого процессора. Все модели Teranex обеспечивают преобразование сигнала из SDI-источников. Некоторые из них дополнительно оснащены HDMI-интерфейсом и поддерживают обработку аналогового видео, поэтому доступный функционал может варьироваться. VIDEO AUDIO FORMAT FRAME RATE ASPECT MENU VIDEO Этот раздел содержит перечень разъемов на каждой модели Teranex. EMBED 23.98 ANAM... -
Page 857: Teranex Av
VIDEO AUDIO FORMAT FRAME RATE ASPECT MENU VIDEO EMBED 23.98 ANAM 14:9 HOME GAIN LBOX CCUT MENU Teranex AV HDMI 1080 PBOX ZOOM ULTRA 29.97 59.94 MENU ANLG SMART SHARP VIDEO AUDIO FORMAT FRAME RATE ASPECT MENU VIDEO REF OUT CH A CH B PUSH... -
Page 858: Teranex 2D
VIDEO AUDIO FORMAT FRAME RATE ASPECT MENU VIDEO 23.98 ANAM 14:9 HOME GAIN EMBED MENU Teranex 2D LBOX CCUT HDMI 1080 PBOX ZOOM 29.97 59.94 MENU ANLG ANLG SMART SHARP 1080 REF IN Y/NTSC/PAL IN B-Y IN R-Y IN Y/NTSC/PAL OUT B-Y OUT R-Y OUT ANALOG AUDIO IN/OUT... -
Page 859: Teranex 3D
VIDEO AUDIO FORMAT FRAME RATE ASPECT MENU VIDEO 23.98 ANAM 14:9 HOME GAIN EMBED LBOX CCUT MENU Teranex 3D HDMI 1080 PBOX ZOOM 29.97 59.94 MENU ANLG ANLG SMART SHARP 1080 VIDEO AUDIO FORMAT FRAME RATE ASPECT MENU VIDEO DOLBY METADATA REMOTE IN/OUT REF IN Y/NTSC/PAL IN... -
Page 860: Настройки Входящего Сигнала
Входы аналогового видео Выходы аналогового видео Один разъем BNC — Один разъем BNC — компонентный/композитный вход компонентный/композитный выход Y/NTSC/PAL. Y/NTSC/PAL. Один разъем BNC — компонентный Один разъем BNC — компонентный вход B-Y. выход B-Y. Один разъем BNC — Один разъем BNC — компонентный компонентный... -
Page 861: Настройки Исходящего Сигнала
ПРИМЕЧАНИЕ. При работе с аналоговым видео на Teranex 2D или 3D используйте поворотную ручку, чтобы задать компонентное или композитное видео в меню на ЖК-дисплее. На Teranex AV при каждом повторном нажатии кнопки SDI можно выбрать один из двух SDI-входов: SDI 1 или SDI 2. При ее однократном... -
Page 862: Обзор Панели Управления
Теперь на ЖК-дисплей будет выводиться видео, которое поступает на все выходы процессора после преобразования с заданными настройками. Качество обработки можно повысить с помощью дополнительной регулировки параметров Proc Amp и Video, таких как шумоподавление, Clean Cadence, цветокоррекция и резкость. Подробнее см. разделы «Настройки процессора Teranex» и «Выполнение преобразования». VIDEO AUDIO FORMAT... - Page 863 Ниже приводится обзор панели управления. VIDEO AUDIO FORMAT FRAME RATE ASPECT MENU VIDEO System Video Main Menu Setup EMBED 23.98 ANAM 14:9 HOME GAIN Audio LBOX CCUT MENU HDMI 1080 PBOX ZOOM Noise Reduction 29.97 59.94 MENU ANLG ANLG SMART Ancillary SHAR 1080...
-
Page 864: Presets
PRESETS Шесть кнопок секции PRESETS служат для сохранения и применения настроек преобразования. Сохранять и применять настройки, а также давать им описательное название можно с помощью утилиты Blackmagic Teranex Setup. Конфигурация Preset представляет собой комбинацию всех параметров. Например, для дальнейшего использования можно сохранить текущие настройки Video Proc Amp и пропорций кадра... -
Page 865: Подключение К Локальной Сети
SYSTEM STATUS Наличие видеосигнала. Выбран и используется внешний источник синхросигнала. Используется вход питания 1. Используется вход питания 2. Только модели Teranex 2D и Teranex 3D. Тайм-код во входящем или исходящем сигнале. Скрытые субтитры во входящем или исходящем сигнале. Наличие соединения через порт Ethernet. <-->... - Page 866 Blackmagic Teranex Setup Утилита Blackmagic Teranex Setup позволяет проверять состояние Teranex и управлять им в удаленном режиме из любой точки сети Ethernet. Это приложение обеспечивает дистанционный контроль устройства при отсутствии доступа к передней панели. Все настройки преобразования можно установить в удаленном режиме с помощью утилиты Blackmagic Teranex Setup При...
- Page 867 Teranex Setup Чтобы добавить устройство, нажмите значок "+" в левом нижнем углу окна входа в систему. Введите IP-адрес и нажмите Add. Процессор Teranex будет отображаться как еще одно контролируемое устройство в сети. Чтобы добавить процессор Teranex вручную, нажмите значок "+" в...
- Page 868 Configure Отображает имя и IP-адрес того процессора Teranex, с которым вы в данный момент работаете. Если используется несколько процессоров, для облегчения идентификации каждому из них можно присвоить имя. Щелкните кнопкой мыши в поле Name и введите название устройства. Имя будет отображаться при выборе процессора с помощью Teranex Setup и...
- Page 869 При нажатии на значок настроек отображается меню, которое позволяет в удаленном режиме заблокировать переднюю панель, сохранить или применить конфигурацию параметров. Все текущие настройки Teranex можно скопировать на компьютер и загрузить на другой процессор. Переднюю панель Teranex можно заблокировать в удаленном режиме. Для этого используется опция...
- Page 870 Таблица ниже содержит возможные варианты пропорций кадров при выполнении преобразования. В ней наглядно показано, как изменяется соотношение сторон при выборе той или иной настройки. 16:9 PBOX Отображение 4:3 SD в границах Pillarbox 16:9 HD с черными полосами по краям. ZOOM Увеличение...
- Page 871 16:9 SD 4:3 SD Хотя большинство программ стандартного разрешения используют пропорции кадра 4:3, некоторые источники SD-сигнала могут быть записаны в широкоэкранном формате 16:9. Для обработки такого материала необходимо настроить процессор Teranex на прием сигнала 16:9. Нажмите кнопку IN на передней панели. В...
- Page 872 Ниже описан порядок установки параметров для основных видов преобразования, выполняемых с помощью Teranex. Все настройки форматной, повышающей, понижающей и перекрестной конверсии выбирают с передней панели управления. Этот раздел также содержит информацию о том, как сохранять и использовать конфигурации настроек, восстанавливать и удалять преобразование 3:2. СОВЕТ.
-
Page 873: Teranex Express
Нажмите кнопку 1080. Выберите кнопку P для формата Progressive и 29,97/30 для настройки кадровой частоты. Соответствующие кнопки в секциях FORMAT, FRAME и RATE загорятся зеленым цветом. Установленные настройки можно подтвердить или изменить. Выберите Change в многофункциональном блоке. Исходящий видеосигнал будет отображаться... -
Page 874: Понижающая Конверсия
Нажмите кнопку IN на панели управления Teranex и выберите SDI в секции VIDEO. На ЖК-дисплее появится входящее видео. Teranex автоматически определяет его формат и подсвечивает соответствующие кнопки. В секции AUDIO загорится кнопка EMBED. VIDEO AUDIO FORMAT FRAME RATE ASPECT 23.98 ANAM 14:9 EMBED... - Page 875 Включите процессор Teranex и соедините его входы и выходы с нужным оборудованием. Нажмите кнопку IN на панели управления и выберите SDI в секции VIDEO. На ЖК- дисплее появится входящее видео. Процессор автоматически определяет его формат и подсвечивает соответствующие кнопки. Выберите EMBED в секции AUDIO. VIDEO AUDIO FORMAT...
-
Page 876: Перекрестная Конверсия
СОВЕТ. Подробнее о преобразовании пропорций кадра см. разделы «Меню Aspect» на стр. 882 и «Преобразование пропорций кадра» на стр. 870. Перекрестная конверсия — это изменение разрешения и (или) пропорций кадра. Для преобразования между 1080 и 720 HD используется высококачественный алгоритм устранения чересстрочности, который... -
Page 877: Форматная Конверсия
Настройка пропорций кадра для исходящего сигнала Нажмите кнопку LBOX/PBOX для выбора эффекта Letterbox. Процессор Teranex готов к выполнению перекрестной конверсии. Вывод изображения с Изображение с пропорциями пропорциями 4:3 кадра 16:9 Кнопка LBOX/PBOX используется для вывода изображения 16:9 с пропорциями 4:3 при конверсии в SD. Для сохранения широкоэкранного формата... - Page 878 Нажмите кнопку 1080. Кнопка загорится зеленым цветом. Выберите кнопку I для чересстрочной развертки и кнопку 50 для установки кадровой частоты. Они также загорятся зеленым цветом. Выберите Change в многофункциональном блоке. Исходящий видеосигнал будет отображаться на ЖК-дисплее и поступать на все видеовыходы. Кнопки выбранных настроек теперь...
-
Page 879: Удаление Преобразования 3:2
Эта функция позволяет удалять преобразование 3:2, которое используется при переводе киноматериала 24 fps в видео с частотой 59,94 полей/с. Процессор Teranex автоматически удаляет такое преобразование при создании видео 24 кадра/с. VIDEO AUDIO FORMAT FRAME RATE ASPECT 23.98 ANAM 14:9 EMBED LBOX CCUT HDMI... - Page 880 Нажмите кнопку HOME в секции MENU и выберите Video>Advanced>Clean Cadence. Включите режим Clean Cadence, выбрав ON с помощью поворотной ручки или кнопки многофункционального блока. Теперь исходящий сигнал в формате 1080i/59,94 содержит корректное преобразование 3:2. После выполнения конверсии отключите режим Clean Cadence, выбрав...
-
Page 881: Встраивание Звука
Lowest Latency Перейдите к меню System Setup, выберите подменю Processing, затем — режим Lowest Latency. Для доступа к этой функции можно также использовать вкладку Setup утилиты Teranex Setup. Процессор будет использовать режим Lowest Latency для текущего вида преобразования с задержкой обработки два кадра или меньше. Значение задержки на Teranex AV зависит от выбранной... - Page 882 Video Меню Video позволяет изменять настройки исходящего видеосигнала, такие как цвет, параметры отсечки и пропорции кадра. Color Для настройки параметров цвета установите ручку в положение Red (красный), Green (зеленый) или Blue (синий). ‚ Каждый канал имеет диапазон значений от -200 до +200. ‚...
- Page 883 Adjust Aspect Для изменения пропорций кадра, параметров расположения и подгонки используйте кнопки многофункционального блока и поворотную ручку. Size Изменяет размер изображения по горизонтали и вертикали. Диапазон значений примерно от -50 до +200 процентов. Position Позволяет двигать поступающее изображение в границах кадра исходящего сигнала. Диапазон...
- Page 884 Video>Setup Это меню позволяет выбирать параметры видео для аналогового интерфейса, SDI- и HDMI-входов и выходов. Доступные настройки зависят от используемой модели Teranex. No Video Input Используется для выбора черного экрана или цветных полос в исходящем видео при отсутствии сигнала на входе. По умолчанию используется черный экран. HDMI Output ( Teranex AV) Для...
- Page 885 Video Sampling ( Teranex 3D) Это меню позволяет задавать частоту выборки на процессоре Teranex 3D. ‚ 4:2:2 – YUV ‚ 4:4:4 – YUV ‚ 4:4:4 – RGB Proc Video No Video Video Setup Color Input Sampling 4:2:2 YUV Test Analog Clip Patterns Input...
- Page 886 Компоновка сигнала выполняется в соответствии со схемой ниже. ‚ SDI-выход A: фрагмент 1 ‚ SDI-выход В: фрагмент 2 ‚ Сквозной SDI-вход A: фрагмент 3 ‚ Сквозной SDI-вход В: фрагмент 4 Out A Out B Loop A Loop B Полный кадр Ultra HD- Вывод...
- Page 887 СОВЕТ. Эта настройка применяется только при выводе сигнала 3G-SDI. На входе уровень такого сигнала (Level A или Level B) определяется автоматически. Quad SDI Output ( Teranex AV) Teranex AV имеет четыре BNC-выхода, которые обеспечивают непрерывный вывод в режиме Quad SDI для видео в форматах Ultra HD. Эти разъемы имеют маркировку CH A, CH B, CH C и CH D. Teranex AV поддерживает...
- Page 888 После изменения настроек соответствующая кнопка будет гореть белым цветом. Чтобы вернуться к настройке по умолчанию, выберите нужный параметр через меню Proc Amp или с помощью кнопки на панели управления и нажмите на поворотную ручку. Для сброса всех настроек перейдите к меню Proc Amp и выберите Reset All. ‚...
- Page 889 Res Chart Grid Teranex AV Помимо описанных выше тестовых шаблонов, Teranex AV позволяет использовать дополнительные опции. ‚ Test Patterns С помощью настройки Test Patterns выберите тестовый сигнал для видео. ‚ Audio С этим меню можно работать только в том случае, когда выбран тестовый видеосигнал. Необходимую...
- Page 890 На вкладке Setup утилиты Blackmagic Teranex Setup можно выбрать настройки Test Patterns, Test Tones и Motion Advanced Ниже описаны функции, доступные на процессорах Teranex для работы с преобразованием 3:2. Clean Cadence (Teranex 2D 3D) Позволяет создать корректное преобразование 3:2 при выводе видео с частотой 59,94 кадра/с. Clean Cadence Режим...
- Page 891 Scene Detect Функция Scene Detect позволяет устранять смешение полей при монтаже материала на стыке кадров. ‚ On Функция определения переходов включена. ‚ Off Функция определения перехода отключена. По умолчанию установлена настройка On. Обычно включенная функция Scene Detect улучшает качество обработки, однако при быстрой смене...
-
Page 892: Настройки Меню Audio
Audio Меню Audio позволяет назначать выходы для каналов входящего аудиосигнала, управлять уровнем и задержкой звука, а также настраивать определенные параметры. На процессоре Teranex 2D доступно меню Input Mapping для одновременного выбора каналов входящего сигнала со встроенным, AES- и (или) аналоговым звуком. Output Mapping В... - Page 893 Output Mapping Output Mapping Output Mapping Prev Next Prev Next Prev Next Channel 1 Source Channel 4 Source Channel 13 Source Input 1 Input 1 Tone .75 kHz Input 2 Input 2 Tone 1.5 kHz Input 3 Input 3 Tone 3 kHz Input 4 Input 4 Tone 6 kHz...
- Page 894 Input Mapping Input Mapping Prev Next Prev Next Input 1/2 Source Input 3/4 Source Embedded 1/2 AES 5/6 Embedded 3/4 Embedded 5/6 AES 7/8 Embedded 7/8 ANLG-DB25 1/2 Embedded 9/10 ANLG-DB25 3/4 Reset Reset Конфигурация Embedded 1/2 - Конфигурация ANLG-DB25 1/2 Input 1/2 Source - Input 3/4 Source Audio Gain...
- Page 895 Для настройки поверните ручку. Диапазон настройки: от -12 до +12 дБ. Для возврата к 0 нажмите на поворотную ручку. System Output Input Analog Analog Video Main Menu Audio Setup Setup Mapping Mapping In Level Input Audio Output Audio Options Gain Audio Noise Delay...
- Page 896 Teranex AV) Teranex AV позволяет выбрать пару каналов входящего или исходящего сигнала для мониторинга на ЖК-дисплее. Под индикаторами звука отображаются номера каналов. System Output Audio Video Main Menu Audio Setup Mapping Meters Channels 1&2 Audio Output Audio Options Gain Channels 3&4 Channels 5&6 Audio Noise...
- Page 897 На Teranex 3D метаданные Dolby можно получать из поступающего Dolby-сигнала (при наличии установленного модуля Dolby) или через 9-контактный разъем на задней панели процессора (как последовательные данные). Кроме того, можно сгенерировать собственные метаданные с помощью одной из двух конфигураций (Stereo и 5.1) в меню Dolby Metadata. Параметры каждой конфигурации содержатся...
-
Page 898: Настройки Noise Reduction
Stereo Preferred Stereo Downmix не указывается не указывается Lt/Rt Center Downmix Level -3 дБ -3 дБ Lt/Rt Surround Downmix Level -3 дБ -3 дБ Lo/Ro Center Downmix Level -3 дБ -3 дБ Lo/Ro Surround Downmix Level -4,5 дБ -4,5 дБ Extended Bitstream Info 2 да... - Page 899 Bias Эта настройка регулирует уровень шумоподавления. Чем выше значение, тем интенсивнее подавляется шум. ‚ Диапазон значений Bias: от -6 до +6. ‚ По умолчанию используется значение 0. Split Enable Set Value Screen Bias Overlay Меню Noise Reduction>Bias Split Screen При использовании этого режима ЖК-дисплей делится пополам, что позволяет увидеть результаты шумоподавления.
-
Page 900: Настройки Ancillary Data
Ancillary Data Меню Ancillary Data служит для доступа к функциям Closed Caption, Timecode и Video Index. Closed Caption Эта функция служит для обработки скрытых субтитров по стандартам CEA-608B и CEA-708B. Стандарт CEA-608B используется для аналогового SD-сигнала в NTSC и SD-SDI-сигнала. Субтитры кодируются... - Page 901 CC Enable По умолчанию режим CC Enable отключен (Off). Чтобы использовать скрытые субтитры, выберите Main Menu>Ancillary Data>Closed Caption>CC Enable, затем с помощью многофункциональных кнопок или поворотной ручки установите настройку On. Если получаемые данные содержат ошибки или являются некорректными, попробуйте отключить субтитры. Светодиодный...
- Page 902 Service 1 Language Настройка служит для выбора языка при использовании скрытых субтитров по стандарту CEA-708. ‚ Доступные языки: английский, французский, немецкий, итальянский, испанский. ‚ По умолчанию используется английский язык. Service 2 Set Value Enable Source English Analog Service 1 In Line Language French German...
- Page 903 Timecode Generator Меню Timecode Generator позволяет выбрать любой из четырех режимов тайм-кода или отключить ручную обработку тайм-кода. Исходящий видеосигнал не будет содержать тайм-код. Эта настройка используется по умолчанию. Video Closed Ancillary Data Prev Timecode Next Index Caption Timecode Timecode Start Generator Input Input Regen...
- Page 904 Video Closed Ancillary Data Prev Timecode Next Index Caption Timecode Timecode Start Generator Input Input Regen Start Timecode Source Generate Jam Sync Setup Меню Ancillary Data> Меню Timecode>Input Regen Timecode Generate Будет создан тайм-код исходящего сигнала в соответствии с выбранным форматом вывода, даже...
- Page 905 ‚ Set Timecode Опции меню Set Timecode определяются выбором, сделанным в меню Start Source. Prev Timecode Next Start Value Timecode Start Input Generator Jam Sync Start Timecode Source 00:00:00:00 Setup Jam Sync>Set Timecode ‚ Start Source = Input Если в меню Start Source выбрана настройка Input, в качестве начального значения генератор...
- Page 906 Меню AFD Insertion Меню позволяет выбирать необходимый код AFD, который будет добавлен в исходящий видеосигнал. Чтобы задать строку, в которую вставляется код, используют меню AFD Insert Line. ‚ Опции меню AFD-код не добавляется в исходящий сигнал. Auto Соответствующий код добавляется в зависимости от текущего формата исходящего сигнала. Bypass Любой...
-
Page 907: Настройки Меню System Setup
System Setup Из меню System Setup доступны подменю Ethernet, Factory Reset и Reference, а также экран Info. Teranex AV позволяет использовать дополнительные опции, включая обработку с малой задержкой и вывод статичных изображений. Ethernet Меню служит для отображения текущих и ввода новых настроек статичного IP-адреса, адреса Subnet Mask и... - Page 908 DHCP Меню DHCP служит для назначения IP-адреса процессора по протоколу DHCP. Для включения и отключения этой функции используйте кнопку DHCP многофункционального блока или поворотную ручку. После изменения настройки выберите Save and Restart, чтобы активировать новый IP-адрес. ‚ ON Процессор использует IP-адрес, назначенный сетевым маршрутизатором. ‚...
- Page 909 ПРИМЕЧАНИЕ. Сохранение статичных изображений во внутреннюю память выполняется в фоновом режиме и может занимать до 30 секунд для Ultra HD-материала. Если затем нужно отключить питание, необходимо подождать некоторое время, чтобы завершить выполнение этого действия. ‚ Preview После того как захват статичного изображения выполнен, кнопка Preview позволяет выводить...
- Page 910 Файл, загружаемый с компьютера, может иметь любое разрешение. Во время импорта изображение масштабируется в соответствии с разрешением на выходе процессора Teranex AV. Алгоритмы Teranex для этого не используются, поэтому качество будет ниже, чем при внутренней конверсии. Если нужно получить максимально высокий результат, импортируйте...
- Page 911 ‚ Internal Процессор Teranex AV использует внутренний генератор, который обеспечивает постоянную синхронизацию на выходе даже при смене источников входящего сигнала. System Factory Video Main Menu Ethernet System Setup Setup Reset Audio Reference Noise Info Reduction Ancillary Data Main Menu>System Setup System Setup>Reference Pixel Pixel...
- Page 912 1080PsF/29,97 Blackburst 59,94; Tri-level Progressive 29,97 или Tri-level Interlaced 59,94 1080p/30 Tri-level Progressive 30, Tri-level Interlaced 60 1080PsF/30 Tri-level Progressive 30, Tri-level Interlaced 60 1080i/50 Blackburst 50, Tri-level Interlaced 50 1080p/50 Blackburst 50 1080i/59,94 Blackburst 59,94 или Tri-level Interlaced 59,94 1080p/59,94 Blackburst 59,94 1080i/60...
- Page 913 Generate ( Teranex AV) При подключении к Teranex AV через синхровыход процессор можно использовать как генератор опорного сигнала. Тип этого сигнала (Blackburst или Tri-level) зависит от формата видео на выходе. Некоторые форматы допускают использование только одного из них. Так, для NTSC это будет Blackburst с...
- Page 914 1080p/60 Не поддерживается 2K DCI 23,98p Tri-level Progressive 23,98 2K DCI 23,98PsF Tri-level Interlaced 47,96 2K DCI 24p Tri-level Progressive 24 2K DCI 24PsF Tri-level Interlaced 48 2160p/23,98 Tri-level Progressive 23,98 2160p/24 Tri-level Progressive 24 2160p/25 Blackburst 50 или Tri-level Progressive 25 2160p/29,97 Blackburst 59,94 или...
- Page 915 СОВЕТ. Для быстрого вызова меню Output Options можно назначить кнопку MENU 1 ИЛИ MENU 2 на передней панели Teranex AV. Input Эта опция позволяет выводить видео со входа, который задан на передней панели: SDI 1, SDI 2, HDMI или оптический интерфейс (при установке соответствующего модуля). При выборе...
-
Page 916: Настройки 3D
‚ Параметры перехода не учитываются, когда используют опцию Freeze. При ее выборе выполняется мгновенный переход к статичному изображению вне зависимости от настроек перехода. Звуковое сопровождение в этом случае будет отключено. ‚ Когда вместо опции Freeze выбирают Input, Black или Still, переход выполняется по описанным... - Page 917 3D Mode В меню 3D Mode при использовании настройки Off выполняется обработка в обычном 2D-режиме. При активации 3D-режима доступны несколько опций. ‚ Convert Обработка левого и правого каналов входящего стереосигнала, поступающего через SDI- или HDMI-вход. Также позволяет выводить синхронизированный сигнал при использовании двух...
- Page 918 Output Меню 3D Output задает формат исходящего 3D-изображения. ‚ Full Frame Полное разрешение сигналов левого и правого каналов, поступающих на выходы SDI A и SDI B соответственно, либо на HDMI-выход при использовании сигнала в упакованном формате. ‚ Side by Side Кодирование...
- Page 919 ‚ Диапазон настройки: от -12 до +12. По умолчанию используется значение 0. 3D Mode Intensity Input Depth Camera Output Align Меню 3D>2D to 3D>Depth Camera Align Настройка Camera Align доступна только в том случае, если в меню 3D Mode выбрана опция 3D Align.
- Page 920 Меню Rotation Опция Rotation в меню Camera Align позволяет поворачивать изображение отдельно по осям X, Y и Z или в любой их комбинации. Ее можно использовать для устранения погрешностей трехмерной съемки, которая ведется с помощью механических систем. Position Camera Align Zoom Roll Z Rotation...
- Page 921 Position Camera Align Zoom Roll Z Rotation Left Eye Rotation Trim Tilt X Right Eye Flip Toe-in Y Both Eyes Reset Reset Camera Align>Rotation Меню Rotation>Toe In Y Axis Position Camera Align Zoom Flip Flip Left Eye Rotation Trim Right Eye Horizontal Vertical Flip...
- Page 922 ‚ При отрицательном значении выполняется уменьшение, при положительном — увеличение. ‚ Режим Both связывает параметры зуммирования по горизонтали и вертикали с сохранением корректных пропорций кадра. ‚ При выборе режима Both Eyes выполняется одновременное зуммирование обоих каналов стереоизображения в равной степени. Position Camera Align Zoom...
- Page 923 Ниже описан порядок использования разъемов и обработки дополнительных данных для стереоскопического изображения. Видеоразъемы Левый и правый каналы входящего стереосигнала должны поступать на входы SDI A и SDI B соответственно. После обработки левый и правый каналы исходящего сигнала поступают на выходы SDI A и...
-
Page 924: Работа С Приложениями Для Монтажа
Некоторые приложения для монтажа требуют установки плагинов, в то время как для других достаточно установить последнюю версию Blackmagic Design Desktop Video. Чтобы загрузить это ПО, перейдите по ссылке www.blackmagicdesign.com/ru/support/family/capture-and-playback. Во время захвата видео на ЖК-дисплей процессора Teranex выводятся текст "CAPTURE" и формат... -
Page 925: Davinci Resolve
видеокассету, и в то же время создать его HD-копию в DaVinci Resolve. Клипы сохраняются в папке Media Pool, после чего их легко обработать с помощью различных инструментов монтажа и цветоустановки. Для захвата видео с помощью Teranex необходимо установить последнюю версию Desktop Video. Чтобы загрузить это приложение, перейдите по ссылке www.blackmagicdesign.com/ru/support/ family/capture-and-playback. - Page 926 Запустите DaVinci Resolve и в меню Preferences перейдите на вкладку Video I/O and GPU, затем выберите Teranex для опции For capture and playback use. Сохраните настройки и перезапустите программу DaVinci Resolve. В окне Project Settings задайте параметры настроек Timeline resolution, Timeline frame rate и...
-
Page 927: Avid Media Composer
Для воспроизведения клипов на странице Media нажмите значок захвата еще раз, чтобы закрыть окно Capture. Щелкните кнопкой мыши по клипу, чтобы открыть его в окне просмотра. Для воспроизведения используйте кнопки управления. Записав нужные клипы, перейдите на страницу Edit, чтобы начать работу с инструментами DaVinci Resolve. -
Page 928: Apple Final Cut Pro 7
Укажите имя проекта и задайте его настройки Выберите Tools>Capture, чтобы открыть Capture Tool. Нажмите на кнопку Toggle Source (значок деки с перечеркнутым красным кругом). Для входящих аудио- и видеосигналов должны быть установлены настройки Blackmagic. Выберите исходные видеотрек и аудиодорожку. В меню Bin выберите Target Bin. В... - Page 929 Apple Final Cut Pro 7 Запустите Final Cut Pro 7 и выберите File>New Project. Выберите File>Save Project As и присвойте имя проекту. В меню Final Cut Pro выберите Easy Setup. Появится окно Easy Setup. Для параметра Format выберите HD, для Rate — 25,00 fps. В меню Use выберите "Blackmagic HDTV 1080i 50 - 10 bit".
- Page 930 Для вывода видео на подключенный к процессору Teranex монитор или телевизор можно использовать временную шкалу Final Cut Pro. Если изображения нет, проверьте соединения и настройки Blackmagic Design. Для этого выберите View>External Video в приложении Final Cut Pro и убедитесь, что активирована опция All Frames. Apple Final Cut Pro X Для...
-
Page 931: Adobe Premiere Pro Cc
Adobe Premiere Pro CC В примере ниже на выход Teranex поступает преобразованный сигнал в формате 1080i/50. Захват видео ведется на устройстве без функции дистанционного управления. Premiere Pro CC (2015) Запустите Premiere Pro CC. В окне Welcome выберите Create New/New Project. Откроется... -
Page 932: Adobe After Effects Cc
Для параметра Audio and Render Properties выберите настройку Custom Выберите File>Capture. Для начала записи нажмите красную кнопку. Нажмите кнопку остановки, чтобы закончить запись. При создании нового проекта необходимо установить настройки Playback. Выберите Preferences>Playback и под "Video Device" поставьте флажок напротив Blackmagic Playback. - Page 933 Теперь созданные с помощью After Effects изображения можно выводить на вещательный монитор в точном цветовом пространстве. Благодаря этому конечный результат будет доступен для просмотра, в том числе для проверки истинного цвета и чересстрочной развертки, до завершения рендеринга. Чтобы прослушать аудио с помощью процессора Teranex, выберите Preferences>Audio Hardware или...
- Page 934 Другие кодеки, такие как ProRes и DVCPRO HD, будут доступны, если на компьютере установлена программа Final Cut Pro. Windows ‚ Blackmagic 10 бит 4:4:4 без компрессии ‚ Blackmagic 10 бит 4:2:2 без компрессии ‚ Blackmagic HD 8 бит 4:2:2 без компрессии ‚...
-
Page 935: Adobe Photoshop Cc
Adobe Photoshop CC Photoshop В приложении Photoshop выберите File>Import>Blackmagic Image Import. Выберите Video Input Format и Image Bit Depth, затем нажмите Import Image. Photoshop Выберите File>Export>Blackmagic Image Export. Выберите Video Output Format и нажмите Output Image. После того как в окнах Import и Export заданы нужные настройки, в следующий раз во время импорта... -
Page 936: Blackmagic Ultrascope
рекомендуем использовать экран с разрешением 1920 x 1200 или 1920 x 1080 пикселей, который позволяет выводить сразу все шесть дисплеев. Полный перечень системных требований для установки Blackmagic UltraScope содержится в разделе «Поддержка» на сайте www.blackmagicdesign.com/ru. Blackmagic UltraScope В зависимости от условий рабочего процесса и разрешения экрана можно использовать один из... - Page 937 Blackmagic UltraScope — режим Full Screen Режим 2-Up Blackmagic UltraScope Приложение Blackmagic UltraScope позволяет поддерживать заданные уровни видео и аудио, поступающего с процессора Teranex после преобразования. Контроль сигнала осуществляется с помощью вектороскопа, дисплея формы сигнала, параметров RGB, гистограммы и индикатора уровня...
- Page 938 Если темные тона имеют мутный или серый оттенок, информация о них будет показана выше значения 0 IRE. Чтобы изменить уровень черного, нажмите кнопку Blk на передней панели процессора Teranex и с помощью поворотной ручки уменьшите значение. Если уровень черного ниже 0 IRE, отдельные детали в областях тени могут быть утрачены. При установке этого значения следите...
- Page 939 Гистограмма является еще одним способом для проверки контраста изображения. На горизонтальной оси отображается диапазон яркости, где левый край соответствует черному цвету (0 для 10-битного изображения), а правый край — белому (1023 для 10-битного изображения). Изображение с хорошим контрастом будет содержать информацию, расположенную вдоль всей горизонтальной...
- Page 940 Журнал регистрирует ошибки видео и аудио, что делает его полезным инструментом контроля качества при выполнении длительной конверсии. Он позволяет вести мониторинг цвета и яркости, проверять уровень звука и выявлять потерю сигнала, изменение формата и отсутствие аудиодорожки. После настройки параметров, которые будут фиксировать ошибки, можно включать и...
-
Page 941: Teranex Av И Teranex Express
Teranex AV Teranex Express • • • • • • • • • • • • • • • • • • • • • • • • • • • • • • • • • 525i/59,94 NTSC • • • • • • • • • • • • • • • • • • • • • • • • • • • • • • • • • 625i/50 PAL •... -
Page 942: Teranex 2D
Teranex 2D • • • • • • • • • • • • • • • • • • • • • • • • • 525i/59,94 NTSC • • • • • • • • • • • • • • • • • • • • • • • • • 625i/50 PAL •... -
Page 943: Teranex 3D
Teranex 3D • • • • • • • • • • • • • • • • • • • • • • • • • 525i/59,94 NTSC • • • • • • • • • • • • • • • • • • • • • • • • • 625i/50 PAL •... -
Page 944: Teranex 2D
DB-25 Teranex 2D Teranex 2D имеет два RCA-разъема для ввода левого и правого аналоговых аудиоканалов. Кроме того, на задней панели есть многоконтактный разъем DB-25, позволяющий использовать четыре канала аналогового звука на входе и выходе. Чтобы принимать аналоговое аудио, нажмите кнопку ANLG на передней панели. На ЖК-дисплее появится... - Page 945 AES/EBU Чтобы использовать цифровой аудиовход AES/EBU, нажмите кнопку AES на передней панели Teranex 2D. Выход AES/EBU всегда включен. Интерфейс DB-25 в процессоре Teranex 2D позволяет принимать и выводить до 8 каналов (четырех пар) балансного цифрового звука AES/EBU. Для этого требуется дополнительный переходный кабель по стандарту Yamaha с балансными XLR-разъемами.
-
Page 946: Blackmagic Design Fiber Optic Sfp
Blackmagic Design Fiber Optic SFP Процессоры Teranex AV и Teranex Express имеют гнездо для установки оптического модуля SFP, который позволяет увеличить расстояние передачи по сравнению с коаксиальным кабелем и обеспечивает пропускную способность до 12G-SDI. Blackmagic Design Fiber Optic SFP Teranex Express Во... -
Page 947: Зажимы Для Корпуса (Teranex Av)
Установка модуля Blackmagic Design SFP в процессор Teranex Express (Teranex AV) Модель Teranex AV поставляется с двумя зажимами, которые можно установить по бокам корпуса. Они позволяют защитить кабельные соединения от повреждения и перекручивания при работе в мобильных условиях и установке в передвижных эфирных... - Page 948 Downloading the Free Blackmagic Design SDK The DeckLink SDK can be downloaded from the ‘capture and playback’ section of the Blackmagic Design support center at www.blackmagicdesign.com/ru/support. Joining the Blackmagic Design Software Developers Forum If you’re looking for answers, feedback or suggestions regarding technologies used by Blackmagic Design, such as codecs, core media, APIs, SDK and more, visit the Blackmagic Design Software Developers forum.
- Page 949 Connection The Blackmagic Teranex Ethernet Server listens on TCP port 9800. In a Telnet session, type in “telnet” and a space, followed by the IP address of your Teranex, another space and “9800”. For example: telnet 192.168.90.236 9800 Connection Response Upon connection, the Teranex Server sends a complete dump of the state of the device.
- Page 950 VIDEO ADJUST: ↵ Luma low: 4 ↵ Luma high: 1019 ↵ ↵ ANCILLARY DATA: ↵ AFD output line: 11 ↵ CC enabled: false ↵ ↵ VARIABLE ASPECT RATIO: ↵ Variable Aspect Ratio size X left: 0.000000 ↵ Variable Aspect Ratio size X right: 0.000000 ↵ ↵...
- Page 951 ACK ↵ ↵ VIDEO OUTPUT: ↵ Video mode: 1080i5994 ↵ Aspect ratio: Anamorphic ↵ Video demux mode: SingleLink ↵ Video pixel format: YCbCr422 ↵ Analog output: Component ↵ ↵ Retrieving Device Information The “Teranex Device” command returns information about the connected device: TERANEX DEVICE: ↵...
- Page 952 Protocol Commands Command Command Description Align size X left: 0.000000 Set the Horizontal Size (X) (Zoom) value for the Left Eye. Negative values decrease size; positive values enlarge the image. Default = 0 Align size X right: 0.000000 Set the Horizontal (X) Size (Zoom) value for the Right Eye. Negative values decrease size;...
- Page 953 Ancillary Data Teranex processors support closed captions, timecode and video indexing in the ancillary data. Closed Captions Command Command Description CC enabled: Enable Closed Caption processing. True=ON; False=OFF; (Default = False) CC input line: Analog CC input line selection. Range is 20 to 22. Default = 21 CC output line: Analog CC output line selection.
- Page 954 Video Indexing Command Command Description Index reaction: Values are: On, Off (Default = Off) AFD insert type: Values are: Off, Auto, Bypass, or AFD codes 0000 - 1111. For details, see the AFD Insertion Menu topic in the user manual. AFD output line: Range is format dependent.
- Page 955 Command Command Description AudioInLevel0: Set audio level (gain) for Channel 1 AudioInLevel1: Set audio level (gain) for Channel 2 AudioInLevel2: Set audio level (gain) for Channel 3 AudioInLevel3: Set audio level (gain) for Channel 4 AudioInLevel4: Set audio level (gain) for Channel 5 AudioInLevel5: Set audio level (gain) for Channel 6 AudioInLevel6:...
- Page 956 Command Command Description AudioOut2: Select source to be mapped to output Ch 3. AudioOut3: Select source to be mapped to output Ch 4. AudioOut4: Select source to be mapped to output Ch 5. AudioOut5: Select source to be mapped to output Ch 6. AudioOut6: Select source to be mapped to output Ch 7.
- Page 957 Please note: AudioInPair0: refers to input pair 1, AudioInPair1: refers to input pair 2, etc. Command Command Description AudioInPair0: Select source to be mapped to input pair 1 AudioInPair1: Select source to be mapped to input pair 2 AudioInPair2: Select source to be mapped to input pair 3 AudioInPair3: Select source to be mapped to input pair 4 AudioInPair4:...
- Page 958 MODE3D The MODE3D commands are available in the Teranex 3D only. See the “3D Menu Settings” section of this user manual for details. Example: MODE3D: ↵ 3D MODE: 3DModeAlign ↵ ↵ ACK ↵ ↵ MODE3D: ↵ 3D mode: 3DModeAlign ↵ 3D roll left: 0 ↵...
- Page 959 ACK ↵ ↵ MODE3D: ↵ 3D roll left: 20 ↵ 3D roll right: 0 ↵ ↵ Command Command Description 3D roll left: Adjust the Left Eye Z axis image rotation. Range is -400 to +400 units. (Default = 0) 50 units = 1 degree. (1 unit = 0.02 degree) 3D roll right: Adjust the Right Eye Z axis image rotation.
- Page 960 Subnet: Displays current subnet mask as an integer. Cannot be changed by the user. Noise Reduction Command Command Description Enabled: Enable Noise Reduction. False = OFF; True = ON Bias: Adjust the Bias level. Range is -3 to +3 Split screen: Enable NR before/after split screen.
- Page 961 Teranex Device Command Command Description Model name: Display the Teranex model name. Software Version: Display the checksum of the installed software release. FPGA Version: Display the FPGA version of the installed software release. Panel lock: Remotely lock the front panel of the device, preventing local operation.
- Page 962 Command Command Description Variable Aspect Ratio size X left: Adjust horizontal image size. Negative values decrease size; positive values enlarge the image. Default = 0 Variable Aspect Ratio size X right: Adjust horizontal image size of the Teranex 3D right eye output.
- Page 963 Command Command Description Chroma high: Set chrominance high level value to clip overshoots. Range is 5 to 1019 (Default = 1019) Aspect fill luma: Set luminance (Y) value for letterbox or pillarbox fill color. Range is 64 to 940 (Default = 64) Aspect fill Cb: Set B-Y value for letterbox or pillarbox fill color.
- Page 964 Command Command Description Signal present: True indicates presence of input video. False indicates no input video is present. Cannot be changed by the user. Timecode present: Detected indicates presence of timecode. None indicates no timecode is present. Cannot be changed by the user. Closed captioning present: Detected indicates presence of closed captions.
- Page 965 Command Command Description Quad ancillary replication: For Teranex AV and Express. True = replicate the ancillary data on all four quad link outputs. False = ancillary data on quad output A only. Quad SDI output: For Teranex AV only. Select the quad SDI output mode. Values are: QuadLink, QuadHDSplit.
- Page 966 Teranex AV VIDEO AUDIO FORMAT FRAME RATE ASPECT MENU VIDEO PRESETS AUDIO STATUS PANEL 23.98 ANAM 14:9 HOME GAIN EMBED LOCK LBOX CCUT MENU HDMI 1080 PBOX ZOOM SYSTEM STATUS ULTRA 29.97 59.94 MENU ANLG SMART SHARP LOCK VIDEO AUDIO FORMAT FRAME RATE...
- Page 967 Полезным источником информации является форум сообщества на веб-сайте Blackmagic Design. На нем можно поделиться своими идеями, а также получить помощь от персонала поддержки и других пользователей. Адрес форума http://forum.blackmagicdesign.com. Blackmagic Design Если с помощью доступных справочных материалов и форума решить проблему не удалось, воспользуйтесь...
- Page 968 На корпусе Teranex есть желтая наклейка с текстом «Осторожно: опасность поражения электрическим током». Так как внутри процессора могут находиться неизолированные элементы, существует риск поражения электрическим током. Blackmagic Design рекомендует не вскрывать процессор Teranex самостоятельно, а при необходимости обращаться в ближайший сервисный центр...
- Page 969 Компания Blackmagic Design гарантирует отсутствие в продуктах Teranex дефектов материала и производственного брака в течение 12 месяцев с даты продажи. Если во время гарантийного срока будут выявлены дефекты, Blackmagic Design по своему усмотрению выполнит ремонт неисправного изделия без оплаты стоимости запчастей и трудозатрат или заменит такое изделие новым. Чтобы...
Need help?
Do you have a question about the Teranex Series and is the answer not in the manual?
Questions and answers