Table of Contents
Advertisement
Available languages
Available languages
Quick Links
Advertisement
Chapters
Table of Contents

Related Manuals for Candy EGO-G25DCW


Summary of Contents for Candy EGO-G25DCW
- Page 1 EGO-G25DCW EGO-G25DCO EGO-G25DCG EGO-G25DCS EGO-G25DCCH MIKROWELLENHERD BEDIENUNGSANLEITUNG MICROWAVE OVEN HANDLEIDING FORNO MICROONDAS Manual do Proprietário CUPTOR CU MICROUNDE MANUALUL PROPRIETARULUI...
- Page 2 MODÈLE: EGO-G25DCW EGO-G25DCO EGO-G25DCG EGO-G25DCS EGO-G25DCCH Micro-Ondes Mode D'emploi S'il vous plaît lire attentivement ces instructions avant d'installer et d'utiliser le four. Conservez ce mamual pour référence future.
-
Page 3: Table Of Contents
É É É É N'essayez pas de faire fonctionner ce four avec la porte ouverte puisque le fonctionnement de la porte ouverte peut entraîner une exposition dangereuse à l'énergie micro-ondes. Il est important de ne pas annuler ou d'altérer les dispositifs de verrouillage de sécurité. -
Page 4: Installation
É É 230-240V~50Hz,1400WMicro-ondes) Consommation: 1000W (Grill) Micro-ondes nominale Puissance 900W de sortie: Fréquence de fonctionnement: 2450MHz Dimensions extérieures: 291mm(H)×498mm(W)×410mm(D) Four Dimensions de la cavité: 220mm(H)×340mm(W)×320mm(D) Capacité du four: 25Litres Cuisson Uniformité: Système de plaque tournante Poids net: Environ.13.4 kg If the oven fails to operate: Assurez-vous que le four est branché... -
Page 5: Instructions De Mise
Assurez-vous que le cordon d'alimentation n'est pas endommagé et ne fonctionne pas sous le four ou sur toute surface chaude ou pointu. La prise doit être facilement accessible afin qu'il puisse facilement être débranchée en cas d'urgence. Ne pas utiliser le four en plein air. Cet appareil doit être mis à... -
Page 6: Consignes De Sécurité Importantes
É É É É Lorsque vous utilisez appareil précautions élémentaires de sécurité électrique doit être suivie, y compris ce qui suit: : Afin de réduire les risques de brûlure, électrocution, d'incendie, de blessure ou d'exposition à l'énergie micro-ondes excessive: Lisez toutes les instructions avant d'utiliser l'appareil. Utilisez cet appareil uniquement pour son usage prévu, comme décrit dans ce manuel. - Page 7 ISM (Industrial, Scientific and Medical) matériel dans lequel l'énergie radiofréquence est intentionnellement générée et / ou utilisée sous la forme d'un rayonnement électromagnétique pour le traitement de la matière, et de susciter l'équipement de l'érosion. Pour les équipements de classe B est un équipement adapté...
- Page 8 Si la fumée est émis, éteignez ou débranchez l'appareil et garder la porte fermée afin d'étouffer. Arrange food carefully. Place thickest areas towards outside of dish. Watch cooking time. Cook for the shortest amount of time indicated and add more as needed. Food severely overcooked can smoke or ignite.
-
Page 9: Noms
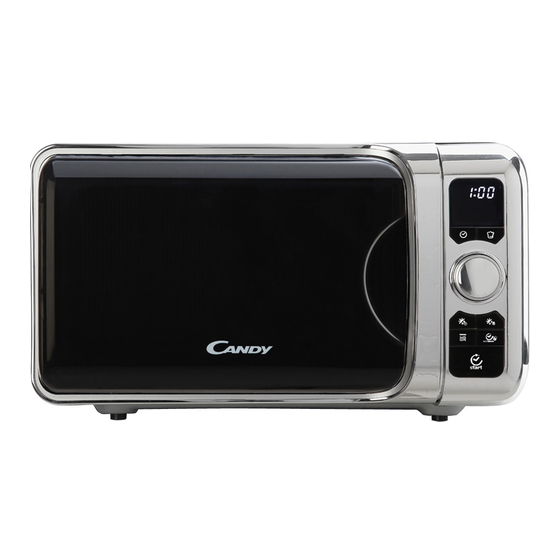
Système de verrouillage de sécurité des portes Hublot du four Shaft Support plaque tournante Panneau de configuration Guide d'onde (Veuillez ne pas retirer la plaque de mica couvrant le guide d'ondes) Plateau en verre Chauffe-Grill métal rack... -
Page 10: Panneau De Commande
Spaghetti icon ICône Pâtisserie Fresh Vegetable icon Fish icon Pizza icon Grill icon Filet Meat icon Microwave icon CLOCK button AUTO COOK button DIAL TIME WEIGHT WEIGHT DEFROST button JET DEFROST button MICROWAVE and GRILL button END/PAUSE button START button... -
Page 11: Comment Mettre Les Commandes Du Four
z Lors de la définition d'un programme, vous pouvez obtenir le retour du four en mode veille après avoir appuyé sur FIN / pad PAUSE. z Pendant la cuisson, vous pouvez mettre en pause le programme en appuyant FIN / pad PAUSE une fois, puis appuyez sur START pour reprendre ou appuyez FIN / PAUSE pad pour l'annuler. -
Page 12: Cuisson Au Gril
cuisson au gril Le plus long temps de cuisson est de 95 minutes. Supposons que vous voulez griller les aliments pendant 10 minute. Placez les aliments dans le four et fermer la porte Appuyez sur le bouton de micro-ondes grill 7 fois Turn TIME•WEIGHT dial to set the cooking time 10:00. -
Page 13: Cuisson Automatique
cuisson automatique Pour la nourriture ou le mode de cuisson qui suit, il n'est pas nécessaire de programmer la durée et la puissance de cuisson. Il suffit d'indiquer le type d'aliments que vous souhaitez faire cuire ainsi que le poids de cette nourriture. Étapes:. - Page 14 Éteindre le four et retirez la fiche d'alimentation de la prise murale avant de le nettoyer. Gardez l'intérieur du four propre. Lorsque des éclaboussures de liquides ou d'aliments renversés adhèrent aux parois du four, essuyez-les avec un chiffon humide. Détergent doux peut être utilisé si le four est très sale.
- Page 15 MODELLO: EGO-G25DCW EGO-G25DCO EGO-G25DCG EGO-G25DCS EGO-G25DCCH Manuale di istruzioni Forno a microonde Si prega di leggere attentamente le istruzioni prima di installare e utilizzare il forno. Conservare questo mamual per riferimento futuro...
- Page 17 230-240V~50Hz, 1400W(Microonde) Consumo di energia: 1000W (Grill) Nominale Microonde Potenza di 900W uscita: Frequenza di funzionamento: 2450MHz Dimensioni esterne: 291mm(H)×498mm(W)×410mm(D) Forno Dimensioni della cavità: 220mm(H)×340mm(W)×320mm(D) Capacità forno: 25Litres Cottura Uniformità: sistema giradischi Peso netto: Circa.13.4 kg Se il forno non funziona: Verificare che il forno è...
- Page 18 corrette. Assicurarsi che il cavo di alimentazione non sia danneggiato e non funziona sotto il forno o sopra una superficie calda o taglienti. La presa deve essere facilmente accessibile in modo che sia possibile scollegare facilmente in caso di emergenza. vo non utilizzare il forno all'aperto.
- Page 19 Quando si usano elettrodomestici basilari precauzioni di sicurezza elettrica dovrebbe essere seguito, tra cui i seguenti: : Per ridurre il rischio di ustioni, scosse elettriche, incendi, lesioni a persone o di esposizione a un'eccessiva energia a microonde Leggere tutte le istruzioni prima di utilizzare l'apparecchio Usare questo apparecchio solo per l'uso previsto, come descritto in questo manuale.
- Page 20 materiale, e scintilla attrezzature erosione. Per le apparecchiature di classe B sono attrezzature idonee per l'utilizzo in ambienti domestici e in stabilimenti direttamente collegati a una rete di alimentazione a bassa tensione che alimenta edifici utilizzati per purpose.for uso domestico domestico. Questo apparecchio non è...
- Page 21 Disporre con attenzione il cibo. Posizionare le aree più spesse verso l'esterno del piatto. Guarda il tempo di cottura. Cuocere per il più breve lasso di tempo indicato e aggiungere di più se necessario. Alimenti gravemente stracotto può fumare o prendere fuoco. Coprire i cibi durante la cottura.
- Page 22 Door Safety Lock System finestra forno Shaft Supporto giradischi Pannello di Controllo Saluto Guida (Si prega di non rimuovere la lastra di mica che copre la guida d'onda) Vassoio di vetro Grill Heater in metallo Rack...
- Page 23 Spaghetti icona icona pasticceria icona del pesce Icona della verdura fresca Grill icona Pizza icona Forno a icona Filetto di carne icona tasto CLOCK Pulsante AUTO COOK DIAL TEMPO • PESO PESO pulsante sbrinamento JET pulsante di sbrinamento MICROONDE e pulsante GRILL Tasto END / PAUSE pulsante START...
- Page 24 z Durante l'impostazione di un programma, è possibile ottenere il ritorno forno in modalità di attesa, dopo aver premuto END / PAUSE pad z Durante la cottura, è possibile mettere in pausa il programma premendo il tasto END / pad PAUSE una volta, quindi premere START per riprendere o premere FINE / PAUSE pad di nuovo per annullare.
- Page 25 griglia di cottura Il tempo di cottura più lungo è di 95 minuti. Si supponga di voler alimentare grill per 10 minuti. Mettete il cibo nel forno e chiudere lo sportello. Premere il pulsante di microonde e grill 7 volte. Ruotare TIME •...
- Page 26 ricordare all'utente di girare il cibo, e quindi premere START per riprendere lo scongelamento. Auto Cook Per alimentare o la seguente modalità di cottura, non è necessario programmare la durata e la potenza di cottura. È sufficiente indicare il tipo di alimento che si desidera cucinare così come il peso di questo alimento.
- Page 27 Spegnere il forno e togliere la spina di alimentazione dalla presa a muro prima di pulire Mantenere l'interno del forno pulito. Quando schizzi di cibo o liquidi versati che aderiscono alle pareti del forno, pulire con un panno umido. Detergente delicato può essere usato se il forno è sporco.
- Page 28 MODEL: EGO-G25DCW EGO-G25DCO EGO-G25DCG EGO-G25DCS EGO-G25DCCH Microwave Oven Owner's Manual Please read these instructions carefully before installing and operating the oven. Retain this mamual for future reference.
- Page 29 Do not attempt to operate this oven with the door open since open door operation can result in harmful exposure to microwave energy. It is important not to defeat or tamper with the safety interlocks. Do not place any object between the oven front face and the door or allow soil or cleaner residue to accumulate on sealing surfaces.
-
Page 30: Before You Call For Service
230-240V~50Hz, 1400W(Microwave) Power Consumption: 1000W (Grill) Rated Microwave Power Output: 900W Operation Frequency: 2450MHz Outside Dimensions: 291mm(H)×498mm(W)×410mm(D) Oven Cavity Dimensions: 220mm(H)×340mm(W)×320mm(D) Oven Capacity: 25Litres Cooking Uniformity: Turntable System Net Weight: Approx.13.4 kg If the oven fails to operate: Check to ensure that the oven is plugged in securely. If it is not, remove the plug from the outlet, wait 10 seconds, and plug it in again securely. -
Page 31: Grounding Instructions
The socket must be readily accessible so that it can be easily unplugged in an emergency. Do not use the oven outdoors. This appliance must be grounded. This oven is equipped with a cord having a grounding wire with a grounding plug. - Page 32 for industrial or laboratory use. Do not operate the oven when empty. Do not operate this appliance if it has a damaged cord or plug, if it is not working properly or if it has been damaged or dropped. If the supply cord is damaged, it must be replaced by the manufacturer or its service agent or a similarly qualified person in order to avoid a hazard.
- Page 33 The temperature of accessible surfaces may be high when the appliance is operating. The appliance shall be placed against a wall. Appliance is not to be used by children or persons with reduced physical, sensory or mental capabilities, or lack of experience and knowledge, unless they have been given supervision or instruction. Children being supervised not to play with appliance.
-
Page 34: Microwave Cooking Principles
Arrange food carefully. Place thickest areas towards outside of dish. Watch cooking time. Cook for the shortest amount of time indicated and add more as needed. Food severely overcooked can smoke or ignite. Cover foods while cooking. Covers prevent spattering and help foods to cook evenly. Turn foods over once during microwaving to speed cooking of such foods as chicken and hamburgers. -
Page 35: Part Names
Door Safety Lock System Oven Window Shaft Turntable Support Control Panel Wave Guide (Please do not remove the mica plate covering the wave guide) Glass Tray Grill Heater Metal Rack... -
Page 36: Control Panel
DISPLAY SCREEN CLOCK button AUTO COOK button DIGITAL DIAL WEIGHT DEFROST button JET DEFROST button MICROWAVE / GRILL button END button START button... -
Page 37: How To Set The Oven Controls
z After plugging in the oven or waiting for 60 seconds without opertation in standby mode, the system enter into lock mode, you can’t operate it until pressing START button. z When setting a program, you can get the oven return to the standby mode after pressing END button or waiting for 30 seconds. -
Page 38: Quick Start
Quick Start Use this feature to program the oven to microwave food at 100% power conveniently. The maximum cooking time is 10 minutes. In standby mode, place food into the oven and close the door, press START button continually to set the cooking time, and the oven will start working automatically. -
Page 39: Jet Defrost
Jet Defrost The longest defrosting time is 95 minutes. Suppose you want to defrost meat food. Place meat into the oven and close the door. Press JET DEFROST button. Turn DIGITAL DIAL to set the defrosting time. Press START button. NOTE: During defrosting program, the system will pause and sound beeps to remind user to turn food over, and then press START to resume the defrosting. -
Page 40: Cleaning And Care
Turn off the oven and remove the power plug from the wall socket before cleaning. Keep the inside of the oven clean. When food splatters or spilled liquids adhere to oven walls, wipe with a damp cloth. Mild detergent may be used if the oven gets very dirty. Avoid the use of spray and other harsh cleaners as they may stain, streak or dull the door surface. - Page 41 MODELO: EGO-G25DCW EGO-G25DCO EGO-G25DCG EGO-G25DCS EGO-G25DCCH Manual del usuario de Microondas Por favor, lea estas instrucciones cuidadosamente antes de instalar y operar el horno. Conserve este mamual para referencia futura.
- Page 43 230-240V~50Hz, 1400W(microonda) Consumo de energía: 1000W (Grill) Calificación Microondas Potencia 900W de salida: Frecuencia de operación: 2450MHz Dimensiones exteriores: 291mm(H)×498mm(W)×410mm(D) Dimensiones Cavidad del Horno: 220mm(H)×340mm(W)×320mm(D) Capacidad del horno: 25 Litros Uniformidad de cocción: sistema Turntable Peso neto: Aprox.13.4 kg Si el horno no funciona: Check to ensure that the oven is plugged in securely.
- Page 44 ninguna apertura de este electrodoméstico. No quite los pies. No haga funcionar el horno sin la bandeja de cristal, soporte del rodillo, y el eje en la posición adecuada. Asegúrese de que el cable de alimentación está dañado y no se ejecuta en el horno o sobre una superficie caliente o afilado.
- Page 45 ISi usando eléctricas precauciones de seguridad básicas aparato debe seguirse, incluyendo las siguientes: ADVERTENCIA: Para reducir el riesgo de quemaduras, electrocución, incendio, lesiones a personas o exposición excesiva a la energía de microondas: Lea todas las instrucciones antes de usar el aparato. Use this appliance only for its intended use as described in this manual.
- Page 46 en establecimientos domésticos y en los establecimientos conectados directamente a una red de alimentación de baja tensión que alimenta a edificios empleados purpose.for uso doméstico interno. Este aparato no está diseñado para ser utilizado por personas (incluidos niños) con capacidades físicas, sensoriales o mentales, o con falta de experiencia y conocimiento, a menos que sean supervisados o instruidos acerca del uso del aparato por una persona responsable de su seguridad.
- Page 47 Disponga los alimentos cuidadosamente. Coloque las áreas más gruesas hacia fuera del plato. Vea el tiempo de cocción. Cocine durante el menor tiempo indicado y añadir más si es necesario. Alimentos se cocinen en exceso puede fumar ni encender Cubra los alimentos durante la cocción. Cubiertas prevenir salpicaduras y ayudan a que se cocine uniformemente.
- Page 48 Sistema de bloqueo de seguridad de la puerta ventana del horno apoyo del plato giratorio Panel de control uía Wave (Por favor, no retire la placa de mica que cubre la guía de onda) bandeja de Cristal Asador metal rack...
- Page 49 espaguetis icono icono de pastelería icono Icono de la verdura fresca pescados icono Grill pizza Enlaces Microondas icono Filet icono de Carne botón CLOCK Botón AUTO COCCIÓN DIAL TIEMPO DE PESO PESO botón DEFROST JET botón DEFROST microondas y botón GRILL Botón END / PAUSE botón START...
- Page 50 Ó Ó z Al configurar un programa, puede obtener la devolución del horno al modo de espera después de pulsar END / pad PAUSA. z Durante la cocción, se puede detener el programa pulsando END / pad PAUSA una vez, y luego presione START para reanudar o presione END / PAUSE pad de nuevo para cancelarla.
- Page 51 cocinar Grill El tiempo de cocción más largo es de 95 minutos. Suponga que quiere comida parrilla de 10 minutos. Coloque los alimentos en el horno y cierre la puerta. Pulse el botón con horno y grill 7 veces. Gire TIEMPO • Marcar PESO para ajustar el tiempo de cocción 10:00. Presione el botón START.
- Page 52 deshielo. Auto Cook Para la comida o el siguiente modo de cocción, no es necesario programar la duración y la potencia de cocción. Es suficiente para indicar el tipo de alimento que desea cocinar, así como el peso de este alimento.
- Page 53 se adhieren a las paredes del horno, limpie con un paño húmedo. Detergente suave se puede utilizar si el horno se ensucia mucho. Evite el uso de aerosol y otros productos de limpieza fuertes, ya que pueden manchar, rayar u opacar la superficie de la puerta Las superficies exteriores deben limpiarse con un paño húmedo.
- Page 54 MODEL: EGO-G25DCW EGO-G25DCO EGO-G25DCG EGO-D25DCS EGO-D25DCCH Micro-Ondes Mode D'emploi S'il vous plaît lire attentivement ces instructions avant d'installer et d'utiliser le four. Conservez ce mamual pour référence future.
- Page 55 É É É É N'essayez pas de faire fonctionner ce four avec la porte ouverte puisque le fonctionnement de la porte ouverte peut entraîner une exposition dangereuse à l'énergie micro-ondes. Il est important de ne pas annuler ou d'altérer les dispositifs de verrouillage de sécurité.
- Page 56 230-240V~50Hz, 1400W(Microwave) Leistungsaufnahme: 1000W (Grill) Mikrowelle 900W Ausgangsleistung: Operation Frequency: 2450MHz Outside Dimensions: 291mm(H)×498mm(W)×410mm(D) Oven Cavity Dimensions: 220mm(H)×340mm(W)×320mm(D) Oven Capacity: 25Litres Cooking Uniformity: Turntable System Net Weight: Approx.13.4 kg Wenn der Ofen nicht funktioniert: Stellen Sie sicher, dass der Ofen in fest eingesteckt. Wenn es nicht ist, ziehen Sie den Stecker aus der Steckdose, warten Sie 10 Sekunden und stecken Sie ihn wieder sicher.
- Page 57 Stellen Sie sicher, dass das Netzkabel unbeschädigt ist und nicht unter dem Gerät oder über heißen oder scharfen Oberfläche laufen. Die Steckdose muss leicht zugänglich sein, so dass es leicht in einem Notfall gezogen werden. Verwenden Sie nicht die Backofen im Freien. Dieses Gerät muss geerdet werden.
- Page 58 übermäßiger Mikrowellenenergie zu reduzieren: Lesen Sie alle Anweisungen, bevor Sie das Gerät Benutzen Sie dieses Gerät nur für den vorgesehenen Einsatz als in dieser Anleitung beschrieben. Verwenden Sie keine ätzenden Chemikalien oder Dämpfe in diesem Gerät. Diese Art von Ofen ist speziell auf Hitze, Koch oder trockene Lebensmittel konzipiert.
- Page 59 Dieses Gerät ist nicht zur Verwendung durch Personen (einschließlich Kinder) mit eingeschränkten physischen, sensorischen oder geistigen Fähigkeiten oder mangels Erfahrung und Wissen, bestimmt, wenn sie unter Aufsicht oder ausführliche Anleitung zur Benutzung des Geräts durch eine verantwortliche Person für ihre Sicherheit.. Kinder sollten beaufsichtigt werden, um sicherzustellen, dass sie nicht mit dem Gerät spielen.
- Page 60 Vereinbaren Lebensmittel sorgfältig. Zeigen dicksten Bereiche nach außen von Gericht. Sehen Garzeit. Kochen kürzester Zeit angegeben und fügen Sie mehr als nötig. Essen verkocht stark rauchen kann oder sich entzünden. Titelbild Lebensmittel beim Kochen. Abdeckungen verhindern Spritzen und helfen Lebensmittel gleichmäßig garen.
- Page 61 Tür-Sicherheits-Lock System Backofen Fenster Shaft Turntable Support Systemsteuerung Wave Guide (Bitte entfernen Sie nicht den Glimmer Platte für den Wellenleiter) Glass Tray Grill Heizung Metall-Rack...
- Page 62 DISPLAY SCREEN CLOCK-Taste AUTO COOK Taste DIGITAL DIAL GEWICHT DEFROST Taste JET DEFROST button MIKROWELLE LL button END-Taste START-Taste...
- Page 63 z Nach dem Einstecken in den Ofen oder das Warten für 60 Sekunden ohne Opertation im Standby-Modus, das System in den Lock-Modus zu gelangen, kann man nicht arbeiten, bis es durch Drücken von START-Taste. z Bei der Einstellung eines Programms können Sie den Backofen Rückkehr in den Standby-Modus nach dem Drücken END-Taste oder warten 30 Sekunden lang erhalten z Während des Kochens, können Sie das Programm anzuhalten, indem END-Taste einmal, und drücken Sie dann die START-Taste, um fortzufahren, oder drücken Sie END-Taste erneut, um den...
- Page 64 Quick Start Use this feature to program the oven to microwave food at 100% power conveniently. The maximum cooking time is 10 minutes. In standby mode, place food into the oven and close the door, press START button continually to set the cooking time, and the oven will start working automatically.
- Page 65 Benutzer daran zu erinnern Lebensmittel umzudrehen, und drücken Sie dann START, um das Abtauen wieder aufzunehmen. Jet Defrost Die längste Zeit Abtauen beträgt 95 Minuten. Angenommen, Sie wollen Fleisch essen auftauen.. Legen Sie das Fleisch in den Ofen und die Tür schließen. Press Jet Defrost-Taste.
- Page 66 Piepton und der Ofen nicht betrieben werden kann. Um die CHILD LOCK abbrechen: Drücken und halten Sie die END-Taste für 3 Sekunden, ertönt ein Piepton und der Ofen betrieben werden kann Schalten Sie das Gerät aus und ziehen Sie den Netzstecker aus der Steckdose, bevor Sie es reinigen..
- Page 67 sauberen Zustand zu halten könnte, um eine Verschlechterung der Oberfläche, die sich negativ auf die Lebensdauer des Gerätes und es nicht zu einer gefährlichen Situation führen. Bitte nicht entsorgen Sie das Gerät in den Hausmüll bin, sollte es auf die jeweilige Entsorgungszentrum von den Gemeinden zur Verfügung gestellt entsorgt werden Wenn die Mikrowelle mit Grill-Funktion zum ersten Mal verwendet, kann es zu leichten Rauch und Geruch.
- Page 76 DISPLAY botão KLOK Botão AUTO COOK DIGITAL DIAL PESO botão DEGELO JET botão DEGELO Botão MICROONDAS / GRILL botão END START...
- Page 81 Por favor, leia atentamente estas instruções antes de instalar e operar o forno. Guarde este mamual para referência futura.
- Page 90 DISPLAY botão CLOCK Botão AUTO COOK DIGITAL DIAL PESO botão DEGELO JET botão DEGELO Botão MICROONDAS / GRILL botão END START...
- Page 96 Vă rugăm să citi i cu aten ie aceste instruc iuni înainte de a instala i de a utiliza cuptorul. Păstra i acest mamual de referin ă pentru viitor.
- Page 98 ă: Gătit Uniformitatea:...
- Page 99 Dacă cuptorul nu func ionează: i pentru a se asigura că cuptorul este conectat în siguran ă. Dacă nu este, scoate techerul din priză, i dacă siguran a circuitului arsă sau un întrerupător de circuit principal ionează corect, verifica i pentru a se asigura că panoul de control este corect programat i pentru a se asigura că...
- Page 100 cazul unui scurt circuit electric , împământarea reduce riscul de electrocutare , oferind un fir de evacuare pentru ul electric . Se recomandă ca un circuit separat care serve te numaicuptorului fi furnizate . Folosind o înaltă tensiune este periculoasă AVERTIZARE Utilizarea necorespunzătoare a fi ă...
- Page 101 rat sau a scăzut . În cazul în care cablul de alimentare este deteriorat , acesta trebuie înlocuit de către producător sau de agentul său de service sau de o persoană calificată , pentru a evita un pericol . dul combinat , copiii ar trebui să utilizeze cuptorul numai sub 6 .
- Page 102 i instruite cu privire la utilizarea aparatului de către o persoană responsabilă pentru siguran i pentru a se asigura că nu se joacă cu aparatul . i cuptorul pe o plita interval sau alte aparate producătoare de energie termică . dacă este instalată...
- Page 103 1. Aranja cu grijă alimente. Pune te la timpul de gătire. Gatiti pentru cel mai scurt suma de timp indicat si adaugati mai mult ca este necesar. 3. Acoperă produsele alimentare în timp ce găti i ajută alimente pentru a găti uniform. 4.
- Page 104 ă Suport placă turnantă (Vă rugăm să nu scoate i placa mica acoperă ghid de undă) 7. Tava de sticlă 8. Încălzitorul grătarului...
- Page 105 Ecran de afi are butonul CEAS Butonul AUTO COOK DIGITAL DIAL GREUTATE butonul DEFROST JET butonul DEFROST Buton cu microunde / GRILL butonul END butonul START...
- Page 106 ș teptare de 60 de secunde, fără a opertation în modul de aș x După sistemul intră în modul de blocare, nu se poate opera pana la apăsarea butonului START. ș teptare după apăsarea ș x timpul de gătit, pute i întrerupe programul apăsând pe butonul END o dată, ș i apoi apăsa Start pentru a relua sau apăsa x După...
- Page 107 i această func ș ș ș a, apăsa ș pentru a seta timpul de gătire, iar cuptorul va porni automat. În timpul gătitului, pute preparare prin apăsarea butonului START. Să presupunem că dori i să alimente gratar pentru 10 ș ș...
- Page 108 Să presupunem că dori ș ș 4. Apăsa ș Notă: În timpul programului de d utilizatorului de a transforma produsele alimentare de peste, iar apoi apăsa Să presupunem că dori ș ș 4. Apăsa ș Notă: În timpul programului de deco utilizatorului de a transforma produsele alimentare de peste, iar apoi apăsa ș...
- Page 109 nesupravegheată de către ș i apăsat ș i apăsat ș Cură ș ș techerul din priză înainte de cură ș i cu o cârpă umedă . Detergent slab poate fi folosit în cazul în care cuptorul devine ș e de cură are dure , deoarece acestea pot păta , ș...
- Page 110 apă cu detergent uș cură vă că pentru a înlocui în pozi ia corectă . ș Ș ș cârpă moale . 10 . Când devine necesar pentru a înlocui becul cuptorului , vă rugăm să consulta ș 11 . Cuptorul trebuie să fie cură părtate depunerile de alimente .
Need help?
Do you have a question about the EGO-G25DCW and is the answer not in the manual?
Questions and answers