Table of Contents
Advertisement
Quick Links
AIR CONDITIONER
AC026MXADKH
AC035MXADKH
AC071MXADKH
Samsung Electronics
SYSTEM AIR CONDITIONER
Model :
AC026MNNDKH
AC035MNNDKH
AC052MNNDKH
AC060MNNDKH
AC071MNNDKH
AC052MXADKH
AC060MXADKH
Mini 4 WAY CASSETTE SERIES
INDOOR UNIT
OUTDOOR UNIT
AC026MNNDKH
AC026MXADKH
AC035MNNDKH
AC035MXADKH
AC052MNNDKH
AC052MXADKH
AC060MXADKH
AC060MNNDKH
AC071MXADKH
AC071MNNDKH
CONTENTS
1. Precautions
2. Product Specifications
3. Disassembly and Reassembly
4. Troubleshooting
5. PCB Diagram
6. Wiring Diagram
7. Reference Sheet
1
Advertisement
Table of Contents
Troubleshooting

Related Manuals for Samsung AC026MNNDKH


Summary of Contents for Samsung AC026MNNDKH
- Page 1 SYSTEM AIR CONDITIONER Mini 4 WAY CASSETTE SERIES INDOOR UNIT OUTDOOR UNIT Model : AC026MNNDKH AC026MXADKH AC035MNNDKH AC035MXADKH AC052MNNDKH AC052MXADKH AC060MXADKH AC060MNNDKH AC071MXADKH AC071MNNDKH AIR CONDITIONER CONTENTS 1. Precautions AC026MNNDKH AC035MNNDKH 2. Product Specifications AC052MNNDKH AC060MNNDKH AC071MNNDKH 3. Disassembly and Reassembly 4.
-
Page 2: Table Of Contents
........................4-3-4 Communication error after finishing Tracking ..............4-21 4-3-5 Indoor unit float sensor error ....................4-22 4-3-6 EEPROM circuit failure ......................4-23 4-3-7 Outdoor unit is not powered on ..................4-24 4-4 Troubleshooting by symptoms ........................4-26 Samsung Electronics... - Page 3 5-1 Indoor Unit 5-2 Outdoor unit ..........................16. Wiring Diagram ..........................6-1 Indoor Unit ............................6-2 Outdoor Unit ............................ 7. Reference Sheet ..........................7-1 Index for Model Name ........................7-2 Refrigerating Cycle Diagram ......................7-3 Pressure Graph ........................... Samsung Electronics...
- Page 4 ■ Check whether the installation location is at least two meters away from other electronic products such as TV, video, or audio. – Otherwise, the video quality might be degraded or noise might be generated. ■ Do not let end users repair the products themselves. – Unauthorized disassembly might cause electric shock or fire. Samsung Electronics...
- Page 5 – Release the high pressure and low pressure valve caps. – Close the high pressure valve completely using an L-wrench – After about two minutes, close the low pressure valve completely. – Stop running the air conditioner. – Separate the connecting pipe. Samsung Electronics...
-
Page 6: The Feature Of Product
With the advanced BLDC inverter technology, it makes a room cool with highly energy saving and arises the efficiency of air conditioner. ■ Long Ambient Operation(In Low Temperature) It can arise the reliability and the capacity of the air conditioner, especially operated in low temperature. ■ Eco-friendly Product(Lead-Free, RoHS, WEEE) ■ Easy installation of ultra-lightweight indoor unit Samsung Electronics... -
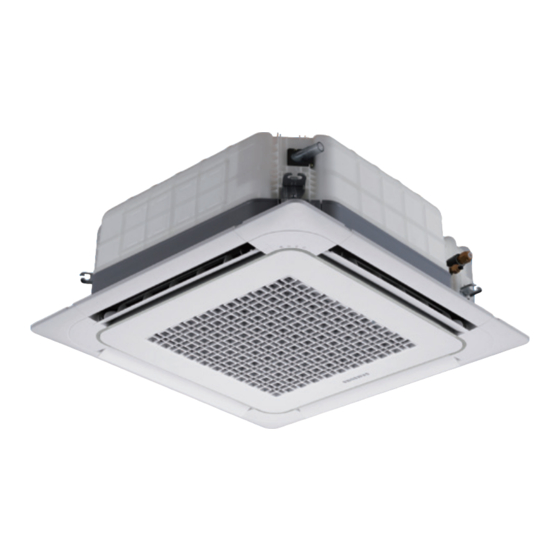
Page 7: Product Specifications
2-2 Product Specifications (cont.) Development Model ITEM AC026MNNDKH AC035MNNDKH AC026MXADKH AC035MXADKH INDOOR UNIT IMAGE OUTDOOR UNIT REMOTE CONTROLLER Cooling [W] 2,600 3,500 Performance Heating [W] 3,400 4,000 Cooling [W] 1,090 Power Consumption Heating [W] 1,200 Voltage / Frequency 1Φ, 220~240V, 50Hz 1Φ, 220~240V, 50Hz... - Page 8 PANEL PC4NUSKFN PC4NUSKFN Refrigerant Type R-410A R-410A Factory Charging [g] 1,300 1,300 Additional Refrigerant (for every 1m) [g] Basic Piping Length [m] Max. Piping Length [m] Max. Level Difference [m] 015077-19345D-27343C-370040 015077-19446E-273C46-370040 Option Code 020000-100000-200000-300000 020000-100000-200000-300000 030000-100000-200000-300000 030000-100000-200000-300000 Samsung Electronics...
- Page 9 DB31-00658D High Pressure Piping Low Pressure PANEL PC4NUSKFN Refrigerant Type R-410A Factory Charging [g] 1,500 Additional Refrigerant (for every 1m) [g] Basic Piping Length [m] Max. Piping Length [m] Max. Level Difference [m] 015077-194581-274750-370040 020000-100000-200000-300000 Option Code 030000-100000-200000-300000 Samsung Electronics...
-
Page 10: Accessories
Seal-drain ass'y DB62-11028H (Indoor Unit) Seal-drain ass'y DB62-11028J USER MANUAL DB68-06489A INSTALLATION MANUAL DB68-06490A CARD WARRNATY DB68-02596B INSTALLATION MANUAL DB68-05688A Essential Offer (Outdoor Drain Plug DB67-00477A Unit) Rubber Leg DB73-20134A BOLT 6011-003975 Essential Offer (Panel) INSTALLATION MANUAL DB68-03837A Samsung Electronics... -
Page 11: Disassembly And Reassembly
3. Disassembly and Reassembly ■ Necessary Tools Item Remarks +SCREW DRIVER Adjustable Wrench (8mm, 10mm, 13mm) M6, M8 Hex Wrench Samsung Electronics... -
Page 12: Indoor Unit
3-1 Indoor unit ■ AC026MNNDKH / AC035MNNDKH / AC052MNNDKH / AC060MNNDKH / AC071MNNDKH Parts Procedure Remark Panel 1) Pull both hooks and take the grille downward. Two safety clips are mounted to the front grille to prevent it from dropping. - Page 13 Control-Box 1) Disconnect the Connector Wire that is connected to the indoor unit’s PBA 2) Unscrew the 2 fixed screws on both sides of the Control Box, and disassemble the Control Box from the indoor unit.(Use +Screw Driver) Samsung Electronics...
- Page 14 2) Push the Bell-Mouth in the direction opposite to where it’s installed on the Control-Box to remove it. Drain Pan 1) Unscrew the screws on the 4 corners of the indoor unit. (Use +Screw Driver) 2) Remove the Drain Pan from the indoor unit. Samsung Electronics...
- Page 15 Drain-Hose out from the indoor unit to disassemble the transparent Drain-Hose fixed on the side of the indoor unit. (Use +Screw Driver) 1) Use your hand to remove the temperature Evap. sensor attached to the Evap Pipe along with Temperature the fixing clip. Sensor Samsung Electronics...
- Page 16 1) Remove the screws of the Steel Holder Evaps that are used to fix the Heat Exchanger, and then remove it. (Use +Screw Driver) 2) Remove the 2 fixing screws of the Partition Evap at the Heat Exchanger’s In/Out Pipe. (Use +Screw Driver) Samsung Electronics...
- Page 17 Parts Procedure Remark 3) Remove the screw of the Cover Pipe that is used to fix the In/Out Pipe. Remove the In/Out Pipe. (Use +Screw Driver) 4) Remove the Heat Exchanger from the indoor unit’s cabinet. Samsung Electronics...
-
Page 18: Outdoor Unit
1) loosen 1 pcs screw of cover control,and detach it. 2) loosen 5 pcs screws on both right and left cabniet side edges and to detach the cover-top 3) Loosen 7 screwsfixed to disassemble cabi-front , and detach it. Samsung Electronics... - Page 19 Parts Procedure Remark common work 4) loosen 2 screws to disassemble steel-bar. 5) Loosen 2 screws to disassemble the cabi left and detach it. Samsung Electronics...
- Page 20 1) loosen 1 screw as indication and detached the fan. 2) loosen 4 pcs motor screws and disconnect the wire betwwen assy control out and motor. 3) loosen 2 pcs bracket-motor screw and detach it. 3-10 Samsung Electronics...
- Page 21 Heat exchanger 1) Release the refrigerant at first 2) Looosen fixing screw on both side. 3) disaessembly the pipes in both inlet and outlet with welding torch. 4) detach the heat exchanger. Samsung Electronics 3-11...
- Page 22 2)disassembly the felt comp sound. loosen the 3 bolts at the bottom . When removing the compressor, CAUTION Heat Exchanger, and Pipe, purge the Coolant inside the Compressor complete- ly and remove the pipe with a welding flame. 3-12 Samsung Electronics...
- Page 23 1) Loosen 1 pcs screw of cover control 2) Loosen 8 pcs screw of the cabi top cover. 3) Loosen 4 pcs screw of the bar steel. 4) Loosen 10 pcs screw of the cabi side front. Samsung Electronics 3-13...
- Page 24 Parts Procedure Remark common work Fan& motor 1) Loosen the fan screw according the indication and detach the fab propeller 2)Disconnect the wire between assy control out and motor. 3-14 Samsung Electronics...
- Page 25 3) Loosen 4 pcs motor screw. 4) Loosen 2 pcs screw of bracket motor. Assy control out 1)Loosen the screws that connected partition and case control then get the control out. 2) Loosen the screw of the cover termimal Samsung Electronics 3-15...
- Page 26 Parts Procedure Remark 3) Loosen 2 screws , disassemble the Coil Harmonic. 4) Loosen the screw of the cover terminal. 3-16 Samsung Electronics...
- Page 27 4) Detach the heat exchanger. When removing the compressor, CAUTION Heat Exchanger, and Pipe, purge the Coolant inside the Compressor complete- ly and remove the pipe with a welding flame. Compressor 1)Loosen the 3 bolts at the bottom of com- pressor. Samsung Electronics 3-17...
- Page 28 1) loosen 1 pcs screw of cover control 2) loosen 8 pcs screw of the cabi top cover. 3) loosen 12 pcs screw of the cabi front 4) loosen 7 pcs screw of the cabi side right. 3-18 Samsung Electronics...
- Page 29 Remark 5)loosen 3pcs screw of the cabi side left. Fan & Motor 1) loosen the fan screw according the indication and detach the fab propeller 2)Cut the cable-tie 3)disconnect the wire betwwen assy control out and motor. Samsung Electronics 3-19...
- Page 30 4) loosen 4 pcs motor screw. 5) loosen 4 pcs screw of bracket motor assy control out 1) lossen the screw of the cover termimal 2)lossen the screws that connected partition and case control then pull up the control out. 3-20 Samsung Electronics...
- Page 31 1) Release the refrigerant at first 2) Looosen fixing screw on both side. 3) disaessembly the pipes in both inlet and outlet with welding torch. 4) detach the heat exchanger. Compressor 1)loosen the 3 bolts at the bottom of compres- sor. Samsung Electronics 3-21...
-
Page 32: Troubleshooting
Remove the batteries from the remote control, and then insert them again. b While holding down the (High Temp) and (Low Temp) buttons simultaneously, insert the batteries into the remote control. c Make sure that you are entered to the mode for setting the options: Samsung Electronics... - Page 33 Set the SEG8 value by pressing the (High Fan) button repeatedly until the value you want to set appears on the remote control display. When you press the (Low Fan) or (High Fan) button, values appear in the SEG8 following order: Samsung Electronics...
- Page 34 (Mode) button. Auto and Off appear on the remote control display. 11 Set the SEG14 and SEG15 values: a Set the SEG14 value by pressing the (Low Fan) button repeatedly until the value you want to set appears on the remote control display. SEG14 Samsung Electronics...
- Page 35 When you press the (Low Fan) or (High Fan) button, values appear in the SEG20 following order: 5 Press the (Mode) button. Fan and Off appear on the remote control display. Samsung Electronics...
- Page 36 Make sure that this command is received by the indoor unit. When it is successfully received, you can hear a short sound from the indoor unit. If the command is not received, press the (Power) button again. Samsung Electronics...
-
Page 37: Setting The Indoor Unit Addresses
Group channel Function Page Setting RMC address Group address (x16) Indication Details Indication Details Indication Details Indication Details Reserved Reserved No RMC Indication address and details RMC1 0 to 2 RMC2 0 to F RMC address setting mode Samsung Electronics... -
Page 38: Setting The Installation Options In A Batch
Function Page Mode temperature control fan RPM sensor Indication Details Indication Details Indication Details Indication Details Indication Details Disuse (recessed installation) Disuse Disuse High-ceiling Reserved mode (recessed Indication installation) and details Disuse (exposed installation) High-ceiling mode (exposed installation) Samsung Electronics... - Page 39 Cycle time of Function Page remote control compensation Swing Indication Details Indication Details Indication Details Indication Details 0 or 1 Indoor 1 Default seconds Reserved Reserved (default) Indication and details Indoor 2 2°C seconds Indoor 3 5°C seconds Indoor 4 Samsung Electronics...
-
Page 40: Changing The Addresses And Options Individually
Example: Changing the Buzzer control (SEG17) option of the installation options to 1 disuse. Option SEG1 SEG2 SEG3 SEG4 SEG5 SEG6 Tens position Units position Option mode to Function Page Mode of the option of the option New value change number number Indication Samsung Electronics... -
Page 41: Items To Check Before Diagnostics
2 minutes) Error of outdoor unit • Check error occurred with outdoor unit. • Check float switch connection. Detection of the float switch • Check whether the drain has been filled with wate EEPROM error • Check if there is damage with EEPROM componen • Check the indoor model to set the options. EEPROM option error • Inspection for match between indoor and outdoo -.Check the wire connection MDS-kit error -. Check the MDS-KIT -.Check the indoor PBA 4-10 Samsung Electronics... - Page 42 4-20 operation-off operation-off operation-off operation-off operation-off operation-off page 4-21 ter. operation-off operation-off operation-off page 4-22 operation-off operation-off operation-off or machine models operation-on operation-on operation-on page 4-49 : On : Blink X : Off Samsung Electronics 4-11...
-
Page 43: Test Run Mode And View Mode
2 : Down Protection control 1 : heating 2 : non-stop 3 : Up_limit defrosting 4 : Sown_limit 3 : over-load 4 : discharge Group address of indoor heat Three digits Two digits One digit exchanger S/W check 4-12 Samsung Electronics... -
Page 44: Eco Mode(Power Save)
4-2-3 ECO mode(Power save) ECO mode lamp : RED Display ECO mode lamp Mode Segment 1 Segment 2 Segment 3 Segment 4 RED color ECO mode “BLANK” “BLANK” “BLANK” “BLANK” Exit ECO mode Press K3 to exit Samsung Electronics 4-13... -
Page 45: Troubleshooting For Outdoor Unit
Check whether 3 phase is reversed or opened. E425 Heating operation restricted at outdoor temperature over HEATING E440 Theat_high value Cooling operation restricted at outdoor temperature below COOLING E441 Tcool_low value Fan speed error FAN1 ERROR E458 4-14 Samsung Electronics... - Page 46 Smart install is not installed E508 Gas leak detected Check the refrigerant E554 Error due to mismatching capacity of indoor and outdoor unit Check the indoor and outdoor unit capacity E556 Inverter EEPROM Checksum error E590 Inverter Boot Code error E660 Samsung Electronics 4-15...
-
Page 47: Wired Remote Controller
Operation Off protection of the compressor control error Check the input power Outdoor unit [Inverter] Total current error/PFC over Check the coolant charging status Operation Off protection current error Check the normal operation of outdoor fan control error 4-16 Samsung Electronics... - Page 48 Wired remote Normal operation error COM2 terminal of the indoor unit controller error Wired remote controller COM2 Wired remote Check that Com1, Com2 setting DIP switch is set to Com2 Normal operation option setting error controller error Samsung Electronics 4-17...
-
Page 49: Indoor Temperature Sensor (Open/Short)
In this case, is the resistance 8.300 value out of range in the temperature table on the right? 10.00 12.10 Indoor temperature sensor 14.70 failure (replace) 18.00 Restart the system after replacing the PCB 22.00 28.30 33.90 42.30 4-18 Samsung Electronics... - Page 50 In this case, is the resistance 8.300 value out of range in the temperature table on the right? 10.00 12.10 Failure of the indoor heat 14.70 exchanger temperature sensor (replace) 18.00 Restart the system after replacing the PCB 22.00 28.30 33.90 42.30 Samsung Electronics 4-19...
- Page 51 PCB? Connect the connector to PCB and restart the unit Is there foreign substance stuck in the motor fan? Remove the foreign substance and restart the unit Replace the PCB and restart the unit 4-20 Samsung Electronics...
- Page 52 PCB and replace the PCB Reconnect the cable connecting the outdoor unit to the indoor unit and restart the unit. If the communication still doesn’t work, replace the indoor unit PCB. Good +0.7V -0.7V Samsung Electronics 4-21...
- Page 53 Is the terminal voltage around AC 220V? Is the water level in drain pan decreasing? Replace the drain pump Replace the indoor unit PCB Normal operation • F loat sensor error is cleared only Replace the drain pump when the indoor power is reset 4-22 Samsung Electronics...
- Page 54 EEPROM component failure, EEPROM circuit parts missing/damaged/soldering failure Are the EEPROM circuit components in good conditions? (missing components / damage / soldering failure) Replace the PCB if the restart fails Restart the unit after replacing the PCB Samsung Electronics 4-23 4-23...
- Page 55 Is the voltage between Replace the inverter PBA the terminal 2 (~) and 4 (~) of the bridge diode 220V? Is the fuse connected? Replace the fuse Replace the inverter PBA Is the resistance value of R001 200Ω? Cont. 4-24 Samsung Electronics...
- Page 56 Outdoor unit is not powered on – Initial diagnosis (cont.) Cont. Is the reactor connector Connect the reactor connected correctly? Replace the PBA. Samsung Electronics 4-25...
- Page 57 Is the power is normal? Exchange the PBA of no power unit (check the LED Lamp Exchange the indoor unit PBA. Terminate the service. Is the communication error occurred again? Exchange the outdoor unit PBA. 4-26 Samsung Electronics...
- Page 58 Connect the sensor to PBA connector (6pin) supply power and measure the voltage of #1-#2 in the connector Exchange the PBA of no power unit Below 0.5V or Over 4.5V? Micom error or connector check Exchange the Outdoor PBA Samsung Electronics 4-27...
- Page 59 Connect the sensor to PBA connector (4pin) supply power and measure the voltage of #1-#2 in the connector Exchange the PBA of no Ourdoor PBA Below 0.5V or Over 4.5V? Micom error or connector check Exchange the Outdoor PBA 4-28 Samsung Electronics...
- Page 60 40°C - 5.83kohm Connect the sensor to PBA connector (6pin) supply power and measure the voltage of #5-#6 in the connector Exchange the Outdoor PBA Below 0.5V or Over 4.5V? Micom error or connector check Exchange the Outdoor PBA Samsung Electronics 4-29...
- Page 61 40°C - 5.83kohm Connect the sensor to PBA connector(4pin) supply power and measure the voltage of #3-#4 in the connector Exchange the Outdoor PBA Below 0.5V or Over 4.5V? Micom error or connector check Exchange the Outdoor PBA 4-30 Samsung Electronics...
- Page 62 40°C - 115kohm Connect the sensor to PBA connector (6pin) supply power and measure the voltage of #3-#4 in the connector Exchange the Outdoor PBA Below 0.5V or Over 4.5V? Micom error or connector check Exchange the Outdoor PBA Samsung Electronics 4-31...
- Page 63 40°C - 115kohm Connect the sensor to PBA connector(4pin) supply power and measure the voltage of #3-#4 in the connector Exchange the Outdoor PBA Below 0.5V or Over 4.5V? Micom error or connector check Exchange the Outdoor PBA 4-32 Samsung Electronics...
- Page 64 Restart after power off Is the discharge over temperature sensor error Terminate the service appeared again? Download the EEPROM data Is the discharge over temperature sensor error Terminate the service appeared again? Exchange the Outdoor PBA Exchanged the Compressor Samsung Electronics 4-33...
- Page 65 Is the voltage of CN901 #3-#5 and #3-#6 with in Exchange the Outdoor PBA 1Vdc~15Vdc during the operation? PBA problem or Motor problem Change the PBA first and check the operation Exchange the Fan motor 4-34 Samsung Electronics...
- Page 66 Connect the comp wire normally Is the connection of compressor wire is normal? Download the EEPROM data Is the restart error occurred again? Terminate the service Is the compressor body and interphase Exchange the Outdoor PBA resistance insulated? Exchanged the Compressor Samsung Electronics 4-35...
- Page 67 Connect the comp wire normally Is the connection of compressor wire is normal? (PBA and Compressor) Is the restart error occurred again? Terminate the service Is the compressor body and interphase Exchange the Outdoor PBA resistance insulated? Exchanged the Compressor 4-36 Samsung Electronics...
- Page 68 Terminate the service occurred again? Correct the sensor position or exchange the Is the position of temperature sensor and sensor sensing value normal? Is the compressor body and interphase Exchange the Outdoor PBA resistance insulated? Exchanged the Compressor Samsung Electronics 4-37...
- Page 69 Normal range(280Vdc~320Vdc) Is the DC_link sensing voltage(R104 or R004) is normal in Exchange the Outdoor PBA operation mode? Normal range (0.2Vdc~2.8Vdc) Exchange the Outdoor PBA Is the reactor insulation damaged? Exchange the Reactor 4-38 Samsung Electronics...
- Page 70 Check the input power mode? Normal range(280Vdc~320Vdc) Is the DC_link sensing voltage(R104 or R004) is normal in Exchange the Outdoor PBA operation mode? Normal range (0.2Vdc~2.8Vdc) Exchange the Outdoor PBA Is the reactor insulation damaged? Exchange the Reactor Samsung Electronics 4-39...
- Page 71 Correct the sensor position or exchange the Is the position of temperature sensor and the sensing value sensor normal? Is the connection cable for the compressor and Correct the cable connection power terminal normal? Exchange the Outdoor PBA 4-40 Samsung Electronics...
- Page 72 3) Is there no short or open around IC451(PF2) or IC451,IC452(PF3)? 2. Troubleshooting procedure Restart after power off. Exchange the Outdoor PBA Is the PFC shunt and IPM shunt resistance value correct? Terminate the service Is the current sensor error appeared again? Exchange the Outdoor PBA Samsung Electronics 4-41...
- Page 73 4) Is the cover assembly in conrol-box normal? 2. Troubleshooting procedure Restart after power off. Fastening the screw Are there screws in PBA-heatsink? (4 screws) Check the fan connection Is the fan operation normal? Change the Fan motor Exchange the Outdoor PBA 4-42 Samsung Electronics...
- Page 74 Terminate the service again? Is the position of temperature sensor and Correct the sensor position or exchange the sensing value normal? sensor Is the compressor body and interphase Exchange the Outdoor PBA resistance insulated? Exchange the Outdoor PBA Samsung Electronics 4-43...
- Page 75 3) Did you download or insert EEPROM IC, after changing outdoor PBA? 2. Troubleshooting procedure power off and download EEPROM data (or. Insert the service EEPROM IC) Restart after power off Terminate the service Is the error appeared again? Exchange the Outdoor PBA 4-44 Samsung Electronics...
- Page 76 1) Check the power condition at customer's house (Is there any power noise?) 2) Have been there power failure? 2. Troubleshooting procedure Restart after power off Is the AC line zero cross signal error appeared Terminate the service again? Exchange the Outdoor PBA Samsung Electronics 4-45...
- Page 77 * Heating mode * * Cooling mode * Is the outdoor temperature over 40°C or under Is the outdoor temperature under °C? -30°C? The temperature condition is too poor to operate. Wait until temperature is changed 4-46 Samsung Electronics...
- Page 78 Reset the option code again at indoor unit Is the capacity miss match error appeared Terminate the service again? Download the EEPROM data Terminate the service Is the capacity miss match error appeared again? Exchange the Outdoor PBA Exchange the Indoor PBA Samsung Electronics 4-47...
- Page 79 Is the EEV valve is operation? Change the EEV valve Check the sound of EEV valve after power on. Check the pipe crack. Is the pressure of refrigerant normal? Fill up the refrigerant. Exchange the Indoor PBA Exchange the Outdoor PBA 4-48 Samsung Electronics...
- Page 80 ■MDS Function only can be set in wired remote controller or central controller. ■Error Message(Error message will be appeared after 3minutes) -Wired remote controller: “E143” message is pop up. -Display Panel: Operation & filter LED is blinking at the same time,after indoor unit is power off. Samsung Electronics 4-49...
- Page 81 5. PCB Diagram 5-1 Indoor Unit Main PBA ■ AC026MNNDKH / AC035MNNDKH / AC052MNNDKH / AC060MNNDKH / AC071MNNDKH BLDC fan ① ② ③ ④ Main power input Earth wire Float switch 1(L):Phase L #1:DC310V #1:Float_SW #1:GND 2(N):Phase N #2:Not used...
- Page 82 Panel PCB ① CN01-DISPLAY #1 : DC 12V #2~5 : LED control signal #6 : Remocon signal out #7~8 : Not used #9 : Remocon signal IN #10: GND #11: DC 5V Samsung Electronics...
- Page 83 SUB PBA POWER:SMW200-05P BLK EEV1:SMW250-05 RED COMP:DBT061-3P WHT SMPS: SMW250-03 BLU EEPROM:B7P-MQ WHT TEMP SENSOR: SMW200-08P WHT MAIN DOWNLOAD:YDW200-20 BLK SUB PBA: SMW200-10P BLK DRED:SMW250-05 WHT INV DOWNDOWN: YDAW200-20TR BLK SUB PBA: SMW200-10P WHT ENABLE CGND: SMW250-03 RED Samsung Electronics...
- Page 84 5-2-2 MAIN PCB AC052MXADKH / AC060MXADKH 11 12 Samsung Electronics...
- Page 85 CN901 : BLDC MOTOR CN551: Downloader CN451 : COMP POWER CN051 : Reactor #1: DV310V #1~#10 : Download #1 : COMP U-Phase #1~#2 : Reactor #3: GND #2 : COMP V-Phase #4: DC15V #3 : COMP W-Phase #5: FAN_PWM #6: FAN_Feedback Samsung Electronics...
- Page 86 5-2-3 SUB PCB AC052MXADKH / AC060MXADKH ① ② CN12 : DC12V CN951 : SIGNAL TO MAIN PCB #1 : DC12V #1~#28 : SIGNAL TO MAIN PCB #2 : GND Samsung Electronics...
- Page 87 TEMP SENSOR :SMW200-08P WHT DRED :SMW250-05 WHT SUB PBA :SMW200-10P WHT SUB PBA :SMW200-10P BLK EEV1 :SMW250-05 RED SMPS :SMW250-03 BLU EEPROM :B7P-MQ WHT MAIN DOWNLOAD :YDW200-20 BLK BLDC FAN MOTOR :YAW396-06V WHT ENABLE CGND :SMW250-03 RED INV DOWNLOAD :YDAW200-20TR BLK Samsung Electronics...
- Page 88 6. Wiring Diagram 6-1 Indoor Unit AC026MNNDKH / AC035MNNDKH / AC052MNNDKH / AC060MNNDKH / AC071MNNDKH This Document can not be used without Samsung’s authorization. Samsung Electronics...
- Page 89 6-2 Outdoor Unit AC026MXADKH / AC035MXADKH This Document can not be used without Samsung’s authorization. Samsung Electronics...
- Page 90 AC052MXADKH / AC060MXADKH / AC071MXADKH This Document can not be used without Samsung’s authorization. Samsung Electronics...
- Page 91 PACK MULTI RAC-Vivace AIR HANDIING UNIT DVM HOME AIR HANDLING UNIT SINGLE HYDRO UNIT MULTI HYDRO UNIT MONO HYDRO UNIT WATER TANK FLAT ※ "/" can be removed from the buyer card if there are not enough digits. STAND Samsung Electronics...
- Page 92 8 Languages English ★ Only display the Global 4 way with Korean/ English K separator. Pattern Waffle Stripe Korean Global market use 4 Way Export/ Panel foreign market use ※ Model name for the column/bundle packaging is “~S”. Samsung Electronics...
- Page 93 You can open the valve by turning the need valve counterclockwise using hex wrench, and it is used for vacuum, gas purging, coolant injection, coolant purging, and indoor-outdoor unit connection. ■ ACCUMULATOR Accumulator prevents the flow of liquid-state coolant into the compressor. (Liquid-state coolant flowing into the compressor will overload the compressor.) Samsung Electronics...
- Page 94 27/19 27/1 21/15 Outdoor Temp.(°C) Heating S Heating 35.0 Indoor (°C) 28/18 27/19 20/15 Outdoor(°C) 30.0 34.3 34.0 30.6 29.8 29.5 26.6 25.0 25.4 25.1 22.6 32/2 28/18 24.2 24.0 21.6 20.0 27/19 27/1 20/15 15.0 Outdoor Temp.(°C) Samsung Electronics...
- Page 95 Samsung Electronics...
- Page 96 This Service Manual is a property of Samsung Electronics Co., Ltd. © Samsung Electronics Co., Ltd. Oct. 2016. Any unauthorized use of Manual can be punished under applicable Printed in China. International and/or domestic law. Samsung Electronics...
Need help?
Do you have a question about the AC026MNNDKH and is the answer not in the manual?
Questions and answers