
Related Manuals for Tektronix TDS 500B


Summary of Contents for Tektronix TDS 500B
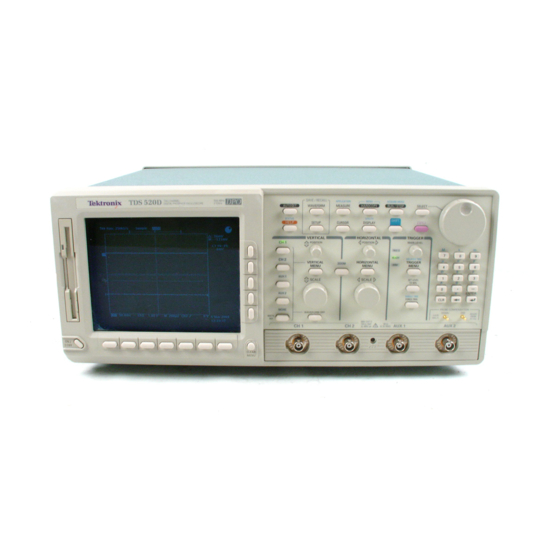
- Page 1 Technical Reference TDS 500B, TDS 600B & TDS 700A Digitizing Oscilloscopes Performance Verification and Specifications 070-9720-01...
- Page 2 Copyright E Tektronix, Inc. All rights reserved. Tektronix products are covered by U.S. and foreign patents, issued and pending. Information in this publication supercedes that in all previously published material. Specifications and price change privileges reserved. Printed in the U.S.A.
- Page 3 Tektronix, with shipping charges prepaid. Tektronix shall pay for the return of the product to Customer if the shipment is to a location within the country in which the Tektronix service center is located.
-
Page 5: Table Of Contents
........2–23 TDS 500B, TDS 600B & TDS 700A Performance Verification and Specifications... - Page 6 Table of Contents TDS 500B, TDS 600B & TDS 700A Performance Verification and Specifications...
-
Page 7: General Safety Summary
To avoid electric shock, do not operate this product in wet or damp conditions. Wet/Damp Conditions Do Not Operate in To avoid injury or fire hazard, do not operate this product in an explosive Explosive Atmosphere atmosphere. TDS 500B, TDS 600B & TDS 700A Performance Verification and Specifications... - Page 8 DANGER indicates an injury hazard immediately accessible as you read the marking. WARNING indicates an injury hazard not immediately accessible as you read the marking. CAUTION indicates a hazard to property including the product. TDS 500B, TDS 600B & TDS 700A Performance Verification and Specifications...
- Page 9 CSA Certification includes the products and power cords appropriate for use in Cords the North America power network. All other power cords supplied are approved for the country of use. TDS 500B, TDS 600B & TDS 700A Performance Verification and Specifications...
- Page 10 General Safety Summary TDS 500B, TDS 600B & TDS 700A Performance Verification and Specifications...
-
Page 11: Preface
Related Manuals The following documents are related to the use or service of the digitizing oscilloscope: H The TDS 500B, 600B & 700A User Manual (Tektronix part number 070-9719-XX). H The TDS Family Programmer Manual (Tektronix part number 070-9556-XX) describes using a computer to control the digitizing oscillo- scope through the GPIB interface. - Page 12 Preface viii TDS 500B, TDS 600B & TDS 700A Performance Verification and Specifications...
-
Page 13: Performance Verification Procedures
Performance Verification Procedures... - Page 15 They require more time to perform and suitable test equipment is required. (See Equipment Required beginning on page 1–16.) If you are not familiar with operating this oscilloscope, read the TDS 500B, TDS 600B & TDS 700A Reference (070-9382-XX) or the TDS 500B, TDS 600B &...
-
Page 16: Input Channels Vs. Model
“Initialize the oscilloscope” by doing “Press save/recall SETUP. Now, press the main-menu button...”. 1–2 TDS 500B, TDS 600B & TDS 700A Performance Verification and Specifications... - Page 17 Pop-up menu Main menu display area. Readouts in lower graticule area move here when CLEAR MENU is pressed. Figure 1–1: Map of Display Functions 1–3 TDS 500B, TDS 600B & TDS 700A Performance Verification and Specifications...
- Page 18 Performance Verification Procedures 1–4 TDS 500B, TDS 600B & TDS 700A Performance Verification and Specifications...
-
Page 19: Brief Procedures
(shown at left) will appear on-screen. When the verification is finished, the resulting status will appear on the screen. d. Confirm no failures are found: Verify that no failures are found and reported on-screen. 1–5 TDS 500B, TDS 600B & TDS 700A Performance Verification and Specifications... - Page 20 Path; then press the side-menu button OK Compensate Signal Paths. g. Wait: Signal-path compensation may take five minutes on the TDS 500B/700A and fifteen minutes on the 600B to run. While it progresses, a “clock” icon (shown at left) is displayed on-screen. When compensation completes, the status message will be updated to Pass or Fail in the main menu.
-
Page 21: Functional Tests
When you are instructed to press a menu button, the button may already be selected (its label will be highlighted). If this is the case, it is not necessary to press the button. 1–7 TDS 500B, TDS 600B & TDS 700A Performance Verification and Specifications... - Page 22 Figure 1–3: Universal Test Hookup for Functional Tests – TDS 600B Shown b. Initialize the oscilloscope: H Press save/recall SETUP. H Press the main-menu button Recall Factory Setup. H Press the side-menu button OK Confirm Factory Init. 1–8 TDS 500B, TDS 600B & TDS 700A Performance Verification and Specifications...
- Page 23 Refer to the icons at the left of each statement as you confirm those statements. 1–9 TDS 500B, TDS 600B & TDS 700A Performance Verification and Specifications...
- Page 24 H Peak Detect mode displays an actively acquiring waveform on-screen with the noise present in Sample mode “peak detected.” H Hi Res mode (TDS 500B and 700A only) displays an actively acquiring waveform on-screen with the noise that was present in Sample mode reduced.
- Page 25 H Press TRIGGER MENU. H Press the main-menu button Mode & Holdoff. H Press the side-menu button Normal. H Press CLEAR MENU to remove the menus from the screen. 1–11 TDS 500B, TDS 600B & TDS 700A Performance Verification and Specifications...
- Page 26 Verify the delayed trigger counter: H Press the main-menu button Delay by Time. H Use the keypad to enter a delay time of 1 second. Press 1, then press ENTER. 1–12 TDS 500B, TDS 600B & TDS 700A Performance Verification and Specifications...
- Page 27 H Set the horizontal SCALE for the M (main) time base to 200 ms. Notice the waveform on the display now shows two cycles instead of five. H Press CLEAR MENU to remove the menus from the screen. 1–13 TDS 500B, TDS 600B & TDS 700A Performance Verification and Specifications...
- Page 28 H Disconnect the probe from the channel input and the probe-compensa- tion terminals. H Remove the disk from the disk drive. Do this by pushing in the tab at the bottom of the disk drive. 1–14 TDS 500B, TDS 600B & TDS 700A Performance Verification and Specifications...
-
Page 29: Prerequisites
Performance Tests This section contains a collection of procedures for checking that the TDS 500B, TDS 600B, and TDS 700A Digitizing Oscilloscopes perform as warranted. The procedures are arranged in four logical groupings: Signal Acquisition System Checks, Time Base System Checks, Triggering System Checks, and Output Ports Checks. -
Page 30: Equipment Required
Checking File System Basic 1.44 Mbyte, DOS-com- Software Disk (Tektronix part Functionality patible floppy disk number 063-1134-XX) that comes with the TDS Family Programmer Manual (Tektro- nix part number 070-9556-XX) 1–16 TDS 500B, TDS 600B & TDS 700A Performance Verification and Specifications... - Page 31 To make measurements beyond 8 V, use either the P6139A probe (good to 500 V), or refer to the catalog for a recom- mended probe. You can replace items 19, 20, or 21 with a Tektronix SG503 (item 25) or SG504 (item 26) – if available. 1–17...
- Page 32 Performance Tests 1–18 TDS 500B, TDS 600B & TDS 700A Performance Verification and Specifications...
-
Page 33: Tds 600B Test Record
+ 11.7835 V –5 Div position setting, +10 V offset 200 mV Vert scale setting, – 11.7835 V __________ __________ – 11.4165 V +5 Div position setting, –10 V offset 1–19 TDS 500B, TDS 600B & TDS 700A Performance Verification and Specifications... - Page 34 100 mV 424 mV __________ __________ 100 mV 424 mV __________ __________ 100 mV 424 mV __________ __________ or AX1 100 mV 424 mV __________ __________ or AX2 1–20 TDS 500B, TDS 600B & TDS 700A Performance Verification and Specifications...
- Page 35 DELAYED TRIGGER OUTPUT, 50 W High 1.0 V __________ __________ __________ __________ Low 0.25 V DELAYED TRIGGER OUTPUT, 1 MW High 2.5 V __________ __________ __________ __________ Low 0.7 V 1–21 TDS 500B, TDS 600B & TDS 700A Performance Verification and Specifications...
- Page 36 Pk-Pk 40 mV __________ __________ Pk-Pk 60 mV Probe Compensator Output Signal Frequency (CH1 Freq.) 950 Hz __________ __________ 1.050 kHz Voltage (difference) 495 mV __________ __________ 505 mV 1–22 TDS 500B, TDS 600B & TDS 700A Performance Verification and Specifications...
-
Page 37: Tds 500B/700A Test Record
+ 11.6805 V –5 Div position setting, +10 V offset 200 mV Vert scale setting, – 11.6805 V __________ __________ – 11.5195 V +5 Div position setting, –10 V offset 1–23 TDS 500B, TDS 600B & TDS 700A Performance Verification and Specifications... - Page 38 100 mV 424 mV __________ __________ 100 mV 424 mV __________ __________ 424 mV __________ __________ or AX1 100 mV 424 mV __________ __________ or AX2 100 mV 1–24 TDS 500B, TDS 600B & TDS 700A Performance Verification and Specifications...
- Page 39 DELAYED TRIGGER OUTPUT, 50 W High High 1.0 V __________ __________ __________ __________ Low 0.25 V DELAYED TRIGGER OUTPUT, 1 MW High High 2.5 V __________ __________ __________ __________ Low 0.7 V 1–25 TDS 500B, TDS 600B & TDS 700A Performance Verification and Specifications...
- Page 40 Pk-Pk 44 mV __________ __________ Pk-Pk 66 mV Probe Compensator Output Signal Frequency (CH1 Freq.) 950 Hz __________ __________ 1.050 kHz Voltage (difference) 495 mV __________ __________ 505 mV 1–26 TDS 500B, TDS 600B & TDS 700A Performance Verification and Specifications...
-
Page 41: Signal Acquisition System Checks
H Press SHIFT; then press ACQUIRE MENU. H On the TDS 600B, press the main-menu button Mode; then press the side-menu button Average 16. H On the TDS 500B and 700A, press the main-menu button Mode; then press the side-menu button Hi Res. H Press CURSOR. - Page 42 H Enter voltage on test record. H Repeat substeps b through f until all vertical scale settings listed in Table 1–2, are checked for the channel under test. 1–28 TDS 500B, TDS 600B & TDS 700A Performance Verification and Specifications...
- Page 43 One DC calibration generator (Item 9) Two precision coaxial cables (Item 5) Prerequisites The oscilloscope must meet the prerequisites listed on page 1–15 See Input Channels vs. Model on page 1–2. 1–29 TDS 500B, TDS 600B & TDS 700A Performance Verification and Specifications...
- Page 44 2. Confirm input channels are within limits for DC accuracy at maximum offset and position: Do the following substeps — test CH 1 first, skipping substep 2a since CH 1 is already selected from step 1. 1–30 TDS 500B, TDS 600B & TDS 700A Performance Verification and Specifications...
- Page 45 H Use the keypad to set vertical position to –5 divisions (press –5, then ENTER, on the keypad). The baseline level will move off screen. H Press the main-menu button Offset. 1–31 TDS 500B, TDS 600B & TDS 700A Performance Verification and Specifications...
- Page 46 H CHECK that the Mean measurement readout on screen is within the limits listed for the current vertical scale setting and position/offset/ generator settings. Enter value on test record. 1–32 TDS 500B, TDS 600B & TDS 700A Performance Verification and Specifications...
- Page 47 H Press the main-menu button Mode; then press the side-menu button Average 16. H Press MEASURE. Press the main-menu button High–Low Setup; then press the side-menu button Min–Max. 1–33 TDS 500B, TDS 600B & TDS 700A Performance Verification and Specifications...
- Page 48 — test CH 1 first, skipping substeps a and b since CH 1 is already set up for testing from step 1. a. Select an unchecked channel: H Press WAVEFORM OFF to remove the channel just confirmed from display. 1–34 TDS 500B, TDS 600B & TDS 700A Performance Verification and Specifications...
- Page 49 Display the test signal: Do the following subparts to first display the reference signal and then the test signal. H Press MEASURE; then press the main-menu button Select Measrmnt for CHx. 1–35 TDS 500B, TDS 600B & TDS 700A Performance Verification and Specifications...
- Page 50 Press SET LEVEL TO 50% as necessary to trigger the signal. H Read the results at the CHx Pk-Pk readout, which will automatically measure the amplitude of the test signal. See Figure 1–9. 1–36 TDS 500B, TDS 600B & TDS 700A Performance Verification and Specifications...
- Page 51 H Passed the 100 mV vertical scale setting just checked in this procedure. H Passed the Verify Internal Adjustment, Self Compensation, and Diagnostics procedure found under Self Tests, on page 1–5. 1–37 TDS 500B, TDS 600B & TDS 700A Performance Verification and Specifications...
- Page 52 1. Install the test hookup and preset the instrument controls: a. Initialize the front panel: H Press save/recall SETUP. H Press the main-menu button Recall Factory Setup. H Press the side-menu button OK Confirm Factory Init. 1–38 TDS 500B, TDS 600B & TDS 700A Performance Verification and Specifications...
- Page 53 CH 1. Hint: As you are adjusting the generator amplitude, push SET LEVEL TO 50% frequently to speed up the updating of the waveform amplitude on screen. 1–39 TDS 500B, TDS 600B & TDS 700A Performance Verification and Specifications...
- Page 54 See Figure 1–11 on page 1–41. H Press CURSOR. H Press the main-menu button Function; then press the side-menu button V Bars. H Press CLEAR MENU. 1–40 TDS 500B, TDS 600B & TDS 700A Performance Verification and Specifications...
- Page 55 Check against limits: CHECK that the cursor readout on screen is 100 ps for the TDS 600B or 50 ps for the TDS 500B/700A. h. If the channel skew is within the limits, enter time on the test record and proceed to step 3.
- Page 56 Check against limits: CHECK that the largest of the three results from steps l, m, and n is between –100 ps and + 100 ps for the TDS 600B or between –50 ps and + 50 ps for the TDS 500B/700A. p. Enter time on the test record.
-
Page 57: Time Base System Checks
H Press VERTICAL MENU; then press the main-menu button Coupling. Press the side-menu button W to toggle it to the 50 W setting. H Press SET LEVEL TO 50%. 1–43 TDS 500B, TDS 600B & TDS 700A Performance Verification and Specifications... - Page 58 CHECK that the rising edge of the marker crosses the center horizontal graticule line at a point within either 2.0 divisions, for the TDS 600B, or 2.5 divisions, for the TDS 500B/700A, of center graticule. See Figure 1–13. H Enter number of divisions on test record.
-
Page 59: Trigger System Checks
Pulse-Glitch or Required (Item 19 or, optionally, item 25) Pulse-Width Triggering One 10X attenuator (Item 1) One 50 W, precision coaxial cable (Item 5) Prerequisites See page 1–15 1–45 TDS 500B, TDS 600B & TDS 700A Performance Verification and Specifications... - Page 60 (Horizontal Scale 1 ms): a. Display the test signal: Set the output of the sine wave generator for a 100 MHz, five-division sine wave on screen. Press SET LEVEL TO 50%. 1–46 TDS 500B, TDS 600B & TDS 700A Performance Verification and Specifications...
- Page 61 H CHECK that the Upper Limit readout, after the oscilloscope loses triggering, is within 3.5 ns to 6.5 ns, inclusive. H Enter time on test record. 1–47 TDS 500B, TDS 600B & TDS 700A Performance Verification and Specifications...
- Page 62 Check against limits: Do the following subparts in the order listed. H Press the side-menu button Lower Limit. H Use the general purpose knob to increase Lower Limit readout until triggering is lost. 1–48 TDS 500B, TDS 600B & TDS 700A Performance Verification and Specifications...
- Page 63 1. Install the test hookup and preset the instrument controls: a. Hook up the test-signal source: H Set the output of the DC calibration generator to 0 volts. 1–49 TDS 500B, TDS 600B & TDS 700A Performance Verification and Specifications...
- Page 64 H Press TRIGGER MENU. H Read the measurement results from the readout below the label Level in the main menu, not the trigger readout in the graticule area. 1–50 TDS 500B, TDS 600B & TDS 700A Performance Verification and Specifications...
- Page 65 (+10 V). Figure 1–17: Measurement of Trigger-Level Accuracy 3. Confirm Delayed trigger system is within limits for Trigger-level/Threshold accuracy: a. Select the Delayed time base: 1–51 TDS 500B, TDS 600B & TDS 700A Performance Verification and Specifications...
- Page 66 First set the output of the DC calibration generator to 0 volts. b. Disconnect the cable from the generator output at the input connector of CH 1. 1–52 TDS 500B, TDS 600B & TDS 700A Performance Verification and Specifications...
- Page 67 Delayed Triggerable. H Set the horizontal SCALE for the D (delayed) time base to 20 ns on the TDS 600B or 25 ns on the TDS 500B/700A; then press the side-menu button Main Only. H Press TRIGGER MENU; then press the main-menu button Mode &...
- Page 68 (positive or negative). This display should not have its trigger point switching between opposite slopes, nor should it roll across the screen. At horizontal scale settings of 1–54 TDS 500B, TDS 600B & TDS 700A Performance Verification and Specifications...
- Page 69 H Press HORIZONTAL MENU; then press the main-menu button Time Base. Press the side-menu button Delayed Only; then press Delayed Triggerable in the same menu. 1–55 TDS 500B, TDS 600B & TDS 700A Performance Verification and Specifications...
- Page 70 Press the main-menu button Slope; then use the side menu to switch between trigger slopes. Use the TRIGGER LEVEL knob to stabilize the trigger if required. H Enter the pass/fail result on the test record. 1–56 TDS 500B, TDS 600B & TDS 700A Performance Verification and Specifications...
- Page 71 NOTE. You just checked the trigger sensitivity. If desired, you may repeat steps 1 through 4 for the other channels (CH2, CH3, and CH4). 5. Disconnect the hookup: Disconnect the cable from the channel last tested. 1–57 TDS 500B, TDS 600B & TDS 700A Performance Verification and Specifications...
-
Page 72: Output Signal Checks
CH 2 through a 50 W precision cable. c. Initialize the oscilloscope: H Press save/recall SETUP. H Press the main-menu button Recall Factory Setup. H Press the side-menu button OK Confirm Factory Init. 1–58 TDS 500B, TDS 600B & TDS 700A Performance Verification and Specifications... - Page 73 50 W setting. H CHECK that the Ch2 High readout is 1.0 volt and that the Ch2 Low readout 0.25 volts. H Enter high and low voltages on test record. 1–59 TDS 500B, TDS 600B & TDS 700A Performance Verification and Specifications...
- Page 74 3. Confirm CH 3 (Ax1 on some TDS models) output is within limits for gain: a. Measure gain: H Move the precision 50 W cable from the rear-panel DELAYED TRIGGER OUTPUT BNC to the rear-panel SIGNAL OUT BNC. H Push TRIGGER MENU. 1–60 TDS 500B, TDS 600B & TDS 700A Performance Verification and Specifications...
- Page 75 TDS 600B or is between 44 mV and 66 mV, inclusive, for the TDS 500B/700A. H Enter voltage on test record. 4. Disconnect the hookup: Disconnect the cables from the channel inputs and the rear panel outputs. 1–61 TDS 500B, TDS 600B & TDS 700A Performance Verification and Specifications...
- Page 76 Figure 1–22: Initial Test Hookup b. Initialize the oscilloscope: H Press save/recall SETUP. H Press the main-menu button Recall Factory Setup. H Press the side-menu button OK Confirm Factory Init. 1–62 TDS 500B, TDS 600B & TDS 700A Performance Verification and Specifications...
- Page 77 H CHECK that the CH 1 Freq readout is within 950 Hz to 1.050 kHz, inclusive. See Figure 1–23. H Enter frequency on test record. H Press MEASURE; then press the main-menu button Remove Measrmnt for Ch1. Press the side–menu Measurement 1. 1–63 TDS 500B, TDS 600B & TDS 700A Performance Verification and Specifications...
- Page 78 BNC T connector. See Figure 1–24. H Connect the Sense output of the generator through a second dual-banana connector followed by a 50 W precision coaxial cable to 1–64 TDS 500B, TDS 600B & TDS 700A Performance Verification and Specifications...
- Page 79 (This value will be near zero volts.) H Record the setting of the DC generator. Press CLEAR MENU to remove the menus from the display. See Figure 1–25. 1–65 TDS 500B, TDS 600B & TDS 700A Performance Verification and Specifications...
- Page 80 H CHECK that the difference obtained is within 495 mV to 505 mV, inclusive. H Enter voltage difference on test record. 3. Disconnect the hookup: Disconnect the cable from CH 1. 1–66 TDS 500B, TDS 600B & TDS 700A Performance Verification and Specifications...
-
Page 81: Option 05 Video Trigger Checks
Press the main-menu Standard pop-up until you select 625/PAL. d. Press the main-menu Line. e. Use the keypad to set the line number to 7 (press 7, then ENTER). Press VERTICAL MENU. 1–67 TDS 500B, TDS 600B & TDS 700A Performance Verification and Specifications... - Page 82 75 W Cable Figure 1–26: Jitter Test Hookup b. CHECK that the oscilloscope lights up its front panel TRIG’D LED and it displays the waveform on screen. See Figure 1–27. 1–68 TDS 500B, TDS 600B & TDS 700A Performance Verification and Specifications...
- Page 83 Press SHIFT; then press ACQUIRE MENU. n. Press the main-menu Limit Test Setup. o. Toggle the side-menu Limit Test to ON. p. Toggle the side-menu Ring Bell if Condition Met to ON. 1–69 TDS 500B, TDS 600B & TDS 700A Performance Verification and Specifications...
- Page 84 Toggle the side-menu Ring Bell if Condition Met to OFF. y. Toggle the side-menu Limit Test to OFF. 4. Check Triggered Signal Range. Set up oscilloscope for Triggered Signal Test. a. Press MORE. 1–70 TDS 500B, TDS 600B & TDS 700A Performance Verification and Specifications...
- Page 85 That is, it does not move horizontally or vertically. Also, CONFIRM that the waveform on the screen has one positive pulse and a number of negative pulses. See Figure 1–29. 1–71 TDS 500B, TDS 600B & TDS 700A Performance Verification and Specifications...
- Page 86 That is, it does not move horizontally or vertically. Also, CONFIRM that the waveform on the screen has one positive pulse and a number of negative pulses. See Figure 1–30. 1–72 TDS 500B, TDS 600B & TDS 700A Performance Verification and Specifications...
- Page 87 SHIFT, m, then ENTER). b. Set up 60 Hz signal generator. H Connect the output of the signal generator to the CH2 input through a 50 W cable. See Figure 1–31. 1–73 TDS 500B, TDS 600B & TDS 700A Performance Verification and Specifications...
- Page 88 H Use the keypad to set the horizontal scale (/div) to 50 ms (press 50, SHIFT, m, then ENTER). H Reconnect the output of the signal generator. Connect the composite signal connector of the PAL signal source (labeled COMPST on the 1–74 TDS 500B, TDS 600B & TDS 700A Performance Verification and Specifications...
- Page 89 Also, confirm that the waveform on the screen has one positive pulse and a number of negative pulses. See Figure 1–34. H Disconnect all test equipment from the digitizing oscilloscope. 1–75 TDS 500B, TDS 600B & TDS 700A Performance Verification and Specifications...
- Page 90 H Connect a composite output signal from the rear of the PAL signal source (labeled COMPST on the TSG 121) to the CH1 input through a 75 W cable and a 75 W terminator. See Figure 1–35. 1–76 TDS 500B, TDS 600B & TDS 700A Performance Verification and Specifications...
- Page 91 H Press the side-menu to Set to 50%. H Use the HORIZONTAL POSITION knob to move the falling edge of the sync pulse to two divisions to the left of center screen. See Figure 1–36. 1–77 TDS 500B, TDS 600B & TDS 700A Performance Verification and Specifications...
- Page 92 H Use the HORIZONTAL POSITION knob to position the right cursor to center screen. H Verify that the cursor is positioned on a positive slope of the burst signal. See Figure 1–37. 1–78 TDS 500B, TDS 600B & TDS 700A Performance Verification and Specifications...
- Page 93 H Use the keypad to set the field rate to 60.05 Hz (press 60.05, then ENTER). H Press the side-menu Lines. H Use the keypad to set the field rate to 793 lines (press 793, then ENTER). 1–79 TDS 500B, TDS 600B & TDS 700A Performance Verification and Specifications...
- Page 94 H Set PERIOD to 10 ms. H Set OUTPUT (VOLTS) to –1 for LOW LEVEL and +1 for HIGH LEVEL. H Depress the COMPLEMENT button. H Be sure BACK TERM is depressed (in). 1–80 TDS 500B, TDS 600B & TDS 700A Performance Verification and Specifications...
- Page 95 See Figure 1–39. NOTE. You may need to adjust the trigger level control to obtain a stable trigger. 1–81 TDS 500B, TDS 600B & TDS 700A Performance Verification and Specifications...
- Page 96 NOTE. The pulse duration and period adjustments are critical in making this measurement. If the pulse duration and/or the duty cycle are not stable, the FLEXFMT function may not function. You must take care when making these adjustments. 1–82 TDS 500B, TDS 600B & TDS 700A Performance Verification and Specifications...
- Page 97 H Press Sync Polarity. H Press Pos Sync. H Push the pulse generator COMPLEMENT button out. H CONFIRM that the TRIG’D LED is lighted and the waveform is stable. 1–83 TDS 500B, TDS 600B & TDS 700A Performance Verification and Specifications...
-
Page 98: Sine Wave Generator Leveling Procedure
Level meter and power sensor (Item 20) Power splitter (Item 21) Two male N to female BNC adapters (Item 23) One precision coaxial cable (Item 5) Prerequisites See page 1–15 1–84 TDS 500B, TDS 600B & TDS 700A Performance Verification and Specifications... - Page 99 H Adjust the sine wave generator amplitude until the level meter again reads the value noted in step 3. The signal amplitude is now correctly set for the new frequency. 1–85 TDS 500B, TDS 600B & TDS 700A Performance Verification and Specifications...
- Page 100 3. Record the reference level: H Disconnect the sine wave generator from the digitizing oscilloscope. H Connect the sine wave generator to the power sensor. H Note the level meter reading. 1–86 TDS 500B, TDS 600B & TDS 700A Performance Verification and Specifications...
- Page 101 3. The signal amplitude is now correctly set for the new frequency. H Disconnect the sine wave generator from the power sensor. H Connect the sine wave generator to the digitizing oscilloscope. 1–87 TDS 500B, TDS 600B & TDS 700A Performance Verification and Specifications...
- Page 102 Performance Tests 1–88 TDS 500B, TDS 600B & TDS 700A Performance Verification and Specifications...
-
Page 103: Specifications
Specifications... -
Page 105: Product Description
Specifications This section begins with a general description of the traits of the TDS 500B, TDS 600B, and TDS 700A oscilloscopes. Three sections follow, one for each of three classes of traits: nominal traits, warranted characteristics, and typical characteristics. Product Description... -
Page 106: User Interface
Each of the full-featured channels can be displayed, vertically positioned, and offset, can have their bandwidth limited (250 MHz or 20 MHz) and their vertical coupling specified. Fine gain can also be adjusted. 2–2 TDS 500B, TDS 600B & TDS 700A Performance Verification and Specifications... -
Page 107: Horizontal System
In this case, the events source is the delayed-trigger source. The delayed trigger can also be set to occur after a number of events plus an amount of time. 2–3 TDS 500B, TDS 600B & TDS 700A Performance Verification and Specifications... -
Page 108: Trigger System
Trigger signals recognized include: H Edge (main- and delayed-trigger systems): This familiar type of triggering is fully configurable for source, slope, coupling, mode (auto or normal), and holdoff. 2–4 TDS 500B, TDS 600B & TDS 700A Performance Verification and Specifications... -
Page 109: Acquisition Control
TDS to signal you or generate hard copy output either to a printer or to a floppy-disk file based on the results. Also, you can create templates for use in limit tests. 2–5 TDS 500B, TDS 600B & TDS 700A Performance Verification and Specifications... -
Page 110: On-Board User Assistance
Digitizing Oscilloscope. Any four out of the 25 parameters available can be displayed to the screen. The waveform parameters are measured continuously with the results updated on-screen as the Digitizing Oscilloscope continues to acquire waveforms. 2–6 TDS 500B, TDS 600B & TDS 700A Performance Verification and Specifications... -
Page 111: Storage
The hardcopies can be stamped with date and time and spooled to a queue for printing at a later time. You can output screen information via GPIB, RS-232C, or Centronics interfaces. 2–7 TDS 500B, TDS 600B & TDS 700A Performance Verification and Specifications... -
Page 112: Display
Specifications Display The TDS 500B, TDS 600B and TDS 700A Digitizing Oscilloscopes offer flexible display options. You can customize the following attributes of your display: H Color (TDS 644B, TDS 684B, and TDS 700A): Waveforms, readouts, graticule, and variable persistence with color coding... -
Page 113: Nominal Traits
Nominal Traits This section contains a collection of tables that list the various nominal traits that describe the TDS 500B, TDS 600B, and TDS 700A oscilloscopes. Electrical and mechanical traits are included. Nominal traits are described using simple statements of fact such as “Four, all identical”... - Page 114 For all these cases, the waveform rate is 1/(Waveform Interval) for the waveform record, where the waveform interval (WI) is the time between the samples in the waveform record. 2–10 TDS 500B, TDS 600B & TDS 700A Performance Verification and Specifications...
- Page 115 HDTV – (787.5/60) (1050/60) (1125/60) (1250/60) FlexFormat (user definable standards) User can specify: field rate, number of lines, sync pulse width and polarity, line rate, and vertical interval timing. 2–11 TDS 500B, TDS 600B & TDS 700A Performance Verification and Specifications...
- Page 116 Data is maintained by small lithium-thionyl-chloride batteries internal to the memory ICs. The amount of lithium is so small in these ICs that they can typically be safely disposed of with ordinary garbage in a sanitary landfill. 2–12 TDS 500B, TDS 600B & TDS 700A Performance Verification and Specifications...
- Page 117 Forced-air circulation with no air filter. Clearance is required. Construction Material Chassis parts constructed of aluminum alloy; front panel constructed of plastic laminate; circuit boards constructed of glass laminate. Cabinet is aluminum and is clad in Tektronix Blue vinyl material. Finish Type...
- Page 118 Nominal Traits 2–14 TDS 500B, TDS 600B & TDS 700A Performance Verification and Specifications...
-
Page 119: Warranted Characteristics
Warranted Characteristics This section lists the various warranted characteristics that describe the TDS 500B, TDS 600B, and TDS 700A oscilloscopes. Electrical and environ- mental characteristics are included. Warranted characteristics are described in terms of quantifiable performance limits which are warranted. - Page 120 TDS 600B: 1.5% for all sensitivities from 2 mV/div to 10 V/div 2.0% at 1 mV/div sensitivity TDS 500B, 700A: 1% for all sensitivities from 1 mV/div to 10 V/div with offset from 0 V to 100V Accuracy, DC Voltage Measurement,...
- Page 121 The limits given are for the ambient temperature range of 0_C to +30_C. Reduce the upper bandwidth frequencies by 5 MHz for the TDS 600B or by 2.5 MHz for the TDS 500B/700A for each _C above +30_C. The AC Coupled Lower Frequency Limits are reduced by a factor of 10 when 10X passive probes are used.
- Page 122 TDS 600B: 250 mV from DC to 50 MHz, increasing to 500 mV at Auxiliary 100 MHz TDS 500B, 724A, & 754A: 400 mV from DC to 50 MHz, increasing to 750 mV at 100 MHz TDS 782A & 784A: 250 mV from DC to 50 MHz, increasing to...
- Page 123 Random vibration (floppy diskette not installed): 0.31 g rms, from 5 to 500 Hz, 10 minutes each axis, operating 3.07 g rms, from 5 to 500 Hz, 10 minutes each axis, nonoperating 2–19 TDS 500B, TDS 600B & TDS 700A Performance Verification and Specifications...
- Page 124 IEC 801-2 Electrostatic Discharge Performance Criteria B IEC 801-3 Radiated Susceptibility 3 V/meter from 27 MHz to 500 MHz unmodulated IEC 801-4 Fast Transients Performance Criteria B IEC 801-5 AC Surge Performance Criteria B 2–20 TDS 500B, TDS 600B & TDS 700A Performance Verification and Specifications...
- Page 125 The GPIB cable connected to the instrument for certain of the emissions tests must be “low EMI” having a high-quality outer shield connected through a low impedance to both connector housings. Acceptable cables are Tektronix part numbers 012-0991-00, -01, -02, and -03. In order to maintain the EMI performance conforming to the above regulations, the following cables, or their equivalent, should be used: a shielded Centronics cable, 3 meters in length, part number 012-1214-00, and a shielded RS-232 cable, 2.7 meters in length, CA part number 0294-9.
- Page 126 Warranted Characteristics 2–22 TDS 500B, TDS 600B & TDS 700A Performance Verification and Specifications...
-
Page 127: Typical Characteristics
DC – 750 MHz 20 mV/div – 49.8 mV/div DC – 300 MHz DC – 600 MHz 10 mV/div – 19.9 mV/div DC – 250 MHz DC – 500 MHz 2–23 TDS 500B, TDS 600B & TDS 700A Performance Verification and Specifications... - Page 128 TDS 600B: ( 10 ps + (100 ppm | Reading |) + (0.25 W are: 100 Averages, will Full Band- TDS 500B/700A: 20 ps + (25 ppm | Reading |) + t/div/1000 width selected, and for TDS 500B/700A, repetitive mode.
- Page 129 The limits given are for the ambient temperature range of 0_C to +30_C. Reduce the upper bandwidth frequencies by 5 MHz for the TDS 600B or by 2.5 MHz for the TDS 500B/700A for each _C above +30_C. The numbers given are valid 0_C to +30_C and will increase as the temperature increases due to the degradation in bandwidth.
- Page 130 Time Between Triggering Type Width Width Channels Logic Not Applicable 1 ns 1 ns Events Delay 1 ns (for either + or Not Applicable 2 ns – pulse widths) 2–26 TDS 500B, TDS 600B & TDS 700A Performance Verification and Specifications...
- Page 131 The minimum signal levels required for stable runt pulse triggering of an acquisition. Also, see the footnote for Sensitivity, Edge-Type Trigger, DC Coupled in this table. (Stable counting of events is counting that misses no events.) 2–27 TDS 500B, TDS 600B & TDS 700A Performance Verification and Specifications...
- Page 132 For Slew Rate Triggering, this is the minimum transition time, defined to be the time the user’s signal spends between the two trigger threshold settings. 2–28 TDS 500B, TDS 600B & TDS 700A Performance Verification and Specifications...
Need help?
Do you have a question about the TDS 500B and is the answer not in the manual?
Questions and answers