AGA Legacy 44 Installation & User Manual
Aga ranges inc. users guide electric range legacy 44
Hide thumbs
Also See for Legacy 44:
- Installation & user manual (60 pages) ,
- User's manual & installation instructions (56 pages) ,
- Service instructions manual (32 pages)
Table of Contents
Advertisement
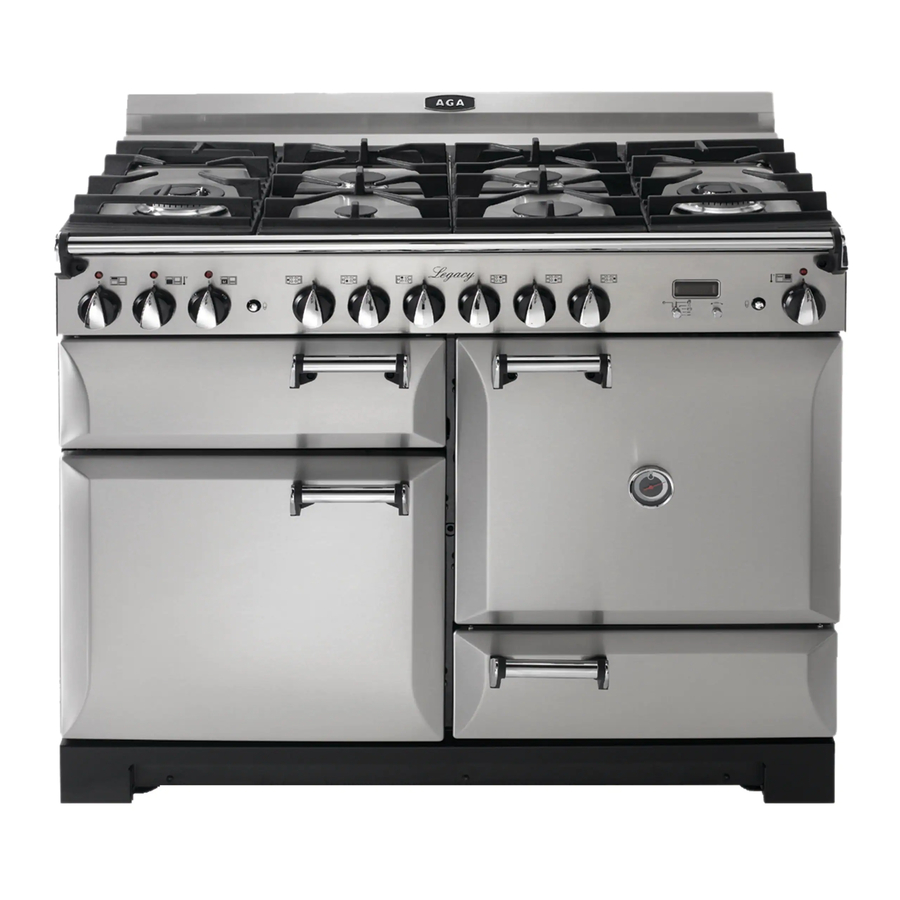
Electric Range
Users Guide
&
Installation Instructions
This book contains many important safety messages.
Always read and obey all safety messages.
Installer:Leave these instructions with the appliance
Important - Save the installation instructions for the local electrical inspector's
use.
U107401-01
www.aga-ranges.com
Advertisement
Chapters
Table of Contents

Related Manuals for AGA Legacy 44


Summary of Contents for AGA Legacy 44
-
Page 1: Users Guide
Electric Range Users Guide & Installation Instructions This book contains many important safety messages. Always read and obey all safety messages. Installer:Leave these instructions with the appliance Important - Save the installation instructions for the local electrical inspector’s use. U107401-01 www.aga-ranges.com... - Page 2 Warning The anti-tip device supplied with this range must be correctly fi tted when the appliance is installed. This will reduce risk of tipping of the appliance from abnormal usage or by excessive loading of the oven door WARNING • ALL RANGES CAN TIP •...
-
Page 3: Table Of Contents
Contents General Safety Instructions The Cooktop The Broiler The Ovens Storage Multi-function (Left hand) Oven cooking guide Cooking chart Cleaning your range Troubleshooting Service and spares Installation The Clock Both ovens Multi-function oven Multi-function oven modes Handyrack Oven racks Oven lights Using your Range... -
Page 4: Important Safety Information
Read all instructions before using this appliance. IMPORTANT SAFETY INFORMATION Have your appliance properly installed and grounded by a qualifi ed technician in accordance with the National Electrical Code ANSI/NFPA No. 70—latest edition, and local code requirements. Install only as described in the installation section of this book. - Page 5 Read all instructions before using this appliance. IMPORTANT SAFETY INFORMATION the range that may become warm or hot. Do not leave plastic items on the cooktop as they may burn, melt or soften. Storage should not be fi tted directly above a range.
-
Page 6: Proper Installation
Read all instructions before using this appliance. IMPORTANT SAFETY INFORMATION DO NOT TOUCH HEATING ELEMENTS OR INTERIOR SURFACES OF OVENS Oven and Broiler heating elements may be hot though they are dark in color. Interior surfaces of an oven or broiler may become hot enough to cause burns. -
Page 7: User Servicing
Read all instructions before using this appliance. IMPORTANT SAFETY INFORMATION Use the Right Size Pan This range is equipped with cooktop elements of diff erent sizes. Use cookware with fl at bottoms large enough to cover the heating element (marked with a ring on the cooktop). -
Page 8: General Safety Instructions
Read all instructions before using this appliance. IMPORTANT SAFETY INFORMATION General Safety Instructions This appliance must be installed by a competent person in accordance with the installation instructions. The installation must comply with the relevant regulations and also the local electricity supply company requirements This appliance is designed for domestic cooking only. - Page 9 Read all instructions before using this appliance. IMPORTANT SAFETY INFORMATION Save these instructions for future reference. When using an electrical appliance near the cooktop, be sure that the cord of the appliance does not come into contact with the cooktop. Take care that no water seeps into the appliance The range is designed for cooking foods only and must not be used for any other purpose.
-
Page 10: The Cooktop
Using your Range The Cooktop When you cook on a electric cooktop its very important to use the right sort of pans... Use only pans that are suitable for electric cooktops. We recommend stainless steel and enameled steel pans because pots and pans with copper or aluminum bases leave traces on the cooktop that are diffi... - Page 11 Using your Range Although the cooktop surface is very strong, a heavy or sharp falling object (a salt shaker for example) might cause the surface to crack. If you fi nd a crack in the surface immediately disconnect the appliance from the supply and arrange for its repair.
-
Page 12: The Broiler
Using your Range The Broiler Before using for the first time, to dispel manufacturing odors, turn on the broiler and run for 30 minutes with the broiler pan in position. To clear the smell make sure the room is well ventilated to the outside air, by opening windows for example. -
Page 13: The Ovens
The Ovens The clock must be set to the time of day before the ovens will work. See ‘The Clock’ section for instructions on setting the time of day. Before using for the fi rst time, to dispel manufacturing odors turn the ovens to 400°F (204°C) and run for an hour. -
Page 14: The Clock
Using your Range The Clock Setting the time of day Setting knob When the clock is fi rst connected the display will fl ash ( ) and ( To set the clock to read the time of day turn and hold the Setting knob to the clock symbol ( ) and at the same time... - Page 15 Using your Range Turn the Setting knob to the ( ) position. The display will show the current time of day plus the ‘cook period’ you just set. Use the adjustment knob to set the ‘Stop time’ you need. ‘Stop Time’ shows. AUTO will show in the display.
-
Page 16: Both Ovens
Using your Range Cooking using the timer (Delayed baking) The timer can be used to turn just one oven or both on and off automatically. The start and stop time must be the same for both ovens but diff erent cooking temperatures can be set. -
Page 17: Multi-Function Oven
Using your Range Multi-function oven The left hand oven of your range is Multi-function. It has many varied uses. We suggest you keep a careful eye on your cooking until you are familiar with each function. Remember - not all functions will be suitable for all food types. -
Page 18: Handyrack
Using your Range Conventional oven (top and base heat) This function combines the heat from the top and base elements. It is particularly suitable for roasting and baking pastry, cakes and biscuits. Food cooked on the top rack will brown and crisp faster than on the lower rack, because the heat is greater at the top of the oven than at the base, as in ‘Convection assisted oven’... -
Page 19: Oven Racks
Using your Range Oven racks the rack guard should be at the back pointing upwards As well as the fl at racks some models are supplied with drop racks. The drop racks increase the possibilities for oven rack spacing. fl at rack drop rack The oven racks can be easily removed and refi... - Page 20 Using your Range To remove the drawer pull it right out Lift up the ends of the plastic clips (one each side) to release the catches holding the drawer to the side runners and at the same time pull the drawer forward and away from the side runners.
-
Page 21: Multi-Function (Left Hand) Oven Cooking Guide
Multi-function (Left hand) Oven cooking guide Remember - not all modes will be suitable for all food types. The oven control settings and cooking times given are intended to be used only as a guide. Individual tastes may require the temperature to be altered to provide a preferred result. -
Page 22: Cooking Chart
Using your Range Cooking chart Conventional Oven Food Temperature FISH ROAST MEATS Beef with bone Beef without bone Lamb Pork Stuff ed and rolled - Add approx. 10 mins. per lb to above cooking times or cook at 390°F for 20mins. then 320°F for remainder. THOROUGHLY THAW FROZEN MEAT AND POULTRY BEFORE COOKING. -
Page 23: Cleaning Your Range
Using your Range Cleaning your range Essential information Before thorough cleaning isolate the electricity supply. Remember to switch on the electricity supply before use. Never use paint solvents, washing soda, caustic cleaners, biological powders, bleach, chlorine based bleach cleaners, coarse abrasives or salt. Don’t mix diff... -
Page 24: Cleaning Chart
Using your Range Cleaning chart All Parts listed here can be cleaned using hot soapy water (dishwashing liquid detergent) and a soft cloth. For more diffi cult cleaning, follow the appropriate instruction. Check cleaner manufacturers guidelines for compatibility with the material of your range. Part Finish Electric Cooktop... -
Page 25: Oven Doors
Using your Range Control Panel The control panel and control knobs should only be cleaned with a soft cloth wrung out in clean hot soapy water - but take care that no surplus water seeps into the appliance. Wipe with a clean dampened cloth then polish with a dry cloth. -
Page 26: Troubleshooting
Using your Range Troubleshooting A crack has appeared in the Cooktop surface Disconnect the range immediately from the power supply and arrange for its repair. Don’t use the range until after the repair. See the "Service and spares" section for imformation about service. - Page 27 Using your Range A dish of water when placed on the rack should be the same depth all over. (For example, if it is deeper at the back, then the back of the range should be raised up or the front lowered). If the range is not level arrange for your supplier to level it for you.
-
Page 28: Service And Spares
You may be required to produce the receipt to validate a warranty fi eld visit. Fuel Type: Ceramic Electric Appliance Name: AGA Legacy 44 Appliance Color*: Appliance Serial Number*: Retailers Name & Address: Date of Purchase: Installers Name & Address: Date of Installation: * This information is on the appliance data badge. -
Page 29: Installation Instructions
Read all instructions before installing or using this appliance. Installation Instructions Save these instructions for future reference. Installation This book contains many important safety messages. Always read and obey all safety messages. Installer:Leave these instructions with the appliance Important - Save the installation instructions for the local electrical inspector’s use. - Page 30 Warning The anti-tip device supplied with this range must be correctly fi tted when the appliance is installed. This will reduce risk of tipping of the appliance from abnormal usage or by excessive loading of the oven door WARNING • ALL RANGES CAN TIP •...
-
Page 31: Installation
Installation Installation Regulations Tools Materials Installation Safety Instructions Dimensions and clearances Location guidelines Moving the Range Checking the parts Leveling the Range Anti-Tip Device Electrical Connection Assemble the range Range operational checks How To Remove the Range for Servicing Schematic diagram of the Range Schematic diagram of the Range Technical Data... -
Page 32: Regulations
Read all instructions before installing or using this appliance. Regulations This range has been design-certifi ed by CSA International according to UL858, latest edition. Read the instructions before installing or using this appliance. This range becomes hot in use. Take safety precautions - see the safety warnings in the User Guide, which should be read together with this installation guide. -
Page 33: Positioning The Range
Read all instructions before installing or using this appliance. Installation Safety Instructions Warning! Improper installation, adjustment, alteration, service or maintenance can cause injury or property damage. Refer to this manual. For assistance or additional information, consult a qualifi ed installer, service agency or manufacturer (dealer). -
Page 34: Location Guidelines
Read all instructions before installing or using this appliance. If the range is to be installed between 24’’ deep cabinets the optional rear spacer should be fi tted to move the range 2’’ forward. See the spacer fi tting instruction section of these instructions. Any range hood should be installed in accordance with the hood manufacturer’s instructions. -
Page 35: Moving The Range
Read all instructions before installing or using this appliance. Moving the Range The range is very heavy. Take great care. We recommend two people maneuver the range. Ensure that the fl oor covering is fi rmly attached, or removed to prevent it being disturbed when moving the range around. -
Page 36: Checking The Parts
Read all instructions before installing or using this appliance. Checking the parts Check that the range has the following parts. Leveling tool & Allen keys Broiler pan and trivet Meat tin Handyrack anti tip device kit 6 oven racks Splashback & Plinth Rear spacer Miscellaneous parts pack (rear spacer end caps, fi... -
Page 37: Electrical Power Supply Requirements
Read all instructions before installing or using this appliance. Electrical Connection When installed the range must be electrically grounded in accordance with local codes or; in the absence of local codes with the National Electrical Code ANSI/NFPA 70, latest edition. Electrical Power Supply Requirements Electrical Requirements CAUTION: FOR PERSONAL SAFETY, DO NOT USE AN... - Page 38 Read all instructions before installing or using this appliance. 4-Wire Conduit Installation Disconnect the supplied power cord from the terminal block and ground post. Keep the terminal block parts; you will need them. Remove the strain relief clamp from the power cord and remove the power cord and strain relief clamp from the mounting bracket.
-
Page 39: Seal The Openings
Read all instructions before installing or using this appliance. The neutral or ground wire of the power cord must be connected to the neutral terminal located in the center of the connector block. The power leads must be connected to the outside terminals. -
Page 40: Assemble The Range
Read all instructions before installing or using this appliance. Assemble the range Fit the Door Handles Remove the 4mm Hex headed screws from the doors with the hexagon key tool. Use the screws to fi t the door handles. The handles should be above the fi xings. Fit the plastic blanking plugs to the fi... - Page 41 Read all instructions before installing or using this appliance. Fit the new end caps to the rear spacer and fl ue grille and hold in place with the nuts and spring washers supplied. If you are not fi tting the splashback the splashback mounting holes can be blocked with the extra screws supplied.
-
Page 42: Customer Care
Read all instructions before installing or using this appliance. Fit the plinth Loosen the 3 screws along the front bottom edge of the range. Hook the central keyhole over the central screw. Twist and fi t each end keyhole over their respective screws. -
Page 43: How To Remove The Range For Servicing
Read all instructions before installing or using this appliance. How To Remove the Range for Servicing Follow these procedures to remove appliance for servicing: The range is very heavy. Take great care. We recommend two people maneuver the range. Ensure that the fl oor covering is fi rmly attached, or removed to prevent it being disturbed when moving the range around. -
Page 46: Technical Data
Read all instructions before installing or using this appliance. Technical Data INSTALLER: Please leave these instructions with the User. DATA BADGE LOCATION: Inside base of drawer cavity - remove drawer. For removal of drawer see installation instructions. Dimensions Overall height (splash not fi tted) Overall width Overall depth without spacer Overall depth with spacer... - Page 47 Read all instructions before installing or using this appliance. Installation Instructions Save these instructions for future reference.
- Page 48 Aga Ranges 110 Woodcrest Road Cherry Hill, NJ 08003 USA 1.866.4AGA.4USA www.aga-ranges.com Email support@aga-ranges.com...
Need help?
Do you have a question about the Legacy 44 and is the answer not in the manual?
Questions and answers