Table of Contents
Advertisement
Available languages
Available languages
Quick Links
Advertisement
Table of Contents

Related Manuals for HOMCOM 370-189V90


Summary of Contents for HOMCOM 370-189V90
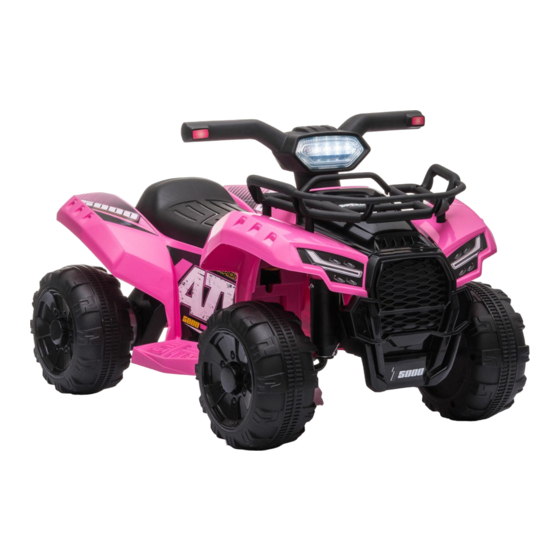
- Page 1 INfac016V01_DE 370-189V90 Kinderspielzeug Strandauto AKKUBETRIEBENES AUFSITZAUTOAKKUBETRIEBENES AUFSITZAUTO *Geeignet für Kinder im Alter von 18-36 Monate. *Max Gewicht: 20 kg. IMPORTANT, RETAIN FOR FUTURE REFERENCE: READ CAREFULLY ASSEMBLY INSTRUCTION...
- Page 2 Bedienungsanleitung 电动童车/沙滩车 mit Montageanleitungen 型号: JS320 Stile und Farben können variieren. In China hergestellt. Die Bedienungsanleitung enthält wichtige Sicherheitsinformationen sowie Anweisungen zur Montage, Verwendung und Wartung. Das Fahrzeug muss von einem Erwachsenen zusammengestellt werden, der die Anweisungen in dieser Anleitung gelesen und verstanden hat. Halten Sie die Packung von Kindern fern und entsorgen Sie sie vor dem Gebrauch ordnungsgemäß.
- Page 3 Über Ihr neues Fahrzeug │ 1 关于本产品 | 1 Über den Kauf Ihres neuen LEXUS Ride-On. 感 谢 你 购买本公司 生产 的JS320儿童电 动车 Diese Fahrt wird Ihrem Kind viele Kilometer Freude bereiten. Um 使用之前非 常 重要 的一 件事 情 就是仔 细阅 读 本产 品 说明 书 ,它 能 Ihnen und Ihrem Fahrer eine sichere Fahrt zu ermöglichen, bitten 告...
- Page 4 Benutzerhinweis │ 2 安装和使用前需知 | 2 WARNUNG! 警告! ·ERSTICKUNGSGEFAHR - Kleinteile. Nicht geeignet für Kinder unter 18 Monaten. ● 本产品必须由成人组装! Das Produkt enthält Kleinteile, halten Sie Kinder beim Zusammenbau fern. ● 内含细小零部件,不适合18个月以下的儿童使用。 ·ZUSAMMENBAU DURCH ERWACHSENE ERFORDERLICH. ● 产品在组装前可能含有潜在危险锐利边缘或锐利尖端。 ·Immer Schutzmaterial und Polybeutel entfernen und vor dem Zusammenbau entsorgen.
- Page 5 Teilediagramm │ 3 分解图 | 3 HINWEIS: Einige der abgebildeten Teile müssen beidseitig am Fahrzeug 提示 :一些零部件两侧都需要安装。 montiert werden...
- Page 6 零件清单 | 4 Stückliste | 4 TEILE 零件 TEILE-BEZEICHNUNG MENGE (STCK) BEMERKUNGEN 数 量(单位:个) 零 件 名 称 备 注 -NR. 编号 Karosserie 车身 Ø10 Unterlegscheibe Ø10垫片 Vorderrad 前轮 Splint 开口销 Radkappe 帽盖 Kontermutter 自锁螺母 Griffstange 车把 Sitz 座垫 Ladegerät 充电器...
- Page 7 Montieren Sie den Lenker │ 5 安装车把 | 5 Gestänge der Vorderachse 前轴连接铁片上的孔 Rückansicht von unten 车头底部视图 Lenkerverbindung 车把插件 Fahrzeugstecker 车身插件 车头底部视图 Rückansicht von unten 1. Führen Sie die Lenkerbaugruppe zusammen mit dem Kabel in die große Öffnung an der Vorderseite der Fahrzeugkarosserie ein. ①...
- Page 8 Montieren Sie die Vorderräder │ 6 安装后轮 | 6 Frontansicht von unten 车头底部视图 Drehen Sie die Fahrzeugkarosserie auf den Kopf. Entfernen Sie alle Teile ※ 翻转车身,使其底部朝上。 移去后轴上的所有零件。 von der Vorderachse. ① 在前轴上装入一个Ø10垫片。 1. Schieben Sie eine Unterlegscheibe Ø10 auf die Vorderachse. ②...
- Page 9 Anschließen der Stromversorgung und Anbringen des Sitzes │ 7 连接电源和安装座垫 | 7 Ansicht von oben 俯视图 Roter 电瓶插件 Akku-Anschluss Roter 车身插件 Akku-Anschluss Drehen Sie die Fahrzeugkarosserie aufrecht. 翻转车身,使其正面朝上。 1. Stecken Sie den roten Fahrzeugstecker in den roten Akkustecker am ① 将车身插件与电瓶上的插件连接。 Akku.
- Page 10 功能示意 | 8 Verwenden Sie Ihr Aufsitzfahrzeug │ 8 注意! IMPORTANT 不使用时,请关闭音 When not using, please 频播放器,防止电瓶 turn the audio player 跑电并降低电瓶寿 命。 off, avoid to reduce 1.Vorwärts-Taste: Drücken Sie die Taste, um vorwärts zu fahren, lassen Sie sie ① 前进按钮:按下按钮, 产品往前移动。抬按钮, 产品会缓慢减速直到停止。 los, um langsamer zu fahren und anzuhalten.
- Page 11 Aufladen │ 9 维护和保养 | 10 故障排查| 22 WARNUNG! • 在充电之前请检查充电器的电线、插头、外壳和其它部件是否损坏,如果 发现有任何损坏现象,应停止使用,直至修复完好再使用。 NUR ein Erwachsener darf den Akku laden und aufladen! • Dieses Produkt kommt mit Ladeschutz: Beim Aufladen werden alle Funk- • • 使用一段时间后用少量润滑油润滑一下产品的铁件部位, 以防止磨损生锈。 tionen abgeschaltet. • 产品应该放置在远离火源的地方并且避免长期光照。存放时要朝上平放, Der BETRIEBSSCHALTER muss während des Ladevorgangs auf AUS gestellt •...
-
Page 12: Fehlerbehebung Guide
Fehlerbehebung Guide | 10 故障排查 |11 故障类型 检查部位 排除方法 Mögliche Ursache Lösung Problem 电机不转 1.产品的保险丝是否过载?(位于 是,保险丝会自动切断电源 15-20 Fahrzeug läuft nicht Batterie gering Batterie aufladen. 本车座垫下方的保险丝盒) 秒,然后重新启动 ; 否,下一项。 Thermische Sicherung ist Neu erstellen Fuse, sehen <Fuse> 2.脚踏开关接触是否良好? ausgetrippt 否,将脚踏开关修好;是,下一项。 3.电机端子上焊线是否良好? 否,将端子线焊好;是,下一项。... - Page 13 Instandhaltung | 11 关于我们 |12 • Es liegt in der Verantwortung der Eltern, die Hauptteile des Spielzeugs vor dem ● 本产品仅适合在中国市场销售和使用。 Einsatz zu überprüfen. Muss regelmäßig auf mögliche Gefahren, wie z. B. Batterie, Aufladung, Kabel oder Kabel, Stecker, überprüfen. Schrauben dienen zum Befesti- ●...
-
Page 14: Assembly Instruction
Children’s Toy Beach Car BATTERY POWERED RIDE-ON *Suitable for children of 18-36 Months. *Max weight: 20 kg. IMPORTANT, RETAIN FOR FUTURE REFERENCE: READ CAREFULLY ASSEMBLY INSTRUCTION... - Page 15 Owner’s Manual with Assembly Instructions Styles and colo(u)rs may vary. Made in China. The owner’s manual contains important safety information as well as assembly, use and maintenance instructions. The Ride-on Car must be assembled by an adult who has read and understands the instructions in this manual.
-
Page 16: Specifications
About Your New Ride-On │ 1 On the purchase of your new Ride-On. This ride-on will provide your child with many miles of riding of enjoyment. To help assure you and your rider a safe ride we ask you to please read this manual carefully, and keep it for future reference. -
Page 17: User Notice
User Notice │ 2 WARNING! • CHOKING HAZARD - Small parts. Not suitable for children under 18 months. The product contains small parts, keep children away when assembling. • ADULT ASSEMBLY REQUIRED. • Always remove protective material and poly bags and dispose before assembly. -
Page 18: Parts Diagram
Parts Diagram │ 3 HINT: Some parts shown are assembled on both sides of vehicle... -
Page 19: Parts List
Parts List │ 4 PART PART NAME Q’ty (pcs) REMARKS Vehicle body Ø10 washer Front wheel Split pin Hubcap Lock nut Handle bar Seat Charger Spanner Assembly tools required (not included): Screwdriver Long nose pliers... -
Page 20: Attach The Handlebar
Attach the handlebar │ 5 Front axle linkage Front axle linkage Rear Bottom View Handlebar Handlebar Vehicle Vehicle connector connector connector connector Rear Bottom View 1. Insert the handlebar assembly together with wire into the large opening at the front of the vehicle body. -
Page 21: Attach The Front Wheels
Attach the Front Wheels │ 6 Front Bottom View Turn the vehicle body downside up. Remove all the parts from the front axle. 1. Slide a Ø10 washer onto the front axle. 2. Slide a front wheel onto the front alxe. 3. - Page 22 Connect the Power Supply & Attach the Seat │ 7 Top View Red battery connector Red vehicle connector Turn the vehicle body upright. 1. Plug the red vehicle connector into red battery connector on the battery. 2. Fit the tab on the seat into the grooves on vehicle body. 3.
- Page 23 Use Your Ride-on │ 8 IMPORTANT When not using, please turn the audio player off, avoid to reduce the battery life. 1. Forward button: Press down on the button to drive forward, release to slow and stop. IMPORTANT ● Always stop vehicle when changing the speed (if equipped) or direction to avoid damage the gears and motor.
- Page 24 Charging │ 9 WARNING! • ONLY an adult is allowed to charge and recharge the battery! • This product with Charging Protection: when charging, all functions will be cut off. • The POWER SWITCH must be in the OFF position when charging. •...
-
Page 25: Troubleshooting Guide
Troubleshooting Guide │ 10 Possible Cause Solution Problem Vehicle does not run Battery low on power Recharge battery. Thermal fuse has tripped Reset fuse, see <Fuse> Check that the battery connectors are firmly plugged Battery connector or wires into each other. If wires are loose around the motor are loose contact your distributor please. - Page 26 Maintaining │ 11 It is the responsibility of the parent to check main parts of the toy before using. • You must regularly examine for potential hazard, such as the battery, charge, cable or cord, plug, screws are fastened, enclosure of other parts and that in the event of such damage, the toy must not be used until that damage had been properly removed.
Need help?
Do you have a question about the 370-189V90 and is the answer not in the manual?
Questions and answers