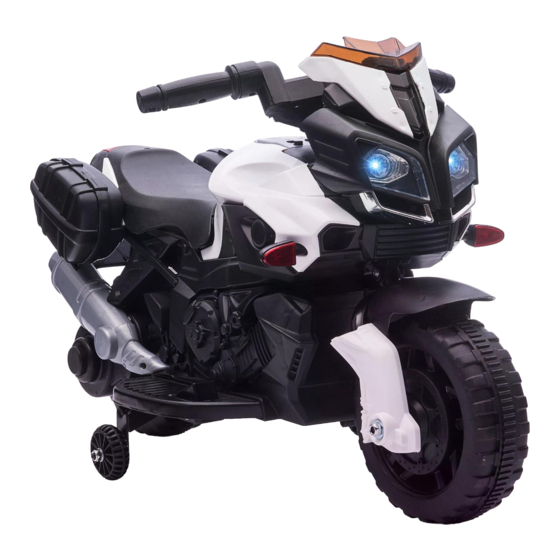
Summary of Contents for HOMCOM 370-159V70
- Page 1 IN220901396V01_UK 370-159V70 Children’s Battery Operated Ride on Car WARNING! ● The toy must be assembled by adults. IMPORTANT, RETAIN FOR FUTURE REFERENCE: READ CAREFULLY ASSEMBLY INSTRUCTION...
- Page 2 Specifications: Battery: 6V4.5AH x1 Motor: 6V 20W*1 Suitable ages: 18-48 months Maximum weight: 25KG Speed : 0-3KM/H Power way: Charging type Charg: 8-12 hours ; Use: 0.75 hours Use of time: Charger: Input AC 100~240 V, 50~60Hz, output DC 6 V 500mA WARNING 1.The pictures in this instruction is only for explaining the operation and structure of the product, when there's any difference with the real product, please confirm with the...
- Page 3 STORAGE BATTERY INFORMATION AND MAINTENANCE ● Please charge 8 to12 hours before first time use. ● Please use the suitable adapter to charge storage battery, otherwise the ride-on will be damaged. ● Please charge the car once the speed is slower than normal, otherwise it will decrease storage battery life.
- Page 4 PREVENT FIRE AND ELECTRIC SHOCK: - Use the only rechargeable battery and charger supplied with your vehicle. -NEVER substitute the battery or the charger with another brand. Using another battery or charger may cause a fire or explosion. -Do not use the battery or charger for any other product. Overheating, fire or explosion could occur.
-
Page 5: Parts List
Parts List Q’TY (PCS) REMARK PART NAME Vehicle body Gear box Wheel Pre-installed Bushing Pre-installed Rear axle Φ10 washer Pre-installed Pre-installed Φ8 washer Pre-installed Lock nut Hubcap Side wheel Φ4x16 turss head screw Front fork Front wheel cover Spanner Front fender Φ3x10 round head screw Front axle Foot board... -
Page 6: Parts Diagram
Parts Diagram... - Page 7 Assembly 1. Insert the tabs on the foot board into the opening on the left of the vehicle body. Left side view Rear bottom view 2. Fit the linkage of the side wheel against to the vehicle body. 3. Tighten four Φ4x16 truss head screws to secure it.
- Page 8 Assembly...
- Page 9 Assembly 1. Fit the front wheel cover against to the front fender. 2. Insert four Φ3x10 round head screws through the front fender wall and into the front wheel cover and tighten. 3. Repeat for the other front wheel cover. 4.
- Page 10 Assembly...
- Page 11 Assembly 1. Fit the straight end of the front fork into the hole on the front of the vehicle. 2. Fit the handle bar to the front fork. 3. Align the holes on each side of the handle bar with the holes at the end of front fork. 4.
- Page 12 Assembly Front view 1. Fit the windshield to the faceguard. 2. Insert two Φ3x10 round head screws and tighten with a screwdriver. 3. Plug the connector on the faceguard into the connector on the vehicle. 4. Insert the tabs on the faceguard into the slots on the front of the vehicle. 5.
- Page 13 Assembly Seat inside view B a t t e r y Remove the screw on the top of the seat and lift the seat. 1. Insert the red vehicle connector into the red terminal on the battery 2. Replace the seat. 3.
- Page 14 Assembly 1. Insert the tabs on the turn signal into the hole on the side of vehice. Push it until you hear it “click” into place. Repeat for the other turn signal. 2. Fit the rear number plate to the vehicle.
- Page 15 Assembly 1. Fit the tool box to vehicle body, push until you hear it “click” into place. 2. Open the tool box, insert the two Φ4x12 flat head screw through the tool box and into the vehicle, tighten with a screwdriver. 3.
- Page 16 Use Your New Ride-on IMPORTANT! 1. Power Switch: Turns the vehicle on and off. 2. Forward/Reverse switch: Changes the direction that vehicle moves from forward to reverse. 3. Foot pedal: Applies power (speed) to the ride-on. ● To move the ride-on, press the pedal down. ●...
- Page 17 Charging WARNING! This product with Charging Protection: when charging, all functions will be cut off! Only an adult can charge and recharge the battery! • The POWER SWITCH must be turned in OFF position when charging. • Do not recharge the battery for more than 10 hours to avoid overheating the charger.
- Page 18 Maintaining • It is parents' responsibility to check main parts of the toy before using, Must regularly examine for potential hazard, such as the battery, charge,cable or cord, plug, screws are fastening enclosure of other parts and that in the event of such damage, the toy must not be used until that damage had been properly removed.
-
Page 19: Troubleshooting Guide
Troubleshooting Guide Possible Cause Solution Problem Vehicle does not run Battery low on power Recharge battery. Thermal fuse has tripped The fuse will reset automatically in 20 seconds. Check that the battery connectors are firmly plugged Battery connector or wires into each other. -
Page 20: Disposal Of Battery
Disposal Of Battery ● Your sealed lead-acid battery must be recycled or disposed of in an environ- mentally sound manner. ● Do not dispose of your lead-acid battery in a fire. The battery may explode or leak. ● Do not dispose of a lead-acid battery in your regular, household trash. The incineration, land filling or mixing of sealed lead-acid batteries with household trash is prohibited by law.


Need help?
Do you have a question about the 370-159V70 and is the answer not in the manual?
Questions and answers