Advertisement
Quick Links
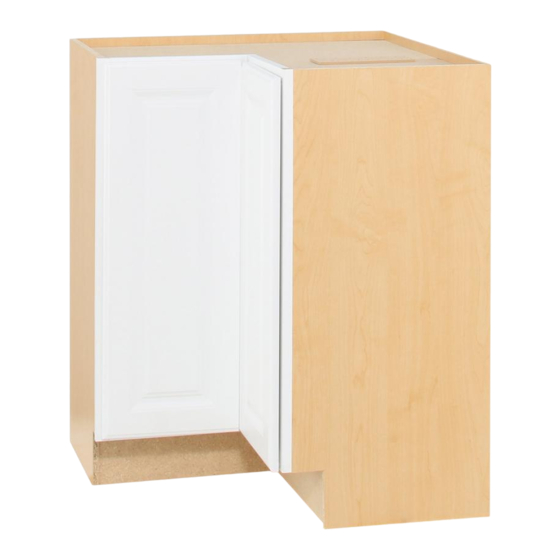
UNFINISHED LAZY SUSAN CABINET INSTALLATION |
INSTALACIÓN DEL GABINETE INACABADO DE LAZY SUSAN
CABINET PREPARATION |
Start your cabinet install by making sure the corner cleat
A
is in place. It should be level, 34.5" above the high spot of
the floor. The cleats (not provided) are necessary to support
the countertop.
Comienza la instalación de tu gabinetes asegurándote de que el listón
para esquinero esté en su lugar. Debe estar nivelado, 87.6 cm desde
el punto alto del piso. Los listones (no incluidos) son necesarios para
sostener el mostrador.
Your Lazy Susan cabinet will be placed away from the
B
corner, and the front edge of the cabinet must align with
the cabinets next to it.
There is an intentional void space behind the Lazy Susan
cabinet. The corner cabinet will be placed away from the wall
[B], and the cabinets to the left and right will be a guide to
how it flushes to the front edge.
Tu gabinete con Lazy Susan se colocará lejos de la esquina y el borde
delantero del mismo debe quedar alineado con los gabinetes junto a él.
Hay un espacio vacío intencional detrás del gabinete con Lazy Susan.
El gabinete esquinero se colocará lejos de la pared [B] y los gabinetes
hacia la izquierda y la derecha servirán de guía para colocarlo al ras en
el borde delantero.
These adjoining cabinets [C] will have to be clamped
C
and secured with standard permanent methods (glue,
screws, pressure) to form a corner unit. This new unit of
three cabinets does butt to the wall, as the outside two
cabinets are made to use the whole depth. Push the 3-unit
against the wall. Shim cabinets level to align with the cleats.
Estos gabinetes contiguos [C] deberán sujetarse con abrazaderas y
asegurarse con métodos permanentes estándar (pegamento, tornillos,
presión) para formar una unidad esquinera. Esta nueva unidad de tres
gabinetes se coloca a tope con la pared, ya que los dos gabinetes
C L E A T
28.5"
16.5"
36"
PREPARACIÓN DEL GABINETE
externos están hechos para
usar toda la profundidad.
Empuja la unidad de 3
contra la pared. Calza los
gabinetes nivelados para
36"
alinearlos con los listones.
TOP VIEW:
Open space: Void
areas in hatched
black line.
VISTA SUPERIOR:
Espacio libre: Áreas
vacías rayadas en
negro.
U180734 | 5-22
A
Corner cleat, top is level to a leveled floor |
esquinero, la parte superior debe estar nivelada con un piso nivelado
B
VOID areas in hatched black, cabinet is spaced away from
wall |
Áreas vacías rayadas en negro, el gabinete está separado de
la pared
C
Securely join cabinets to each other and push new unit of
three cabinets against the wall |
gabinetes entre sí y coloca la nueva unidad de tres gabinetes contra
la pared
34.5"
Listón para
Une de manera segura los
Advertisement

Related Manuals for HAMPTON BAY Lazy Susan KBLS36-SW


Summary of Contents for HAMPTON BAY Lazy Susan KBLS36-SW
- Page 1 UNFINISHED LAZY SUSAN CABINET INSTALLATION | INSTALACIÓN DEL GABINETE INACABADO DE LAZY SUSAN U180734 | 5-22 CABINET PREPARATION | PREPARACIÓN DEL GABINETE Start your cabinet install by making sure the corner cleat is in place. It should be level, 34.5" above the high spot of the floor.
- Page 2 and methanol, which is known to the State of California to cause birth Important health notice: Some of the building materials used in defects or other reproductive harm. For more information go to www. this home (or these building materials) emit formaldehyde. Eye, P65Warnings.ca.gov nose, and throat irritation, headache, nausea and a variety of asthma- like symptoms, including shortness of breath, have been reported as a...
- Page 3 to provide We have partnered with BILT ™ 3D interactive instructions for this product. Download the free BILT app to a mobile ™ device and search “Woodmark” Nos hemos asociado con BILT para proporcionar instrucciones interactivas en 3D para este producto.
- Page 4 AMERICAN WOODMARK Representative by mail, email, fax or telephone at the address or phone numbers listed on this page. All warranty claims must include the model CORPORATION LIMITED WARRANTY number of the product, copy of the original receipt and the nature of the This warranty covers defects in materials and workmanship in your problem.
Need help?
Do you have a question about the Lazy Susan KBLS36-SW and is the answer not in the manual?
Questions and answers