
Related Manuals for Cardini OV9250


Summary of Contents for Cardini OV9250
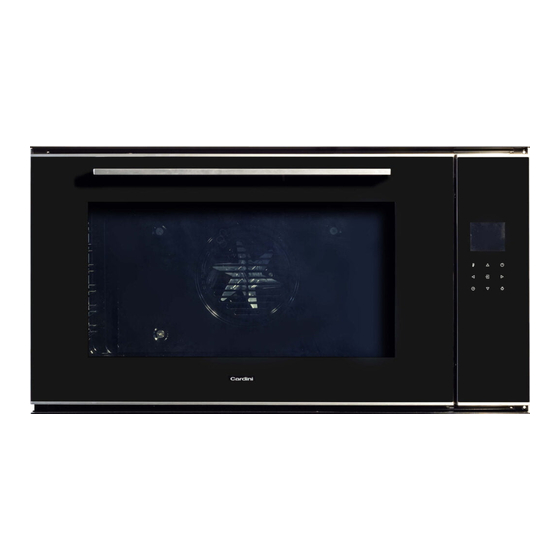
- Page 1 90cm BUILT-IN ELECTRIC OVEN INSTRUCTION MANUAL Read this manual carefully before operation Note: Pictures in this manual are for reference only. OV9250 Electronic controls - 90cm electric oven...
-
Page 2: Table Of Contents
Contents Contents..............How to Keep your Oven in Shape......Safety Instructions........... Installing the Appliance..........Control Panel and Display........Operation..............Oven Functions............Useful Notes for Cooking......... Troubleshooting............Practical Cooking Advice......... Technical Specifications.......... Warranty & Service.......... -
Page 3: How To Keep Your Oven In Shape
How to Keep your Oven in Shape This appliance is for household use only and is not to be used outdoors. Important: Before cleaning your oven or performing maintenance, disconnect it from the power supply. To extend the life of your oven it must be cleaned frequently, keeping in mind the following: •... - Page 4 The appliance must not be installed behind a decorative door in order to avoid overheating. Ensure that shelves are installed with the raised barrier to the rear, in order to prevent cooking dishes or the like from sliding over the rear edge. The following maintenance should be undertaken by an authorised service centre or similarly qualified persons in order to avoid a hazard.
- Page 5 WARNING: It is essential to use specific soft wire or specific groupware bought from the manufacturer or maintenance department to replace any broken soft wires. Protective kit During operation, the oven glass door and adjacent parts of the appliance become hot. Make sure, therefore, that children do not touch the appliance.
- Page 6 Fig. 1 Fig. 2 Instructions to remove glass from the oven door The oven door is made up of 3 panes of glass and has vents at the top and bottom. When the oven is operating, air is circulated through the door to keep the outer pane cool. If condensation has worked its way in between the glass panes, the door can be dismantled in order to clean in between the panes.
-
Page 7: Safety Instructions
Safety Instructions • This appliance is designed for non-professional, household use and its functions must not be changed. • The electrical system of this appliance may be used safely only when it is correctly connected to an efficient earthing system in compliance with the safety standards currently in effect. •... -
Page 8: Installing The Appliance
Qualified personnel must be contacted in the following cases: − Installation (Following the manufacturers instructions); − When in doubt about operating the appliance; − Replacing the electrical supply. Service Centres authorised by the manufacturer must be contacted in the following cases: −... - Page 9 Fig. 7 Provide a 30cm x 10cm vent with 50% ventilation openings on the kickboard or provide an alternative means of free airflow through the front, of equal opening area. Important note for the Cabinet maker To provide adequate ventilation for oven cooling, there must be appropriate ventilation openings in the front bottom and the top part with an area of 200cm²...
- Page 10 Fig. 8 NOTE: Provide adequate ventilation as per notes min. on previous page. min. 400 x 700 base cut-out 897.4 23.7 Cabinetmaker shall verify all dimensions prior to manufacture by measuring the actual oven unit Connecting the power supply cable to the mains The appliance must be directly connected to the mains using an omnipolar circuit- breaker with a minimum contact opening of 3mm installed between the appliance and the mains, suitable for the load indicated and complying with current directives (the...
- Page 11 The power supply cable must be positioned so that it does not exceed 50°C more than room temperature at any point of its length. Before making the connection check that: • the electrical supply can support the appliance load (see data label); •...
-
Page 12: Control Panel And Display
A. Control Panel B. Touch control board D. Door C. Display Control Panel & Display Display Description Control Description 1. Function / programme 11. On/off 2. Set temperature 12. Up 3. Actual temperature 13. Down 4. Boost 14. Left 5. Timer 15. -
Page 13: Operation
Operation Press the (11) button to turn the oven on. When turned on, the display will light up and the time of day will be shown. Function / Temperature To select a function, press the (14,15) buttons to toggle through the functions and press SELECT (19) once you have reached the required function. - Page 14 Alarm setting To set the Alarm/minute minder, press the (17) button until the symbol starts to flash. (12,13) to adjust the time and then press SELECT (19) to confirm. If you want to cancel the alarm, set the alarm time back to '0:00' and press SELECT to confirm.
-
Page 15: Oven Functions
Oven Functions Press the programme button (1) continuously to scroll through the functions below: Light - - Press the light button on the control panel to switch the light on and off. The light symbol will show on the display when the light is on. Defrost - The air at ambient temperature is distributed inside the oven for defrosting food quicker. -
Page 16: Useful Notes For Cooking
Useful notes for cooking The table below provides some helpful cooking tips: Faults Causes Remedies The upper crust Not enough heat from the bottom - Use the natural convection position is dark and the - Use deeper cake tins lower part too pale - Lower the temperature - Put the cake on a lower shelf The lower part is... -
Page 17: Practical Cooking Advice
Practical Cooking Advice Preheating If the oven must be preheated (generally this is the case when cooking leavened foods), use the "Ventilation mode" when possible in order to save energy. Once the food has been placed in the oven, the most appropriate cooking mode can then be selected. - Page 18 The pastry sticks to the pan Grease the pan well and sprinkle it with a dusting of flour. I used more than one level and they are not all at the same cooking point Use a lower temperature setting. It is not necessary to remove the food from all the racks at the same time.
-
Page 19: Technical Specifications
Shaded motor (top) 15Watt Oven light 15Watt Circle heating el. 2800Watt 220-240V,50-60Hz Voltage and frequency: 2800W(220V)-3400W(240V) Power supply max: Warranty & Service For warranty information, please visit the Cardini website: www.cardini.com.au For any service issues, please email our customer care team: service@cardini.com.au...
Need help?
Do you have a question about the OV9250 and is the answer not in the manual?
Questions and answers