Table of Contents
Advertisement
Quick Links
Advertisement
Chapters
Table of Contents

Related Manuals for Epson EMP-S3L


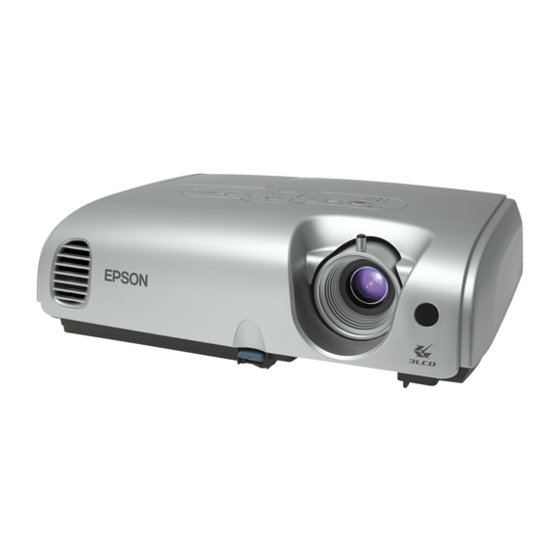
Summary of Contents for Epson EMP-S3L
- Page 1 Epson PowerLite User’s Guide...
-
Page 2: Notations Used In This Guide
Notations Used in This Guide Indicates procedures which may result in damage or injury if sufficient care is not taken. Indicates additional information and points which may be useful to know regarding a topic. Indicates a page where useful information regarding a topic can be found. Click on the page number to display that page. - Page 3 Epson is not responsible for any use of this information as applied to other products. Neither Seiko Epson Corporation nor its affiliates shall be liable to the purchaser of this product or third parties for damages, losses, costs, or expenses incurred by purchaser or third parties as a result of: accident, misuse, or abuse of this product or unauthorized modifications, repairs, or alterations to this product, or (excluding the U.S.) failure to strictly...
-
Page 4: Table Of Contents
Contents Notations Used in This Guide..........2 Security functions..............28 Contents .................4 Preventing theft (Password Protect).......... 28 Projector Features..............6 Operation Button Lock Function..........31 Part Names and Functions.............8 Configuration Menu Front/Top ..................8 Control Panel ................9 Using the Configuration Menu ..........34 Rear ................... - Page 5 List of ESC/VP21 Commands ..........72 Command List................72 Cable Layouts ................72 List of Supported Monitor Displays........73 Specifications ...............74 Appearance ................75 Important Safety Instructions..........76 Epson America, Inc. Limited Warranty .........78 Index..................80 FCC Compliance Statement..........82 Declaration of Conformity.............82 Remote Control ................. 83...
-
Page 6: Projector Features
Projector Features A single foot design simplifies leveling adjustments You can easily make height adjustments with one hand. sSetup Guide You can enjoy images of “Photos,” “Presentations,” “Games,” and so on, in the optimum color tone by choosing the most suitable mode for your surroundings. - Page 7 Projector Features When you cannot setup this projector directly in front of the screen, the projection position can be adjusted to fit on the screen. sp.18 Manage users with password protect You can set up a password to restrict the use of the projector. sp.28 Operation lock stops the use of all control panel buttons except for the Power button...
-
Page 8: Part Names And Functions
Part Names and Functions Front/Top • Security lock ( ) sp.70 • • Lamp cover sp.61 Control panel sp.9 Open this cover when replacing the • projector's lamp. Focus ring (See the Quick Setup sheet) • Adjusts the image focus. Air exhaust vent Do not touch the exhaust vent •... -
Page 9: Control Panel
Part Names and Functions Control Panel • [ ] [ ] button • • [Menu] button [Enter] button sp.14, p.34 sp.34 sp.34 Displays and closes the configuration menu. Automatically adjusts analog RGB images from Press to correct keystone distortion. computers and RGB video images to the optimum If a configuration menu or help screen settings. -
Page 10: Rear
Part Names and Functions Rear • • S-Video port Video port (See the Quick (See the Quick • Computer port • Setup sheet) Setup sheet) USB port sp.25, p.72 (See the Quick Setup sheet) Inputs S-Videog Inputs composite Connects the projector to a computer via the Inputs analog RGB video signals from a signals to the videog... -
Page 11: Base
Part Names and Functions Base • Foot adjust lever • Front adjustable foot (See the Quick Setup sheet) • Lens cover string attachment ring Remove this when suspending the projector from a ceiling. • Air filter (air intake vent) p.65 sp.59, This prevents dust and other foreign particles from getting inside the projector when air is... -
Page 12: Remote Control
Part Names and Functions Remote Control If you position the over the button icon or button name, a description of that button will appear. • • [Page down] [Page up] buttons Remote control light-emitting area sp.26 • [E-Zoom] button ( ) ( ) sp.24 •... -
Page 13: Adjusting And Changing The Image
Adjusting and changing the image This section explains how to adjust image quality, volume, and the color mode. It also explains how to change the image source and adjust the projection position. -
Page 14: Adjusting The Image Quality
Adjusting the Image Quality Adjusting Computer Images and RGB Video Images Adjusting the Tracking If vertical stripes appear in the projected Automatic Setup computer or RGB video images, and this cannot Automatic setup detects analog RGB signals coming from a connected be fixed using automatic setup, you will need to computer, and automatically adjusts these signals so that the optimum adjust the... - Page 15 Adjusting the Image Quality Adjust the tracking until the vertical stripes disappear Adjusting the Sync from the image. If flickering, fuzziness or interference appear in computer or RGB video images, and this cannot be fixed using automatic setup, you will need to adjust the Sync (synchronisation)g manually...
-
Page 16: Selecting The Projection Type (Color Mode)
Adjusting the Image Quality Selecting the Projection Type (Color Mode) Adjust the synchronization until the horizontal noise The following seven preset color modes are available. You can easily disappears from the image. obtain the optimum image quality simply by selecting the color mode that corresponds to the projected images. - Page 17 Adjusting the Image Quality PROCEDURE Remote control Each time you press the button, the color modes change in the following order. The current setting appears in the top-right corner of the screen each time the color mode is changed. While the color mode name is displayed on the screen, it does not change to the next color mode setting unless you press the button.
-
Page 18: Adjusting The Projection Position (Image Shift)
Adjusting the Projection Position (Image Shift) When you cannot setup the projector directly in front of the screen, the Remote control Control panel projection position can be moved without moving the projector. Press the [Esc] button to close the adjustment PROCEDURE screen. -
Page 19: Adjusting The Volume
Adjusting the Volume The volume of the projector’s built-in speaker can be adjusted as follows. PROCEDURE Remote control When the [ ] button is pressed, the volume increases. When the [ ] button is pressed, the volume decreases. The volume gauge appears on the screen while the volume is being adjusted. -
Page 20: Changing The Projected Image (Source Search)
Changing the Projected Image (Source Search) Automatically Detect Incoming Signals and Change the Projected Image (Source Search) • When your video equipment is connected, start playback. The picture signal input from the connected equipment is automatically • The following screen is displayed when there is only detected and projected. -
Page 21: Useful Functions
Useful Functions This section explains useful functions for giving presentations and other projection, and also explains the security functions. -
Page 22: Functions For Enhancing Projection
Functions for Enhancing Projection Pausing the Image and Sound (A/V Mute) Freezing the Image (Freeze) For example, this can be used if you want to pause the projection for a The source image continues to project even when the screen is frozen. You can moment and focus the audience’s attention on what you are saying. -
Page 23: Changing The Aspect Ratio (Resizing)
Functions for Enhancing Projection Changing the Aspect Ratio (Resizing) Displaying the Pointer (Pointer) This function changes the aspect ratiog of images from 4:3 to 16:9 when This allows you to move a pointer icon on the projected image, and helps you component videog, S-Videog, or composite videog... -
Page 24: Enlarging Part Of The Image (E-Zoom)
Functions for Enhancing Projection Move the pointer icon. Enlarging Part of the Image (E-Zoom) Remote control This is useful when you want to see images in greater detail, such as graphs and details in a table. Pointer icon PROCEDURE You can use the "Pointer Shape" command in the "Settings"... -
Page 25: Using The Remote Control To Operate The Mouse Pointer (Wireless Mouse)
Functions for Enhancing Projection Move the crosshair to the area of the image that is to Using the Remote Control to Operate the Mouse be enlarged or reduced. Pointer (Wireless Mouse) Remote control If the USB terminal of a computer and the USB terminal on the back of this projector are connected by a commercially available USB A-B cable, you can use the projector’s remote control like a wireless mouse to control the computer’s mouse pointer. - Page 26 Functions for Enhancing Projection Once the connection has been made, the mouse pointer can be operated as follows. • The USB cable can only be connected to computers with a standard USB interface. If using a computer Moving the mouse pointer Mouse clicks which is running Windows, the computer must have had a full version of Windows 98/2000/Me/XP Home...
- Page 27 Functions for Enhancing Projection • If the mouse button settings are set to reverse on the computer, the operation of the remote control buttons will also be reversed. • The wireless mouse function cannot be used while the following functions are being used. ·...
-
Page 28: Security Functions
"The projector’s operation will be locked. Contact the nearest address provided in the “International Warranty Conditions” section of the Safety Instructions/ World Wide Warranty terms.” If you see this message, contact Epson. sp.56... - Page 29 Security functions When “Password Timer” is set to “ON” and “Timer” is used Setting Password Protect The password entry screen will not be displayed at all when the power is Use the following procedure to set Password Protect. turned on until the length of time that has been set has elapsed. When the set length of time has elapsed, the password entry screen will be displayed PROCEDURE each time the power is turned on.
- Page 30 Security functions Turn “Password Timer” on. Enter the password. If you don't use this setting, proceed to step 4. (1) To set a password, select “Password” and then press the (1) Select “Password Timer,” and then press the [Enter] [Enter] button. button.
-
Page 31: Operation Button Lock Function
Security functions Operation Button Lock Function Set to “ON.” If set to “ON,” none of the buttons on the control panel except This function locks the buttons on the projector's control panel. the [Power] button can be operated. This function is useful at times such as during show events so that only projection is carried out deactivating all buttons operation, or in places such as schools to limit the range of buttons that can be operated. - Page 32 Security functions When the confirmation message is displayed, select “Yes.” The control panel buttons will be locked in accordance with the selected setting. There are two methods to cancel the projector’s control panel lock. • Using remote control, change the “Settings” - “Operation Lock”...
-
Page 33: Configuration Menu
Configuration Menu This section explains how to use the configuration menu and its functions. -
Page 34: Using The Configuration Menu
Using the Configuration Menu Buttons used Selecting from Selecting from Changing the Control panel the top menu the sub menu selected item Top menu Remote control guide Sub menu (Settings) Select the setting to change. -
Page 35: List Of Functions
List of Functions “Image” Menu The items that can be set will vary depending on the input source that is currently being projected. Setting details are saved separately for each source. Computer/RGB video Component videog/ Composite videog/ S-Videog Sub-menu Function Color Mode Select the type of image to suit your surroundings. -
Page 36: Signal" Menu
List of Functions “Signal” Menu The items that can be set will vary depending on the input source that is currently being projected. Setting details are saved separately for each source. Computer/RGB video Component videog Composite videog/ S-Videog Sub-menu Function Auto Setup Selects whether the automatic adjustment function for automatically optimising images when the input source is changed is turned “ON”... -
Page 37: Settings" Menu
List of Functions "Settings" Menu Sub-menu Function Keystone Corrects vertical keystone distortion in images. Zoom Adjusts the size of the projected image. Wide: Larger Tele: Smaller Image Shift Adjusts the projection position. sp.18 Operation When set to “ON,” the operation of all buttons on the projector's control panel except for the [Power] button will be disabled. sp.31 Lock Pointer... -
Page 38: Extended" Menu
List of Functions “Extended” Menu Sub-menu Function Display This lets you make settings related to the projector’s display. Message: Sets whether the input source name or color mode name or a message is displayed on the screen (“ON”) or not displayed (“OFF”) at times such as when the input source or color mode is changed or when no image signals are being input. - Page 39 List of Functions Sub-menu Function Direct Power ON: Operation Sets whether direct power on is enabled (“ON”) or disabled (“OFF”). When you set to “ON” and leave the power cable connected to a wall socket, be aware of that sudden surges of electricity that may occur when power comes back on after a power outage may cause the projector to turn on automatically.
-
Page 40: Info" Menu
(Does not appear when the input source is composite video or S-video.) Sync. Info Information from this menu may be required when you ask for service from your dealer or from Epson. sp.56 (Does not appear when the input source is composite video or S-video.) -
Page 41: Reset" Menu
List of Functions “Reset” Menu Sub-menu Function Reset All Resets all items in all menus to their default settings. •The “Computer Input,” “Zoom,” “Image Shift,” “User’s Logo,” “Lamp Hours,” and “Language” settings will not be reset to their defaults. Lamp-Hours Clear the cumulative lamp operating time and reset to “0H.”... -
Page 42: Troubleshooting
Troubleshooting This chapter describes how to identify problems and what to do if a problem is found. -
Page 43: Using The Help
Using the Help Select a menu item. If a problem occurs with the projector, the Help function uses on-screen displays to assist you in solving the problem. It uses a series of menus in a question and answer format. PROCEDURE Display the Help menu. - Page 44 Using the Help Repeat the operations in steps 2 and 3 to proceed through the menu to more detailed items. Press the [Help] button to exit the help menu. If the Help function does not provide a solution to the problem, refer to “Problem Solving”...
-
Page 45: Problem Solving
Internal error Stop using the projector, disconnect the power cable from the electrical outlet, and contact your Power dealer or Epson. sp.56 Fan related error/ Stop using the projector, disconnect the power cable from the electrical outlet, and contact your... - Page 46 If this does not solve the problem and the projector continues to overheat or the indicators continue to show a problem when the power is turned on, stop using the projector, disconnect the power cable from the wall outlet, and contact your dealer or Epson. sp.56 Lamp timer failure/ Take out the lamp and check if it is broken.
- Page 47 • If the projector is not operating properly even though the indicators are all showing normal, refer to “When the Indicators Provide No Help” on the following page. • If an indicator is showing a status which does not appear in the previous tables, contact your dealer or Epson. sp.56...
-
Page 48: When The Indicators Provide No Help
Problem Solving When the Indicators Provide No Help If any of the following problems occur and the indicators do not offer a solution, refer to the pages given for each problem. Problems relating to images Problems when projection starts No images appear Power does not turn on sp.49 sp.54... -
Page 49: Problems Relating To Images
Problem Solving Problems relating to images No images appear Check Remedy Was the [Power] button pressed? Press the [Power] button to turn the power on. Are both indicators switched off? The power cable is not connected correctly or power is not being supplied normally. Connect the projector’s power cable correctly. -
Page 50: The Message "Not Supported." Is Displayed
Problem Solving The message “Not Supported.” is displayed Check Remedy Are the image signal format settings If a composite videog S-Videog source is connected to the projector, use the “Video Signal” menu command to select the signal format. “Signal” - “Video Signal” correct? sp.36 Only when projecting images... -
Page 51: Images Are Fuzzy Or Out Of Focus
Problem Solving Images are fuzzy or out of focus Check Remedy Has the focus been adjusted correctly? Turn the focus ring on the projector to adjust the focus. Is the lens cover still attached? Remove the lens cover. Is the projector at the correct distance? The recommended projection distance ranges from 2.9 ft (87 cm) to 39.8 ft (1212 cm). - Page 52 Problem Solving Image is too large and cut off, or too small Check Remedy Has the “Aspect ratiog” been set Press the [Resize] button on the remote control. sp.23 correctly? Is the image still being enlarged by the Press the [Esc] button on the remote control to cancel the E-Zoom function. sp.24 E-Zoom function? Has the “Position”...
-
Page 53: Image Colors Are Not Right
Problem Solving Image colors are not right Check Remedy Do the input signal settings match the If a composite videog S-Videog source is connected to the projector, use the “Video Signal” menu command to select the video signal format. signals from the connected device? “Signal”... -
Page 54: Problems When Projection Starts
There is probably a poor contact in the power cable, or the power cable may be defective. Reinsert the power cable. If this does not solve the problem, stop using the projector, disconnect the power cable from power cable is touched? the wall outlet and contact Epson. sp.56 Other problems... -
Page 55: The Remote Control Does Not Work
Problem Solving The remote control does not work Check Remedy Is the remote control facing towards the Face the remote control towards the remote control light-receiving area. The operating angle for the remote control is approximately ±30º horizontally and approximately ±15º remote control light-receiving area on the vertically. -
Page 56: Where To Get Help
Telephone Support Services To use the Epson PrivateLine Support service, call (800) 637-7661 and enter the PIN on the included Epson PrivateLine Support card. This is the fastest way of speaking to a live representative, and it’s free. This service is available... -
Page 57: Appendices
Appendices This chapter provides information on maintenance procedures to ensure the best level of performance from the projector. -
Page 58: Installation
Installation Setting Up the Projector • Front/ceiling projection (Front/Ceiling projection) The projector supports the following four different projection methods, allowing you to choose the best method for displaying your images. • Before setting up the projector, make sure you read the Important Safety Instructions first. -
Page 59: Maintenance
Maintenance This section describes maintenance tasks such as cleaning the projector and Cleaning the Air Filters and Air Intake Vent replacing consumable parts. If dust collects on the air filter or the air outlet, it can cause the internal temperature of the projector to rise, and this can lead to problems with Cleaning operation and shortening of the optical engine's service life. -
Page 60: Replacing Consumables
Maintenance Replacing Consumables Insert the batteries. Check the positions of the (+) and (–) marks inside the battery This section explains how to replace the remote control batteries, the lamp, holder to ensure that the batteries are inserted the correct way. and the air filters. - Page 61 Maintenance Lamp Replacement Period • The lamp replacement message is set to appear after the It is time to replace the lamp when: following periods of time in order to maintain the initial brightness and quality of the projected images. •...
- Page 62 Maintenance Loosen the two lamp screws. PROCEDURE Loosen the two lamp screws with the screwdriver that is supplied with the spare lamp (or your own cross head [Phillips] After you turn off the projector’s power, and the screwdriver). confirmation buzzer beeps twice, disconnect the power cable.
- Page 63 Maintenance Install the new lamp. Insert the new lamp so that it fits in place correctly. Once it is fully inserted, tighten the two screws. Install the lamp cover. Slide the lamp cover onto the projector and tighten the cover screw.
- Page 64 Maintenance Select “Reset” from the configuration menu, and then Resetting the Lamp Operating Time select “Lamp-Hours reset.” The projector has a built-in counter which keeps track of the lamp operating time. When the cumulative operating time reaches a certain For details on this operation, refer to Using the Configuration “...
- Page 65 Maintenance Install the new air filter. Replacing the Air Filter Slide the air filter covers in from the outside and push them in If the air filters are broken or if the warning message reappears after they have been cleaned, they should be replaced. until they click into place.
-
Page 66: Saving A User's Logo
Saving a User's Logo You can record the image that is currently being projected as a user's logo. Select “Extended” from the configuration menu, and then select “User’s Logo.” For details on this operation, refer to Using the Configuration “ When a user's logo is recorded, the previous user’s logo Menu.”... - Page 67 Saving a User's Logo When “Choose this image as the User's Logo?” appears, select “Yes.” User's logos can be saved at up to 400 × 300 dots in size. When you press the [Enter] button on either the remote control or the projector's control panel, the image will be displayed at its original resolution, so if a signal with a When “Select this image?”...
-
Page 68: Checking Projected Images On An External Monitor (Monitor Output)
Checking Projected Images on an External Monitor (Monitor Output) While performing presentations and so on, you can check analog RGB images and RGB video images from a computer being input to the "Computer/ Component Video" terminal by connecting an external monitor to this projector. -
Page 69: Optional Accessories And Consumables
800-GO-EPSON (800-463-7766) or browse our catalog of products at www.epson.com, select the product you are interested in, and click “Where to Buy.” To purchase online, please visit the Epson Store at www.epsonstore.com (U.S. sales only). In Canada, please call 800-463-7766 for a reseller referral.This list of optional accessories is current as of January 2005. -
Page 70: Glossary
Glossary The following is an explanation of some of the terms used in this guide which may be unfamiliar or which are not explained in the text of this guide itself. Further information can be obtained by referring to other commercially-available publications. Aspect ratio The ratio between an image's length and its height. - Page 71 Glossary Squeeze mode In this mode, wide-screen images in 16:9 mode are compressed in the horizontal direction so that they are stored on the recording medium as 4:3 images. When these images are played back by the projector in squeeze mode, they are restored to their original 16:9 format. sRGB An international standard for colour intervals that was formulated so that colours which are reproduced by video equipment can be handled easily by computer operating systems (OS) and the Internet.
-
Page 72: List Of Esc/Vp21 Commands
List of ESC/VP21 Commands Command List Cable Layouts When a power on command is sent to the projector, the power will turn on USB connection and the projector will change to warm-up mode. When the power has Connector shape: USB (type B) turned on, a colon ":"... -
Page 73: List Of Supported Monitor Displays
List of Supported Monitor Displays Computer/RGB Video Component Video/RGB Video Source Projected Resolution (dots)* Signal Refresh rateg (Hz) Resolution Resolution* Signal Refresh rateg (Hz) Aspect ratiog Aspect ratio (dots) (dots) 16:9 640 × 480 800 × 600 SDTV g(525i) 800 × 600 800 ×... -
Page 74: Specifications
Specifications * The USB interface complies with the USB 1.1 standard. Product name PowerLite S3 The USB connector is not guaranteed to operate correctly with all USB- 327 (W) × 86 (H) × 246 (D) mm (not including feet) Dimensions compatible devices. -
Page 75: Appearance
Appearance 3-M4×9 Center of lens 50.1* 83.7 104.7 69.7 *Distance from center of lens to suspension bracket fixing point Units: mm... -
Page 76: Important Safety Instructions
Important Safety Instructions Please read the following important information about your projector. • Take the following precautions when handling the plug. Failure to comply with these precautions could result in sparks or fire or electric shock. • Do not insert the plug into an outlet with dust present. •... - Page 77 Contact your dealer or Authorized source. Mercury lamps may make a loud noise when they break. Handle the Epson Service Center to clean inside the projector at least once a year. A lamp with extreme care while observing the following. If the following charge will be levied for this service.
-
Page 78: Epson America, Inc. Limited Warranty
EPSON property. The exchanged product REFUND OF THE PRICE PAID FOR THE EPSON PRODUCT COVERED or part may be new or previously refurbished to the EPSON standard of BY THIS LIMITED WARRANTY. EXCEPT AS PROVIDED IN THIS quality, and at EPSON’s option, the replacement may be another model of like... - Page 79 This warranty gives you specific legal rights, and you may also have other rights, which vary from jurisdiction to jurisdiction. To locate the Authorized EPSON Servicer nearest you, call the EPSON Connection at (800) 637-7661 + PIN or (562) 276-4394 in the U.S. and (905) 709-3839 in Canada or write to: Epson America, Inc., P.O.
-
Page 80: Index
Display .........38 Aspect ratio........23 "Image" Menu......35 Audio input ........10 Image Shift........37 Numeric buttons ......12 Auto Setup ......14 EPSON Image shift ........18 accessories......56 "Info" Menu ......... 40 PrivateLine Support ....56 Input Signal........40 technical support ....56 Operating temperature....74... - Page 81 Index Power ON Protect......28 Setting Up the Projector ....58 Presentation ......... 16 Sharpness........35 USB port ........10 Presenters Online......56 Sleep Mode........39 User’s Logo ......... 66 PrivateLine Support..... 56 Source...........40 User’s Logo Protect ..... 29 Problem Solving ......45 Source Search......
-
Page 82: Fcc Compliance Statement
However, there is no guarantee that interference EPSON AMERICA, INC. will not occur in a particular installation. If this equipment does cause Located at... -
Page 83: Remote Control
Part Names and Functions Remote Control • • [Page down][Page up] buttons Remote control light-emitting area (See the Quick Setup sheet) sp.26 When using the remote control as a wireless mouse, press these buttons to scroll back and Outputs remote control signals. forth through pages in a PowerPoint file.
Need help?
Do you have a question about the EMP-S3L and is the answer not in the manual?
Questions and answers