Advertisement
Quick Links
DME11D327-06
Maintenance mode manual
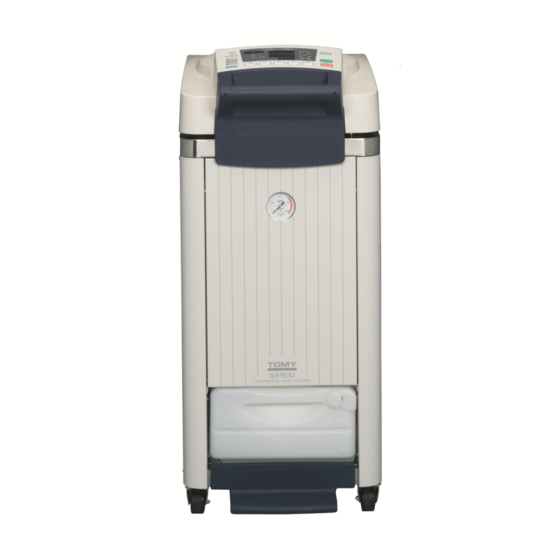
Autoclave
SX-300/500/700, SX-300E/500E/700E
TOMY SEIKO CO.,LTD.
TOMY DIGITAL BIOLOGY CO.,LTD.
3-14-17 Tagara,Nerima-ku,Tokyo 179-0073,Japan
e-mail:info@digital-biology.co.jp
URL:http://www.digital-biology.co.jp
phone:+81-3-5971-8160
fax:+81-3-3970-6036
Advertisement

Summary of Contents for Tomy SX-300
- Page 1 DME11D327-06 Maintenance mode manual Autoclave SX-300/500/700, SX-300E/500E/700E TOMY SEIKO CO.,LTD. TOMY DIGITAL BIOLOGY CO.,LTD. 3-14-17 Tagara,Nerima-ku,Tokyo 179-0073,Japan e-mail:info@digital-biology.co.jp URL:http://www.digital-biology.co.jp phone:+81-3-5971-8160 fax:+81-3-3970-6036...
-
Page 2: Function Key
C. 0 0 2) Press the HR-TIMER/℃-WARM setting ▲ or ▼ keys to select the SX-Model code 1 = SX-300/300E, 2 = SX-500/500E, 3 = SX-700/700E (e.g., this is case of SX-700) C. 0 0 3) Press the START key keep pressing over 3 seconds. - Page 3 5) Turn off the power supply switch. 6) Turn on the power supply switch. It is displayed as shown below during 5 sec. a. 3 U 1.1 0 1: SX-300/300E Program Ver, number 2:SX-500/500E 3:SX-700/700E 3. Temperature display adjustment [ c.01 ] 1) Selecting Maintenance code [ C 01 ] C.
- Page 4 DME11D327-06 4. Pressure display and adjustment [ c.02 ] As you make an adjustment of pressure, the lid opens before the maintenance mode. 1) Selecting Maintenance code [ C 02 ] C. 0 2 - - - - -l 2) Press the START key (e.g., adjusted value –0.1 , Pressure 0.1 Kpa) 0.
- Page 5 DME11D327-06 6. Error History [ c.04 ] 1) Selecting Maintenance code [ C 04 ] C. 0 4 - - - - -l 2) Press the START key Er. 0 E 0 1 - -l 3)Temperature ▲ ▼ keys : Indicate last 10 Error Code 7.
- Page 6 DME11D327-06 8. SYSTEM PARAMETER [ c10 ] 1) Selecting Maintenance code [ C 10 ] C. 1 0 - - - - -l 2) Press the START key ■[P 0 0 ] External temperature sensor for articles to be sterilized setting P.
- Page 7 DME11D327-06 (e.g., If the temperature measured inside the chamber is 0.8℃ lower than the temperature displayed on the control panel ( or the set temperature ), Enter [ -8 ] by pressing the time setting ▲ ▼ keys.) P. 3 5 - -l Calibration values for the temperature sensor inside the chamber: -30~+30 (Calibration value 1 = 0.1℃)
- Page 8 DME11D327-06 ■[P 3 6 ] External sensor for the articles to be sterilized calibration a) Press the temperature setting ▲ ▼ keys to select the system parameter [ P 3 6 ] P. 3 6 - -l b) Press the START key P.
- Page 9 DME11D327-06 e) Press the STOP key to return to the control panel display as shown below. C. 1 0 - - - - -l Press the STOP key again to end the procedures. ■[P 6 9 ] High altitude setting a) Press the temperature setting ▲...
- Page 10 P. 9 4 - -l b) Press the START key P. 9 4 - -l Model Code 1 : SX-300/300E 2 : SX-500/500E 3: SX-700/700E c) Press the time setting ▲ ▼ keys to set the model code. P. 9 4...
- Page 11 DME11D327-06 4) Connect dummy resistor (123.24 ohm) to CN12 on Main Control PCB 5) Press the START key while more than 2 seconds. It is displayed as shown below [r-2]. r- 2 135. 6) Connect dummy resistor (151.71 ohm) to CN12 on Main Control PCB 7) Press the START key while more than 2 seconds.


Need help?
Do you have a question about the SX-300 and is the answer not in the manual?
Questions and answers