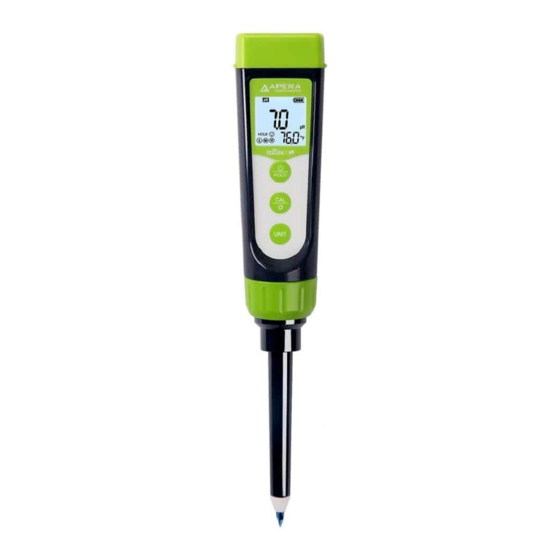
Summary of Contents for Apera Instruments GroStar GS2
- Page 1 GroStar™ GS2 Premium Soil pH Pen Tester User Manual APERA INSTRUMENTS (Europe) GmbH www.aperainst.de...
-
Page 2: Table Of Contents
Thank you for choosing the Apera GroStar™ GS2 Premium pH Pen Tester. This premium pen has been designed specifically for the horticultural market. Since 1991, Apera instruments has been dedicated to providing hi-tech, accurate, lab-grade instruments and sensors. GroStar's intelligent design reduces the guesswork, so you can easily manage your crops success. - Page 3 3-Color LCD Screen Long Short Press Press • White for measurement mode • Green for calibration mode 1. Power on • Red for calibration error 2. Manual hold Power off Press again to cancel hold In measurement stands for stabilized reading mode, press to Start turn on/off the...
-
Page 4: Preparation Before First Use
Preparation Before First Use Pull out the battery insulation slip; Prepare a bucket of clean water (tap loosen the probe cap ring, then pull out water is ok. Ideally use RO water). the probe cap. Rinse the probe in it and shake off excess water. -
Page 5: Ph Measurement
icon will show up on the lower left corner of the screen, indicating the pen is successfully calibrated. Repeat Step 3.2 to 3.3 to calibrate pH 4 using 4.00 pH buffer, then will show up next to . You can continue to calibrate pH 10 by repeating Step 3.2 to 3.3 using 10.01 pH buffer (sold separately), then will show up to the right of... -
Page 6: Measure Soil Ph Directly
Measure Soil pH Directly Remove about 2 inches (5cm) of the top layer soil in the test area, make sure the soil is wet. If the soil is dry, pH measurement cannot be performed, and the probe can be damaged. For dry soil, please add some distilled or RO water to moisten. -
Page 7: Making A Soil Slurry
Making a Soil Slurry Remove about 2 inches (5 cm) of the top layer soil and collect different locations’ soil samples at approximately 6 inches (15 cm) deep. Thoroughly mix all collected soil. Ideally, dry the soil in the air or bake in an oven at 104 ˚F / 40 ˚C. Weigh out 20 g of the mixed soil sample into a glass jar and add 100 g of distilled or deionized water in it. -
Page 8: Probe Cleaning
Probe Cleaning The tester is only as accurate as the probe is clean. Always thoroughly rinse off the probe before and after each measurement with clean water in a container or with a wash bottle. Use the probe cleaning brush with water to clean off all the dirt on the probe, especially the white PTFE junction ring. -
Page 9: Battery Replacement
10 Battery Replacement ① Pull up the battery cap (might take some force). ② Slide the battery cover along the OPEN arrow to open the cover. ③ Open the battery cover. ④ Insert the batteries (ALL POSITIVE SIDES FACING UP). ⑤... -
Page 10: Troubleshooting Guide
12.3 Avoid testing in high (>113°F/ 45°C) or low temperature (<41°F/ 5°C) solutions as it will cause greater measurement error and damage to the probe. Test your samples and perform calibration close to room temperature as much as possible. 12.4 Never test oily liquids. 12.5 Make sure the battery cap is completely closed with the O-ring. - Page 11 Make sure the soil is wet. Testing in dry soil will damage the Display similar probe. If you don’t find any visible damage of the probe and it’s readings in any within the 1-year probe warranty, contact your point of purchase solutions or Broken probe for warranty fulfillment;...
-
Page 12: Technical Specs
14 Technical Specs 0.0 to 14.0 pH, Range 0 to 50˚C (32 to 122˚F) 0.1 pH, 0.1˚F/0.1˚C Resolution ±0.1 pH, Accuracy ±1˚C/±1˚F Temperature Compensation Automatic Automatic 1 to 3 points (7/4/10) pH Calibration *pH 10.01 solution sold separately pH, ˚F, ˚C Unit Power supply 4-AAA alkaline batteries... -
Page 13: What's In The Box
17 Warranty How Long Does the Coverage Last? Apera Instruments® (Apera) warrants the GroStar™ Premium GS2 Soil pH Pen Tester (Product) for a period of 24 months for the instrument and 12 months for the probe from date of purchase by original purchaser or consumer. Proof of purchase is required for the warranty to be effective (store sales receipt for Product showing model number, payment and date of purchase). - Page 14 PROFITS, PERSONAL INJURY OR PROPERTY DAMAGE. IT IS UNDERSTOOD AND AGREED BY CONSUMER UPON PURCHASE OF A PRODUCT THAT, EXCEPT AS STATED IN THIS WARRANTY, APERA INSTRUMENTS IS NOT MAKING AND HAS NOT MADE ANY EXPRESS OR IMPLIED WARRANTY OR OTHER...
- Page 15 Product. No Apera distributor, employee or agent is authorized to modify, extend or otherwise change the terms of this warranty. APERA INSTRUMENTS (Europe) GmbH Wilhelm-Muthmann-Straße 18 42329 Wuppertal, Germany Contact: info@aperainst.de...


Need help?
Do you have a question about the GroStar GS2 and is the answer not in the manual?
Questions and answers