
Related Manuals for GreenWorks Pro CS60L02


Summary of Contents for GreenWorks Pro CS60L02
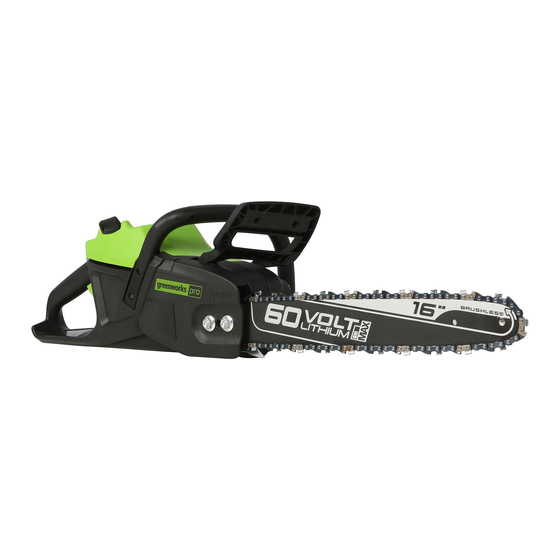
- Page 1 CS60L02 CHAINSAW OPERATOR MANUAL SIERRA DE CADENA MANUAL DEL OPERADOR CSC404 www.greenworkstools.com...
-
Page 3: Table Of Contents
English Install the battery pack........8 Description......... 4 Remove the battery pack........8 Purpose.............. 4 10 Operation........... 8 Overview............4 General power tool safety 10.1 Examine the chain oil........8 10.2 Hold the machine..........8 warnings..........4 10.3 Start the machine..........9 Work area safety.......... -
Page 4: Description
English DESCRIPTION The term “power tool” in the warnings refers to your battery- operated (cordless) power tool. PURPOSE WORK AREA SAFETY This chainsaw is designed for cutting branches, trunks, logs • Keep work area clean and well lit. Cluttered or dark and beams of a diameter determined by the cutting length of areas invite accidents. -
Page 5: Power Tool Use And Care
English CHAINSAW SAFETY POWER TOOL USE AND CARE WARNINGS • Do not force the power tool. Use the correct power tool for your application. The correct power tool will do • Keep all parts of the body away from the saw chain the job better and safer at the rate for which it was when the chainsaw is operating. -
Page 6: Prevent Operator Kickback
English PREVENT OPERATOR Symbol Explanation KICKBACK Wear eye and ear protection. Kickback may occur when the nose or tip of the guide bar touches an object, or when the wood closes in and pinches the saw chain in the cut. Do not expose the product to rain or moist conditions. -
Page 7: Environmentally Safe Battery Disposal
English ENVIRONMENTALLY SAFE PROPOSITION 65 BATTERY DISPOSAL WARNING This product contains a chemical known to the state of California to cause cancer, birth defects or other reproductive harm. Some dust created by power sanding, sawing, grinding, drilling, and other construction activities contains chemicals known to cause cancer, birth defects or other reproductive harm. -
Page 8: Add The Bar And Chain Oil
English ADD THE BAR AND CHAIN OIL 1. Align the lift ribs on the battery pack with the grooves in the battery compartment. Examine the amount of oil in the machine. If the oil level is 2. Push the battery pack into the battery compartment until low, add the bar and chain oil as follows. -
Page 9: Start The Machine
English 10.3 START THE MACHINE 10.6 FELL A TREE 1. Press the lock-out button (4). 2. Press the trigger (5) while you hold the lock-out button. 3. Release the lock-out button. Recommendation that the first-time user should, as a minimum practice, start cutting logs on a saw-horse or cradle. IMPORTANT Before you start to fell a tree, make sure that The chain brake must be disengaged for the chain saw to... -
Page 10: Limb A Tree
English It is important to make sure your footing is secure and your CAUTION weight is evenly distributed. If possible, lift the log and hold The level notching cut helps prevent pinching of the it with branches, logs or chock. Obey the instructions below: saw chain or the guide bar when you make the second notch. -
Page 11: Maintenance
English 3. Put the chain drive links (21) into the bar groove (20). 4. Put the chain cutters (22) in the direction of the chain operation. 5. Put the chain in position and make sure that the loop is behind the guide bar. When the log is on a slope, 6. -
Page 12: Sharpen The Cutters
English 11.3 SHARPEN THE CUTTERS Tension the chain so that it can only just be pulled away from the bar at its centre point. Sharpen the cutters if it is not easy for the chain to go into the WARNING wood. -
Page 13: Guide Bar Maintenance
English • the groove does not fit with the height of the drive links NOTE (which must never touch the bottom). During the process, • the inside of the guide bar is worn and makes the chain lean to one side. •... - Page 14 English Problem Possible cause Solution Problem Possible cause Solution The motor runs The chain is too Adjust the chain The machine does Pull the chain but the chain does tight. tension. not start. The chain brake is brake in the direc- not rotate.
-
Page 15: Technical Data
English TECHNICAL DATA HELPLINE: Warranty service is available by calling our toll-free helpline, Voltage 60 V DC at 1-855-345-3934. No load speed 20 m/s TRANSPORTATION CHARGES: Guide bar length 16'' (406 mm) Transportation charges for the movement of any power Chain pitch 3/8"... -
Page 16: Exploded View
English EXPLODED VIEW Part No. Description Part No. Description R0200301-00 Bar / Chain / Scabbard R0200012-00 Bucking Spikes RB339022028A Chain Brake Kit RB311031063A Tensioner Kit R0200302-00 Sprocket Kit R0200304-00 Sprocket Cover Assembly R0200303-00 Oil Cap Assembly R0200305-00 Bar Pad Cover R0200009-00 Chain Brake Handle 10 R0200306-00... - Page 17 Español Descripción........18 Instalación........22 Finalidad............18 Desembalaje de la máquina......22 Perspectiva general.......... 18 Adición del aceite para barras y cadenas..22 Advertencias generales de Instalación de la batería........22 Retirada de la batería........23 seguridad para herramientas 10 Funcionamiento....... 23 eléctricas...........18 10.1 Examen del aceite de la cadena.......
-
Page 18: Descripción
Español DESCRIPCIÓN HERRAMIENTAS ELÉCTRICAS FINALIDAD AVISO Esta motosierra se ha diseñado para cortar ramas, troncos, Lea todas las advertencias de seguridad y todas las leños y vigas de un diámetro determinado por la longitud de instrucciones. El incumplimiento de las advertencias e corte de la barra de guía. -
Page 19: Utilización Y Cuidado De Herramientas Eléctricas
Español • Retire cualquier llave de ajuste antes de encender la probabilidades de atascarse y son más fáciles de herramienta eléctrica. Una llave que se quede fijada a controlar. una pieza giratoria de la herramienta eléctrica puede • Utilice la herramienta eléctrica, los accesorios, las provocar lesiones personales. -
Page 20: Prevención Del Retroceso Del Operario
Español • Sujete la herramienta eléctrica solo por las superficies El contacto con la punta en algunos casos puede provocar una de agarre aisladas, ya que la cadena de la sierra puede reacción inversa repentina, que levanta la barra de guía y la entrar en contacto con cableado oculto. -
Page 21: Niveles De Riesgo
Español ELIMINACIÓN DE BATERÍA Símbolo Explicación SEGURA PARA EL MEDIO Lleve protección ocular y auditiva. AMBIENTE No exponga el producto a la lluvia o a condiciones de humedad. Evite el contacto con la punta de la barra. Los materiales tóxicos y corrosivos que figuran a continuación se encuentran en las baterías utilizadas en esta Sujete con ambas manos. -
Page 22: Propuesta 65
Español PROPUESTA 65 ADICIÓN DEL ACEITE PARA BARRAS Y CADENAS AVISO Examine la cantidad de aceite que hay en la máquina. Si el Este producto contiene una sustancia química conocida en nivel de aceite es bajo, añada el aceite para barras y cadenas el estado de California como causante de cáncer, defectos de la siguiente manera. -
Page 23: Retirada De La Batería
Español 2. Sujete las asas con los pulgares y los dedos alrededor de AVISO ellas. • Si la batería o el cargador ha sufrido daños, sustituya la 3. Asegúrese de que la mano izquierda sujete el asa batería o el cargador. delantera y que el pulgar esté... -
Page 24: Tala De Un Árbol
Español • El freno de la cadena no detiene la cadena a) Tenga 1/3 de la anchura del diámetro del árbol. inmediatamente. b) Sea perpendicular a la dirección de tala. • El freno de la cadena no permanece en la posición PRECAUCIÓN desacoplada sin ayuda. -
Page 25: Mantenimiento
Español Es importante asegurarse de que su equilibrio sea seguro y que su peso esté distribuido uniformemente. Si es posible, levante el tronco y sopórtelo con ramas, troncos o calzos. Respete las siguientes instrucciones: Cuando el tronco se mantenga apoyado longitudinalmente (32), córtelo desde la parte superior (33). -
Page 26: Ajuste De La Tensión De La Cadena
Español 11. Apriete las tuercas cuando la cadena esté correctamente tensada. NOTA Si arranca la motosierra con una cadena nueva, haga una prueba de 2-3 minutos. Una cadena nueva se alarga después del primer uso, examine la tensión y apriete la cadena si es necesario. -
Page 27: Afilado De Los Cortadores
Español 5. Cuando la cadena tenga la tensión deseada, apriete las contratuercas. NOTA Durante el funcionamiento normal de la sierra, la temperatura de la cadena aumenta. Los eslabones de accionamiento de una cadena caliente correctamente tensada colgarán aproximadamente 1/16 in. (1,58 mm) fuera de la ranura de la barra. -
Page 28: Transporte Yalmacenamiento
Español SOLUCIÓN DE PROBLEMAS Problema Posible causa Solución La barra de guía y La cadena está de- Ajuste la tensión la cadena se cal- masiado tensa. de la cadena. ientan y sueltan El depósito de Añada aceite. humo. aceite está vacío. La contaminación Retire la barra de produce una ob-... - Page 29 Español Problema Posible causa Solución Problema Posible causa Solución El motor funciona, La cadena está de- Ajuste la tensión La máquina no se Tire del freno de la El freno de la ca- pero la cadena no masiado tensa. de la cadena. pone en marcha.
-
Page 30: Datos Técnicos
Español ARTÍCULOS NO CUBIERTOS POR LA GARANTÍA: Problema Posible causa Solución 1. Cualquier pieza que no funcione debido a mal uso, uso La máquina ha de- La temperatura de Lleve la máquina a comercial, abuso, negligencia, accidente, mantenimiento jado de funcionar funcionamiento de un lugar fresco y inadecuado o alteración;... -
Page 31: Vista Despiezada
Español VISTA DESPIEZADA Nº Nº pieza Cant. Descripción Nº Nº pieza Cant. Descripción R0200301-00 Barra / Cadena / Vaina R0200012-00 Dientes RB339022028A Kit de freno de cadena RB311031063A Kit de tensor R0200302-00 Kit de piñón R0200304-00 Conjunto de cubierta de pi- ñón R0200303-00 Conjunto de tapa de aceite...
Need help?
Do you have a question about the CS60L02 and is the answer not in the manual?
Questions and answers