
Related Manuals for Bresser EXPLORE SCIENTIFIC


Summary of Contents for Bresser EXPLORE SCIENTIFIC
- Page 1 Digital camera · Digitalkamera · 4K Planetary & DeepSky Astro Camera Instruction manual Bedienungsanleitung...
- Page 2 Entonces visite nuestra página web utilizando el siguiente enlace (código QR) para ver las versioneAs disponibles. Desidera ricevere informazioni esaustive su questo prodotto in una lingua specifica? Venga a visitare il nostro sito Web al seguente link (codice QR Code) per conoscere le versioni disponibili. www.bresser.de/P0510530 GARANTIE · WARRANTY · GARANTÍA · GARANZIA www.bresser.de/warranty_terms...
- Page 3 English........................Deutsch .........................
-
Page 4: Intended Use
We ask for your understanding that unsolicited returns cannot be pro- cessed. Errors and technical changes excepted. © 2022 Bresser GmbH All rights reserved. The reproduction of this documentation - even in extracts - in any form (e.g. photocopy, print, etc.) as well as the use and distribution by means of electronic systems (e.g. -
Page 5: General Safety Instructions
5 General safety instructions DANGER Danger of suffocation! Improper use of this product may result in suffocation, especially for children. It is therefore imperative that you observe the following safety information. • Keep packaging materials (plastic bags, rubber bands, etc.) away from children! There is a danger of choking! •... -
Page 6: Parts Overview And Scope Of Delivery
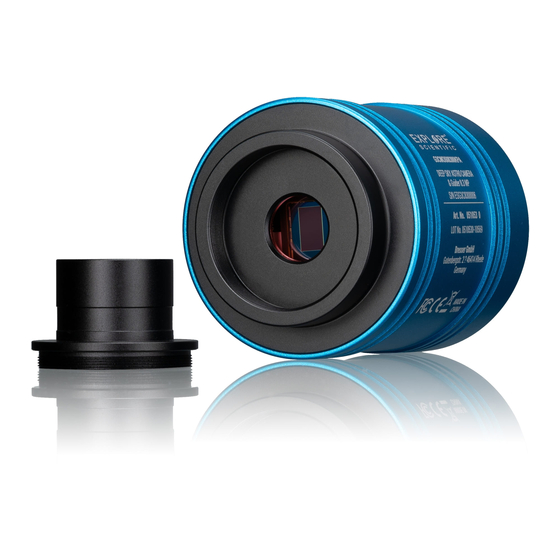
6 Parts overview and scope of delivery Illustration 1: All parts of the Astro camera 1 Camera body 2 Mounting thread (T2/M42x0,75mm) 3 Camera connection: 4 Ventilation slits 5 Function indicator light 6 USB 3.0 port 7 ST4 port 8 Plug-in adaptor 1 ¼" 9 Connection thread 10 USB 3.0 connection cable 11 DC connection cable... -
Page 7: Installing The Software And Drivers
7 Installing the software and drivers 1. Insert the CD-ROM included in the scope of delivery into the CD drive of your computer. Alternat- ively, you can download the software package from the product page and start the installation dir- ectly. - Page 8 9 Camera mounting as an autoguider Illustration 4: Mounting of the Astro camera as an autoguider on the guide tube 1 Guide tube 2 Socket adaptor 1 ¼" 3 Camera body 4 USB 3.0 port 5 ST4 port 6 USB cable 7 USB port on PC/notebook 8 ST4 connecting cable 9 ST4 port on the mount*...
-
Page 9: Cleaning And Maintenance
NOTICE! Autoguiding requires an appropriate software (see below). Autoguiding Software The following software packages, among others, can be used for autoguiding with this camera: PHD-Guiding, GuideDog, Metaguide, Guidemaster (free of charge) or AstroArt, MaxIm DL (fee pay- able) DOWNLOAD PHD-Guiding: https://openphdguiding.org DOWNLOAD GuideDog: http://barkosoftware.com/GuideDog 10 Optimizing the camera settings for long exposures... -
Page 10: Ec Declaration Of Conformity
13 EC declaration of conformity A "Declaration of conformity" in accordance with the applicable directives and correspond- ing standards has been prepared by Bresser GmbH. The full text of the EC declaration of conformity is available at the following Internet address: www.bresser.de/down- load/0510530/CE/0510530_CE.pdf... -
Page 11: Zu Dieser Anleitung
„Garantie“ und „Service“ in dieser Dokumentation. Wir bitten um Verständnis, dass unaufgeforderte Rücksendungen nicht bearbeitet werden können. Irrtümer und technische Änderungen vorbehalten. © 2022 Bresser GmbH Alle Rechte vorbehalten. Die Reproduktion dieser Dokumentation – auch auszugsweise – in irgendeiner Form (z.B. Fotokopie, Druck, etc.) sowie die Verwendung und Verbreitung mittels elektronischer Systeme (z.B. -
Page 12: Allgemeine Sicherheitshinweise
• Es wurde entwickelt als elektronisches Zubehörteil zum ausschließlichen Anschluss und Betrieb an in dieser Anleitung beschriebenen privat genutzten Geräten. 5 Allgemeine Sicherheitshinweise GEFAHR Erstickungsgefahr! Bei unsachgemäßer Verwendung dieses Produkts besteht Erstickungsgefahr, insbesondere für Kin- der. Beachten Sie deshalb unbedingt die nachfolgenden Sicherheitsinformationen. •... -
Page 13: Teileübersicht Und Lieferumfang
6 Teileübersicht und Lieferumfang Abb. 1: Alle Teile der Astro-Kamera 1 Kamera-Body 2 Aufnahmegewinde (T2/M42x0,75mm) 3 Kamera-Anschlusspanel 4 Lüftungsschlitze 5 Funktionsleuchte 6 USB 3.0 Port 7 ST4 Port 8 Steckadapter 1 ¼" 9 Anschlussgewinde 10 USB 3.0 Anschlusskabel 11 ST4-Anschlusskabel 12 Software-CD Lieferumfang Astro-Kamera (A);... - Page 14 7 Software und Treiber installieren 1. Legen Sie die im Lieferumfang enthaltene CD-ROM in das CD-Laufwerk Ihres Computers ein. Al- ternativ können Sie das Software-Paket auch von der Produktseite herunterladen und die Installa- tion direkt starten. Die Dateien sind unter der Rubrik ‚Software‘ hinterlegt. Den Link/QR-Code zur Produktseite finden auf der zweiten Seite dieser Bedienungsanleitung.
- Page 15 9 Kamera-Montage als Autoguider Abb. 4: Montage der Astro-Kamera als Autoguider am Leitrohr 1 Leitrohr* 2 Steckhülsen-Adapter 1 ¼" 3 Kamera-Body 4 USB 3.0 Port 5 ST4 Port 6 USB-Kabel 7 USB-Port am PC/Notebook 8 ST4-Verbindungskabel* 9 ST4-Port an der Montierung* 10 Aufnahmegerät* (z.B.
- Page 16 HINWEIS! Für das Autoguiding ist eine entsprechende Software erforderlich (siehe unten). Autoguiding-Software Für das Autoguiding mit dieser Kamera können u.a. die folgenden Software-Pakete verwendet wer- den: PHD-Guiding, GuideDog, Metaguide, Guidemaster (kostenlos) oder AstroArt, MaxIm DL (kostenpflich- tig) DOWNLOAD PHD-Guiding: https://openphdguiding.org DOWNLOAD GuideDog: http://barkosoftware.com/GuideDog 10 Optimierung der Kameraeinstellung für Langzeitbelichtungen Bild 1...
-
Page 17: Reinigung Und Wartung
Wiederverwertung zugeführt werden. 13 EG-Konformitätserklärung Eine „Konformitätserklärung“ in Übereinstimmung mit den anwendbaren Richtlinien und entsprechenden Normen ist von der Bresser GmbH erstellt worden. Der vollständige Text der EG-Konformitätserklärung ist unter der folgenden Internetadresse verfügbar: www.bresser.de/download/0510530/CE/0510530_CE.pdf 17 / 20... - Page 19 Telefon*: +49 28 72 80 74 310 Teléfono*: +31 528 23 24 76 BRESSER GmbH BRESSER Benelux Kundenservice Explore Scientific Klantenservice Gutenbergstr. 2 Smirnoffstraat 8 46414 Rhede 7903 AX Hoogeveen Deutschland Nederland * Lokale Rufnummer in Deutschland (Die Höhe der Gebühren je * Het telefoonnummer wordt in het Nederland tegen lokaal tarief Telefonat ist abhängig vom Tarif Ihres Telefonanbieters);...
- Page 20 Bresser GmbH Gutenbergstraße 2 46414 Rhede · Germany www.bresser.de @BresserEurope...
Need help?
Do you have a question about the EXPLORE SCIENTIFIC and is the answer not in the manual?
Questions and answers