Polini E-P3 Manual
Hide thumbs
Also See for E-P3:
- User manual (17 pages) ,
- Use and maintenance manual (12 pages) ,
- Use and maintenance manual (28 pages)
Table of Contents
Advertisement
Quick Links
Advertisement
Table of Contents

Related Manuals for Polini E-P3


Summary of Contents for Polini E-P3
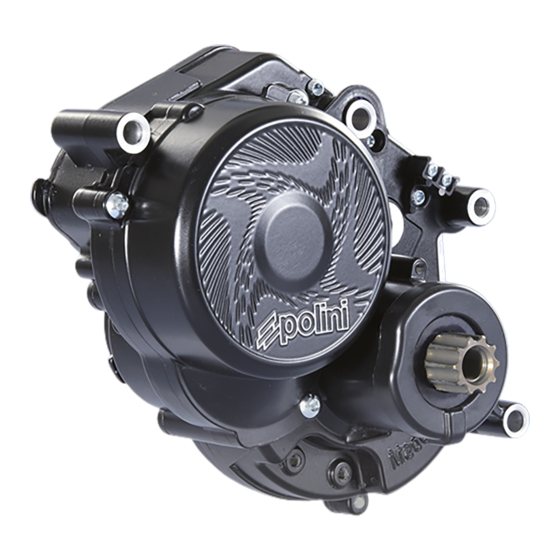
- Page 1 POLINI E-P3: POWERFUL, COMPACT, LIGHT...
- Page 2 THE E-BIKE The maximum speed of the E-Bike is 25 Km / h (the engine turn off once reach this speed) and the maximum continuous rated power of the engine is 250 Watts. According with the European Directive 2002/24 / EC, transposed in Italy with the decree of January 31, 2003 from the Ministry of Infrastructure and Transport, the engine is power of the eletric bike must be 250 watts, the engine must be activated automatically when you start riding and it must switched off immediately when stop...
- Page 3 THE E-P3 ENGINE CONCEPT Among all types of electric motors, Polini has adopted the center position of the engine on the bike frame, because we believe it is the most functional and efficient. The distribution of the weights is optimal and has the possibility to take advantage of the gearbox already present on the bike.
- Page 4 E-P3 POLINI ENGINE CONCEPT LEFT STATOR CASE EP3 SECOND GEAR CRANKCASE EP3 PLASTIC INTERMEDIATE GEAR Z.57 EP3 ENGINE CASE PRIMARY GEAR ELECTRIC CARD CABLE Z8 EP3 SECONDARY GEAR Z.11 CENTRAL PIM SPLASH GUARD FLAME EP3 TORQUE SENSOR PEDAL AXLE ELECTRIC CARD...
- Page 5 TECHNICAL EXPLANATION: DIFFERENCES BETWEEN WATT and WATT per HOUR THE WATT ARE THE MEASUREMENT UNIT OF THE ELECTRIC POWER. FOR EP3 MEAN THE MAXIMUM POWER THAT CAN SUPPLY THE ENGINE.THIS POWER IS LIMITED TO 250 WATT AS PROVIDED BY LAW. - THE WATT ARE THE MEASUREMENT UNIT OF THE ENERGY QUANTITY OF THE BATTERY - THE WATT per HOUR REPRESENTS THE TANK AT THE DISPOSAL OF THE ENGINE...
-
Page 6: Important Safety Information
EP-3 POLINI MOTOR – USER’S MANUAL 1.1- Important Safety information Handling the battery • Do not deform, modify and disassemble the battery. • Do not leave the battery near sources of heat such as heaters. • Do not subjects the battery to strong shocks or throw it. -
Page 7: Cleaning The Battery
1.2- Cleaning the battery • Do not use thinner or other solvents to clean any of the products. These substances may damage the surfaces. • Use a damp cloth, with the water well wrung-out, when cleaning the battery and plastic cover. •... - Page 8 2 - Features of POLINI EP-3 system The following information must be satisfied before using the E-bike propulsion system: • Battery is charged, inserted and turned on. • Speed sensor is connected in accordance to the central movement and the magneto is...
- Page 9 2.1- Turn E-P3 system on 1. Turn the battery ON using the on/off button 2. Select your preferred assist mode from 1 to 5 using the arrow buttons. 3. Assistance will start when the pedals start turning 4. Change the assist mode in accordance with the conditions of use.
- Page 10 2.2 - Turn E-P3 system off 1- To keep the travelling data updated on the display, first turn the display off and then the battery. On the contrary the travelling data on the display are not saved properly. 2- By turning off the display only, the battery remains ON for 2 hours with a low battery consumption.
-
Page 11: Charging The Battery
3 - Charging the battery Charging can be carried out at any time regardless of the amount of charge remaining, but you should fully charge the battery at the following circumstances. (Be sure to use the dedicated charger when recharging the battery during these circumstances): •... -
Page 12: About The Charger Led Lamp
3.2- About the charger LED lamp Charger connected into the outlet and battery under charge – RED Power led /RED charge led Charger connected into the outlet and battery recharged (recharged ended) RED Power led /GREEN charge led Time to recharge a dead battery is about 5 hours... - Page 13 3.3 - Indications of the battery charge level After pushing the LED light button, the five LED lamps indicate the charge level. Each LED corresponds to 20% of capacity. You can check the current charging status on the LED lamp on the battery (state of charge ).
-
Page 14: Removing And Installing The Battery
3.4- Removing and Installing the battery CAUTION: always turn the battery off before removing or installing it. 1. Unscrew the security screw. 2. Insert the key in the cylinder on the battery holder. 3. To open it, turn the key while pulling the battery upwards. - Page 15 Installing the battery 1. Insert the battery into the battery mount paying attention not to damage the rubber gasket. 2. First insert the upper part of the battery and then the bottom part of the electric connectors. 3. Press the battery until a click is heard to lock it. Battery may be assembled even if the key is not inserted.
- Page 16 4.0 - Displays The main screen shows the following Motor power information: Motor power screen example. 1 Display of the current assistance It displays the power provided by the 2 Speed pedal-assist electric motor in percentage 3 Triangular symbol: assist-walk activated. respect to the maximum power.
- Page 17 Average speed of the distance Total distance travelled travelled Example of total distance travelled. Example of the average speed of the It shows the total distance covered with distance travelled. pedal-assist bicycle. > average speed Another page follows to this screen. It displays the average speed from the last reset of the data.
- Page 18 4.1- Controls Buttons Functions Increase of the level of assistance; press for more than 3 seconds: walk assist mode activated Decrease of the level of assistance Joystick Upper screen To enter next screen, exit from the modification mode and confirm. Elaborate the highlighted value To enter next right screen Down screen...
- Page 19 4.2 - Displays The main screen shows the following information: 1 Display of the current assistance 2 Speed 3 Triangular symbol: assist-walk activated. Headlights symbol: it activates if the lights are ON. 4 Battery level indicator (each notch corresponds to 20% of the battery) ATTENTION: the notches in the battery symbol do not indicate the battery recharging level.
- Page 20 • Riding performance • Motor power • Distance travelled in assist-mode • Distance travelled • Average speed of the distance travelled • Maximum speed of the distance travelled • Reset • Total distance travelled • Total distance travelled/ maximum speed •...
-
Page 21: Turning Off
4.3- Turning off Turn the Comfort service unit off Press button T4 for more than 2 seconds ■ The service unit turns OFF ➞ NOTE: it is not allowed to turn it off if the bicycle is moving. Polini E-P3 “Quick Guide”... - Page 22 4.4 - Headlights – install additional lights Button T5 turns the lights ON and OFF, in accordance with the pedal-assist bicycle. Turn the headlights ON Turn the headlights OFF Shortly press button T5 Press T5 button for more than 2 seconds. ■...
- Page 23 Additional lights installation The motor body is equipped with a plastic block for the light wiring that must have the following features: 1. Lights voltage: 6 Vdc 2. The sum of the lights powers must not exceed 8W 3. The block is provided with 2 cables fixing points, + (pink) and –...
- Page 24 5.0- Assist-mode adjustment Level Description None Normal bicycle. Motor is not activated. Level 1 30% assistance – recommended when travelling on level ground or long distance covered Level 2 60% assistance - recommended when travelling on level ground/gentle slope for medium/long distance covered Level 3 120% assistance - recommended when travelling on gentle slope/uphill for medium...
- Page 25 5.1- Suggestions to optimize the range • Pedal: slow pedalling consumes a lot of energy; maintain a pedalling frequency higher than 70 rpm to optimize the efficiency. • Driving style: many hard braking and starts produce more consumption, when possible, prefer a constant speed. •...
- Page 26 Lubricate the e-bike gear every 5000 km for maximum noise reduction. - remove the crown-holder if necessary - unscrew the cap of the grease tank and add about 2/3 grams of Polini grease. (item 955.435.001) - Fit all the parts again paying attention to tight the crown holder screw properly (5/6Nm torque) Display does not read the speed.
- Page 27 8- FIRMWARE UPDATE Internet connection and a cable with micro USB outlet are required to update the firmware. Remove the plastic coverdirection. Remove the aluminium cap...
- Page 28 Connect the cable to the plug in the right direction Updated Firmware are available on www.polini.com Besides the Firmware it is possible (with the cable connected to the motor) to download a software to modify the mounting side of the right or left display and, in case of variation of the tire size, to set the speed detector.
- Page 29 OPTIONALS 955.815.001 955.815.003 955.764.001 Stand for bicycles with rear tire width from Battery housing bottlecage. Battery housing side bottlecage. 40mm to 70mm. 955.815.002 955.815.004 Universal bottlecage. Universal side bottlecage. 955.764.002 Stand for bicycles with rear tire width till 40mm 955.830.002 955.520.009 Battery charger UE 220-240V 3A.
- Page 30 Thanks to the Cut Off Sensor you may shift without causing hits or pulls to the gears and chain. It is installed on the rear shifter cable with the aim to improve the efficiency and the lifetime of all the transmission parts. CUSTOMER SERVICE: ebike@polini.com...
Need help?
Do you have a question about the E-P3 and is the answer not in the manual?
Questions and answers