Advertisement
Quick Links
Advertisement

Related Manuals for Konig CMP-NWIPCAM10


Summary of Contents for Konig CMP-NWIPCAM10
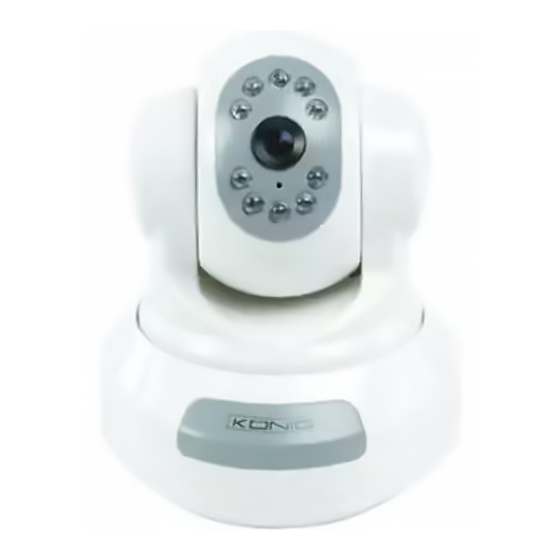
- Page 1 CMP-NWIPCAM10 USER MANUAL ENGLISH...
- Page 2 1. Package contents - IP network camera - Network cable - Power adapter - Manual 2. System requirements - Intel Pentium III 800 MHz or above - 64MB memory or above (256MB is recommended) - Windows 98SE/ME/2000/XP - Internet Explorer 6.0 - At least 5 GB free hard disk space - Network with 10/100Mbps Ethernet interface 3.
- Page 3 Step 1: Name: The user can define the name of the IP network camera. Step 2: IP: The IP address of the IP network camera; if the IP address of the PC you use is for example 192.168.1.159, then the IP address of the IP network camera can be set to 192.168.1.* (*=1~254).
- Page 4 3.2 Operation of the <AV SET> Button During normal system operation, press and hold the <AV SET> button for a while and then release. The system will reboot. If you press and hold the button for over five seconds, the system will restore the default settings.
- Page 5 Step 2: The system login window will appear in IE, as follows: Step 3: Enter the Account ID and Password. The default Account ID is "admin", and the default Password is "password". Click <Cancel> to reenter in case of any input error. Step 4: Click <Submit>...
- Page 6 5. LiveView During the first use of the IP network camera, you need to modify the IE security setting parameters (for details refer to the setting procedures below). Otherwise, the following prompt may appear in IE, causing failure image detection. After successful change of this setting, you do not need to repeat it anymore in the future.
- Page 7 6. Capture Images This function can capture PC images and store them in the PC. Operating procedures: Step 1: Enter the LiveView list. Step 2: Select an appropriate image, press and hold the <Ctrl> key on the keyboard. Step 3: Move the cursor to the monitoring image picture, and click (or press and hold the <Capture Image>...
- Page 8 7. Usage of Image Function Move the cursor to a real-time monitoring image and right click, and at this moment four options appear: Image: Adjusts image parameters Record: Sets and records animation files in AVI format Zoom: Zooms in an image in a selected box in digital mode Motion Detec Set: Sets motion detection parameters.
- Page 9 8. AVI Record Setup Click to select Record, the following window appears (corresponding to the <Record Video> button at the top of the screen), and you can adjust AVI Frame Rate. Set the parameters and file name. (Note that the recorded file can only be saved in an existing folder.
- Page 10 10. Motion Detection Setup environmental parameters Motion Detection (MD) trigger events, including the first group (red) and the second group (green). You may change the following settings in the enabled mode: Reset MD range: Select motion_detec 1, click and hold your mouse (in this case the upper left corner of the MD range is displayed), drag your mouse to select a range, and release your mouse.
- Page 11 11. Maximum Size If the monitoring image resolution is 320x240 or 160x120, click the <Max Size> button at the top of the screen. You may directly set the monitoring image resolution to 640x480. 12. Audio On/Off The <Audio On/Off> button at the top of the screen is used for audio control.
- Page 12 13. Description of Advanced Functions This chapter describes the specific functions of the functional menus in the left of the main window. Image setup Network setup Sever setup Administration setup Event trigger Capture View Image Setup In this window, the user can perform the following settings: Resolution: Image output resolution;...
- Page 13 14. Network Setup The Network window is shown in the figure below: IP Assignment This option can be used to change the network connection mode of the IP network camera. The preset mode is Static. The MAC Address field shows the MAC address of the IP network camera.
- Page 14 PPPoE The option can be used to set the dial-up access settings in PPPoE IP assignment. In general, enter a correct ID Account and Password. It must be the same as your ISP settings. Operating procedures: Step 1: Enter a correct ID in the Account text box. Step 2: Enter a correct password in the Password text box.
- Page 15 Server Setup This window is used to set the parameters of the IP network camera related to the server. Mail Server It is used to set the parameters related to the mail server and the sending of mails with images. It depends on whether the MAIL Image setting in EventTrigger is enabled.
- Page 16 Operating procedures: Step 1: IP/Host: Enter the IP address of the FTP server or HTTP address. Step 2: Port: Enter the designated port number of the FTP server. Step 3: Account ID: Enter the account ID for login to the FTP host. Step 4: Password: Enter the password for login to the FTP host.
- Page 17 DDNS Server DDNS (Dynamic Domain Name Server) provides dynamic DNS settings. With the designated DDNS server, pre-entered HTTP address, and related settings, the IP network camera using PPPoE dial up connection (with dynamic IP) can only use a http address (such as sqipcam.dyndns.org) to get a connection, which is easy to memorize and facilitates the view of the IP network camera without a fixed IP address.
- Page 18 Administration Setup This window is used to set IP network camera name, administrator account and password, and general user account and password. An administrator can use all functions and settings of the IP network camera. A general user can only use the LiveView function and cannot set any parameters, as shown in the figure below: Camera Name: Set the Name of IP network camera...
- Page 19 Administrator Operating Procedures: Step 1: Account ID: Enter the login name of the IP network camera; Step 2: Old Password: Enter the old password; Step 3: New Password: Enter the new password; Step 4: Re-type: Enter the new password again for verification;...
- Page 20 Operating procedures: Step 1: Enable either group of events (MD will automatically display the trigger sensitivity); Step 2: Click <Submit> upon confirmation; or Step 3: Click <Default> to return to the original settings (none enabled). Note: If any event item is enabled, Save In PC will automatically be enabled and files will be saved to the directory C:\tmp\webmd.
- Page 21 Operating procedures: Step 1: Select CaptureView. The default value is PC. A maximum of 48 thumbnail images can be previewed in three pages. Step 2: Files can be read from a PC or a SD memory card, depending on the setting, and then click <Apply>.
- Page 22 Note: If the user PC is in a LAN, the user can also connect the IP network camera to an idle port of the switch with a straight-through cable. The setting methods are the same as above. Step 2: Access to the Internet Upon the completion of the settings in step 1, the user can view the monitored pictures of the IP network camera in the LAN.
-
Page 23: Adsl Modem
Turn on the power of the ADSL Modem, and switch on the IP network camera only when the link indicator light of the modem lights up. Upon the completion of dial-up, the user can visit the IP network camera from any PC connected with the Internet. - Page 24 The setting method is as follows: Configure the IP network camera according to step 1. IP assignment mode: Select the STATIC option and set an IP address in the same network segment of the ADSL modem (for example, if the default IP address of the ADSL modem is 192.168.1.1, set the IP address of the IP network camera to 192.168.1.2).
- Page 25 Enter the Server setting page and enter account and password in the DDNS Server field ((It is necessary to apply for a DDNS service account in the link on the Server page), and click <Submit>. To make the IP network camera accessible to Internet users, it is necessary to set the NAT function of the router and to map the IP network camera to port 80 of the public network.
-
Page 26: Safety Precautions
SAFETY PRECAUTIONS To reduce risk of electric shock, this product should ONLY be opened by an authorized technician if service is required. Disconnect the product from mains and other equipment if a problem should occur. Do not expose the product to water of moisture. WARRANTY No guarantee or liability can be accepted for any changes and modifications of the product or damage... - Page 27 Designs and specifications are subject to change without a notice.
- Page 28 WWW.KONIGCOMPUTER.COM...
Need help?
Do you have a question about the CMP-NWIPCAM10 and is the answer not in the manual?
Questions and answers