Table of Contents
Advertisement
Quick Links
Advertisement
Table of Contents

Subscribe to Our Youtube Channel
Related Manuals for Galanz GLOMJB17S2ASWZ-10


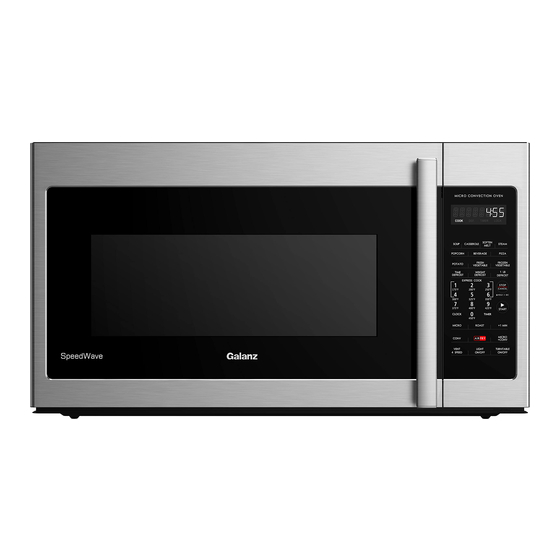
Summary of Contents for Galanz GLOMJB17S2ASWZ-10
- Page 1 Model# GLOMJB17S2ASWZ-10 User Manual Thank you for purchasing a Galanz product. Please read this manual carefully for correct usage and safety, and keep for future reference. For service, support and warranty information, call 1-800-562-0738. 2020 Galanz Americas Limited Company ©...
-
Page 2: Table Of Contents
CONTENTS IMPORTANT SAFETY INSTRUCTIONS ..........Precautions to avoid possible exposure to excessive microwave energy: . -
Page 3: Important Safety Instructions
IMPORTANT SAFETY INSTRUCTIONS Precautions to avoid possible exposure to excessive microwave energy: 1 Do not attempt to operate this microwave with the door open because this can result in harmful exposure to microwave energy. It is important not to defeat or tamper with the safety interlocks. 2 Do not place any object between the microwave front face and the door or allow soil or cleaner residue to accumulate on sealing surfaces. -
Page 4: Unpacking Instructions
IMPORTANT SAFETY INSTRUCTIONS 13 Cooking utensils may become hot because of heat transferred from the heated food. Potholders may be needed to handle the utensil. 14 Do not cover or block any openings on the appliance. 15 Do not store or use this appliance outdoors. Do not use this product near water, for example, near a kitchen sink, in a wet basement, near a swimming pool, or similar locations. -
Page 5: Grounding Instructions
• If you have any questions about the grounding or electrical instructions, consult a quali ed electrician or service person. • Galanz does not accept any liability for damage to the oven or personal injury resulting from failure to observe the electrical connection procedures. -
Page 6: Cookware And Cooking Materials
IMPORTANT SAFETY INSTRUCTIONS Cookware and cooking materials Warning Personal Injury Hazard Tightly-closed containers could explode. Closed containers should be opened and plastic pouches should be pierced before cooking. Cookware and other materials must t on the turntable. Always use oven mitts or pot holders because cookware may become hot. -
Page 7: Features
FEATURES Features • 7 AirFry Programs • 7 auto-cook settings • 11 variable power level • 1000 watts of power • Press number pad to express cooking • Exhaust fan with four speeds • Hidden vent • LED lighting • Child lock •... -
Page 8: Control Panel
CONTROL PANEL ITEM DESCRIPTION The display includes a clock and indicators to tell you time of day, cooking Display time settings and cooking functions selected. Cook Menus Press to set auto cooking and sensor cooking programs. Time Defrost Use to set defrost program based on time. Weight Defrost Use to set defrost program based on weight. -
Page 9: Accessories Instruction
ACCESSORIES INSTRUCTION Accessories Instruction Product Name Multi-function Steam Kit Air Fry Kit Model Number QZ2550DA QJ876S Volume Around 0.6Gal (2.5L) Dimension(D×H) 10.2×6.4 in. (258mm×163mm) 10.63×3.94 in. (270mm×100mm) Net Weight 1.1LB (0.5kg) 1.6lb (0.7kg) Temperture 4°F to 248°F(-20℃-120℃) <500°F (260℃) Notes •... -
Page 10: Setting Up Your Microwave Oven
SETTING UP YOUR MICROWAVE OVEN Cautions Please add water into the steam kit base before using. Please always use the steam kit with water. You can directly put the food onto the stainless steel basket. If you see any sparking or hear sparking noise, please immediately stop the microwave and stop using the steam kit. -
Page 11: Operation Instruction
OPERATION INSTRUCTION Setting the Clock This is a 12 or 24 hour clock. In standby mode, press CLOCK button once to choose 12 hour clock and if you want to choose 24 hour clock , press CLOCK button again. Example 1: suppose you want to set the clock to 5:00 p.m. on 12 hour clock. In standby mode, press CLOCK button once. -
Page 12: Roast Cook
OPERATION INSTRUCTION Roast Cook In standby mode, press ROAST button repeatedly to choose the temperature.(450F→425F→400F →375F). Use the number pads to enter cooking time. The longest time is 99 minutes and 99 seconds Press START button to con rm. Notes During cooking, you can press ROAST button once to check the temperature. -
Page 13: Convection
OPERATION INSTRUCTION Press Number Menu Number Pad Weight Cooking Time French Fries 26:00 22:00 10oz 24:00 Popcorn Chicken 12oz 26:00 16oz 28:00 24:00 12oz 27:00 Chicken Drumsticks 16oz 30:00 20oz 33:00 24oz 36:00 23:00 12oz 26:00 Chicken Wings 16oz 29:00 20oz 32:00 Onion Rings... -
Page 14: Microwave+Convection
OPERATION INSTRUCTION Microwave+Convection In standby mode, press MICRO+CONV button repeatedly to choose the temperature. (”400F”→”350F”→”300F”→”250F”). Use the number pad to enter the cooking time. Press START button to start cooking. Notes During the cooking, press MICRO+CONV button once to check the temperature. Steam Cook For Egg, Carrots, Broccoli or Rice: In standby mode, press the STEAM button once, the display will shows “USE STEAM KIT”... -
Page 15: Auto Cook
OPERATION INSTRUCTION Auto Cook For Soup, Popcorn, or Beverage: In standby mode, press the SOUP, POPCORN, or BEVERAGE button once. Use number button “1”,”2” or "3" to select food weight or servings. Press START button to con rm. Menu Press number Weight/Serving Time 1 bowl... -
Page 16: Use The Turntable
OPERATION INSTRUCTION Press VENT 4 SPEED button Display Once BOOST Twice HIGH 3 times MEDIUM 4 times 5 times Notes When you turn on the fan on the boost wind and start cooking,it has ve gears (Boost/High/Medium/Low/O ) can be switched in the rst 12 minutes. During 12 minutes to 18 minutes, there are four gears (High/Medium/Low/O ) can be switched. -
Page 17: Clean And Care
CLEAN AND CARE Cleaning the outside of your microwave Exterior The outside surface is precoated steel and plastic. Clean the outside with mild soap and water, then rinse and dry with a soft cloth. Do not use any type of household or abrasive cleaner. Door Wipe the window on both sides with a damp cloth to remove any spills or spatters. -
Page 18: Cleaning And Replacing The Lters
CLEAN AND CARE Cleaning and replacing the lters Cleaning the grease lters Clean the lters at least once a month. Never use the fan or microwave without the lters in place. 1 Pull down slightly on the tab toward the front of the microwave to remove the lter. Repeat for the other lter. 2 Soak the lter in a sink or dish pan lled with hot water and detergent. -
Page 19: Changing The Light Bulbs
CLEAN AND CARE 4 Replace the charcoal lter. Make sure that the wire mesh is visible from the front. Charcoal lter 5 Carefully push the louver back into place and replace the louver mounting screws. Louver Changing the light bulbs Countertop light (exterior) 1 Disconnect power to the microwave at the circuit breaker or by unplugging it. - Page 20 CLEAN AND CARE Microwave light (interior) 1 Disconnect power to the microwave at the circuit breaker or by unplugging it. 2 Remove the louver mounting screws from the top center of the louver, then push down on the tabs at each end of the louver to disengage it.
-
Page 21: Troubleshooting
2. Unplug the oven, wait for 10 seconds, then plug it back in again. too long 3. If the error re-occurrs, contact customer service for assistance. Speci cations Model GLOMJB17S2ASWZ-10 Rated Voltage 120V/60Hz Rated Input Power 1500W Rated Output Power... -
Page 22: Product Warramty
PRODUCT WARRANTY This warranty applies to products sold by Galanz Americas in the U.S. This warranty is in lieu of any other warranty and expressly applies to the individual product only. Galanz product is warrantied for one year following purchase for defects in material and workmanship. -
Page 23: Warramty Registration
WARRANTY REGISTRATION Please mail this warranty card to the address below within 30 days of purchase.Galanz Americas, 55 Challenger Road, Suite 503, Ridge eld Park, NJ 07660. PLEASE PRINT CLEARLY. Name Address City State Phone Email Model Number Serial Number Purchase Location You must attach a copy of your purchase receipt to validate your registration. - Page 24 ©2020 Galanz Americas Limited Company...
Need help?
Do you have a question about the GLOMJB17S2ASWZ-10 and is the answer not in the manual?
Questions and answers