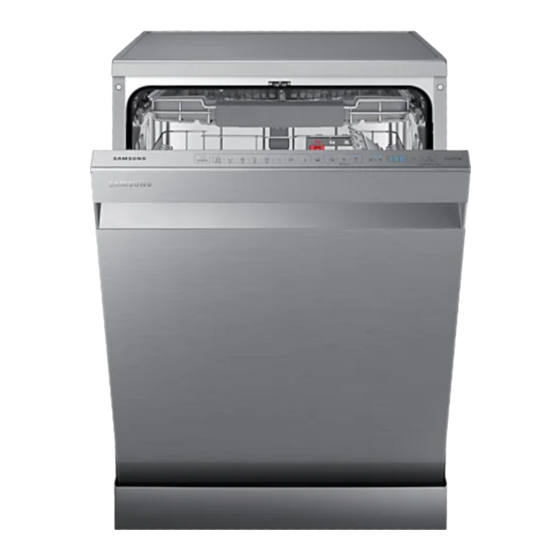
Samsung DW60A807 Series User Manual
Hide thumbs
Also See for DW60A807 Series:
- User manual (420 pages) ,
- Manual (420 pages) ,
- Design manual (32 pages)

Related Manuals for Samsung DW60A807 Series


Summary of Contents for Samsung DW60A807 Series
- Page 1 غسالة األطباق دليل امل ُ ستخ د ِ م DW60A807*/DW60A806*/DW60A805*/DW60A804* السلسلة DD81-03206F-00 DW8500AM_DW60A8070BB_UAE_DD81-03206F-00_AR.indd 1 2021-05-27 10:52:17...
- Page 2 اوتحملا معلومات السالمة مبلحملا مجب مبرفتهل عن إرشلداا السالما رمحز السالما املهما )WEEE( تبليملا ححل تحجيه مخلفلا األجهزة الكهرعلئيا واإللكترونيا احتيلطلا السالما املهما إرشلداا ححل استخدام غسللا األطبلق إرشلداا حلملما أطفللك إرشلداا ححل تركيب غسللا األطبلق التركيب مل هح م ُ ضمن علجلهلز متطلبلا...
- Page 3 استكشاف املشاكل وحلها تبليملا الفحص رمحز املبلحملا مخطط الدورات امللحق النقل/تغيير املحقع احلملما من الصقيع التخلص من غسللا األطبلق واحلفلظ على البيئا ملزمد من مبلحملا ححل التصميم اإلمكحلحجي املحاصفلا اختبار املعيار البرعيا DW8500AM_DW60A8070BB_UAE_DD81-03206F-00_AR.indd 3 2021-05-27 10:52:17...
- Page 4 مبلحملا السالما .. محتحي هذا الدليل على مبلحملا مهما ححل تركيب اجلهلز واستخدامه والبنلما عهSamsung تهلنينل لشرائك غسللا أطبلق جدمدة من .رجل ء ً خذ وق ت ً ل كلفي ً ل في قراءة هذا الدليل لتحقيق االستفلدة الكلملا من كلفا مزامل غسللا األطبلق متبددة الفحائد وامليزاا...
- Page 5 .املنتج وملحقلته اإللكترونيا مع اخمللفلا التجلرما األخرى عند التخلص منه ، مثل التزام تسجيل وتقييم املحادSamsung للحصحل على مبلحملا ححل االلتزاملا البيئيا وااللتزاملا التنظيميا اخللصا مبنتجلا شركا ) والتزام البطلرملا، تفضل عزملرةWEEE( )، وتحجيه مخلفلا األجهزة الكهرعلئيا واإللكترونياREACH( الكيميلئيا وإصدار التراخيص لهل...
- Page 6 مبلحملا السالما احتيلطلا السالما املهما لتقليل مخاطر حدوث حريق أو صدمة كهربائية أو إصابة لألشخاص عند استخدام :اجلهاز اخلاص بك، اتبع االحتياطات األساسية التي تشمل اآلتي مجب على األشخلص (مبل في ذلك األطفلل) ممن مبلنحن من قصحر في القدراا اجلسدما أو احلسيا أو البقليا أو ممن تنقصهم اخلبرة أو املبرفا الالزما الستخدام هذا...
- Page 7 عللنسبا لألجهزة التي عهل فتحلا تهحما في القلعدة، مجب أال متم وضع أي سجلدة .أسفل اجلهلز لتجنب سد هذه الفتحلا .مجب إعبلد األطفلل أقل من 3 سنحاا عن اجلهلز إال في حللا مراقبتهم علستمرار تنبيه: لتجنب حدوث أي مخلطر نتيجا إعلدة ضبط القلطع احلراري عشكل غير مقصحد،...
- Page 8 مبلحملا السالما إرشلداا ححل استخدام غسللا األطبلق غسللا األطبلق هذه ليست مصمما لالستخدام التجلري. حيث إنهل مخصصا لالستخداملا املنزليا واستخداملا مملثلا في عيئلا البمل أو :أملكن اإلقلما، مثل اوالا املكلتب واملبلرض :واملقيمني في البنلملا، مثل .الفنلدق ودور الضيلفا مجب استخدامهل فقط كجهلز منزلي كمل هح محضح عدليل امل ُ ستخ د ِ م هذا، لتنظيف األواني الفخلرما املنزليا وأدواا امللئدة. ال تدعم الشركا .املص...
- Page 9 إرشلداا حلملما أطفللك هذا اجلهلز ليس لببا! لتجنب خطر التبرض لإلصلعا، اعبد أطفللك عن غسللا األطبلق متلم ً ل وال تسمح لهم علللبب داخلهل أو ححلهل أو استخدام مفلتيح التحكم. فقد ال مستحعبحن حجم اخلطر اوتمل الذي قد ملحق عهم. مجب مراقبتهم وقتمل وجحدوا في املطبخ. ثما أمض ً ل .خطر...
- Page 10 مبلحملا السالما إرشلداا ححل تركيب غسللا األطبلق قبل تركيب اجلهلز، تأكد من خلحه من أي تلفيلا خلرجيا ميكن رؤمتهل. وال تقبل علستخدام جهلز تللف حتت أي ظرف، ألن اجلهلز التللف قد مسبب .مخلطر منبغي عدم تحصيل غسللا األطبلق مبصدر التيلر الكهرعلئي سحى عبر مقبس تحصيل منلسب. مجب أن متميز املقبس الكهرعلئي عسهحلا الحصحل...
- Page 11 .محتحي الهيكل اخللرجي البالستيكي ملحصل امليله على مكحن كهرعلئي. م ُ حظر غمر الهيكل اخللرجي علمليله .تحجد أسالك كهرعلئيا في اخلرطحم املزود مبلنبا تسرب امليله. ال تقطع أع د ً ا خرطحم إمداد امليله حتى إذا كلن طحم ال ً ج د ً ا مجب...
- Page 12 .املنتج واحلحض فقد مؤدي ذلك إلى تلف احلحض أو منح البفن ).53 تأكد من أن إعداد مستحى عسر امللء في غسللا األطبلق متحافق مع املنطقا التي تبيش فيهل. (راجع قسم "خزان امللح" في صفحا . للحصحل على مزمد من املبلحملا ححل املحاد واإلصالحwww.samsung.com/support مرجى الرجحع إلى املحقع اإللكتروني البرعيا...
- Page 13 مل هح م ُ ضمن علجلهلز تأكد من وجحد جميع األجزاء امل ُ ضمنا عببحة املنتج. إذا كلنت لدمك أما أسئلا عخصحص غسللا األطبلق أو أجزائهل، فلتصل مبركز خدما عمالء . اولي أو علئع التجزئا. قد مختلف املظهر الفبلي لغسللا األطبلق حسب الطراز والبلدSamsung تنبيه...
- Page 14 التركيب )DW60A80**IB ، (االنزالقياFBI طرز )2( غطلء عالستيكي )1( ملصق تكثيف واقي )14( 14 × 4 عرغي قطره )2( الدعلما البلحما )2( مثبت اللححا اخملصصا )3( قدم فرعيا )2( 16 × 3.5 عرغي قطره )2( مثبت اللححا اخملصصا )1( حلفا اجللنب البلحي )4( 13 ×...
- Page 15 )طقم التركيب (غير مرفق مشبك اخلرطحم )األدواا املطلحعا (غير مرفقا مفتلح رعط (22 مم) للقدم مصبلح مدوي قفلزاا نظلرة واقيا األملميا شرمط قيلس كم ّ لشا زردما T15 مفك تحركس سكني قطع مفك عراغي مسطح الرأس مفك عراغي فيليبس قلم رصلص ذردما...
- Page 16 ال جت ُ ري أي تبدمل على قلعس الطلقا عغسللا األطبلق. وفي )، أغلق صنلعير امليله وافصل قلعس الطلقا فحر ً ا. ثم، اتصلStop حللا عدم تحافقه مع مخر َ ج التيلر، استبن عفني كهرعلء مؤهل . اولي أو عفني مؤهلSamsung مبركز خدما عمالء .لتركيب املأخذ عطرمقا صحيحا البرعيا...
- Page 17 درجا حرارة اجلح اويط التصرمف ال تركب غسللا األطبلق في مكلن مبرض لدرجلا حرارة تصل إلى إذا كنت تستخدم نظلم تصرمف مخصص لغسللا األطبلق، وص ِّ ل التجمد، ألنهل حتتفظ دوم ً ل عببض امليله في صملم امليله واملضخا خرطحم التصرمف عنظلم تصرمف مببد عن األرض مسلفا 03 سم واخلرطحم.
- Page 18 التركيب عمليا التركيب خطحة عخطحة .قد تختلف خطحاا التركيب حسب الطراز حتدمد محقع التركيب خطوة .حدد املحقع الذي متحافق مع الشروط التلليا مجب أن متسم املحقع عأرضيا صلبا ميكنهل حتمل وزن غسللا .األطبلق مجب أن مكحن املحقع قرم ب ً ل من ححض ومن السهل الحصحل إلى .مصدر...
- Page 19 أعبلد اخلزانا )055 (الطراز املدمج عللكلمل مالحظا حتقق ممل إذا كلنت املسلفا عني األرضيا واجلزء السفلي من سطح البمل تزمد عن 058 مم. وإذا كلن األمر كذلك، أدخل القدم الفرعيا املرفقا في .3 طقم التركيب. للحصحل على التفلصيل، راجع القسم التللي. إذا كلنت املسلفا أقل من 058 مم، انتقل إلى اخلطحة البرعيا...
- Page 20 التركيب خطوة )إدخلل القدم الفرعيا (علستثنلء الطراز الذي عدون حلمل إذا كلنت املسلفا عني األرضيا واجلزء السفلي من سطح البمل أكثر من 058 مم، أدخل القدم الفرعيا في الفتحا املحجحدة في اجلزء السفلي من .غسللا األطبلق قبل عدء تركيبهل .ضع غسللا األطبلق على اجلزء اخللفي منهل تنبيه...
- Page 21 خطوة ترتيب اخلراطيم .نظ ِّ ف اجلزء السفلي من سطح البمل .ضع امللصق الحاقي كمل هح محضح اسحب قلعس الطلقا وخرطحم امليله وخرطحم التصرمف عبر .فتحا احلحض تنبيه تحخ احلذر لتجتب التشلعك أو السير على قلعس الطلقا أو .اخلراطيم .ال ت ُ زمل الحرق البني املحجحد على اجلزء اخللفي من غسللا األطبلق فهذا...
- Page 22 التركيب خطوة )ر ك ِّ ب اللححا اخملصصا (للطرز املدمجا عللكلمل )DW60A80**BB ، (املدمجا عللكلملFBI طرز ضع قللب التركيب على اجلزء اخللفي من اللححا اخملصصا وثب ت ِّ ه مؤق ت ً ل علستخدام شرمط شفلف. الحظ أنه سيتم تركيب اجلزء 2 قطر...
- Page 23 ) علستخدام 8 براغيC( أحكم رعط دعامة الباب .، بقطر 4 × 41) كمل هح محضح في الشكلD( )E( ) على اللححا اخملصصا في الفتحاتC( أدخل دعلملا الباب .املحجحدة في علب غسللا األطبلق لتثبيت اللححا اخملصصا عينمل متسك علللححا اخملصصا، ثبتهل عللبلب وأدخل مثبتاتها .) كمل...
- Page 24 التركيب .افتح علب غسللا األطبلق وأزل البراغي األرعبا تنبيه تحخى احلذر عند فتح البلب. فقد منفتح البلب أو م ُ غلق عشكل غير متحقع في حللا عدم ضبط مستحى الزنبرك عشكل منلسب، ممل مؤدي .إلى التبرض إلصلعا جسدما 10 . أحكم...
- Page 25 )DW60A80**IB ، (املدمجا عللكلمل االنزالقياFBI طرز طراز غسللا األطبلق هذا مجهز عنظلم محازنا تلقلئي في البلب. ومحتحي على مفصلا انزالقيا، ممل مجبله مثللي للمطلعخ التي عدون قلعدة أو ) عني 076 مم كحد أدنى و008 مم كحد أقصى حسب عيئا التركيب. مجبA( للتركيب فحق خزانا صغيرة. وميكن أن متراوح ارتفلع اللححا اخملصصا .)،...
- Page 26 التركيب أزل قللب التركيب، ثم أحكم رعط مثبتلا اللححا اخملصصا .) كمل هح محضح في الشكلA( ) علستخدام 21 عرغي ً لB(، )C( عينمل متسك علللححا اخملصصا، ثبتهل عللبلب وأدخل مثبتلتهل .في الفتحلا املقلعلا املحجحدة في البلب تنبيه استخدم لححا مخصصا متراوح وزنهل عني 4 - 01 كجم. تأكد من...
- Page 27 خطوة تركيب احللفا .ميكنك استخدام احللفا لتقليل مستحى الضحضلء لتركيب حلفا اجللنب البلحي، أزل الفينيل الحاقي للشرمط .الالصق مزدوج اجللنب املحجحد في اجلزء اخللفي من احللفا أدخل الشكل اخلطلفي للحلفا إلى اجللنب اخللفي من الدعلما .البلحما للححض .ارعط البراغي املرفقا عللفتحلا األرعبا البرعيا...
- Page 28 التركيب خطوة ضبط استحاء غسللا األطبلق ميكنك ضبط ارتفلع غسللا األطبلق لضبط استحائهل. الحظ أنه في .هذه اخلطحاا، متم إدخلل غسللا األطبلق نصف املسلفا حللي ً ل استخدم ميزان ضبط االستحاء للتحقق من استحاء غسللا .األطبلق لضبط االرتفلع األملمي، استخدم مفك عراغي مسطح الرأس .)-( .خلفض...
- Page 29 اترك مسلفا 5 مم على األقل عني اجلزء البلحي من غسللا األطبلق .واجلزء السفلي من سطح البمل (5 مم) عحد أدنى عند اكتملل ضبط االستحاء، حتقق ممل إذا كلن البلب مفتح ومغلق .عشكل صحيح أم ال البرعيا DW8500AM_DW60A8070BB_UAE_DD81-03206F-00_AR.indd 29 2021-05-27 10:52:27...
- Page 30 التركيب خطوة إحكلم تثبيت غسللا األطبلق ميكنك استخدام الدعلملا إلحكلم تثبيت غسللا األطبلق عسطح البمل. عدال ً من ذلك، ميكنك ثقب الثقحب اجللنبيا إلحكلم تثبيت غسللا .األطبلق على جلنبي اخلزانا التثبيت عسطح البمل علستخدام الدعلملا أدخل الدعلملا املرفقا في الفتحلا األملميا البلحما لغسللا .األطبلق...
- Page 31 التثبيت علجللنبني تنبيه في حللا عدم جتميع األغطيا البالستيكيا، قد تتسرب ميله .ومتسبب ذلك في نشحب حرمق أو حدوث صدما كهرعلئيا .أزل األغطيا البالستيكيا أحكم رعط البرغيني (قطر 5.3 × 61) علملكلنني (املشلر إليهمل في .)الرسم التحضيحي .أدخل األغطيا البالستيكيا املرفقا في مكلني تثبيت البرغيني وص...
- Page 32 التركيب خطوة تحصيل خرطحم التصرمف .وص ِّ ل خرطحم التصرمف مبنفذ التصرمف تنبيه ر ك ِّ ب نظلم التصرمف عشكل صحيح عحيث ال مخرج خرطحم .التصرمف من منفذ التصرمف أثنلء عمليا التصرمف تأكد من عدم تشلعك أو ثني خرطحم التصرمف، وخرطحم إمداد .امليله،...
- Page 33 احللفا اجل د ّ ارما .ميكنك تركيب احللفا اجل د ّ ارما وفقً ل للطراز أو ظروف التركيب احللفا اجل د ّ ارما .ضع احللفا اجلدارما على اجلزء السفلي من غسللا األطبلق افتح علب غسللا األطبلق، وارسم خط ً ل مرجبي ً ل على احللفا .اجلدارما...
- Page 34 التركيب )DW60A80**U* احللفا اجلدارما املقطحعا مسبقً ل (سلسلا .أدخل الدعلملا املرفقا في اجلزء السفلي من غسللا األطبلق .أدرهم إلى محضبهم انظر الشكل املحجحد على اليسلر لالطالع على تسلسل .التثبيت الصحيح ومكلن الدعلملا أدخل احللفا اجلدارما املقطحعا مسبقً ل في الدعلملا أوال ً ، ثم أحكم...
- Page 35 ملبا البيلن .ميكنك االطالع على حللا تشغيل غسللا األطبلق عن طرمق التحقق من ملبا البيلن ملبا البيلن .عند تشغيل غسللا األطبلق، تبمل ملبا البيلن وتضيء علجتله األرض .محضح لك ذلك حللا تشغيل غسللا األطبلق مالحظا .حتقق ممل إذا كلنت ملبا البيلن مغطلة عحلفا مطلطيا أم ال .مجب...
- Page 36 التركيب )DW60A80**U* لحح احلملما (السلسلا .إذا كنت ترغب في تثبيت لحح احلملما، فلتبع هذه اخلطحاا .أدخل الدعلملا املرفقا في اجلزء السفلي من غسللا األطبلق .أدرهم إلى محضبهم انظر الشكل املحجحد على اليسلر لالطالع على تسلسل .التثبيت الصحيح ومكلن الدعلملا أدخل لححا احلملما في الدعلملا أوال ً ، ثم أحكم رعط املسلمير .والصحاميل...
- Page 37 .التبليملا الحاردة في التطبيق. ال حتتلج إلى تطبيق منفصل إلنشلء حسلعك مالحظا عتسجيلSamsung عللفبل، فلستخدمه لتسجيل الدخحل. مقحم م ُ ستخ د ِ م الهلتف الذكي املسجل لدىSamsung إذا كلن لدمك حسلب .الدخحل تلقلئي ً ل Wi-Fi إمقلف تشغيل شبكا...
- Page 38 أو مل عبده، وأجهزةAndroid OS 6.0 )Marshmallow( في أجهزة اجلهلا اخللرجيا التي تبمل عنظلم التشغيلSmartThings متحافر تطبيق أو ملiOS 10.0 التي تبمل عنظلم التشغيلiOS أو مل عبده، وأجهزةAndroid OS 5.0 )Lollipop( التي تبمل عنظلم التشغيلSamsung .)...
- Page 39 .2014/53/EU أن األجهزة من نحع املبداا الالسلكيا متحافقا مع التحجيهSamsung Electronics مبحجب هذا، تبلن شركا ومتحافر النص الكلمل إلعالن املطلعقا لالحتلد األوروعي في عنحان اإلنترنت التللي: ميكن البثحر على إعالن املطلعقا الرسمي على املحقع .، انتقل إلى الدعم > البحث في دعم املنتج وأدخل اسم الطرازhttp://www.samsung.com ."مبلغ...
- Page 40 التركيب ) (شبكا االستشبلر الالسلكياWSN ، اضغط مع االستمرار على زر التحكمAP . (للدخحل إلى وضعAP (البدء) في وضعSTART كيفيا الحصحل: اضغط مع االستمرار على زر ). ٍ الذكي ملدة 3 ثحان تنسيق البرض ، متم عرض "-" + أول رقمني ومتم عرض األرقلم الثالثاWi-Fi (شبكا االستشبلر الالسلكيا) من وحدةWSN عبد استقبلل عيلنلا .")...
- Page 41 اإلعالن مفتحح املصدر .محتحي البرنلمج املضمن في هذا املنتج على عرنلمج مفتحح املصدر إلى مبلحملا ترخيص مفتححا املصدرhttp://opensource.samsung.com/opensource/SMART_TP2_0/seq/0 التلليURL مقحدك عنحان .فيمل متبلق عهذا املنتج البرعيا DW8500AM_DW60A8070BB_UAE_DD81-03206F-00_AR.indd 41 2021-05-27 10:52:28...
- Page 42 قبل عدء التشغيل .اتبع هذه اإلرشلداا عبنلما لضملن التركيب الصحيح لغسللا األطبلق ومنع احلحادث أثنلء التشغيل وا سرمبا عن غسللا األطبلق DW60A807*/DW60A806*/DW60A805* طراز خزان امللح الرف البلحي رف أدواا امللئدة دعلما الكؤوس الزجلجيا مح ز ِّ ع املنظف الرف السفلي خرطحم...
- Page 43 DW60A804* طراز خزان امللح الرف البلحي رف السكلكني سلا أدواا امللئدة مح ز ِّ ع املنظف الرف السفلي خرطحم اإلمداد القلعدة البلب دعلما الكؤوس الزجلجيا خرطحم التصرمف البرعيا DW8500AM_DW60A8070BB_UAE_DD81-03206F-00_AR.indd 43 2021-05-27 10:52:31...
- Page 44 قبل عدء التشغيل تنبيه ال تغسل األدواا امللحثا عللرملد أو الرملل أو الشمع أو زمت التشحيم أو الطالء. س ت ُ لحق هذه املحاد الضرر عغسللا األطبلق. ال مذوب الرملد عل .منتشر داخل غسللا األطبلق .تخلص من عقلمل الطبلم كللبظلم وعذور الفلكها وغيرهل من الفضالا مثل أعحاد األسنلن واملنلدمل الحرقيا وغير ذلك املحجحدة علألطبلق .ميكن...
- Page 45 االستخدام األسلسي لألرفف تبدمل ارتفلع األرفف ميكنك ضبط ارتفلع الرف البلحي كي متمكن الرف السفلي من استيبلب األطبلق األكبر حجم ً ل. وفقً ل الرتفلع الرف البلحي، ميكن للرف السفلي استيبلب أطبلق مصل قطرهل إلى 03 سم، وميكن للرف البلحي استيبلب أطبلق مصل قطرهل إلى 81 سم (عرف أدواا امللئدة) أو 52 سم (عدون رف .)أدواا...
- Page 46 قبل عدء التشغيل وضع األطبلق الرف السفلي .نحصي عحضع البنلصر الكبيرة التي مصبب تنظيفهل (مثل األواني واملقللي واألغطيا وأطبلق التقدمي واألوعيا) في الرف السفلي م ُ فضل وضع أطبلق التقدمي واألغطيا على جلنبي األرفف لتجنب إعلقا دوران الفحها البلحما. مجب وضع األعلرمق وآنيا امللئدة مع تحجيههل .ألسفل...
- Page 47 استخدام النتوءات التي ميكن طيها .لتثبيت األعلرمق والقالملا عإحكلم على نحح أفضل، ميكن طي ّ النتحءاا ألسفل كمل هح محضح في الشكل الرف العلوي ص ُ مم الرف البلحي خصيص ً ل ليحضع عه أطبلق امللئدة اخلفيفا والهشا مثل األكحاب وفنلجني الشلي والقهحة وصححن الفنلجني واألطبلق .الزجلجيا...
- Page 48 قبل عدء التشغيل نتوءات التوجيه ميكنك وضع األطبلق في الرف األوسط عطرق مختلفا عن طرمق ،تغيير نتحءاا التحجيه. في حللا حترمك زر التحجيه إلى اليسلر ميكنك وضع الكؤوس الزجلجيا القيلسيا. أمل إذا كلن زر التحجيه في املنتصف، فيمكنك وضع الكؤوس الزجلجيا األقصر. أمل إذا كلن زر .التحجيه...
- Page 49 صينية الرف الثالث ميكنك عسهحلا تفرمغ أدواا امللئدة من الصينيا القلعلا لإلزالا في الرف البلحي. ميكنك أمض ً ل إزالا الصينيا اليسرى أو اليمنى لحضع األواني .األكبر نسبي ً ل. ميكن إزالا كلتل الصينيتني رف أدوات املائدة استخدام دعامة الكؤوس الزجاجية دعلما...
- Page 50 قبل عدء التشغيل درج املنظف .تتطلب جميع دوراا غسللا األطبلق وجحد منظف في درج املنظف. استخدم املنظف عللكميا املحصى عهل للدورة اوددة لضملن أفضل أداء حتذمر ال تضع منظف غسللا األطبلق في فمك. جتنب استنشلق األعخرة املتصلعدة من املنظف. حيث محتحي منظ ّ ف غسللا األطبلق على مكحنلا...
- Page 51 .أغلق الغطلء عتحرمكه ألعلى إذا كلنت األواني شدمدة االتسلخ، اسكب كميا قليلا من .املنظف على البلب للحصحل على نتلئج تنظيف أفضل مالحظا .سي ُ نشط املنظف اإلضلفي أثنلء عمليا الغسل األولي .مفتح الغطلء تلقلئي ً ل لتحزمع املنظف أثنلء عمليا الغسل البرعيا...
- Page 52 قبل عدء التشغيل خزان مسلعد الشطف ،مبمل مسلعد الشطف على حتسني أداء التجفيف لغسللا األطبلق. مبجرد أن مضئ مؤشر إعلدة ملء مسلعد الشطف املحجحد علححا التحكم .أعد ملء اخلزان مبسلعد الشطف. استخدم مسلعد الشطف السلئل فقط .سيتسبب مسلعد الشطف املسححق في انسداد فتحا اخلزان ممل مؤدي إلى حدوث خلل أثنلء التشغيل تنبيه...
- Page 53 خزان امللح تنبيه استخدم امللح اخملصص لغسللا األطبلق فقط. ال تستخدم أي نحع آخر من امللح أو املذمب. قد مؤدي ذلك إلى تلف خزان امللح ونظلم تيسير .امليله .ملنع التآكل نتيجا كميا امللح الزائدة أو امليله امللحلا، امأل خزان امللح دوم ً ل قبل عدء دورة الغسيل ملء...
- Page 54 قبل عدء التشغيل مؤشر امللح .) إذا كلنت كميا امللح غير كلفيا للدوراا التلليا ( مضيء املؤشر استجلعا لححا اللمس .لتجنب فقدان عنلصر التحكم التي تبمل علللمس لالستجلعا، اتبع هذه التبليملا .املس وسط كل زر عإصبع واحد ال تلمس أكثر من زر واحد ملرة واحدة، إال إذا وردا إرشلداا عخالف .ذلك...
- Page 55 وضع اإلعداد .ميكنك تغيير الصحا، ووظيفا الفتح التلقلئي للبلب، ومستحى مسلعد الشطف، وإعداداا عسر امللء حسب تفضيالتك الدخحل إلى وضع اإلعداد .ش غ ِّل غسللا األطبلق .اضغط مع االستمرار على زر الدورة تلقائي ملدة خمس ثحان ٍ في غضحن 06 ثلنيا من تشغيل غسللا األطبلق ."0:00"...
- Page 56 قبل عدء التشغيل إعداد مستحى مسلعد الشطف .ميكنك تغيير كميا مسلعد الشطف املستخدما أثنلء الدورة لتحدمد قلئما إعداد مستحى مسلعد الشطف. حدد املفتلح "تلقائي" ملدة 5 ثحان ٍ ، عبد سملع صلفرة التحذمر متبحعا عإعلدة تبيني ."الشلشا "00:0"، ثم اضغط على املفتلح "التعقيم )"F4"...
- Page 57 البمليلا لححا التحكم DW60A807*/DW60A806*/DW60A805* طراز DW60A804* طراز .اضغط لتشغيل غسللا األطبلق أو إمقلف تشغيلهل ) (تشغيلPOWER اضغط الختيلر دورة الغسل املطلحعا. للحصحل على مزمد من املبلحملا، راجع القسم "نظرة الدورة .59 عامة حول الدورة" في صفحا .اضغط لغسل األواني علستخدام الرف السفلي فقط الرف...
- Page 58 البمليلا املؤشراا DW60A807*/DW60A806*/DW60A805* طراز DW60A804* طراز مؤشر نفاد امللح .مضيء عند نفلد امللح من خزان امللح مؤشر إعادة ملء مساعد الشطف .مضيء عند نفلد مسلعد الشطف من غسللا األطبلق مؤشر قفل التحكم .مضيء في حللا تنشيط قفل التحكم DW60A807*/DW60A806*/ (طراز )DW60A805* مؤشر...
- Page 59 نظرة علما ححل الدورة DW60A807*/DW60A806*/DW60A805* طراز DW60A804* طراز تكشف هذه الدورة عن مستحى االتسلخ وتبدأ تلقلئي ً ل في الدورة املثلى التي تنلسب جميع تلقلئي .مستحملا األواني املتسخا .تقلل هذه الدورة من استهالك الطلقا وامليله وتنلسب علد ة ً األواني املتسخا اقتصلدي...
- Page 60 البمليلا )DW60A807*/DW60A806*/DW60A805* تنزيل الدورة (طراز .ميكنك تنزمل الدوراا واستخدامهل عخالف الدوراا املتحفرة افتراضي ً ل من خالل هلتفك الذكي .) (تشغيلPOWER اضغط على الزر .حدد تنزيل الدورة .حدد الدورة القلعلا للتنزمل التي ترمد استخدامهل في تطبيق هلتفك الذكي .والدوراا املتلحا هي مزمد من الهدوء، واألواني واملقللي، وعالستيك، والبنلما عللطفل .الدورة...
- Page 61 خطحاا تشغيل عسيطا .افتح البلب، ثم قم عتحميل غسللا األطبلق. تأكد من إزالا عقلمل الطبلم والفضالا املحجحدة على األطبلق .ضع املنظف في مح ز ِّ ع املنظف. للحصحل على نتلئج أفضل، أضف مسلعد الشطف (تشغيل)، ثم حدد دورة علخليلراا الالزما (الرف السفلي فقط، مز و ل د السرعة، التعقيم، و تأجيل البدء). قد ال تتحفرPOWER اضغط على .عبض...
- Page 62 البمليلا خزان امللح ص ُ مم منقي امليله إلزالا املبلدن واألمالح من امللء، التي من شأنهل أن حتدث تأثير ً ا ضلر ً ا أو سلبي ً ل عند تشغيل اجلهلز. كلمل زادا محتحملا هذه .املبلدن واألمالح، مزمد عُ سر امليله. منبغي ضبط املنقي تبب ً ل ملدى عُ سر امليله في منطقتك .ميكن...
- Page 63 عسر املاء التحكم الذاتي استهالك امللح إعداد عسر املياه mmol/l °Clark °fH °dH )(دورات/1 كجم/ث )(جرام/دورة (مللي (بالدرجات (بالدرجات (بالدرجات )مول/لتر )البريطانية )الفرنسية )األملانية 0.94-0 2.0-1.0 14-7 20-10 11-6 3.0-2.1 21-15 30-21 17-12 4.0-3.1 28-22 40-31 22-18 6.0-4.1 42-29 60-41 34-23 9.8-6.1 69-43...
- Page 64 البمليلا تأجيل البدء ميكنك تأجيل عدء تشغيل الدورة حتى 42 سلعا عزملدة تأجيل عدء التشغيل سلعا واحدة. لزملدة وقت التأجيل، اضغط على تأجيل البدء. ت ُ شير .السلعا املبروضا إلى الحقت الذي ستبدأ فيه الدورة .افتح البلب، ثم قم عتحميل غسللا األطبلق .اضغط...
- Page 65 الصيلنا التنظيف .حلفظ على نظلفا غسللا األطبلق لتحسني األداء وتقليل اإلصالحلا غير الضرورما أو إطللا البمر االفتراضي لغسللا األطبلق الهيكل اخللرجي نظ ِّ ف االنسكلعلا التي حتدث على سطح غسللا األطبلق فحر ً ا. استخدم قطبا قملش نلعما ورطبا ملسح االنسكلعلا والغبلر عرفق على لححا .التحكم...
- Page 66 الصيلنا الفحهلا .ملنع انسداد الفحهلا أو في حللا انسدادهل، أزل جميع الفحهلا ونظ ِ فهل. تحخ احلذر عند إخراج الفحهلا إذ إنهل قد تتبرض للكسر الفوهة العلوية افتح البلب ثم اسحب الرف البلحي إلى اخللرج إلظهلر الفحها .البلحما .قم عفك الصلمحلا وإزالتهل، ثم قم عإزالا الفحها .أزل...
- Page 67 الفلتر .نحصي عتنظيف الفلتر شهرم ً ل .افتح البلب، ثم قم أوال ً عإزالا الرف السفلي أدر مقبض الفلتر عكس اجتله حركا عقلرب السلعا لفتح .الفلتر واسع الثقحب أزل الفلتر واسع الثقحب، ثم الفلتر الدقيق األسطحاني املحجحد .علألسفل البرعيا DW8500AM_DW60A8070BB_UAE_DD81-03206F-00_AR.indd 67 2021-05-27 10:52:41...
- Page 68 الصيلنا أزل أي أوسلخ أو شحائب من الفلتر الدقيق و الفلتر واسع .الثقحب .اشطفهم مبيله جلرما، ثم جففهم جي د ً ا .أعد إدخلل الفلتر، ثم ضع الفلتر واسع الثقحب .أدر مقبض الفلتر في اجتله حركا عقلرب السلعا لغلقه تنبيه .تأكد...
- Page 69 استكشلف املشلكل وحلهل تبليملا الفحص .إذا كنت تحاجه مشكلا في غسللا األطبلق، فقم أوال ً مبراجبا اجلدول التللي وجر ِّ ب االقتراحلا اإلجراء السبب احملتمل املشكلة تأكد من أن البلب مقفل عإحكلم ومغلق .جي د ً ا تأكد من تحصيل الرف البلحي عللفحها .لم...
- Page 70 استكشلف املشلكل وحلهل اإلجراء السبب احملتمل املشكلة حدد دورة وفقً ل ملستحى اتسلخ األطبلق وفق .مت اختيلر دورة غير صحيحا .تبليملا هذا الدليل .نظ ِّ ف الفالتر .الفالتر مسدودة وغير مرعحطا عشكل صحيح .تأكد من رعط الفالتر عشكل صحيح استخدم كميا املنظف املنلسبا لكل .استخدام...
- Page 71 اإلجراء السبب احملتمل املشكلة تصدر غسللا األطبلق صح ت ً ل عندمل مكحن غطلء .وهذا أمر طبيبي .املح ز ِّ ع مفتح ح ً ل ومضخا التصرمف قيد التشغيل .تصدر غسالة األطباق ضوضاء ٍ تأكد من أن غسللا األطبلق على سطح .غسللا...
- Page 72 حتقق ممل إذا كلن صملم إمداد امليله مغلق ل ً أو مل إذا كلن مصدر إمداد امليله مبلق ل ً أو مل إذا كلن صملم أو خط إمداد . اوليSamsung امليله مجمد ا ً أو مسدود ا ً عأشيلء غرمبا. إذا استمرا املشكلا، فلتصل مبركز خدما...
- Page 73 مخطط الدوراا DW60A807*، DW60A806* مكثف اقتصادي تلقائي الدورة )غسل أولي (05 درجا مئحما الغسل غسل أولي )غسل أولي (54 درجا مئحما الغسل الرئيسي )الرئيسي (84 درجا مئحما الغسل الرئيسي (55-56 درجا الشطف )(56 درجا مئحما ...
- Page 74 مخطط الدوراا تنزيل الدورة التنظيف الذاتي الدورة األواني واملقالي مزيد من الهدوء )غسل أولي (05 درجا مئحما )غسل أولي (53 درجا مئحما الغسل غسل أولي الغسل الرئيسي (86 درجا الغسل الرئيسي (06 درجا )الرئيسي (07 درجا مئحما تسلسل...
- Page 75 DW60A805*، DW60A804* مكثف اقتصادي تلقائي الدورة )غسل أولي (54 درجا مئحما )غسل أولي (05 درجا مئحما الغسل غسل أولي الغسل الرئيسي (55-56 درجا الغسل الرئيسي (56 درجا )الرئيسي (05 درجا مئحما الشطف )مئحما تسلسل عمليات الدورة ...
- Page 76 مخطط الدوراا تنزيل الدورة التنظيف الذاتي مزيد من الهدوء الدورة األواني واملقالي )غسل أولي (05 درجا مئحما الغسل غسل أولي )غسل أولي (53 درجا مئحما الغسل الرئيسي (86 درجا )الرئيسي (07 درجا مئحما الغسل الرئيسي (06 درجا ...
- Page 77 .اقطع سلك التيلر عحيث ال ميكن تحصيل اجلهلز مبصدر طلقا .قم عفك البلب ملنع تبرض احليحانلا أو األطفلل لالحتبلس داخل اجلهلز ملزمد من مبلحملا ححل التصميم اإلمكحلحجي .www.samsung.com/support ميكن البثحر على مبلحملا التصميم اإلمكحلحجي علالنتقلل إلى دليل امل ُ ستخ د ِ م على البرعيا DW8500AM_DW60A8070BB_UAE_DD81-03206F-00_AR.indd 77...
- Page 78 امللحق املحاصفلا DW60A807*IB DW60A807*BB DW60A807*U* DW60A807*F* DW60A806*IB DW60A806*BB DW60A806*U* DW60A806*F* الطراز DW60A805*IB DW60A805*BB DW60A805*U* DW60A805*F* DW60A804*IB DW60A804*BB DW60A804*U* DW60A804*F* )م ُ دمجة بالكامل (انزالقية م ُ دمجة بالكامل مر ك ّبة حتت سطح العمل بدون حامل النوع 022-042 فحلت ~ ، 05 هرتز الطاقة...
- Page 79 اختبلر املبيلر مالحظا .فيمل ملي مبلحملا اختبلر التحافق DW60A807*/DW60A806*/DW60A805* طراز سبا غسللا األطبلق: 41 فرد IEC 60436 :اختبلر املبلمير محضع الرف البلحي: املحضع السفلي دورة الغسل: اقتصلدي خيلراا إضلفيا: ال محجد F4 :إعداد مستحى مسلعد الشطف H3 :إعداد مستحى عسر امليله جرعا...
- Page 80 هل لديك أسئلة أو تعليقات؟ أو قم بزيارة موقعنا على اإلنترنت على اتصل بنا البلد U.A.E 800-SAMSUNG )800 - 726 7864( OMAN 800-SAM CS )800-72627( www.samsung.com/ae/support )English( KUWAIT 183-CALL )183-2255( www.samsung.com/ae_ar/support )Arabic( BAHRAIN 8000-GSAM )8000-4726( 800-CALL )800-2255( QATAR DW8500AM_DW60A8070BB_UAE_DD81-03206F-00_AR.indd 80...
- Page 81 Dishwasher User manual DW60A807*/DW60A806*/DW60A805*/ DW60A804* Series DW8500AM_DW60A8070BB_UAE_DD81-03206F-00_EN.indd 1 2021-04-07 8:43:17...
-
Page 82: Table Of Contents
Contents Safety information What you need to know about safety instructions Important safety symbols Instructions about the WEEE Important safety precautions Instructions when using your dishwasher Instructions for protecting your children Instructions for installing your dishwasher Installation What’s included Installation requirements Step-by-step installation Skirting board Info Light... - Page 83 Troubleshooting Checkpoints Information codes Cycle chart Appendix Transportation/relocation Protection against frost Disposing the dishwasher and helping the environment For more ecodesign information Specifications For standard test English DW8500AM_DW60A8070BB_UAE_DD81-03206F-00_EN.indd 3 2021-04-07 8:43:17...
-
Page 84: Safety Information
If you have any questions or concerns, contact your nearest service center or find help and information online at www.samsung.com. Important safety symbols... -
Page 85: Instructions About The Weee
This product and its electronic accessories should not be mixed with other commercial wastes for disposal. For information on Samsung’s environmental commitments and product specific regulatory obligations e.g. REACH, WEEE, Batteries, visit our sustainability page available via Samsung.com English DW8500AM_DW60A8070BB_UAE_DD81-03206F-00_EN.indd 5... -
Page 86: Important Safety Precautions
Safety information Important safety precautions To reduce the risk of fire, electric shock, or injury to persons when using your appliance, follow basic precautions, including the following: 1. This appliance is not to be used by persons (including children) with reduced physical, sensory or mental capabilities, or lack of experience and knowledge, unless they have been given supervision or instruction concerning use of the appliance by a... - Page 87 6. For appliances with ventilation openings in the base, a carpet must not obstruct the openings. 7. Children of less than 3 years should be kept away unless continuously supervised. 8. CAUTION: In order to avoid a hazard due to inadvertent resetting of the thermal cut-out, this appliance must not be supplied through an external switching device, such as a timer, or connected to a...
-
Page 88: Instructions When Using Your Dishwasher
Safety information Instructions when using your dishwasher This dishwasher is not designed for commercial use. It is intended for use in domestic households and in similar working and residential environments such as: • Shops • Offices and showrooms and by residents in establishments such as: •... -
Page 89: Instructions For Protecting Your Children
Knives and other utensils with sharp points must be loaded in the basket with their points down or placed in a horizontal position. Instructions for protecting your children This appliance is not a toy! To avoid the risk of injury, keep children well away and do not allow them to play in or around the dishwasher or to use the controls. -
Page 90: Instructions For Installing Your Dishwasher
Safety information Instructions for installing your dishwasher Before setting up the appliance, check it for any externally visible damage. Under no circumstances should you use a damaged appliance. A damaged appliance could be dangerous. The dishwasher must only be plugged into the electricity supply via a suitable switched socket. - Page 91 The plastic housing of the water connection contains an electrical component. The housing must not be submerged in water. There are electrical wires in the hose of Aqua-Stop. Never cut the water inlet hose, even if it is too long. Installation, maintenance and repairs may only be carried out by a suitably qualified and competent person in strict accordance with current national and local safety regulations.
- Page 92 Make sure that your dishwasher’s hardness level setting is correct as your area. (Refer to the “Salt storage” section on page 53.) Please consult www.samsung.com/support for more information about materials and repair. English DW8500AM_DW60A8070BB_UAE_DD81-03206F-00_EN.indd 12...
-
Page 93: Installation
Make sure all the parts are included in the product package. If you have a question about the dishwasher or the parts, contact a local Samsung customer centre or your retailer. The actual appearance of the dishwasher may differ, depending on your model and country. - Page 94 Installation FBI (Sliding, DW60A80**IB) models Top bracket (2) Ø4 X 14 screw (14) Protective Plastic cap (2) condensation sticker (1) Custom panel fixer Ø3.5 X 16 screw (2) Sub foot (3) Custom panel fixer Ø3.9 X 13 screw (4) Upper side trim (1) BU (Built Under, DW60A80**U*) models Top brackets (2) Ø4 X 14 screws (2)
- Page 95 Installation kit (not provided) Hose clamp Tools required (not provided) Safety glasses Gloves Flashlight Wrench (22 mm) for the front foot Torx T15 Pliers Nipper Tape measure Pencil Phillips screwdriver Flat head Cutting knife screwdriver Level Hole saw Ear clamp plier (80-100 mm) English DW8500AM_DW60A8070BB_UAE_DD81-03206F-00_EN.indd 15...
-
Page 96: Installation Requirements
• Do not modify the power plug of the Then, contact a local Samsung customer dishwasher. If the power plug does centre or a qualified technician. not fit the outlet, have a proper outlet installed by a qualified electrician. - Page 97 Drain Ambient temperature If you are using a drain system dedicated Do not install the dishwasher in an area to the dishwasher, connect the drain hose exposed to freezing temperatures. The to a drain system that is between 30 cm dishwasher always retains some water in and 70 cm off the ground.
-
Page 98: Step-By-Step Installation
Installation Step-by-step installation The installation procedure may differ depending on the model. STEP 1 Select a location Select a location that meets the following conditions. • The location must have a solid floor that can support the weight of the dishwasher. •... - Page 99 Cabinet dimensions 550 (Fully Built-in model) NOTE Check if the distance between the floor and the bottom of the worktop is more than 850 mm. If so, insert the sub foot included in the installation kit. For details, see the next section.
- Page 100 Installation STEP 2 To insert the sub foot (Except Free Standing model) If the distance between the floor and the bottom of the worktop is more than 850 mm, insert the sub foot into the hole on the bottom of the dishwasher before you start the installation.
- Page 101 STEP 4 Arrange the hoses 1. Clean the bottom of the countertop. 2. Attach the protective sticker as shown. 3. Pull the power plug, the water hose, and the drain hose through the sink hole. CAUTION • Use caution not to kink or step on the power plug or the hoses.
- Page 102 Installation STEP 5 Install the custom panel (For Fully Built-In models) FBI (Fully Built-In, DW60A80**BB) models 1. Put the installation template on the back of the custom panel and fix it Ø2 temporarily using transparent tape. Note that the rear of the custom panel will be attached to the dishwasher door.
- Page 103 4. Tighten the door bracket (C) with 8 screws (D, Ø4 X 14) as shown in the figure. 5. Insert the door brackets (C) on the custom panel to the holes (E) on the dishwasher door to fix the custom panel. 6.
- Page 104 Installation 9. Open the dishwasher door and remove the 4 screws. CAUTION Use caution when opening the door. The door might open or close unexpectedly if the spring level is not adjusted appropriately, resulting in physical injury. 10. Secure the custom panel to the door by fastening the 4 screws (3.5 X 45).
- Page 105 FBI (FBI Sliding, DW60A80**IB) models This dishwasher model is equipped with an auto-balancing system in the door. It has a sliding hinge, which is perfect for plinth-less kitchens or for installation above a small cupboard. Custom panel’s height (A) can be between minimum 670 mm to maximum 800 mm depending on the installation environment.
- Page 106 Installation 3. Remove the installation template, and then tighten the Custom panel fixers (B), (C) with 12 screws (A) as shown in the figure. 4. While holding the custom panel, attach it to the door and insert the Custom panel fixers into the corresponding holes at the door.
- Page 107 STEP 6 Install the trim You can use the trim to reduce the noise level. 1. To install the upper side trim, remove the protective vinyl of double-side adhesive tape on the back of the trim. 2. Insert the Hook shape of the trim to the rear side of tub top bracket.
- Page 108 Installation STEP 7 Level the dishwasher You can adjust the height of the dishwasher to level it. Note that in these steps, the dishwasher is currently inserted halfway. 1. Use the level to check if the dishwasher is level. 2. To adjust the front height, use a flat head(-) screwdriver.
- Page 109 4. Leave at least a 5 mm space between the top of the dishwasher and the bottom of the countertop. Min. (5 mm) 5. When levelling is complete, check if the door opens and closes properly. English DW8500AM_DW60A8070BB_UAE_DD81-03206F-00_EN.indd 29 2021-04-07 8:43:36...
- Page 110 Installation STEP 8 Secure the dishwasher You can use the brackets to secure the dishwasher to the countertop. Alternatively, you can drill the side holes to secure the dishwasher to the cabinet sides. To the countertop using the brackets 1. Insert the provided brackets into the top front holes of the dishwasher as shown.
- Page 111 To the sides CAUTION If the plastic caps are not assembled, water may leak and cause a fire or electric shock. 1. Remove the plastic caps. 2. Tighten the 2 screws (Ø3.5 X 16) to the 2 places (marked on the illustration). 3.
- Page 112 Installation STEP 9 Connect the drain hose 1. Connect the drain hose to the drain outlet. CAUTION • Install the drain system properly so that the drain hose does not come out of the drain outlet in the draining process. •...
-
Page 113: Skirting Board
Skirting board You can attach the skirting board according to the model or installation conditions. Skirting board 1. Put the skirting board on the bottom of the dishwasher. 2. Open the door of the dishwasher, and draw a baseline on the skirting board where it interferes with the door. - Page 114 Installation Pre-cut skirting board (DW60A80**U* Series) 1. Insert the provided brackets to the bottom of the dishwasher. Turn them into position. • See the figure on the left for the correct attaching sequence and place of the brackets. 2. Insert the pre-cut skirting board into the brackets first, and then tighten the screws to fix the board.
-
Page 115: Info Light
Info Light You can see the dishwasher’s operating status by checking the info light. Info Light When the dishwasher has operated, the info light is on and shining toward the floor. This tells you the dishwasher’s operating status. NOTE Check whether the info light is covered by the rubber skirt. -
Page 116: Kick Plate (Dw60A80**U* Series)
Installation Kick plate (DW60A80**U* Series) If you want to install the kick plate, follow these steps. 1. Insert the provided brackets to the bottom of the dishwasher. Turn them into position. • See the figure on the left for the correct attaching sequence and place of the brackets. -
Page 117: Smartthings (Applicable Models Only)
On your smartphone, go to Settings and connect to your home Wi-Fi network. Download On an app market (Google Play Store, Apple App Store, Samsung Galaxy Apps), find the SmartThings app with a search term of “SmartThings”. Download and install the app on your device. - Page 118 • If your Internet provider has registered the MAC address of your PC or the modem module for permanent use, your Samsung dishwasher fails to connect to the Internet. If this is the case, contact your Internet provider. • The Internet firewall may interrupt your Internet connection. If this happens, contact your Internet provider.
- Page 119 • Hereby, Samsung Electronics, declares that the radio equipment type appliance is in compliance with Directive 2014/53/EU. The full text of the EU declaration of conformity is available at the following internet address: The official Declaration of conformity may be found at http://www.samsung.com, go to Support > Search Product Support and enter the model name.
- Page 120 Installation 1. How to access: press and hold the Start button in AP mode. (To enter the AP mode, press and hold the Smart Control button for 3 seconds.) 2. Display format - After receiving WSN data from WiFi module, “-” + first 2 digits are diplayed and next 3 digits are diplayed by every “start”...
-
Page 121: Open Source Announcement
Open Source Announcement The software included in this product contains open source software. The following URL http://opensource.samsung.com/opensource/SMART_TP2_0/seq/0 leads to open source license information as related to this product. English DW8500AM_DW60A8070BB_UAE_DD81-03206F-00_EN.indd 41 2021-04-07 8:43:40... -
Page 122: Before You Start
Before you start Follow these instructions carefully to ensure proper installation of the dishwasher and to prevent accidents when washing dishes. Dishwasher at a glance DW60A807*/DW60A806*/DW60A805* models 9 0 8 01 Cutlery rack 02 Upper rack 03 Salt storage 04 Lower rack 05 Dispenser 06 Glass support 07 Door... - Page 123 DW60A804* models 9 0 8 01 Knife rack 02 Upper rack 03 Salt storage 04 Lower rack 05 Dispenser 06 Cutlery basket 07 Door 08 Base 09 Inlet hose 10 Drain hose 11 Glass support English DW8500AM_DW60A8070BB_UAE_DD81-03206F-00_EN.indd 43 2021-04-07 8:43:47...
-
Page 124: Unsuitable Items For The Dishwasher
Before you start CAUTION • Do not wash items that are covered with ash, sand, wax, lubricating grease, or paint. These materials will damage the dishwasher. Ash does not dissolve and will spread inside the dishwasher. • Remove food remains such as bones, fruit seeds, etc. and waste such as toothpicks, paper napkins, etc. -
Page 125: Basic Use Of Racks
Basic use of racks Height adjustment You can adjust the height of the upper rack so that the lower rack can accommodate larger sized dishes. Depending on the height of the upper rack, the lower rack can accommodate plates up to 30 cm in diameter, and the upper rack can accommodate plates up to 18 cm (with Cutlery rack) or 25 cm (without Cutlery rack) in diameter. - Page 126 Before you start Loading dishes Lower rack We recommend that you place large items, that are difficult to clean (such as pots, pans, lids, serving dishes and bowls), in to the lower rack. It is preferable to place serving dishes and lids on the side of the racks in order to avoid blocking the rotation of the upper nozzle.
- Page 127 Using the folding tines For better stacking of pots and pans, the tines can be folded down as show in the figure. Upper rack The upper rack is designed to hold more delicate and lighter dishware such as glasses, coffee and tea cups and saucers, as well as plates, small bowls and shallow pans (as long as they are not too dirty).
- Page 128 Before you start Guide Tines You can load dishes into the central rack in various ways by changing the guide tines. If the guide button is moved to the left, you can load standard wine glasses. If the guide button is in the middle, you can load shorter wine or brandy glasses.
- Page 129 Rack Tray You can easily unload cutlery from a removable tray in the upper rack. You can also remove the left or right tray to load relatively larger utensils. Both trays are removable. Cutlery rack Using the glass support The glass support is especially suited for wine glasses.
-
Page 130: Detergent Compartment
Before you start Detergent compartment All dishwasher cycles require detergent in the detergent compartment. Apply detergent as recommended for the selected cycle to ensure best performance. WARNING • Do not place dishwasher detergent in your mouth. Avoid breathing in detergent fumes. - Page 131 3. Close the lid by sliding it up. 4. If the items are heavily soiled, pour a small amount of detergent onto the door for better cleaning results. NOTE The additional detergent will activate during the pre-wash process. The cover opens automatically to dispense the detergent during the wash. English DW8500AM_DW60A8070BB_UAE_DD81-03206F-00_EN.indd 51 2021-04-07...
-
Page 132: Rinse Aid Reservoir
Before you start Rinse aid reservoir Rinse aid improves the drying performance of the dishwasher. When the Rinse Refill indicator lights up on the control panel, refill with rinse aid. Only use liquid rinse aid. Powdered rinse aid will clog the reservoir opening and cause the dishwasher to malfunction. -
Page 133: Salt Storage
Salt storage CAUTION • Use dishwasher-specific salt only. Do not use any other type of salt or solvent. This may damage the salt storage and the water softening system. • To prevent corrosion due to an excessive amount of salt or salty water, always fill the salt storage before a washing cycle gets started. -
Page 134: Touchpad Responsiveness
Before you start Salt indicator The indicator ( ) turns on if there is not enough salt for the next several cycles. Touchpad responsiveness To prevent the touch-enabled controls from losing responsiveness, follow these instructions. • Touch the centre of each button with one finger. -
Page 135: Setting Mode
Setting mode You can change the sound, auto door open function, rinse aid level, and water hardness settings to your preference. Entering the Setting mode 1. Turn the dishwasher on. 2. Press and hold the AUTO cycle button for five seconds within 60 seconds from turning on the dishwasher. - Page 136 Before you start Rinse aid level setting You can change the amount of rinse aid applied during a cycle. 1. To select the rinse aid level setting menu. Select the “AUTO” key for 5 seconds, after the beep followed by the reset of the “0:00” display, press the “Sanitize” key. - The display shows the current setting.
-
Page 137: Operations
Operations Control panel DW60A807*/DW60A806*/DW60A805* models DW60A804* models 01 POWER Press to turn the dishwasher on or off. Press to select a desired wash cycle. For more information, 02 Cycle see the “Cycle overview” section on page 59. 03 Lower rack only Press to wash items using only the lower rack. - Page 138 Operations Indicators DW60A807*/DW60A806*/DW60A805* models DW60A804* models No Salt indicator Lights up when the salt storage runs out of salt. Rinse Refill indicator Lights up when the dishwasher runs out of rinse aid. Control Lock indicator (DW60A807*/ Lights up if Control Lock is activated. DW60A806*/ DW60A805* models) Self Clean indicator...
-
Page 139: Cycle Overview
Cycle overview DW60A807*/DW60A806*/DW60A805* models DW60A804* models This cycle detects the level of soil and automatically initiates 01 AUTO the optimal cycle, which is appropriate for all levels of soiled items. This cycle reduces power and water consumption, which is 02 ECO appropriate for normally soiled items. - Page 140 Operations Download Course (DW60A807*/DW60A806*/DW60A805* models) You can download and use courses other than those provided by default through your smartphone. 1. Press the POWER button. 2. Select Download Course. 3. Select the downloadable course you want to use in your smartphone app. Extra Silence, Pots and Pans, Plastic, and Baby Care courses are available.
-
Page 141: Simple Steps To Start
Simple steps to start 1. Open the door, and then load the dishwasher. Make sure to remove food remains and waste on the dishes. 2. Apply detergent to the detergent dispenser. For better results, add rinse aids. 3. Press POWER, and then select a cycle with necessary options (Lower rack only, Speed Booster, Sanitize, and Delay Start). -
Page 142: Salt Storage
Operations Salt storage The water softener is designed to remove minerals and salts from the water, which would have a detrimental or adverse effect on the operation of the appliance. The higher the content of these minerals and salts, the harder your water is. The softener should be adjusted according to the hardness of the water in your area. - Page 143 Water Salt Water hardness Autonomy hardness consumption (cycles/1 kgs) °dH °fH °Clark mmol/l setting (gram/cycle) 0-0.94 6-11 10-20 7-14 1.0-2.0 12-17 21-30 15-21 2.1-3.0 18-22 31-40 22-28 3.1-4.0 23-34 41-60 29-42 4.1-6.0 35-55 61-98 43-69 6.1-9.8 NOTE • 1 dH (German degree) = 0.178 mmol/l •...
-
Page 144: Delay Start
Operations Delay Start You can delay the cycle starting time up to 24 hours in 1-hour increments. To increase the delay time, press Delay Start. The hour displayed indicates the time at which the cycle will start. 1. Open the door, and then load the dishwasher. 2. -
Page 145: Maintenance
Maintenance Cleaning Keep the dishwasher clean to improve performance, reduce unnecessary repairs, and lengthen the lifecycle. Exterior Clean spills on the surface of the dishwasher immediately. Use a soft, damp cloth on the control panel to gently wipe away spills and dust. CAUTION •... - Page 146 Maintenance Nozzles To prevent the nozzles from being clogged or if the nozzles are clogged, remove and clean each nozzle. Use caution when removing the nozzles as they may break. Upper nozzle 1. Open the door, and then pull out the upper rack to reveal the upper nozzle.
- Page 147 Filter We recommend cleaning the filter every month. 1. Open the door, and then remove the lower rack first. 2. Turn the filter handle counterclockwise to unlock the Coarse filter. 3. Remove the Coarse filter, and then the cylindrical micro filter underneath. English DW8500AM_DW60A8070BB_UAE_DD81-03206F-00_EN.indd 67 2021-04-07...
-
Page 148: Long-Term Care
Maintenance 4. Remove any dirt and impurities from the micro filter and the Coarse filter. 5. Rinse them with running water, and then dry well. 6. Reinsert the filter, and then the Coarse filter. 7. Turn the filter handle clockwise to lock. CAUTION Make sure the Coarse filter is closed properly. -
Page 149: Troubleshooting
Troubleshooting Checkpoints If you encounter an issue with the dishwasher, first check the table below and try the suggestions. Symptom Possible cause Action • Make sure the door is latched and completely closed. The door is not completely • Make sure the upper rack closed. - Page 150 Troubleshooting Symptom Possible cause Action • Select a cycle according to An incorrect cycle was the soil level of the dishes selected. as instructed in this manual. • Clean the filters. The filters are clogged or not • Make sure the filters are correctly fastened.
- Page 151 Symptom Possible cause Action The dishwasher makes a sound when the dispenser cover is • This is normal. open and the drain pump is operating. The dishwasher is • Make sure the dishwasher too noisy. The dishwasher is not level. is level.
-
Page 152: Information Codes
Samsung service center. Check filter and drain pipe. If it is jammed, clean it. If the issue continues, contact a local Samsung service center. If any information code keeps appearing on the screen, contact a local Samsung service centre. English DW8500AM_DW60A8070BB_UAE_DD81-03206F-00_EN.indd 72... -
Page 153: Cycle Chart
Cycle chart DW60A807*, DW60A806* Cycle AUTO Intensive Pre wash (45 °C) Pre wash Pre wash (50 °C) Main wash (55 °C- Main wash (48 °C) Main wash (65 °C) Cycle sequence 65 °C) Rinse Rinse ... - Page 154 Cycle chart Download cycle Cycle Self Clean Extra Silence Pots and Pans Pre wash Pre wash (35 °C) Pre wash (50 °C) Main wash (70 °C) Main wash (60 °C) Main wash (68 °C) Cycle sequence Rinse ...
- Page 155 DW60A805*, DW60A804* Cycle AUTO Intensive Pre wash (45 °C) Pre wash Pre wash (50 °C) Main wash (55 °C- Main wash (50 °C) Main wash (65 °C) 65 °C) Rinse Rinse Rinse Cycle sequence Hot rinse (50 °C - Hot rinse (45 °C) ...
- Page 156 Cycle chart Download cycle Cycle Extra Silence Self Clean Pots and Pans Pre wash (35 °C) Pre wash Pre wash (50 °C) Main wash (60 °C) Main wash (70 °C) Main wash (68 °C) Cycle sequence Rinse ...
-
Page 157: Appendix
Remove the door so that animals and children cannot get trapped inside the appliance. For more ecodesign information Ecodesign inforamtion can be found by going to user manual at www.samsung.com/ support. English DW8500AM_DW60A8070BB_UAE_DD81-03206F-00_EN.indd 77... -
Page 158: Specifications
Appendix Specifications DW60A807*F* DW60A807*U* DW60A807*BB DW60A807*IB DW60A806*F* DW60A806*U* DW60A806*BB DW60A806*IB MODEL DW60A805*F* DW60A805*U* DW60A805*BB DW60A805*IB DW60A804*F* DW60A804*U* DW60A804*BB DW60A804*IB Fully Built-in Type Free Standing Built Under Fully Built-in (Sliding) Power 220-240 V ~ , 50 Hz Water pressure 0.04-1.0 Mpa DW60A807* 14 Place settings 14 Place settings... -
Page 159: For Standard Test
For standard test NOTE The information for comparability test as follows. DW60A807*/DW60A806*/DW60A805* models • Washing capacity: 14 place settings • Test standard: IEC 60436 • Position of upper rack: lower position • Wash cycle: ECO • Additional options: None • Rinse aid level setting: F4 •... - Page 160 QUESTIONS OR COMMENTS? COUNTRY CALL OR VISIT US ONLINE AT U.A.E 800-SAMSUNG (800 - 726 7864) 800-SAM CS (800-72627) OMAN www.samsung.com/ae/support (English) 183-CALL (183-2255) KUWAIT www.samsung.com/ae_ar/support (Arabic) 8000-GSAM (8000-4726) BAHRAIN 800-CALL (800-2255) QATAR DD81-03206F-00 DW8500AM_DW60A8070BB_UAE_DD81-03206F-00_EN.indd 80 2021-04-07 8:44:15...
Need help?
Do you have a question about the DW60A807 Series and is the answer not in the manual?
Questions and answers