Canon imagePROGRAF iPF8300 Setup Manual
Large format printer
Hide thumbs
Also See for imagePROGRAF iPF8300:
- User manual (1150 pages) ,
- Basic manual (52 pages) ,
- Brochure (4 pages)
Advertisement
Quick Links
Introduction
Overview of Setup
These are the steps in printer installation.
Preparations
Install the Printheads
Install the Ink Tanks
Install the Printer Driver and
the User Manual
Load Paper to Adjust the Printheads
Store Printed Manuals in the Pocket
• Even if you do not use the printer driver, be sure to install Media
Configuration Tool from the provided User Software CD-ROM.
With Media Configuration Tool, the paper types that are available
in your area can be registered to the printer. For instructions on
installation, refer to "Install the Printer Driver and the User Manual"
on page 5. (In Windows, select Install Individual Software in the
Setup Menu window to install Media Configuration Tool only.)
• We recommend doing a color calibration after completing the setup
to adjust variations in the colors.
MEMO
Details for each step are given in this Setup Guide . Simply follow the instructions
to install the printer.
If an error message is displayed during setup or other problems occur, refer to
"Responding to Messages" on page 16.
Space Required for Installation
An area that is larger than the dimensions shown below is needed to install
the printer.
Height
Width and depth
• When using the output stacker in the front ejection position, provide at
least 1400 mm (55 inches) of unobstructed space in front of the printer.
Caution
QT5-2394-V1
Read this manual before attempting to operate the printer.
Keep this manual in a handy location for future reference.
Printer Documentation
After installing the printer as shown in this Setup Guide , refer to the
documentation for instructions on operation and maintenance.
Daily operation
The Basic Guide includes three booklets containing the following
information:
1 Instructions on basic operation
2 Troubleshooting tips and maintenance procedures
3 Preparations for transferring the printer, and instructions for
reinstalling the printer driver
Detailed instructions
The User Manual (electronic manual) includes the following information:
• Printer operating instructions
• Printer driver instructions
• Printing instructions
• Maintenance procedures
• Instructions for network printing
Supported paper
The Paper Reference Guide (electronic manual) provides information
about paper.
You can access the User Manual and Paper Reference Guide as follows:
• In Windows, double-click the iPFxxxx Support desktop icon. (iPFxxxx
represents the printer model.)
• In Mac OS X, click iPF Support, added to the Dock.
Package Contents
c
e
d
k
i
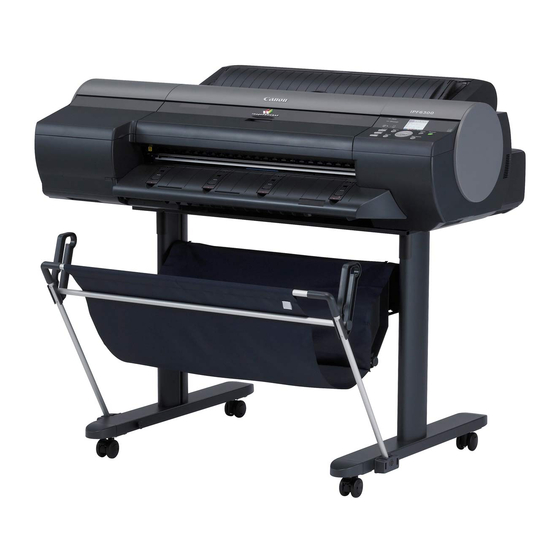
a. Printer
e. Set of CD-ROMs
b. Roll holder
f. Ejection support (x4)
c. Set of printer
g. 3-inch paper core attachment #2
documentation
h. 3-inch paper core attachment #1
d. Allen wrench
i. Power cord
Other documentation may also be included in the package.
• Some items are included with the printer but not described in this
manual. Keep these items in a safe place after setup because they are
MEMO
used in various printing applications.
• For instructions on using items not described in this manual, refer to the
User Manual.
• A cable to connect the printer to a computer is not provided with the
printer.
• Canon, the Canon logo, and imagePROGRAF are trademarks or registered trademarks of CANON
INC.
• Microsoft and Windows are trademarks of Microsoft Corporation, registered in the U.S. and other
countries.
• Macintosh is a trademark of Apple Inc., registered in the U.S. and other countries.
• All other trademarks or registered trademarks described in this Setup Guide are the property of their
respective owners.
1
©CANON INC. 2010
• Troubleshooting tips
• Printer menu descriptions
• Printer driver function details
• Specifications, details on
consumables and optional
accessories, and other
information
g
h
j
k
f
a
b
l
j. Printhead (x2)
k. Starter ink tanks
BK, MBK, C, M, Y, PM,
PC, GY, PGY, R, G, B
l. Sample paper (roll paper)
Printed in JAPAN
ENG
Advertisement

Subscribe to Our Youtube Channel
Related Manuals for Canon imagePROGRAF iPF8300


Summary of Contents for Canon imagePROGRAF iPF8300
- Page 1 • A cable to connect the printer to a computer is not provided with the printer. • Canon, the Canon logo, and imagePROGRAF are trademarks or registered trademarks of CANON INC. • Microsoft and Windows are trademarks of Microsoft Corporation, registered in the U.S. and other countries.
- Page 2 Preparations Prepare the printer for use by installing it and connecting the power cord. Install the printer. Assemble the stand and install the printer referring to the Printer Stand Setup Guide included with the stand. Use the Allen wrench to loosen the screw of the belt stopper (a) and then remove the screw from the belt stopper.
-
Page 3: Install The Printheads
Install the Printheads Press the Power button to turn on the printer. When the display screen shows Open Upper Cover, open the top cover. Instructions on printhead installation are shown on the display screen. Lift the printhead fixer cover to open it fully. -
Page 4: Install The Ink Tanks
Repeat steps 6 to 12 to install the second printhead set. Install the Ink Tanks Instructions on ink tank installation are shown on the display screen. Open the ink tank covers as instructed. Open the pouch and remove the ink tank. •... - Page 5 Make sure the ink lamp lights red. • If the ink lamp does not light, repeat steps 2, 5, and 6. Install the Printer Driver and the User Manual Windows You can print from Windows via USB or TCP/IP (network) connections. The installation procedure varies depending on how your printer is connected.
- Page 6 In the Printer Selection window, select The printer is connected directly to a computer and click Next. • Be careful not to insert the USB cable into the Ethernet port. The printer driver settings take effect after the computer restarts. This completes printer driver installation.
- Page 7 For TCP/IP (network) connections When you first connect the printer to the network Use the LAN cable to connect the LAN port on the back of the printer to the hub port. In the Setup Menu window, click Install Printer Driver. •...
- Page 8 In the Method of Configuring IP Addresses window, enter the IP address in Configure manually, under Method of Configuring IP Addresses. Click Install to start the installation process. Also enter your preferred name for the printer in Device Name and the installation location in Printer Location under Information About Printer to Configure, as desired.
- Page 9 If the printer is already connected to the network • If the printer is already connected to the network, confirm the IP address assigned to the printer. Ask your network administrator for further information. • If the printer is on, the Link indicator under the LAN port lights.
- Page 10 When entering the printer's IP address manually • If the printer is already connected to the network, confirm the IP address assigned to the printer. Ask your network administrator for further information. • If the printer is on, the Link indicator under the LAN port lights.
- Page 11 Macintosh You can print from Macintosh via USB or network connections such as Bonjour or IP. Install the printer driver that suits your printing environment. <Compatible Operating Systems> Mac OS X 10.3.9 or later Connect the printer to a computer Connect the cable Use a cable to connect the printer to a computer or the network.
- Page 12 Click Next. Click Continue. Click Quit. Select the printer to setup and click Next. • To register the printer by entering its IP address, click Registering IP Address. MEMO Enter the IP address of the desired printer in IP Address and click Next. Click OK.
- Page 13 Double-click the iPFxxxx Manual Installer icon on the CD-ROM. (iPFxxxx represents the printer model.) After reading the software license agreement, click Continue . After installation is completed, click Quit . The User Manual is now installed. After you have finished setting up the printer and installing the printer driver and User Manual, we recommend performing color calibration. Color calibration compensates for changes in color from individual variation among printheads or from the printing environment, ensuring better color MEMO consistency.
- Page 14 Raise the holder stopper lever (a) from the shaft side to unlock the stopper. While holding the holder stopper in the position in the figure indicated by (b), remove the holder stopper from the roll holder. • We recommend wearing clean cotton gloves when handling rolls of paper to protect the printable surface.
- Page 15 While holding the leading edge of the paper roll, raise the release lever. • Be sure to perform steps 10 and 11. If paper cannot feed straight or becomes curled, it may rub against the print head or be jammed. •...
-
Page 16: Responding To Messages
Turn off the printer and wait at least three seconds before restoring the power. If the message appears again, write down the error code and message, turn off the printer, and contact your Canon dealer for assistance. Write down the error code and message, turn off the printer, and contact your Canon dealer for assistance.
Need help?
Do you have a question about the imagePROGRAF iPF8300 and is the answer not in the manual?
Questions and answers