Lochinvar 100 Series Instruction Manual
Commercial electric water heaters
Hide thumbs
Also See for 100 Series:
- User's information manual (44 pages) ,
- Installation & service manual (100 pages) ,
- User's information manual (48 pages)
Table of Contents
Advertisement
300 Maddox Simpson Parkway
Lebanon, TN 37090
Technical Service Phone: 1-800-722-2101
Technical Service email: 2tech@lochinvar.com
www.Lochinvar.com
LISTED
Thank you for buying this energy efficient water heater. We
appreciate your confidence in our products.
PLACE THESE INSTRUCTIONS ADJACENT TO HEATER AND NOTIFY OWNER TO KEEP FOR FUTURE REFERENCE.
KEEP THIS MANUAL IN THE POCKET ON HEATER FOR FUTURE REFERENCE WHENEVER MAINTENANCE
PRINTED 0522
LOW LEAD
CONTENT
Read and understand this instruction
manual and the safety messages
herein before installing, operating or
servicing this water heater.
Failure to follow these instructions and
safety messages could result in death
or serious injury.
This manual must remain with the
water heater.
ADJUSTMENT OR SERVICE IS REQUIRED.
COMMERCIAL ELECTRIC WATER HEATERS
MODELS LHS 50/80/119 Series 100
Electrical Shock Hazard
If the water heater becomes immersed in water up to or
above the level of the bottom of the element doors,
the heater should be examined by a qualified service
agency before it is placed in operation.
Instruction Manual
& LHC 50/80/119 Series 100
Installation - Service
- Maintenance - Operation
100358519_2000199939G
Advertisement
Table of Contents

Subscribe to Our Youtube Channel
Related Manuals for Lochinvar 100 Series


Summary of Contents for Lochinvar 100 Series
- Page 1 & LHC 50/80/119 Series 100 Installation - Service - Maintenance - Operation 300 Maddox Simpson Parkway Lebanon, TN 37090 Technical Service Phone: 1-800-722-2101 Technical Service email: 2tech@lochinvar.com www.Lochinvar.com LOW LEAD CONTENT LISTED Thank you for buying this energy efficient water heater. We appreciate your confidence in our products.
-
Page 2: Table Of Contents
CONTENTS SAFE INSTALLATION, USE, AND SERVICE ........3 Surface Mount Control Models ........... 18 Electronic Control Models ..........18 Important Definitions ............3 Thermostat Controls ............18 APPROVALS..................3 Thermostat Settings - Surface Mount Control ....19 GENERAL SAFETY INFORMATION ..........4 Thermostat Settings - Electronic Controls ......19 Do Not Operate if Damaged .......... -
Page 3: Safe Installation, Use, And Service
SAFE INSTALLATION, USE, AND SERVICE The proper installation, use, and servicing of this water heater is and instructions throughout this manual. It is very important that the extremely important to your safety and the safety of others. meaning of each safety message is understood by you and others who install, use, or service this water heater. -
Page 4: General Safety Information
GENERAL SAFETY INFORMATION DO NOT OPERATE IF DAMAGED According to a national standard , Performance Requirements for Water Temperature Limiting Devices (ASSE 1070) and many local plumbing DO NOT USE THIS WATER HEATER IF ANY PART HAS BEEN codes, the water heater’s gas control valve should not be used as EXPOSED TO FLOODING OR WATER DAMAGE. -
Page 5: Hazard Messages
General Safety Information HAZARD MESSAGES CAUTION Property Damage Hazard Read and understand this instruction manual and the safety messages • All water heaters eventually leak. herein before installing, operating or • servicing this water heater. Do not install without adequate drainage. Failure to follow these instructions and safety messages could result in death or serious injury. - Page 6 General Safety Information Burn hazard. Electrical Shock Hazard Hot water discharge. • Turn off power at the branch circuit breaker serving the water heater before performing any service. Keep clear of Temperature- • Label all wires prior to disconnecting Pressure Relief Valve when performing service.
-
Page 7: Introduction
INTRODUCTION interprets certain markings into useful information. See Model and Thank You for purchasing this water heater. Properly installed and Rating Plate (page 10) .Both of these references should be used maintained, it should give you years of trouble free service. to identify the heater, its components and optional equipment. -
Page 8: Features And Components
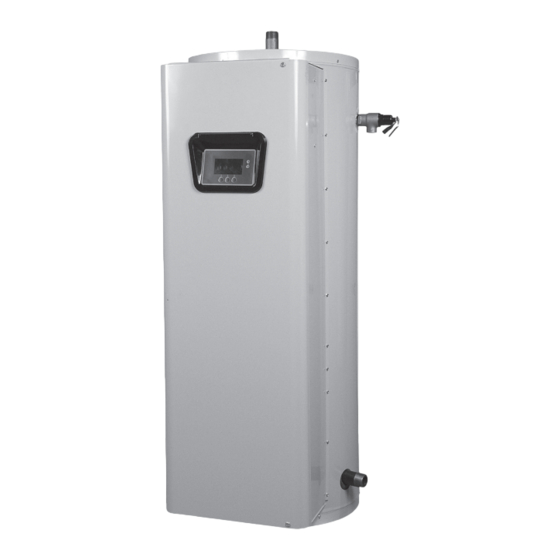
FEATURES AND COMPONENTS LHS/LHC MODEL DIFFERENCES This Instruction Manual covers two models of commercial electric water heaters; LHS models and LHC models. These two models are equipped from the factory with different controls. LHS models are factory equipped with surface mounted thermostat/ECO combination controls. LHC models are factory equipped with an electronic control system. - Page 9 Features and Components Figure 2. Surface Mount Control Models Commercial Electric Water Heaters • 9...
-
Page 10: Model And Rating Plate
Features and Components Table 1. Recovery Rate In Gallons Per Hour* / Temperature Rise °F Standard BTU/ KW Input Hour 30° 40° 50° 60° 70° 80° 90° 100° 110° 120° 130° 140° 20,478 30,717 40,956 13.5 46,075 51,195 61,434 81,912 92,151 102,390 122,868... -
Page 11: Installation Considerations
INSTALLATION CONSIDERATIONS Figure 3. Rough-In Dimensions Model Number Tank Capacity in Gallons (Liters) A - Inches (mm) B - Inches (mm) C - Inches (mm) Inlet/Outlet LHS/LHC 50 50 (189.3) 55 3/4 (1416) 21 3/4 (552) 27 (685) 1 1/4 LHS/LHC 80 80 (302.8) 60 1/4 (1350) -
Page 12: Installing The Water Heater
INSTALLING THE WATER HEATER The installation must conform with these instructions and the local Table 2. Burn Time at Various Temperatures code authority having jurisdiction and the requirements of the power Time for Permanent Time for 1st Degree company. In the absence of code requirements, follow NFPA-70 Water Temperature Burns Burn... -
Page 13: Circulating Pump
Installing the Water Heater Products of this sort should not be stored near the heater. Also, air water heater Btu/hr or kW input rate as shown on the water heater’s which is brought in contact with the water heater should not contain model rating plate. -
Page 14: Water Line Connections
Installing the Water Heater The temperature-pressure relief valve must be manually operated covered under the limited warranty. Thermal expansion can also at least once a year. Caution should be taken to ensure that (1) no cause intermittent temperature-pressure relief valve operation: one is in front of or around the outlet of the temperature-pressure water discharged from the valve due to excessive pressure build relief valve discharge line, and (2) the water manually discharged... - Page 15 Installing the Water Heater Table 3. Allowable Ampacities of Insulated Conductors Not More Than Three Conductors in Raceway or Cable or Earth (Directly Buried), Based on Ambient Temperature of 30°C (86°F) Size Temperature Rating of Conductor Size 60°C 75°C 85°C 90°C 60°C 75°C...
- Page 16 Installing the Water Heater • The control circuit, which controls the electrical power to If the control determines that the actual water temperature inside heating elements, referring the following control circuit diagram the tank is below the programmed Operating Setpoint minus the Figure 12 (page 44).
-
Page 17: Start Up And Operation
START UP AND OPERATION See Features and Components (page 8) for the location of Turn off the electrical disconnect switch. components mentioned in the instructions that follow. Close the water heater drain valve. NEVER turn on power to the water heater without being certain the Open a nearby hot water faucet to permit the air in the system water heater is filled with water and a temperature and pressure to escape. -
Page 18: Temperature Regulation
TEMPERATURE REGULATION LIMITING THE RISK OF SCALDING abnormally high water temperatures it will lock-out and disable further heating element operation. It is important that a qualified service For a variety of reasons, water heaters can produce water that is agent be contacted to determine the reason for the ECO activation much hotter than its temperature setting. -
Page 19: Thermostat Settings - Surface Mount Control
Temperature Regulation The water heater should be located in an area where the general These thermostats are set from the factory at the MED 140°F (60°C) public does not have access to set temperatures. setting. The over temperature device (ECO high limit) attached to each thermostat has a manual reset. - Page 20 Temperature Regulation Figure 5. User Interface Module (UIM) Set the Operating Set Point at the lowest setting which produces an acceptable hot water supply. This will always give the most energy efficient operation. 20 • Commercial Electric Water Heaters...
-
Page 21: Control System Operation
CONTROL SYSTEM OPERATION Control System Features The Home Screen Advanced Diagnostics: Plain English text and animated icons Figure 7. Home Screen below shows the control system Home display detailed operational and diagnostic information. LCD screen Screen. This is the default screen. If there are no active Fault or on the front of the water heater displays the Sequence of Operation Alert conditions and no user input for approximately 10 minutes the in real time. - Page 22 Control System Operation Table 6. Status Icons ICON DESCRIPTION Water temperature in the tank has fallen. Shaded area of the animated thermometer icon will rise and fall in response to water temperature in the storage tank as sensed from the immersion Temperature Probe. Water temperature in the tank has reached the Operating Set Point.
- Page 23 Control System Operation Table 7. Operating States STATE DESCRIPTION The control system has detected/declared a Fault Condition. The control system will discontinue heating operation and “lock Fault out.” Power to the water heater must be cycled off and on to reset the control system. Note; cycling power will not reset the control system until the condition that caused the fault has been corrected.
-
Page 24: Temperatures Menu
Control System Operation TEMPERATURES MENU Operating Set Point DIFFERENTIAL TURN ON TURN OFF BANK NUMBER SETTING TEMP TEMP User adjustable setting 90°F to 190°F range; factory default is Bank 1 2°F 118°F 120°F 120°F. When the water temperature sensed by the control system from the immersion Temperature Probe reaches the Operating Set Bank 2 2°F... - Page 25 Control System Operation Temperature Settings The Operating Set Point and the Differential Settings are adjusted in the Temperatures Menu. The following instructions explain how to adjust these user settings and navigate the control system menus. Water temperature over 125°F (52°C) can cause severe burns instantly resulting in severe injury or death.
- Page 26 Control System Operation Adjusting the Operating Set Point and the Differential Settings ACTION DISPLAY Press the Up and Down buttons to adjust the Operating Set Point to the desired setting. Press the Operational Button underneath “UPDATE” to confirm the new setting.
-
Page 27: Heater Status Menu
Control System Operation HEATER STATUS MENU This menu displays non adjustable operational information. This menu contains more information that can be displayed on one screen of the LCD display. Use the Up & Down Buttons to navigate to the bottom of this menu. Heater Status Menu ACTION DISPLAY... -
Page 28: Economy Mode Setup Menu
Control System Operation ECONOMY MODE SETUP MENU Economy Mode Home Screen and Setup Menu ACTION DISPLAY Home Screen During Economy Mode This menu contains settings used to establish an “Economy Set Point” and “Economy Mode” operating periods. This control system feature can help reduce operating costs during unoccupied, low load, or peak demand periods. -
Page 29: Economy Mode Settings
Control System Operation ECONOMY MODE SETTINGS Set- Point Adjustment Value ACTION DISPLAY From the Home Screen, press the Operational Button underneath “MENU” to enter the Main Menu. Notice how the text above the Operational Buttons on the display changes as you navigate through the various menus and screens. Use the Up/Down buttons to select (highlight in black) the Economy Mode Setup menu from the Main Menu. -
Page 30: Time Clock Settings
Control System Operation Set- Point Adjustment Value ACTION DISPLAY The new Set-Point Adjustment value should now be displayed as the current value. TIME CLOCK SETTINGS Time Clock Settings ACTION DISPLAY From the Home Screen navigate to the Economy Mode Setup menu. Use the Up/Down buttons to select (highlight in black) Current Time sub menu. - Page 31 Control System Operation Time Clock Settings ACTION DISPLAY Press the Up and Down buttons to adjust the Weekday setting to the current day. Notice how the text above the Operational Buttons on the display changes to “ACCEPT” & “CANCEL” when the adjustment mode is activated and how the current setting is outlined rather than highlighted in black.
-
Page 32: Daily Operating Mode Settings
Control System Operation DAILY OPERATING MODE SETTINGS Daily Operating Mode Settings ACTION DISPLAY Economy Mode All Day: From the Economy Mode Setup menu use the Up/Down buttons to select (highlight in black) the Daily sub menu for “Sun.” Press the Operational But- ton underneath “CHANGE”... - Page 33 Control System Operation Daily Operating Mode Settings ACTION DISPLAY Normal Operation Between: From the Economy Mode Setup menu Use the Up/Down and CHANGE but- tons to enter the Mon sub menu as described above. Use the Up/Down buttons to select (highlight in black) the “Normal Operation Between”...
-
Page 34: Alarm Output Setup Menu
Control System Operation ALARM OUTPUT SETUP MENU Alarm Output Setup Menu ACTION DISPLAY Permits user to set the condition (from a list of options) for when the CCB’s integral alarm output relay will be energized. Alarm relay connections (common, normally open, normally closed) are located on the J3 terminal strip on the CCB. -
Page 35: Display Settings Menu
Control System Operation DISPLAY SETTINGS MENU Display Settings Menu ACTION DISPLAY Permits user to set display options for viewing information on the UIM’s LCD screen. Temperature Units - Adjustable user setting that changes temperature units display to Celsius °C or Fahrenheit °F. Backlight Delay - Adjustable user setting that determines how long the UIM’s LCD backlight remains illuminated after a key has been pressed. -
Page 36: Current Fault / Alert Menu
Control System Operation CURRENT FAULT / ALERT MENU Table 9. Current Fault / Alert Menu ACTION DISPLAY Main Menu - Current Fault Selected This menu displays non adjustable operational information. With the Fault History sub menu selected in Main Menu; press the Operational Button underneath “SELECT”... -
Page 37: Fault Occurrence Menu
Control System Operation FAULT OCCURRENCE MENU Fault Occurrence Menu ACTION DISPLAY Fault Occurrence Menu Total accumulated number each individual Fault condition has occurred is displayed in this menu. This running total of Fault Occurrences can be useful in determining which (if any) operational problems have been persistent. -
Page 38: Maintenance
MAINTENANCE Close drain valve. Table 10. Maintenance Schedule Component Operation Interval Reference Remove the wiring connection from the powered anode. Use a See Draining the Water Every 6 Tank Drain and Flush socket wrench to unscrew and remove the old powered anode Months Heater. -
Page 39: Temperature-Pressure Relief Valve Test
Maintenance Reinstall the top plug. Open a nearby hot water faucet and let the water run until the water is no longer hot. Refill the tank. See Filling The Water Heater (page 17). Close the cold water inlet valve to the water heater. Turn on the electrical power supply and restart the water heater See Start Up and Operation (page 17). - Page 40 Maintenance Amount of hot water used. As the volume of the water heated • Place limed ends of heating elements into UN-LIME increases, more scale results. delimer and allow scale to dissolve. Do not permit delimer or water to contact heating element electrical terminals. Water temperature.
-
Page 41: Troubleshooting
TROUBLESHOOTING Before calling for service, check the following points to see if the Repeated activation of the ECO high limit switch should be cause of trouble can be identified and corrected. Reviewing this investigated by a qualified service technician or qualified agency. checklist may eliminate the need of a service call and quickly restore The storage capacity and/or recovery rate of the water heater hot water service. -
Page 42: Checking For Leaks
Troubleshooting CHECKING FOR LEAKS Use this illustration as a guide when checking for sources of water leakage. You or your dealer may be able to correct what appears to be a problem. Water leaks which appear at the water heater bottom or on the surrounding floor may be caused by condensation, loose connections or relief valve operation and leakage. -
Page 43: Diagrams
DIAGRAMS WIRING DIAGRAMS Figure 11. 120 VAC Control Circuit Transformer Connections - Electronic Control Models Commercial Electric Water Heaters • 43... - Page 44 Diagrams Figure 12. Central Control Board (CCB) Control Circuit Diagram - Electronic Control Models 44 • Commercial Electric Water Heaters...
- Page 45 Diagrams Figure 13. Power Circuit Diagrams - Surface Mount Control Models The water heater’s electrical components are pictured and identified on page 8. The following describes the heater circuits and includes wiring diagrams. All heater circuits are designed for 60/50 hertz alternating current. The water heater circuit wiring is 12 AWG, AWM, or TEW type, rated 600 volts, 105°C.
- Page 46 Diagrams Figure 14. Nine Elements - Single and Three Phase Conversion to Single Phase Conversion to Three Phase When the heater is shipped for connection to a three-phase electrical When heater is shipped for connection to a single-phase electrical service, it may be connected to a single-phase electrical service of service, it may be connected to a three-phase electrical service of the same voltage by: the same voltage by:...
- Page 47 Diagrams Figure 15. Power Circuit Diagrams - Electronic Control Models The water heater’s electrical components are pictured and identified on page 7. The following describes the heater circuits and includes wiring diagrams. All heater circuits are designed for 60/50 hertz alternating current. The water heater circuit wiring is 12 AWG, AWM, or TEW type, rated 600 volts, 105°C.
- Page 48 Diagrams Figure 16. Nine Element - Single And Three Phase Conversion to Single Phase Conversion to Three Phase When the heater is shipped for connection to a three-phase electrical When heater is shipped for connection to a single-phase electrical service, it may be connected to a single-phase electrical service of service, it may be connected to a three-phase electrical service of the same voltage by: the same voltage by:...
-
Page 49: Piping Diagrams
Diagrams PIPING DIAGRAMS Commercial Electric Water Heaters • 49... - Page 50 Diagrams 50 • Commercial Electric Water Heaters...
- Page 51 Diagrams Commercial Electric Water Heaters • 51...
- Page 52 Diagrams 52 • Commercial Electric Water Heaters...
- Page 53 Diagrams Commercial Electric Water Heaters • 53...
- Page 54 Diagrams 54 • Commercial Electric Water Heaters...
- Page 55 Diagrams Commercial Electric Water Heaters • 55...
- Page 56 Diagrams 56 • Commercial Electric Water Heaters...
- Page 57 Diagrams Commercial Electric Water Heaters • 57...
- Page 58 Diagrams 58 • Commercial Electric Water Heaters...
- Page 59 Diagrams Commercial Electric Water Heaters • 59...
- Page 60 Diagrams 60 • Commercial Electric Water Heaters...
- Page 61 NOTES Commercial Electric Water Heaters • 61...
- Page 62 NOTES 62 • Commercial Electric Water Heaters...
- Page 63 NOTES Commercial Electric Water Heaters • 63...
- Page 64 300 Maddox Simpson Parkway Lebanon, TN 37090 Technical Service Phone: 1-800-722-2101 Technical Service email: 2tech@lochinvar.com www.Lochinvar.com Copyright © 2022. All rights reserved.
Need help?
Do you have a question about the 100 Series and is the answer not in the manual?
Questions and answers